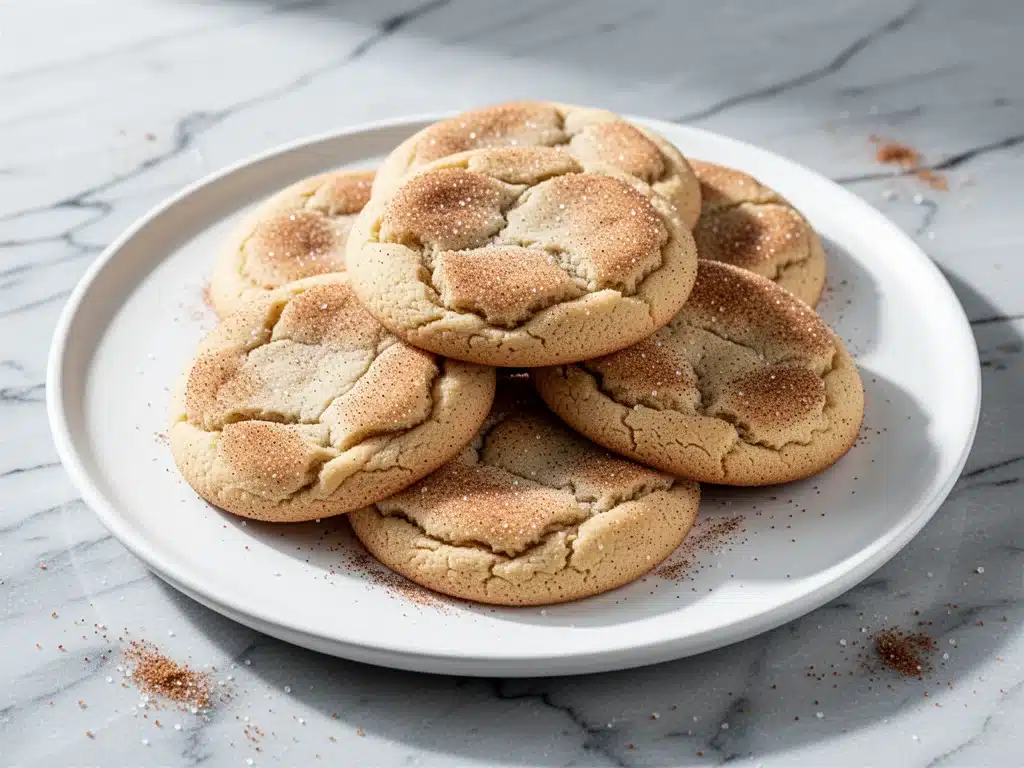
I have a confession to make. For years, I was a snob about snickerdoodles. I thought they were just… okay. You know the type—the flat, dry discs you’d find in a bakery display case, slightly dusty with cinnamon, promising nostalgia but delivering disappointment. I’d grab one out of politeness, take one bite, and put it back. I was convinced that the only way to get a good snickerdoodle was to bake it from scratch, and even then, I assumed it would be more effort than it was worth.
Then, three years ago, I was baking with my niece. She wanted to make “those cinnamon cookies.” We tried a standard recipe, and the result was a tray of hard, crumbly cookies that tasted like cardboard. She was devastated. I felt terrible. So, I put on my apron and decided to fix it. I didn’t want just a cookie; I wanted that perfect contrast everyone talks about—the crackly, sugary exterior that shatters when you bite it, giving way to a center that’s soft, chewy, and pillowy. Not cakey. Not crisp. Chewy.
After four failed attempts (yes, four), I finally cracked the code. It wasn’t about fancy ingredients. It was about technique. Specifically, the way I chill the dough and the exact ratio of cream of tartar to baking soda. Now, these chewy snickerdoodle cookies are the first thing I bake when I need comfort. They’re the ones I pack for lunchbox swaps (check out my easy lunch box roll-ups for the savory side of things, but these are for the sweet side). They’re the ones that disappear from the cooling rack before they’ve even fully cooled. And honestly? They’re easier than making my chocolate crinkle cookies, which is saying something.
If you’ve ever struggled with cookies that spread too thin or taste too plain, you need to try this method. It’s reliable, it’s forgiving, and it yields results that taste like they came from a high-end bakery but cost pennies to make. Let’s get baking.
Why You’ll Love This Recipe
There’s a reason I’ve made this batch of chewy snickerdoodle cookies at least twenty times in the last year. It’s not just nostalgia; it’s the science of the texture. Here’s what makes this version stand out from the crowd:
- The Crackly Crust is Real — Most recipes promise a crackly top, but mine actually delivers. The secret? Rolling the dough balls in extra cinnamon sugar before baking. As they bake, that sugar melts and recrystallizes, creating those beautiful, spiderweb-like cracks that are pure visual and textural heaven.
- Pillowy, Not Cakey — This is the biggest complaint I see with homemade snickerdoodles. They turn out too dense or too cake-like. My recipe uses a specific balance of butter and sugar creaming time to keep them light and chewy in the center. They melt in your mouth.
- Ready in Under 30 Minutes (Plus Chill Time) — Active prep time is maybe 15 minutes. The rest is just waiting. If you don’t have time to chill the dough for an hour, you can bake them immediately, but they’ll be slightly thinner. Still delicious, though.
- Perfect for Beginners — You don’t need a stand mixer. A hand mixer or even a strong arm and a wooden spoon works fine. There are no complex techniques like tempering chocolate or making pastry cream. Just mix, roll, bake. It’s foolproof.
- Freezes Like a Dream — I often double the dough and freeze the balls on a tray. When I have guests, I just pull them out and bake a dozen fresh. They taste just as good as day-old, which is weirdly impressive for a cookie.
This recipe has saved me from takeout dessert orders more times than I can count. It’s my go-to when I need something sweet, comforting, and easy to share. Plus, the smell of cinnamon and butter filling the house is basically a hug for the soul.
Ingredients You’ll Need
One of the best things about snickerdoodles is how simple the ingredient list is. You likely have most of this in your pantry right now. I’m not using any weird extracts or fancy flours here. This is honest, old-school baking. Here’s exactly what you need and why each part matters.
For the Cookie Dough
Unsalted Butter (1 cup / 226g) — This needs to be softened to room temperature. Not melted! If you melt it, your cookies will spread too much and lose that chewy texture. I usually take it out of the fridge about an hour before I start. If you’re in a hurry, you can microwave it in 5-second bursts, but watch it closely.
Granulated Sugar (1 ½ cups / 300g) — This is the main sweetener. Don’t swap this for brown sugar if you want the classic snickerdoodle flavor. Brown sugar makes them chewier but also denser and darker. We want that light, golden color and crisp edge.
Large Eggs (2 large) — Room temperature eggs incorporate better into the butter mixture. If your eggs are cold, crack them into a small bowl and let them sit for 10 minutes while you cream the butter. This helps the emulsion stay stable.
Vanilla Extract (2 teaspoons) — Use real vanilla. The synthetic stuff can taste bitter when baked. I keep a bottle of Nielsen-Massey on hand because it makes a noticeable difference in buttery cookies.
All-Purpose Flour (2 ¾ cups / 340g) — Spoon it into the measuring cup and level it off. Don’t scoop directly from the bag, or you’ll pack in too much flour and get dry cookies. If you don’t have a scale, this is the most critical measurement to get right.
Cream of Tartar (2 teaspoons) — This is the star ingredient. It’s what gives snickerdoodles their signature tang and helps them stay soft. Don’t skip it. If you run out, you can substitute with 1 teaspoon of lemon juice, but the flavor profile will change slightly.
Baking Soda (1 teaspoon) — This reacts with the cream of tartar to create lift. It’s what makes them spread just enough to get that crackly top.
Salt (½ teaspoon) — Even in sweet cookies, salt is crucial. It balances the sugar and enhances the cinnamon flavor. Don’t skip it.
For the Cinnamon Sugar Coating
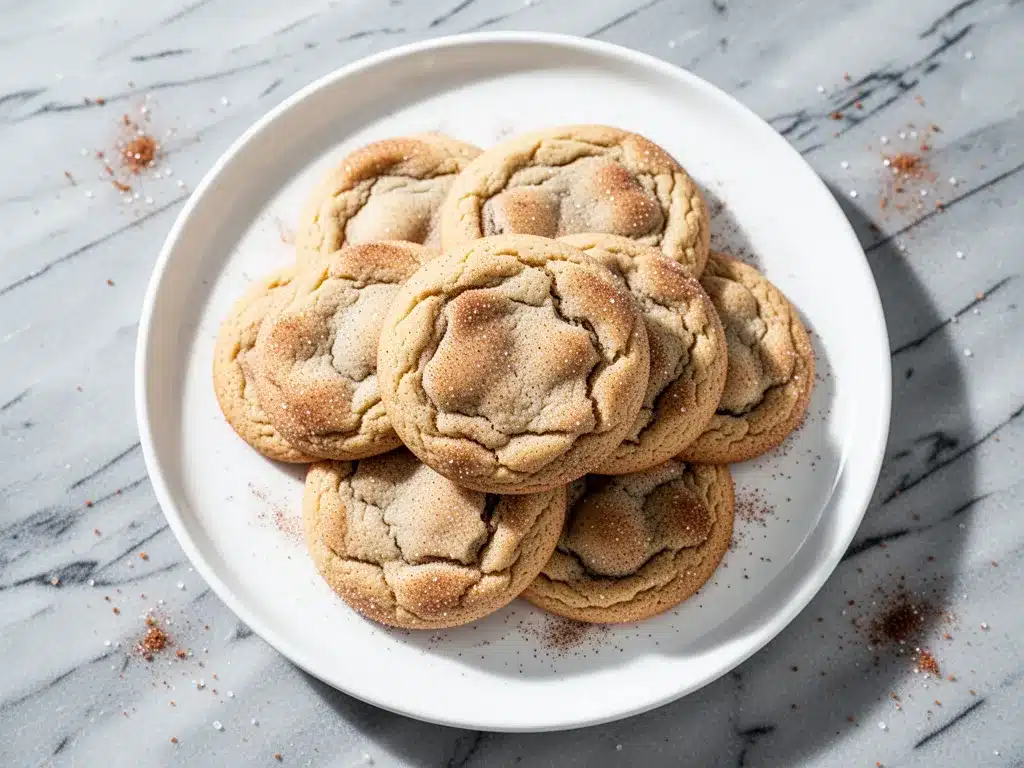
Granulated Sugar (½ cup / 100g) — This is for rolling. You can use white or light brown sugar, but white gives that classic look.
Ground Cinnamon (1 tablespoon) — Use fresh cinnamon. Old, dusty cinnamon tastes like nothing. If your jar has been sitting since 2019, toss it and buy a new one. It makes a world of difference.
Optional Pinch of Salt — Just a tiny pinch in the coating sugar helps the cinnamon pop.
Equipment Needed
You don’t need a fancy kitchen for this. Here’s what I actually use:
Large Mixing Bowl — I use a 4-quart glass bowl. It’s big enough to hold the dough without splattering when I’m mixing.
Electric Hand Mixer — I prefer this over a stand mixer because it’s faster to clean and I can scrape the sides easily. A stand mixer works fine, too, but you’ll need to scrape the bowl down once or twice.
Baking Sheets — Two standard half-sheet pans. I use the heavy-gauge aluminum ones because they conduct heat evenly. Dark non-stick pans can cause the bottoms to burn, so if you use those, lower the oven temp by 25 degrees.
Parchment Paper — Line your baking sheets. This is non-negotiable for easy cleanup and even baking. I never bake cookies directly on the metal.
Cooling Rack — To transfer the cookies after baking. If you don’t have one, just let them cool on the pan for 5 minutes, then move them to a plate. But a rack prevents soggy bottoms.
Small Bowl — For mixing the cinnamon sugar coating.
Spoon or Scoop — I use a 1.5-tablespoon cookie scoop for uniform size. This ensures they all bake at the same rate. If you don’t have a scoop, use two spoons to form rough balls.
How to Make It: Step-by-Step
Alright, let’s make these chewy snickerdoodle cookies! I’m walking you through exactly how I do it, including the little tricks I’ve picked up over the years. This process is straightforward, but attention to detail is key for that perfect texture.
Step 1: Cream the Butter and Sugar (3-4 minutes)
In your large mixing bowl, combine the softened unsalted butter and the 1 ½ cups of granulated sugar. Using your electric mixer on medium-high speed, beat them together until the mixture is light, fluffy, and pale in color. This usually takes about 3 minutes. You’re not just mixing them; you’re incorporating air. This air is what helps the cookies rise and stay chewy. If you rush this step, your cookies will be dense. Scrape down the sides of the bowl with a spatula to make sure everything is evenly mixed.
Step 2: Add Eggs and Vanilla (1-2 minutes)
Beat in the eggs one at a time, mixing well after each addition. Then add the vanilla extract. Mix until just combined. Don’t overmix here. You want the eggs to be fully incorporated, but you don’t need to beat the air back out. The mixture should look smooth and glossy.
Step 3: Whisk Dry Ingredients Separately (1 minute)
In a separate medium bowl, whisk together the flour, cream of tartar, baking soda, and salt. This ensures that the leavening agents are evenly distributed. If you dump them all in at once, you might get a pocket of pure baking soda in one cookie, which tastes bitter. Whisking prevents this.
Step 4: Combine Wet and Dry (2-3 minutes)
With the mixer on low speed, gradually add the dry ingredients to the wet ingredients. Mix until just combined. As soon as the last streak of flour disappears, stop mixing. Overmixing develops gluten, which makes cookies tough. You want tender, chewy cookies, not bread. The dough will look slightly crumbly at first, but it will come together.
Step 5: Chill the Dough (30-60 minutes)
This is the step most people skip, but it’s crucial for chewy snickerdoodle cookies. Cover the bowl with plastic wrap or a damp towel and refrigerate for at least 30 minutes. If you have time, chill it for up to 24 hours. Chilling solidifies the fat, which means the cookies won’t spread too thin in the oven. This keeps them thick and chewy in the center. If you skip this, you’ll get flat, crispy cookies instead of chewy ones.
Step 6: Make the Cinnamon Sugar Coating
While the dough chills, mix the ½ cup of sugar and 1 tablespoon of cinnamon in a small shallow bowl. Stir until well combined. Set aside.
Step 7: Roll and Bake
Preheat your oven to 375°F (190°C). Line two baking sheets with parchment paper. Take a portion of dough (about 1.5 tablespoons) and roll it into a ball between your palms. Then, roll the ball in the cinnamon sugar mixture until it’s fully coated. Place the coated balls on the baking sheet, about 2 inches apart. They will spread, so give them room.
Step 8: Bake (9-11 minutes)
Bake for 9-11 minutes. You want the edges to be set and lightly golden, but the centers should still look soft and slightly underbaked. They will firm up as they cool. Do not overbake! If you wait until they look fully done in the oven, they’ll be dry. Remove the pan from the oven and let the cookies sit on the hot baking sheet for 5 minutes. This allows them to finish cooking gently without drying out.
Step 9: Cool and Serve
Transfer the cookies to a cooling rack to cool completely. Or, eat them warm. I don’t judge. The crackly sugar crust will be soft at first but will harden into that perfect snickerdoodle crunch as they cool.
Expert Tips & Tricks
Here’s everything I’ve learned from making this dozens of times. These tips will save you from my mistakes.
- Room Temperature Butter is Non-Negotiable — If your butter is too cold, it won’t cream properly with the sugar. If it’s too warm (greasy), the cookies will spread. It should be soft enough to leave an indent when you poke it, but not so soft that it’s oily.
- Don’t Skip the Chill — I know it’s tempting to bake them right away. But chilling the dough is the #1 way to get thick, chewy cookies. If you’re short on time, put the dough in the freezer for 15 minutes instead of the fridge.
- Roll Generously in Sugar — Don’t be shy with the cinnamon sugar. You want a thick coating. This is what creates the crackly top. If the coating is too thin, you’ll just get a smooth cookie.
- Underbake Slightly — The cookies should look puffy and soft when you take them out. They will set as they cool. If they look firm in the oven, they’ll be hard when cooled.
- Use Parchment Paper — Baking directly on the pan can cause uneven browning. Parchment ensures even heat distribution and easy cleanup.
- Store Properly — Snickerdoodles stay fresh for up to 4 days in an airtight container at room temperature. Add a piece of bread to the container to keep them soft if they start to dry out.
Common Mistakes:
Mistake: Cookies spread too thin. Fix: Your butter was too warm, or you didn’t chill the dough. Next time, chill for at least 30 minutes.
Mistake: Cookies are cakey. Fix: You overmixed the dough after adding the flour, or you used too much baking soda. Measure your leavening agents carefully.
Mistake: Cookies are dry. Fix: You overbaked them. Take them out when the edges are just setting, not golden brown.
Variations & Substitutions
Once you’ve nailed the basic version, here’s how you can mix it up. I’ve tried all of these, and they all work.
Chocolate Chip Snickerdoodles
Add 1 cup of semi-sweet chocolate chips to the dough after mixing in the flour. The chocolate pairs beautifully with the cinnamon. This is my family’s favorite variation.
Red Velvet Snickerdoodles
Add 1 tablespoon of cocoa powder and 1 teaspoon of red food coloring to the dough. They look stunning and have a mild chocolate flavor.
Gluten-Free Option
Substitute the all-purpose flour with a 1:1 gluten-free flour blend (like Bob’s Red Mill or King Arthur). The texture will be slightly more crumbly, but still delicious. Add an extra 10 minutes of chill time to help with structure.
Dairy-Free Option
Use vegan butter sticks (not tub margarine) instead of regular butter. The results are surprisingly close to the original. I’ve tested this with Earth Balance and Miyoko’s, and both work well.
Vegan Option
Replace the eggs with two flax eggs (2 tablespoons ground flaxseed mixed with 6 tablespoons water, let sit for 5 minutes). Use vegan butter and ensure your sugar is vegan (some sugars are processed with bone char). The cookies will be slightly denser but still tasty.
Spicy Variation
Add ½ teaspoon of cayenne pepper to the cinnamon sugar coating. It adds a subtle kick that’s surprisingly addictive. Great for holiday parties.
Serving & Storage
How to Serve:
I usually serve these warm, right off the cooling rack, with a glass of cold milk. It’s the classic combo for a reason. They’re also great for potlucks, bake sales, or as a snack with coffee. They pair well with my easy yogurt parfait cups if you’re doing a dessert and breakfast spread, or just on their own.
Storage Instructions:
Room Temperature: Store in an airtight container for up to 4 days. Place a sheet of parchment paper between layers to prevent sticking.
Freezing Dough: Scoop the dough balls and freeze them on a baking sheet for 1 hour. Then transfer to a freezer bag. Bake from frozen, adding 1-2 minutes to the bake time. This is perfect for having fresh cookies on demand.
Freezing Baked Cookies: Yes, you can freeze baked cookies! Let them cool completely, then freeze in an airtight container for up to 3 months. Thaw at room temperature before eating.
Reheating: If you’ve stored them and they’ve lost their chew, microwave one for 10-15 seconds. It’ll be soft and warm again.
Nutrition Information
I’m not a nutritionist, but here’s the breakdown if you’re tracking. Keep in mind that these are estimates and can vary based on exact measurements and brands used.
Per Cookie (makes about 24 cookies):
- Calories: 140
- Fat: 6g
- Carbs: 20g
- Sugar: 12g
- Protein: 2g
- Fiber: 0.5g
- Sodium: 80mg
Look, these are cookies. They’re meant to be indulgent. But they’re not overly heavy, and the portion size is manageable. One or two is a perfect treat. If you’re looking for something lighter, these are better than most bakery cookies because you control the sugar and fat. Just don’t eat the whole batch in one sitting… unless you’re me. I won’t tell.
Final Thoughts
So there you have it—my ultimate recipe for chewy snickerdoodle cookies with a crackly cinnamon sugar crust. I’ve probably talked your ear off at this point, but when you care about a recipe this much, you have a lot to say about it.
This recipe has become a staple in my kitchen. It’s my answer to “what’s for dessert?” when I want something comforting but easy. My kids love them, my husband begs for them, and my friends always ask for the recipe. It’s reliable, delicious, and surprisingly easy to make.
Make it yours! Try adding chocolate chips, swap in gluten-free flour, or make them spicy. The best recipes are the ones you adapt to your tastes. And remember, the key is in the details: chill the dough, coat generously in sugar, and underbake slightly.
If you make this, drop a comment and let me know how they turned out! I love hearing how recipes work in your kitchen. And if something doesn’t work, tell me that too—I’m here to help troubleshoot. Happy baking! And I hope your kitchen smells as amazing as mine does right now.
Frequently Asked Questions
Can I use brown sugar instead of white sugar?
You can, but the cookies will be chewier and darker, more like a snickerdoodle-chocolate chip hybrid. For the classic light, crisp-edged snickerdoodle, stick with granulated white sugar. If you want a mix, try 50% white and 50% light brown sugar for a balance of chew and crisp.
Why did my cookies spread too much?
This usually happens for one of three reasons: 1) The butter was too warm or melted. 2) You didn’t chill the dough. 3) Your baking sheet was too hot (don’t bake on a hot pan from the oven; let it cool between batches). Next time, chill the dough for at least 30 minutes and make sure your butter is just softened, not greasy.
Can I double the recipe?
Yes, absolutely. Double all ingredients. You’ll just need to bake in two batches. Make sure your baking sheets are cool before adding the next batch of dough, or the bottom of the cookies will melt before they bake.
Why do snickerdoodles have cream of tartar?
Cream of tartar gives snickerdoodles their signature tangy flavor. It also reacts with the baking soda to create carbon dioxide, which helps the cookies rise. It also helps keep the cookies soft and chewy by inhibiting sugar crystallization. Don’t skip it!
How do I know when the cookies are done?
They’re done when the edges are set and lightly golden, but the centers still look soft and slightly underbaked. They will firm up as they cool on the hot baking sheet. If they look fully firm in the oven, they’ll be hard when cooled.
Can I freeze the dough?
Yes! Scoop the dough into balls, freeze them on a baking sheet for 1 hour, then transfer to a freezer bag. You can bake them straight from frozen, just add 1-2 minutes to the bake time. This is great for meal prepping desserts.
Pin This Recipe!

Chewy Snickerdoodle Cookies: Easy Cinnamon Sugar Crust
- Total Time: 45 minutes
- Yield: 24 cookies 1x
Description
These chewy snickerdoodle cookies feature a crackly, sugary exterior that shatters when bitten, revealing a soft, pillowy center. The secret lies in chilling the dough and using the correct ratio of cream of tartar to baking soda for the perfect texture.
Ingredients
- 1 cup (226g) unsalted butter, softened to room temperature
- 1 ½ cups (300g) granulated sugar, divided
- 2 large eggs, room temperature
- 2 teaspoons vanilla extract
- 2 ¾ cups (340g) all-purpose flour
- 2 teaspoons cream of tartar
- 1 teaspoon baking soda
- ½ teaspoon salt, divided
- 1 tablespoon ground cinnamon
- Optional: Pinch of salt for coating
Instructions
- Cream the butter and 1 ½ cups of granulated sugar in a large mixing bowl using an electric mixer on medium-high speed for 3-4 minutes until light, fluffy, and pale. Scrape down the sides.
- Beat in the eggs one at a time, followed by the vanilla extract, mixing until just combined and smooth.
- In a separate medium bowl, whisk together the flour, cream of tartar, baking soda, and ½ teaspoon salt.
- With the mixer on low speed, gradually add the dry ingredients to the wet ingredients. Mix until just combined; do not overmix.
- Cover the dough and refrigerate for at least 30 minutes (up to 24 hours) to solidify the fat and prevent excessive spreading.
- Preheat oven to 375°F (190°C). In a small bowl, mix the remaining ½ cup sugar with the cinnamon.
- Roll the chilled dough into 1.5-tablespoon balls and coat generously in the cinnamon sugar mixture.
- Place cookies on parchment-lined baking sheets, 2 inches apart.
- Bake for 9-11 minutes until edges are set and lightly golden, but centers still look soft.
- Let cookies cool on the baking sheet for 5 minutes before transferring to a wire rack to cool completely.
Notes
Ensure butter is softened but not melted. Do not skip the chilling step for chewy texture. Underbake slightly as cookies firm up while cooling. Store in an airtight container for up to 4 days. Dough can be frozen for up to 3 months.
- Prep Time: 15 minutes
- Cook Time: 11 minutes
- Category: Dessert
- Cuisine: American
Nutrition
- Serving Size: 1 cookie
- Calories: 140
- Sugar: 12
- Sodium: 80
- Fat: 6
- Saturated Fat: 3.5
- Carbohydrates: 20
- Fiber: 0.5
- Protein: 2
Keywords: snickerdoodle cookies, chewy cookies, cinnamon sugar cookies, easy baking, homemade cookies, crackly crust


