Last week, I was staring at my pantry like it held the secrets to the universe. It was one of those evenings where I’d been running around all day, and dinner was an afterthought. I had a sudden, desperate craving for something sweet. Not a salad. Not a protein bar. I wanted something rich, chocolatey, and slightly messy. I rummaged through the cabinets, found a box of cake mix (yes, I said it), some oil, and an egg, and whipped up a batch of chocolate crinkle cookies.
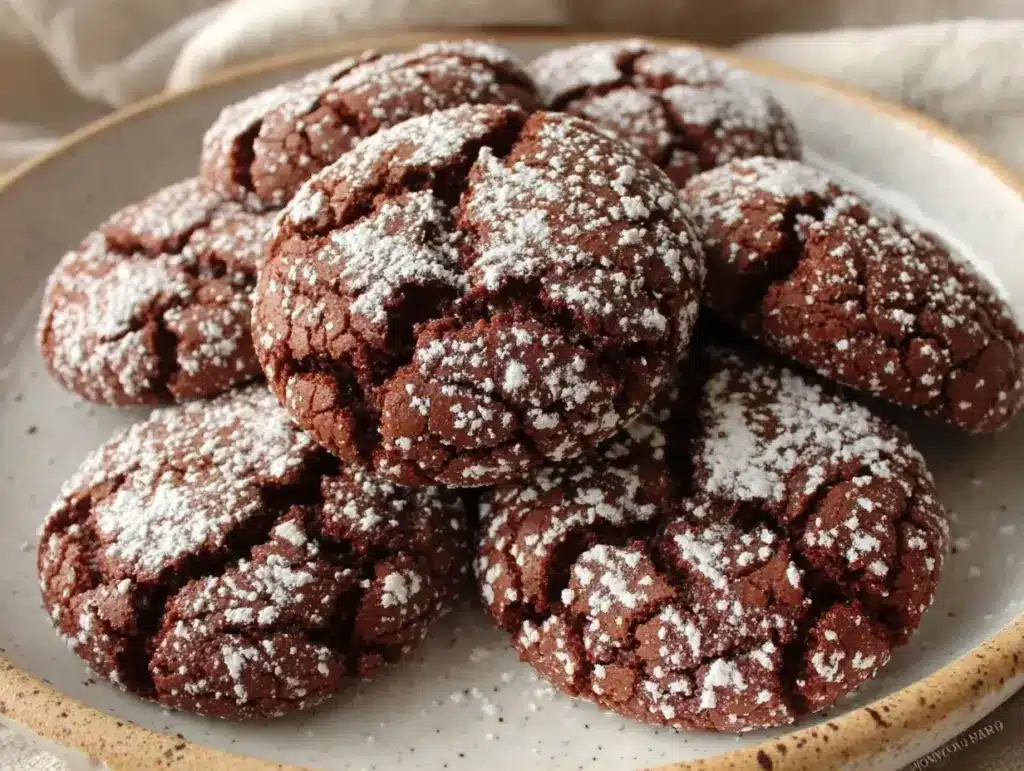
They came out of the oven looking like little galaxies—dark, cracked surfaces dusted with snowy powdered sugar. I ate one while they were still warm. Then another. Then I put the rest on a plate and set it on the counter, knowing they’d be gone in ten minutes if my husband didn’t get home soon. They were. But the next morning, my daughter asked if I could make “the snowball cookies” again. That’s what she calls them. And honestly? She’s right. These chocolate crinkle cookies are the easiest homemade treat to pull together, and they always get a reaction that makes me feel like a baking genius, even though I’m basically just following a few simple steps.
There is something deeply satisfying about the contrast in these cookies. You bite into that crisp, sugary exterior, and then you hit that soft, fudgy, warm chocolate center. It’s texture heaven. I’ve made these for school bake sales, last-minute dinner party desserts, and just because I wanted a snack with my coffee. They travel well, they freeze beautifully, and they require zero fancy equipment. If you can stir, you can make these. And if you’re looking for another quick win, check out my high-protein Greek yogurt chocolate chip blondies for a slightly different vibe, but honestly? Nothing beats the classic crinkle.
Why You’ll Love This Recipe
Look, I’m not going to lie to you. Baking can be intimidating. Some recipes require tempering chocolate, whipping egg whites to stiff peaks, or waiting three days for dough to ferment. This recipe? It’s the opposite. It’s fast, forgiving, and incredibly delicious. Here’s why these chocolate crinkle cookies have earned a permanent spot in my rotation:
- Stupid Simple Ingredients — Seriously, you probably have most of this already. Cake mix (or flour), cocoa powder, oil, egg, and powdered sugar. That’s it. No butter to soften, no cream cheese to whip. Just mix and roll.
- Zero Chill Time Required — Most cookie doughs need to sit in the fridge for hours so they don’t spread into oblivion. This dough is stiff enough to roll immediately. You can go from pantry to oven in about 15 minutes.
- Restaurant-Quality Look — The “crinkle” effect isn’t magic; it’s science. The high sugar content in the coating and the quick bake time create those beautiful cracks. They look like you spent hours perfecting them, but you didn’t.
- Perfect for Beginners — I’ve taught my teenage nephew to make these, and he nailed it on the first try. There’s no room for error here. If you overmix, it’s fine. If you underbake slightly, it’s fudgier (which I prefer).
- Freezer Friendly — I often double the batch, freeze the dough balls, and bake them fresh whenever the craving hits. They thaw and bake just like fresh dough.
Real talk: these cookies are my go-to when I need to impress someone but have zero energy. They’re the answer to “what’s for dessert?” when I’m tired. And trust me, once you taste one, you’ll be making them every weekend.
Ingredients You’ll Need
Here’s the best part: this recipe relies on pantry staples. I’m not asking you to run to the store for anything obscure. Here’s exactly what you need to make these chocolate crinkle cookies, and why each item matters.
For the Cookie Dough
Chocolate cake mix (1 box / 15.25 oz) — Yes, cake mix. I know some purists might cringe, but it provides the perfect structure and moisture. It has the right balance of sugar, leavening, and flour built-in. I use the standard Devil’s Food or Dark Chocolate cake mix. If you want to get fancy, you can use a box of dark chocolate cake mix for a deeper flavor, but the classic box works perfectly.
Vegetable oil (½ cup / 120ml) — We’re using oil instead of butter. This keeps the cookies soft and fudgy rather than crisp and buttery. Oil doesn’t solidify in the fridge, which is why these cookies stay chewy for days. You can use any neutral oil: vegetable, canola, or even melted coconut oil if you want a hint of coconut flavor.
Large egg (1) — Just one egg. It binds the dough together. Don’t use a small egg; a large one is standard for this ratio.
Chocolate chips (½ cup / 85g) — I add semi-sweet chocolate chips to the dough for extra gooey pockets of chocolate. It’s optional, but highly recommended. If you’re using a dark chocolate cake mix, use dark chocolate chips. If you’re using regular cake mix, semi-sweet is the way to go.
For the Coating
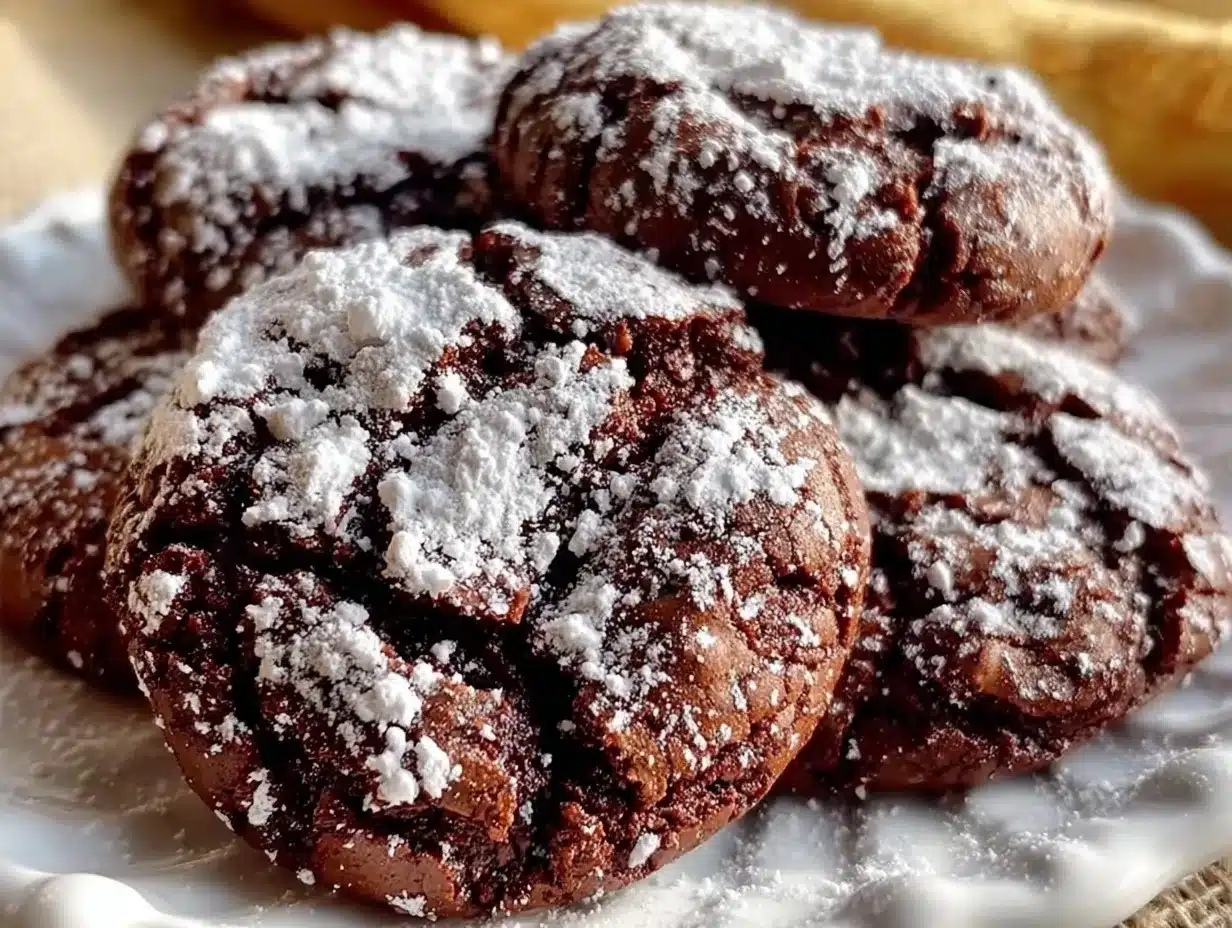
Powdered sugar (1 cup / 120g) — This is non-negotiable. Granulated sugar won’t stick, and it won’t create that snowy, cracked look. You need fine powdered sugar (also called confectioners’ sugar). Sift it if it’s clumpy; nobody wants gritty cookies.
Optional Add-Ins
Pink sprinkles — I love adding a few red or pink sprinkles to the powdered sugar before rolling the cookies. It adds a festive touch, especially for holidays. But plain is classic, too.
Peanut butter chips — If you’re a fan of chocolate and peanut butter, swap half the chocolate chips for peanut butter chips. It’s a game-changer.
Equipment Needed
You don’t need a stand mixer or any fancy gadgets. Here’s what I actually use:
- Large mixing bowl — Any bowl big enough to hold the dough comfortably. Glass or ceramic works best so you can see the consistency.
- Fork or rubber spatula — To mix the dough. A fork is actually better here because it helps incorporate the oil without overworking the dough.
- Baking sheets — Two standard sheet pans. Line them with parchment paper or silicone mats. I use silicone mats because cleanup is literally zero.
- Cookie scoop or tablespoon — A small cookie scoop (about 1.5 tablespoons) makes uniform cookies. But a tablespoon works fine if you’re eyeballing it.
- Small bowl — For holding the powdered sugar for rolling.
I’m not using an electric mixer because you don’t want to aerate this dough too much. You want it dense and fudgy, not light and cakey. Hand mixing is faster and gives you better control.
How to Make It: Step-by-Step
Alright, let’s make these chocolate crinkle cookies! I’m walking you through exactly how I do it, including the little tricks I’ve picked up over the years.
Step 1: Prep Your Oven and Pans (2 minutes)
Preheat your oven to 350°F (175°C). This is crucial. If your oven is too cool, the cookies will spread too much and lose their crinkle. If it’s too hot, they’ll burn on the outside before the inside is cooked. Line your baking sheets with parchment paper. I swear by parchment paper for these because the powdered sugar can get sticky if it touches the metal directly.
Step 2: Mix the Dough (3 minutes)
In your large mixing bowl, combine the cake mix, vegetable oil, and egg. Stir with a fork or rubber spatula until the dough comes together. It will look a bit crumbly at first, then come together into a thick, sticky ball. This is normal. Don’t worry if it looks dry; the oil will hydrate it as you mix.
Once the dough is formed, fold in the chocolate chips. Use your hands if you need to—they’re sticky, but it’s faster than a spoon. The dough should be thick enough to hold its shape when you scoop it.
Step 3: Roll the Dough Balls (5 minutes)
This is the fun part. Take about 1.5 tablespoons of dough and roll it between your palms to form a smooth ball. Don’t over-roll them; just get them into a sphere shape. If the dough is too sticky, wet your hands slightly with water. But honestly, it shouldn’t be that sticky if you got the ratio right.
Step 4: Coat in Powdered Sugar (5 minutes)
Place your powdered sugar in a small bowl. Take the dough ball and drop it into the sugar. Roll it around until it’s completely coated. You want a thick, snowy layer. Shake off any excess sugar—you don’t want a pile of sugar on your baking sheet, just a good coating on the cookie.
Pro tip: If you’re adding sprinkles, sprinkle them onto the powdered sugar-coated cookie while it’s still wet with sugar. They’ll stick instantly.
Step 5: Bake (10-12 minutes)
Place the coated dough balls on your prepared baking sheets, leaving about 2 inches between them. They will spread, but not too much. Bake for 10-12 minutes. Here’s the key: they should look set on the outside but still soft in the center. They will firm up as they cool. Do not overbake them, or they’ll be dry. The center should still look slightly underdone when you take them out.
Step 6: Cool and Serve (10 minutes)
Let the cookies cool on the baking sheet for 5 minutes. Then, transfer them to a wire rack to cool completely. The cracks will become more pronounced as they cool. Dust them with a little extra powdered sugar if you want that extra snowy look.
Total Time: About 25 minutes (5 minutes prep, 20 minutes cook and cool). That’s it. Dinner party dessert, sorted.
Expert Tips & Tricks
Here’s everything I’ve learned from making these dozens of times. These tips will save you from my mistakes.
Don’t Skip the Parchment Paper — The powdered sugar melts slightly during baking. If you bake these directly on the pan, you’ll have a sticky mess to scrub. Parchment paper is your best friend.
Roll Them While Warm? — No! Roll them while the dough is room temperature. If you try to roll warm dough balls, they’ll flatten out. If you need to chill the dough (maybe you made it ahead), chill it for 30 minutes, then roll.
The Crinkle Secret — The cracks happen because the sugar coating doesn’t expand at the same rate as the dough. If your cookies aren’t cracking, your oven might be too hot, or you didn’t coat them thickly enough in sugar. Give them another roll in sugar before baking.
Storage is Key — These cookies stay fresh in an airtight container at room temperature for up to 5 days. In fact, they taste even better on day 2, as the flavors meld and the texture softens.
Freezing the Dough — You can roll the dough balls, coat them in sugar, and freeze them on a baking sheet. Once frozen, transfer them to a freezer bag. Bake straight from frozen, adding 1-2 minutes to the bake time. This is my favorite meal-prep hack.
Variations & Substitutions
Once you’ve nailed the basic version, here’s how you can mix it up. I’ve tried all of these.
Red Velvet Crinkles — Use a box of red velvet cake mix. The red color shows through the cracks beautifully against the white sugar. Super festive for Valentine’s Day.
White Chocolate Chip — Swap the semi-sweet chips for white chocolate chips. It’s sweeter and creamier. Great if you’re not a huge dark chocolate fan.
Gluten-Free Version — Use a gluten-free chocolate cake mix. Most major brands have a GF version now. The texture is slightly different (a bit more crumbly), but still delicious.
Vegan Option — Use an egg replacer (like flax egg) and check that your cake mix is vegan (some contain dairy). Use coconut oil instead of vegetable oil. It works surprisingly well.
Spicy Kick — Add a teaspoon of cinnamon or a pinch of cayenne pepper to the dough. It adds a warm depth that pairs perfectly with the chocolate. It’s subtle, but it elevates the flavor.
Serving & Storage
How to Serve:
I usually serve these with a cold glass of milk. Classic. But they’re also great with coffee or a hot chocolate. If you’re hosting a party, put them on a platter with a dusting of extra powdered sugar. They look stunning.
Refrigerator:
Store in an airtight container at room temperature for up to 5 days. Do not refrigerate them, as they can absorb odors and become soft. Room temp is best for texture.
Freezing:
Freezing the dough: Roll, coat, freeze on a tray, then bag. Bake from frozen.
Freezing baked cookies: Let them cool completely, then layer them in an airtight container with parchment paper between layers. They’ll last for 2 months. Thaw at room temperature.
Pro Tip:
If your powdered sugar gets clumpy, sift it before rolling. It makes a huge difference in how smoothly the cookies coat.
Nutrition Information
I’m not a nutritionist, but here’s the breakdown if you’re tracking. Keep in mind these are rich, chocolatey cookies, so they’re indulgent.
Per Cookie (makes about 24 cookies):
- Calories: 160
- Fat: 7g
- Carbs: 24g
- Sugar: 18g
- Protein: 2g
It’s a treat. Enjoy it as part of a balanced day. Pair it with a piece of fruit or some yogurt if you want to balance it out. But honestly? Just enjoy the cookie. Life’s too short to stress over 160 calories.
Final Thoughts
So that’s my go-to chocolate crinkle cookies recipe! I’ve probably talked your ear off at this point, but when you make a recipe this often, you have a lot to say about it. These cookies have saved me more times than I can count. They’re my answer to “what’s for dessert?” when I’m tired, don’t want to order out, and still want something that tastes really good. My kids are happy, my husband’s happy, and I’m happy because I’m not stressed about cooking.
Make it yours! Try different cake mixes, add different chips, or sprinkle on some nuts. The best recipes are the ones you adapt to your family’s tastes. If you make these, drop a comment and let me know what you think! I love hearing how recipes turn out in your kitchen. And if something doesn’t work, tell me that too—I’m here to help troubleshoot.
Happy baking! And I hope your kitchen smells half as good as mine does right now.
Frequently Asked Questions
Can I use butter instead of oil?
You can, but the texture will be different. Butter makes the cookies crispier and more cake-like. Oil keeps them soft and fudgy, which is what we want for crinkles. If you must use butter, melt it first and let it cool slightly before mixing. But I stick with oil.
Why didn’t my cookies crack?
Usually, this means the oven wasn’t hot enough, or you didn’t coat the dough balls thickly enough in powdered sugar. Make sure your oven is fully preheated to 350°F. Also, roll the dough balls in sugar twice if needed. The sugar creates the barrier that forces the cracks.
Can I make these ahead of time?
Absolutely. You can make the dough, roll the balls, coat them in sugar, and freeze them. Bake them straight from the freezer, adding 1-2 minutes to the bake time. This is perfect for holiday baking.
Why are my cookies too dry?
You might have baked them too long. These cookies should look slightly underdone in the center when you take them out. They will firm up as they cool. Also, make sure you’re using the correct amount of oil. Too little oil = dry cookies.
Can I use a different type of cake mix?
Yes! Any chocolate cake mix will work. Devil’s Food, Dark Chocolate, or even a German Chocolate mix. Just avoid white cake mix unless you want vanilla crinkles (which are also good, but not chocolate).
How do I store leftover cookies?
Store them in an airtight container at room temperature for up to 5 days. If they start to lose their crunch, you can crisp them up in the oven for 2 minutes at 300°F.
Pin This Recipe!

Chocolate Crinkle Cookies: Easy Homemade Treat
- Total Time: 25 minutes
- Yield: 24 cookies 1x
Description
These easy chocolate crinkle cookies are made with just a few pantry staples including cake mix and oil. They feature a crisp, sugary exterior with a soft, fudgy center and require no chill time.
Ingredients
- 1 box (15.25 oz) chocolate cake mix (Devil’s Food or Dark Chocolate)
- 1/2 cup (120ml) vegetable oil
- 1 large egg
- 1/2 cup (85g) semi-sweet chocolate chips
- 1 cup (120g) powdered sugar
- Optional: Pink sprinkles or peanut butter chips
Instructions
- Preheat oven to 350°F (175°C) and line two baking sheets with parchment paper.
- In a large mixing bowl, combine the cake mix, vegetable oil, and egg. Stir with a fork or rubber spatula until a thick, sticky dough forms.
- Fold in the chocolate chips.
- Roll about 1.5 tablespoons of dough into a smooth ball between your palms.
- Drop the dough ball into the powdered sugar and roll until completely coated. Shake off excess sugar.
- Place coated dough balls on the prepared baking sheets, leaving 2 inches between them.
- Bake for 10-12 minutes until the outside looks set but the center is still soft.
- Let cookies cool on the baking sheet for 5 minutes, then transfer to a wire rack to cool completely.
Notes
Do not overbake; the center should look slightly underdone as it will firm up while cooling. For best results, use parchment paper to prevent sticking. Cookies stay fresh in an airtight container at room temperature for up to 5 days. Dough balls can be frozen before baking.
- Prep Time: 15 minutes
- Cook Time: 10-12 minutes
- Category: Dessert
- Cuisine: American
Nutrition
- Serving Size: 1 cookie
- Calories: 160
- Sugar: 18
- Sodium: 150
- Fat: 7
- Saturated Fat: 2
- Carbohydrates: 24
- Fiber: 1
- Protein: 2
Keywords: chocolate crinkle cookies, easy dessert, cake mix cookies, fudgy cookies, no chill cookies, holiday baking