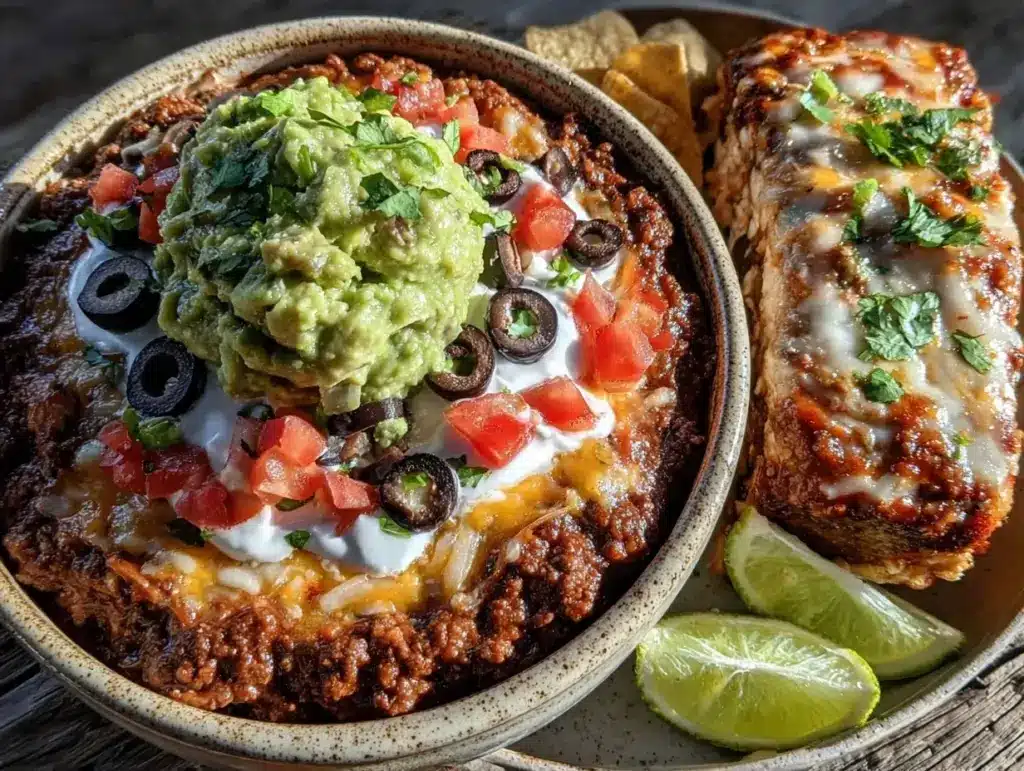
It was 8:30 PM on a Tuesday, and I had just collapsed onto the couch after a day that felt like it lasted three weeks. My brain was fried. My shoulders were up by my ears. The last thing I wanted to do was stand over a hot stove, chop vegetables, or figure out what to cook for dinner. I didn’t want takeout—I wanted something that felt like a hug, but didn’t require me to be a person who cooks.
So, I made this seven layer taco dip. Again.
It sounds ridiculous, I know. “Self-care” usually involves face masks or journaling. But for me? Self-care is making something colorful and delicious when I have zero energy. It’s the act of assembling something beautiful without actually having to cook it. This seven layer taco dip for game day gatherings might be famous for football parties, but let’s be honest: it’s the ultimate weeknight rescue mission. It’s vibrant, it’s comforting, and it tastes like a treat, even if you’re eating it straight from the bowl while watching a rerun of a show you’ve already seen.
I’ve been making this dip for years, usually on nights when I feel like I’ve given everything to everyone else and have nothing left for myself. There’s something deeply satisfying about layering ingredients in a clear glass dish. It’s meditative. It’s quiet. And the best part? You get to eat it immediately. No waiting for it to cool, no complex plating, no stress. Just you, a bag of tortilla chips, and a moment of peace.
People often ask me for the “best” recipes, but I think the best recipe is the one that meets you exactly where you are. If you’re tired, this seven layer taco dip meets you there. If you’re hosting a crowd, it meets you there too. It’s versatile, forgiving, and incredibly nourishing in the way that good food should be—simple, fresh, and made with care, even if that care is just taking ten minutes for yourself.
Why You’ll Love This Seven Layer Taco Dip
There are about ten reasons I keep coming back to this dip, but here are the big ones. It’s not just about the taste (though it is delicious). It’s about how it makes me feel when I make it.
Zero Cooking Required — Seriously. If you can open a can and spread something with a spoon, you can make this. There is no sautéing, no boiling, no chopping onions until you cry. I’ve made this at 11 PM after a long shift, and I didn’t turn on a single burner. It’s just assembly. Pure, unadulterated assembly.
It Feels Like a Treat — It’s not a “diet” food. It’s rich, creamy, savory, and crunchy. It tastes like a night out at a Mexican restaurant, but you’re in your pajamas. It’s indulgent without being heavy. It’s the kind of snack that makes you smile because it’s colorful and fun.
It’s a Visual Mood Booster — I’m serious. When I’m having a low-energy day, making something that looks beautiful helps lift my spirits. The layers of red beans, green guacamole, white sour cream, and orange cheese are like a little rainbow on a plate. It’s edible art that doesn’t require any skill.
It’s Flexible — Don’t like olives? Skip them. Want more cheese? Go for it. This dip is your canvas. I’ve made it with black beans, pinto beans, refried beans, and even a mix. It always works. It’s forgiving because it’s all about texture and flavor contrasts, not precise chemistry.
It’s Perfect for Sharing (or Not) — When I have friends over, this is the centerpiece. It’s easy to eat while standing around, talking, and laughing. But when I’m alone? It’s my private moment of joy. I’ll grab a bag of chips and sit by the window and just eat it slowly. It’s nourishing in a way that feeds my soul, not just my stomach.
This is my go-to when I need dinner to just work. No complicated techniques, no weird ingredients, just reliable, delicious food that makes everyone happy. It’s the one to make when you need to take care of yourself.
Ingredients You’ll Need
Here’s the best part: you probably have most of this already. This seven layer taco dip for game day gatherings relies on pantry staples and a few fresh items. It’s not about buying expensive, hard-to-find ingredients. It’s about using what you have and making it shine.
For the Base Layer:
Tortilla Chips (1 large bag, broken if needed) — I use thick, sturdy chips. Thin ones break and make a mess. I like the restaurant-style ones because they hold up to the heavy layers. You’ll need about 12-16 ounces. Don’t skimp on the chips; they’re the foundation.
For the Protein Layer:
Refried Beans (1 can, 16 oz) — I use black beans or pinto beans, lightly mashed. Some people use whole beans, but I prefer the creamy texture of refried or mashed beans. It creates a smooth base that holds the other layers. Look for a brand with simple ingredients—beans, oil, salt. Avoid the ones with weird additives.
For the Creamy Layers:
Sour Cream (1 cup / 240g) — Full-fat only. Low-fat sour cream can be watery and separate. I like the tanginess it adds to balance the richness of the cheese and guacamole. If you want a lighter option, Greek yogurt works, but the texture will be different.
Guacamole (1 cup / 240g) — I make my own, but store-bought is totally fine for this. If you’re making it fresh, mash ripe avocados with lime juice, salt, and a little cilantro. The key is to keep it from browning. Press plastic wrap directly on the surface if you’re not using it right away.
For the Flavor Layers:
Shredded Cheddar Cheese (1 cup / 100g) — I use a sharp cheddar for more flavor. You can also use a Mexican blend. The key is to shred it yourself. Pre-shredded cheese has anti-caking agents that prevent it from melting properly, and while we’re not melting it, we want it to be soft and clump-free.
Black Olives (½ cup, sliced) — I love the briny punch they add. If you’re not a fan of olives, you can skip them or use jalapeño slices instead. Sliced black olives distribute evenly throughout the dip.
Diced Tomatoes (1 cup, drained) — I use canned diced tomatoes, drained well. Excess water is the enemy of this dip. If you use fresh tomatoes, dice them small and pat them dry with a paper towel. The acidity cuts through the richness of the cheese and sour cream.
Green Onions (3-4 stalks, chopped) — For a fresh, oniony bite. They add color and a mild crunch. You can use red onion if you prefer, but green onions are milder and look prettier in the layers.
Optional Add-ins:
Jalapeños — Sliced fresh or pickled, depending on how spicy you like it. I add a little heat to contrast the creamy layers.
Cilantro — Chopped fresh cilantro adds brightness. I sprinkle it on top for garnish.
Corn — Canned corn, drained, adds a nice sweetness and crunch. It’s a fun variation that I sometimes add.
Personal Tips:
I always buy the block of cheddar and grate it myself. It melts better and tastes fresher. For the beans, I like to warm them slightly before spreading so they’re soft and easy to layer. If you’re making this ahead, keep the guacamole layer on top to prevent browning, or press plastic wrap directly on the surface.
Equipment Needed
You don’t need fancy equipment for this. Here’s what I actually use.
Clear Glass Serving Dish — I use a 9×9 inch or 8×10 inch dish. The clear glass is important because the whole point is to see the layers. It’s part of the appeal. If you don’t have clear glass, a white ceramic dish works too, but you won’t get the same visual effect.
Spatula — A flat spatula is perfect for spreading the layers evenly. I like a silicone one because it’s flexible and easy to clean.
Measuring Cups and Spoons — Pretty standard stuff. Dollar store versions work fine.
Knife and Cutting Board — For chopping the green onions and slicing the olives. Dull knives make you cry more—learned this the hard way.
Colander — For draining the tomatoes and corn. Or just use the lid to drain—I do this when I’m lazy.
Food Processor — Optional. If you’re making your own guacamole, a food processor makes it quick. But a fork works fine if you like a chunkier texture.
Tool Tips:
Don’t have a 9×9 dish? Any square or rectangular dish works. The shape matters more than the size. I’m obsessed with my simple glass dishes from IKEA—they’re like $3 and make life easier.
How to Make It: Step-by-Step
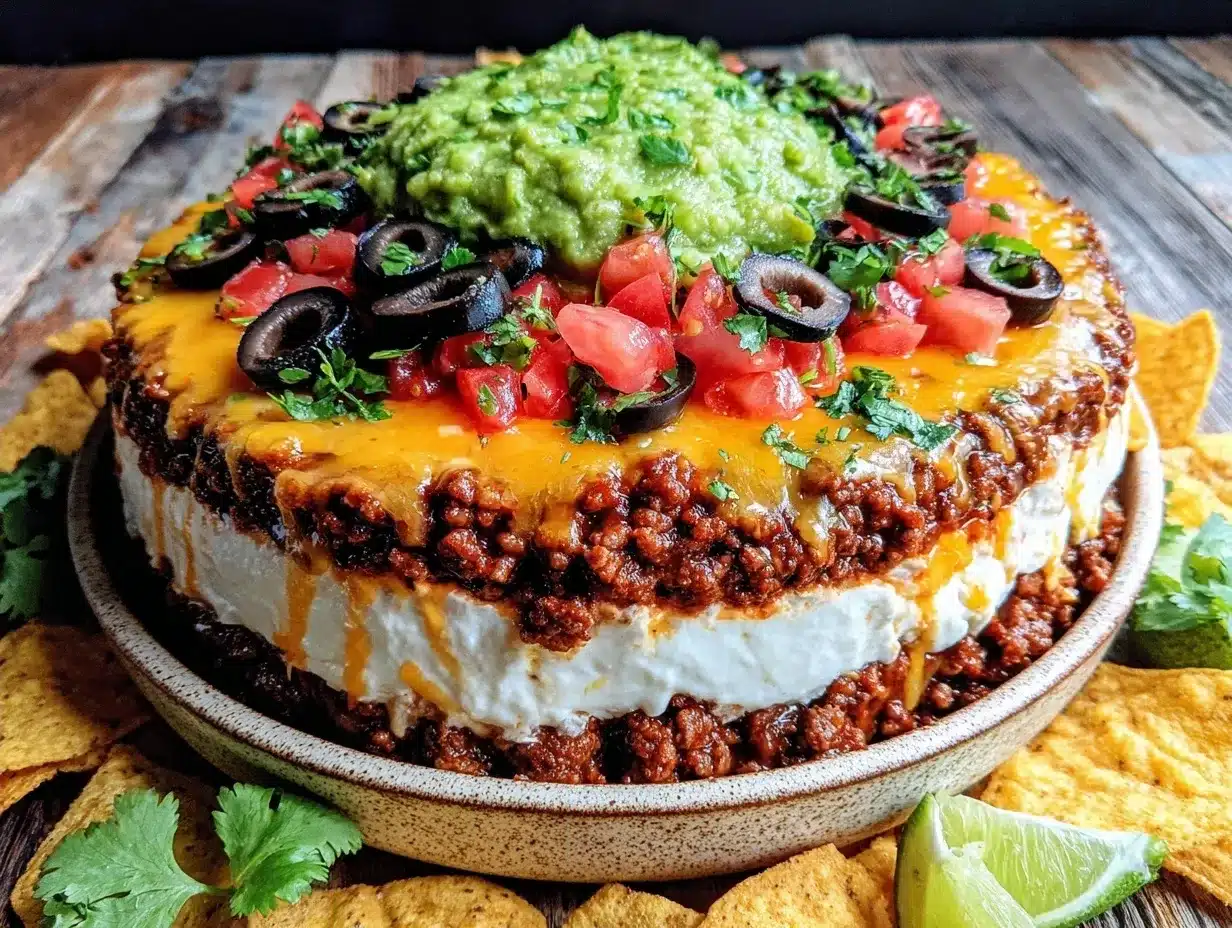
Alright, let’s make this! I’m walking you through exactly how I do it, including the little tricks I’ve picked up.
Step 1: Prep Your Ingredients (5-8 minutes)
Before you start assembling, chop your green onions, slice your olives, and drain your tomatoes. I know it seems fussy, but it makes the actual assembly way less stressful. Grate your cheese while you’re at it. Once you start layering, things move fast, and you want everything ready to go.
Step 2: The Chip Base (2 minutes)
Break your tortilla chips into your serving dish. Don’t worry about making it perfectly flat; just create an even layer that covers the bottom. I like to leave a few bigger pieces on top for visual interest. This is your foundation, so make it sturdy.
Step 3: The Bean Layer (2 minutes)
Spread the mashed beans or refried beans evenly over the chips. Use your spatula to press it down slightly so it adheres to the chips. This layer prevents the chips from getting soggy too quickly. If the beans are too thick, add a splash of water or milk to thin them out.
Step 4: The Sour Cream Layer (2 minutes)
Spread the sour cream over the beans. Keep it smooth and even. This is your creamy buffer. If you’re using Greek yogurt, add a little lime juice to mimic the tang of sour cream. Don’t skip this layer; it’s essential for the texture contrast.
Step 5: The Guacamole Layer (2 minutes)
Gently spread the guacamole over the sour cream. This is the trickiest layer because it can be lumpy. Use the back of a spoon to smooth it out as much as possible. If you’re making this ahead, press plastic wrap directly on the surface of the guacamole to prevent browning.
Step 6: The Cheese Layer (1 minute)
Sprinkle the shredded cheese evenly over the guacamole. Don’t be shy with the cheese; it’s one of the best parts. I like to save a little bit for the very top as a garnish.
Step 7: The Veggie Layers (2 minutes)
Scatter the diced tomatoes, sliced olives, and chopped green onions over the cheese. Distribute them evenly so every bite has a bit of everything. If you’re adding jalapeños or corn, add them now.
Step 8: Garnish and Serve (1 minute)
Sprinkle the remaining cheese and a little fresh cilantro on top. Serve immediately with extra tortilla chips on the side. The best part? You get to eat it right away. No waiting.
Total Time: About 15 minutes (mostly prep, zero cooking)
Built-in Troubleshooting:
Dip is too dry? Add a splash of milk to the sour cream or guacamole to loosen it up.
Layers are sliding? Make sure each layer is spread evenly and pressed down slightly before adding the next.
Guacamole is browning? Press plastic wrap directly on the surface to keep air away.
Expert Tips & Tricks
Here’s everything I’ve learned from making this dozens of times. These tips will save you from my mistakes.
Drain Your Tomatoes
This is the #1 tip. Wet tomatoes make the whole dip soggy. I always drain canned tomatoes in a colander and pat them dry with paper towels. It takes an extra minute, but it’s worth it.
Warm the Beans
Cold refried beans are hard to spread. I microwave them for 30 seconds to soften them up. It makes layering so much easier.
Layer Thickness Matters
Don’t make the layers too thick. You want a balance of every ingredient in each bite. Aim for about ¼ to ½ inch per layer.
Make It Ahead
This dip actually tastes better the next day. The flavors meld together. I make it the night before and store it in the fridge. Just add fresh guacamole and green onions right before serving to keep the colors bright.
Common Mistakes (and how to avoid them):
Mistake: Chips get soggy
Fix: Make sure the bean layer is thick enough to act as a barrier. Also, serve it within a few hours of assembly.
Mistake: Guacamole turns brown
Fix: Press plastic wrap directly on the surface. Or, add a little extra lime juice, which helps prevent oxidation.
Pro Tricks I’ve Learned:
For Extra Flavor
Add a packet of taco seasoning to the beans. It infuses the base layer with extra flavor.
For Better Texture
Use a mix of cheeses. Sharp cheddar for flavor, and Monterey Jack for creaminess.
Make-Ahead Strategy
Make the dip up to 2 days ahead. Store in the fridge. Add fresh toppings right before serving. It’s almost as good as fresh.
Variations & Substitutions
Once you’ve nailed the basic version, here’s how you can mix it up. I’ve tried all of these.
Vegetarian Version
Skip the meat layer (if you add it) and just stick to the beans. This is already vegetarian-friendly unless you add ground beef.
Chicken Taco Dip
Add 2 cups shredded cooked chicken on top of the bean layer. My husband prefers this version—makes it more filling.
Spicy Version
Add diced jalapeños to the guacamole and sprinkle red pepper flakes on top. Totally different vibe—spicy and bold.
Lighter Version
Use Greek yogurt instead of sour cream, and reduce cheese to ½ cup. It’s thinner but still good. I make this when I’m trying to be “healthy.”
Black Bean Variation
Use mashed black beans instead of refried beans. It adds a nice earthy flavor and looks cooler in the layers.
Dietary Modifications:
Gluten-Free
Use gluten-free tortilla chips. Everything else is naturally gluten-free. I’ve used simple brands and they work great.
Dairy-Free
Replace sour cream with coconut cream and cheese with nutritional yeast. It’s different but still tasty. My lactose-intolerant friend requests this version.
Lower-Carb
Use lettuce cups or cucumber slices instead of chips. Reduce sauce ingredients by half. I won’t lie—it’s not the same, but it works if you’re watching carbs.
Serving & Storage
How to Serve:
I usually serve this straight from the dish at the dinner table—it looks rustic and stays warm. But here are other ways I’ve enjoyed it:
Side Dishes:
– Simple green salad with balsamic vinaigrette
– Roasted broccoli or green beans
– Corn on the cob (if you’re feeling fancy)
Toppings Bar:
When I have guests, I put out: extra cheese, jalapeños, fresh cilantro, lime wedges, crispy bacon bits. Everyone customizes their bowl.
Wine Pairing:
Not a wine expert, but my wine-snob friend says a crisp Sauvignon Blanc or a light Pinot Grigio works great with this.
Storage Instructions:
Refrigerator:
Store in an airtight container or covered with plastic wrap for up to 3 days. The guacamole may brown slightly, but it’s still good.
Reheating:
This dip is best served cold or room temperature. Don’t heat it up; the cheese will clump and the chips will get soggy.
Freezing:
Honestly, this doesn’t freeze well because of the dairy and chips. The texture breaks down. Make it fresh or store in the fridge for up to 3 days.
Pro tip: If leftovers are drying out, stir in a splash of lime juice when reheating (if you do reheat). Brings back that fresh flavor.
Nutrition Information
I’m not a nutritionist, but here’s the breakdown if you’re tracking.
Per Serving (based on 8 servings):
- Calories: 280
- Protein: 8g
- Carbs: 24g
- Fiber: 4g
- Sugar: 2g
- Fat: 16g
- Saturated Fat: 6g
- Cholesterol: 25mg
- Sodium: 450mg
- Calcium: 150mg
What’s Good:
- Decent fiber from beans and veggies
- Calcium from the cheese
- Can add vegetables to boost nutrition
- More filling than it looks
What to Know:
- Higher in calories from cheese and sour cream
- Contains dairy
- Moderate sodium (use low-sodium beans to reduce)
My Take:
Look, this is comfort food. It’s not a diet recipe. But it’s way better than packaged snacks, costs less, and I know exactly what’s in it. When I want to make it lighter, I use Greek yogurt and less cheese. But usually? I just eat a reasonable portion and enjoy it.
Final Thoughts
So that’s my seven layer taco dip for game day gatherings! I’ve probably talked your ear off at this point, but when you make a recipe this often, you have a lot to say about it.
This has saved weeknight dinners more times than I can count. It’s my answer to “what’s for dinner” when I’m tired, don’t want takeout, and still want something that tastes really good. My kids are happy, my husband’s happy, and I’m happy because I’m not stressed about cooking.
Make it yours! Try different add-ins, swap in your favorite vegetables, adjust the spice level. The best recipes are the ones you adapt to your family’s tastes.
If you make this, drop a comment and let me know what you think! I love hearing how recipes turn out in your kitchen. And if something doesn’t work, tell me that too—I’m here to help troubleshoot.
Happy cooking! And I hope your kitchen smells half as good as mine does right now.
Frequently Asked Questions
Q: Can I use milk instead of sour cream?
A: You can, but the texture will be very different. Sour cream provides thickness and tang. If you want to try it, use a thicker milk like half-and-half, but it won’t be the same. Greek yogurt is a better substitute for texture.
Q: My guacamole turned brown—what happened?
A: Avocados oxidize when exposed to air. To prevent this, press plastic wrap directly on the surface of the guacamole. You can also add extra lime juice, which helps slow down the browning.
Q: Can I make this ahead for a party?
A: Absolutely! In fact, it tastes better the next day. Make the dip up to 2 days ahead and store in the fridge. Add fresh guacamole, green onions, and cilantro right before serving to keep the colors bright.
Q: Why did my chips get soggy?
A: Usually means the bean layer was too thin or watery. Make sure the bean layer is thick enough to act as a barrier. Also, don’t assemble it too far in advance. Serve within a few hours for best results.
Q: Can I use fresh tomatoes?
A: Yes, but you must drain them well. Dice them small and pat them dry with paper towels. Excess water will make the dip soggy. Canned diced tomatoes are easier, but fresh works if you prep them properly.
Q: How do I store leftovers?
A: Store in an airtight container in the fridge for up to 3 days. The guacamole may brown slightly, but it’s still good. Don’t freeze it; the texture will break down.
Q: Can I double this recipe?
A: Yes! Double everything and use a larger dish. The assembly process stays the same. Just make sure your dish is big enough to hold all the layers.
Pin This Recipe!

Seven Layer Taco Dip: Best Easy Self-Care Snack
- Total Time: 15 minutes
- Yield: 8 servings 1x
Description
A vibrant, no-cook seven-layer taco dip that serves as the ultimate weeknight rescue mission or game day centerpiece. It requires zero cooking, just simple assembly of pantry staples and fresh ingredients for a comforting, colorful treat.
Ingredients
- 1 large bag (12–16 oz) thick, sturdy tortilla chips
- 1 can (16 oz) refried beans (black or pinto), lightly mashed or warmed
- 1 cup (240g) full-fat sour cream
- 1 cup (240g) guacamole (fresh or store-bought)
- 1 cup (100g) shredded sharp cheddar cheese
- 1/2 cup sliced black olives
- 1 cup diced tomatoes, well drained
- 3–4 stalks green onions, chopped
- Optional: Sliced jalapeños, chopped fresh cilantro, canned corn (drained)
Instructions
- Prep ingredients: Chop green onions, slice olives, drain and pat dry tomatoes, and grate cheese.
- Create the base: Break tortilla chips into a 9×9 or 8×10 inch clear glass serving dish to form an even layer.
- Add bean layer: Spread the warmed mashed beans evenly over the chips, pressing down slightly to adhere.
- Add sour cream layer: Spread the sour cream smoothly over the beans.
- Add guacamole layer: Gently spread guacamole over the sour cream. If making ahead, press plastic wrap directly on the surface to prevent browning.
- Add cheese layer: Sprinkle shredded cheese evenly over the guacamole, reserving a little for garnish.
- Add veggie layers: Scatter diced tomatoes, sliced olives, and chopped green onions over the cheese.
- Garnish and serve: Top with remaining cheese and fresh cilantro. Serve immediately with extra chips.
Notes
Drain tomatoes thoroughly to prevent sogginess. Warm beans slightly before spreading for easier layering. If making ahead, store in the fridge for up to 3 days, adding fresh guacamole and green onions right before serving to maintain color and texture. Do not freeze as the texture will break down.
- Prep Time: 15 minutes
- Cook Time: 0 minutes
- Category: Appetizer
- Cuisine: Mexican
Nutrition
- Serving Size: 1 serving
- Calories: 280
- Sugar: 2
- Sodium: 450
- Fat: 16
- Saturated Fat: 6
- Carbohydrates: 24
- Fiber: 4
- Protein: 8
Keywords: seven layer taco dip, easy dip, no cook recipe, game day snacks, weeknight dinner, self-care snack, vegetarian appetizer, party dip


