Last Tuesday, I was in a panic. My oven was technically off, my kitchen was a disaster zone from trying to bake a birthday cake for my niece that morning, and I had zero energy left for actual cooking. But here’s the thing: I had a sudden, violent craving for something chocolatey, salty, and crunchy. Not a complicated dessert. Not something that required three bowls and twenty minutes of active work. Just something sweet to tide me over until I could sleep.
I opened the fridge. I had half a jar of peanut butter. I had a bag of oats that had been sitting in the pantry since September. I had some chocolate chips and a tiny bottle of vanilla extract. I didn’t have butter. I didn’t have flour. I barely had hope.
So I threw it all in a pot, heated it up, mixed it with the oats, pressed it into a pan, and stuck it in the freezer. I expected a disaster. I expected a sticky, melted mess that would fall apart the second I tried to cut it.
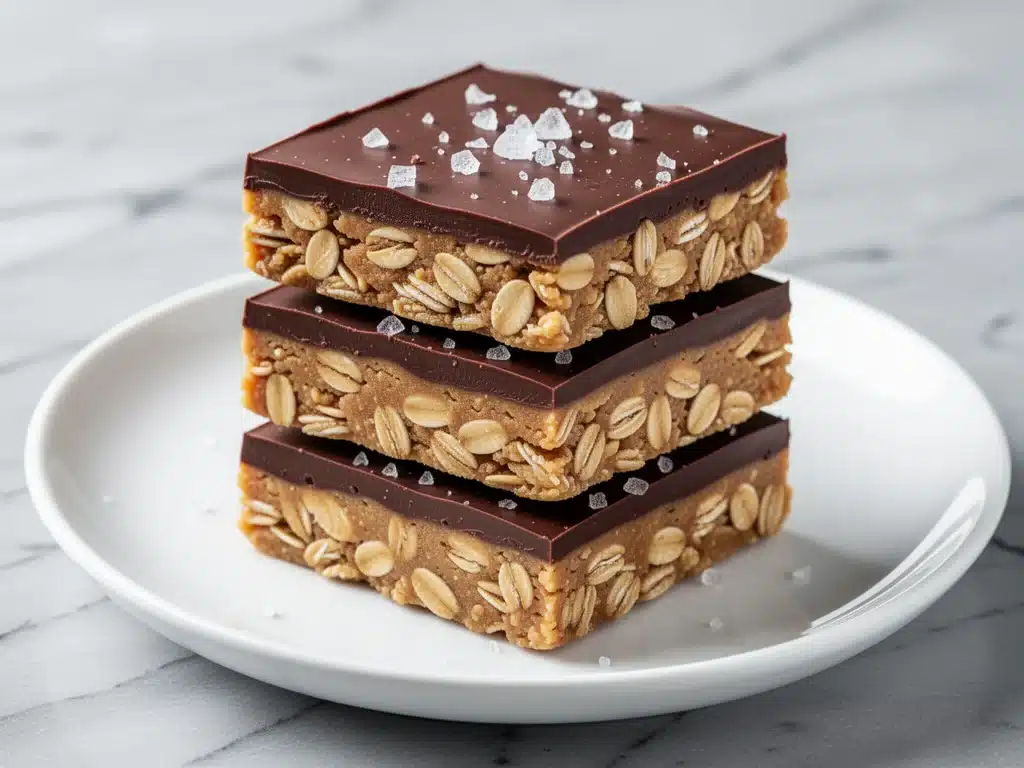
Instead, I got these no-bake chocolate peanut butter oat bars. They were firm. They were chewy. They were the perfect balance of sweet peanut butter and rich chocolate, with just a pinch of sea salt to make my brain go “yes.” I ate one straight out of the pan at 11:30 PM, wiped my face, and went to bed. The next morning, I made another batch before my kids woke up.
That was six months ago. I have made these bars at least twenty times. They are my secret weapon for when I don’t want to turn on the oven, when I need to bring a dessert to a potluck and don’t want to spend hours decorating, or when I just need to satisfy a sugar craving without the guilt of buying them from a fancy bakery. They’re simple, they’re cheap, and they taste like a Reese’s cup had a baby with a granola bar.
If you’ve ever wanted a dessert that’s easier than toast but tastes like indulgence, you need to make these. Seriously. Once you try them, you’ll wonder why you ever bothered with complicated cookie recipes.
Why You’ll Love These No-Bake Bars
There are a lot of “easy” dessert recipes out there, but most of them are just sugar bombs with no texture. These bars are different. They have substance. They have crunch. They have that satisfying snap when you bite into them after they’ve chilled. Here’s why they’ve permanently replaced store-bought treats in my house:
- Zero Oven Required — Seriously. If you have a stovetop and a fridge, you can make this. I’ve made these in the middle of summer when the house is already 80 degrees and I refuse to turn on the oven. It keeps the kitchen cool and your sanity intact.
- Five Ingredients (Yes, Really) — I’m not exaggerating. You need oats, peanut butter, chocolate chips, honey (or syrup), and salt. That’s it. You don’t need to sift flour. You don’t need to whip eggs. You don’t need to temper chocolate. Just melt, mix, press, and chill.
- Meal Prep Friendly — I make a batch on Sunday night. They last in the fridge for two weeks. I pack them in my kids’ lunch boxes (along with these turkey ranch lunch box roll-ups for a savory balance). They don’t get squished. They don’t get messy. They just sit there, looking delicious.
- Gluten-Free Option — If you use certified gluten-free oats, these are naturally gluten-free. No weird flour blends or xanthan gum needed. My celiac friend tried one and couldn’t believe it wasn’t store-bought GF junk.
- Customizable — Love nuts? Add chopped peanuts. Love M&Ms? Stir them in. Love coconut? Sprinkle it on top. The base recipe is a canvas, not a cage. I’ve even made a version with almond butter for a nuttier flavor.
- Ready in 20 Minutes (Plus Chill Time) — The active work takes about 10 minutes. The rest is just waiting. It’s the perfect “do it and forget it” dessert.
Real talk: these bars have saved me more times than I can count. They’re my answer to “what’s for dessert?” when I’m tired, broke, or just lazy. And they always, always impress people.
Ingredients You’ll Need
Here’s the best part: you probably have most of this already in your pantry. I’m not asking you to go to the store for anything exotic. This is the beauty of the no-bake chocolate peanut butter oat bars—they rely on staples that taste incredible together.
The Base
Old-Fashioned Rolled Oats (3 cups / 270g) — Do not use instant oats or steel-cut oats. Instant oats turn to mush. Steel-cut oats are too hard. You need old-fashioned rolled oats for that chewy, substantial texture. I use the generic store brand, but Bob’s Red Mill works great too. If you need gluten-free, make sure your oats are certified GF.
Creamy Peanut Butter (1 cup / 250g) — This is non-negotiable. Do not use natural peanut butter where the oil has separated. Stirring it in makes a mess, and the texture won’t bind right. Use a standard brand like Jif or Skippy. Or if you’re feeling fancy, use a high-quality organic creamy peanut butter. Almond butter works, but the flavor changes significantly.
The Binder & Sweetener
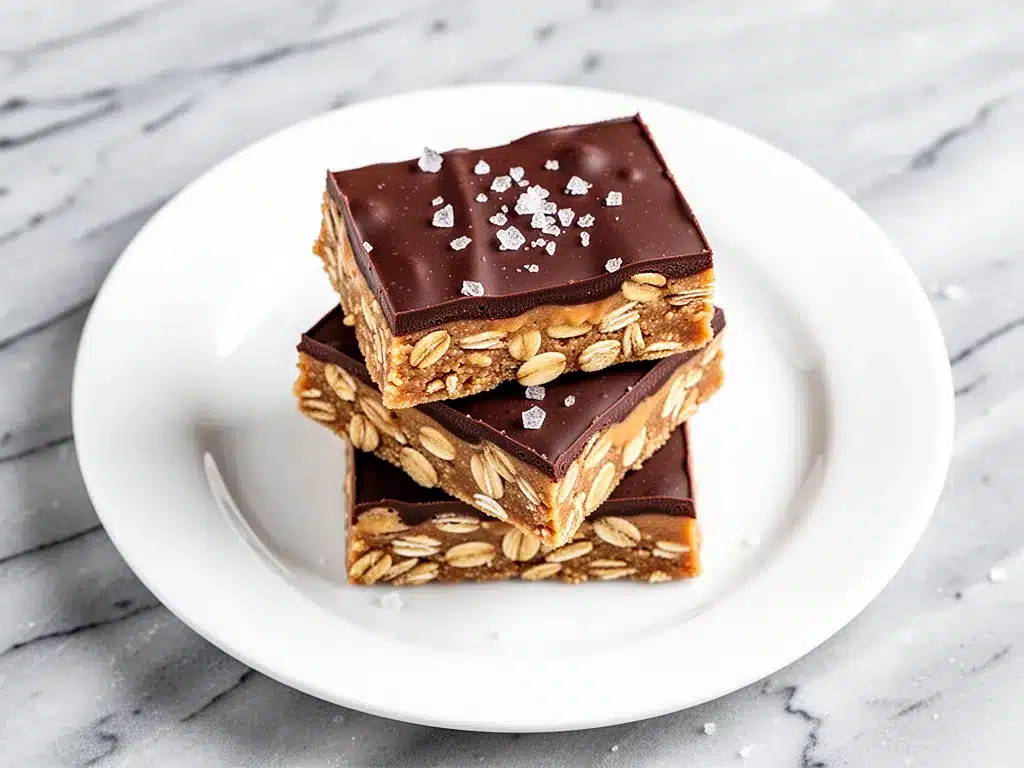
Honey (½ cup / 170g) — Honey acts as the glue. It’s sticky, sweet, and holds everything together. Maple syrup works too, but the bars will be slightly softer. Agave nectar is another option, but honey gives the best flavor. Don’t skimp on this—it’s what makes them bar-like instead of crumbly.
Butter (2 tablespoons / 30g) — Unsalted butter adds richness and helps the mixture come together smoothly. If you’re dairy-free, use coconut oil, but note that it will change the texture slightly. I usually use butter because it tastes better.
Vanilla Extract (1 teaspoon) — Just a splash. It rounds out the flavors and makes it taste like a real dessert, not just peanut butter and oats.
The Chocolate Topping
Chocolate Chips (1 cup / 170g) — Semi-sweet chocolate chips are my go-to. They’re not too sweet and they melt beautifully. Milk chocolate works if you like it sweeter. Dark chocolate (70%) works if you want it less sweet. I’ve even used chocolate chunks for a chunkier topping.
Coconut Oil (1 tablespoon) — This is the secret weapon. Adding a tablespoon of coconut oil to the chocolate makes it smoother and easier to spread. It also helps the chocolate set with a slight snap. If you don’t have coconut oil, you can skip it, but the chocolate might be a bit thicker.
Sea Salt — Flaky sea salt (like Maldon) is perfect for sprinkling on top. It adds that essential salty crunch that balances the sweetness. Table salt works in a pinch, but flaky salt looks prettier and tastes better.
Optional Add-ins: Chopped peanuts, mini M&Ms, crushed pretzels, or a drizzle of peanut butter on top. I love adding a little extra peanut butter drizzle because it makes it look fancy.
Equipment Needed
You don’t need fancy gadgets for this. Here’s what I actually use:
- Medium Saucepan — I use a 3-quart saucepan. It needs to be big enough to hold the oats and the melted mixture without spilling. My non-stick saucepan works perfectly.
- 8×8 Inch Baking Pan — Line it with parchment paper or aluminum foil. I prefer foil because it’s easier to lift the bars out later. Spray it with cooking spray first so nothing sticks.
- Spatula — A silicone spatula is great for scraping the bowl and pressing the mixture into the pan. I have a cheap one from the dollar store that works fine.
- Microwave-Safe Bowl — For melting the chocolate chips. I use a glass bowl because I can see the chocolate melting evenly. A microwave-safe mug works too if you’re in a rush.
- Measuring Cups and Spoons — Standard stuff. I use the metal ones because they’re durable.
- Knife — For cutting the bars. A sharp chef’s knife gives the cleanest cuts. I wipe the blade between cuts to keep them neat.
Pro Tip: If you don’t have an 8×8 pan, a 9×9 pan will work, but the bars will be thinner. You’ll need less time in the fridge to set them. Just keep an eye on them.
How to Make It: Step-by-Step
Alright, let’s make these bars! I’m walking you through exactly how I do it, including the little tricks I’ve picked up over the years.
Step 1: Prep Your Pan
Line your 8×8 inch baking pan with parchment paper or aluminum foil. Leave a little overhang on the sides so you can lift the bars out later. Spray it lightly with cooking spray. This step is crucial—without it, the bars will stick, and you’ll be picking them out of the pan like a detective at a crime scene.
Step 2: Melt the Peanut Butter Mixture
In your medium saucepan, combine the peanut butter, honey, butter, and vanilla extract. Heat over medium-low heat, stirring constantly. This takes about 3-4 minutes. You want the mixture to be smooth and glossy. Don’t let it boil! If it gets too hot, the honey can seize up. Once it’s smooth, remove it from the heat.
Step 3: Mix in the Oats
Immediately add the rolled oats to the warm peanut butter mixture. Stir vigorously until every single oat is coated. You want to see no dry spots. This takes about 2 minutes. If your mixture is too thick to stir, add a teaspoon of warm water to loosen it up. It shouldn’t be runny, just spreadable.
Step 4: Press Into the Pan
Pour the mixture into your prepared pan. Use your spatula (or wet hands) to press it down firmly. You want it to be even and compact. If it’s loose, the bars will crumble. Press it down like you’re trying to flatten it as much as possible. It doesn’t need to be perfect, but it needs to be tight.
Step 5: Chill While You Melt Chocolate
Place the pan in the freezer for 15 minutes. This firms up the base so the chocolate doesn’t sink in. While that’s happening, melt the chocolate chips and coconut oil in a microwave-safe bowl. Heat in 30-second intervals, stirring between each. Stop when there are still a few small chips left, then stir—it’ll melt from the residual heat. Don’t overheat it!
Step 6: Add the Chocolate Topping
Take the pan out of the freezer. Pour the melted chocolate over the chilled base. Spread it evenly with a spatula. If you want a pretty look, drizzle a little extra peanut butter on top and swirl it with a toothpick. Then, sprinkle with flaky sea salt. This is the fun part.
Step 7: Set and Slice
Place the pan back in the freezer for another 30 minutes, or in the fridge for 1 hour. The bars need to be completely firm before you cut them. If you try to cut them while they’re soft, they’ll be a mess. Once they’re firm, lift them out of the pan using the parchment/foil overhang. Cut into squares or rectangles. Enjoy!
Total Time: About 20 minutes active, plus 45 minutes chill time.
Expert Tips & Tricks
Here’s everything I’ve learned from making these dozens of times. These tips will save you from my mistakes.
- Don’t Skip the Chill — I know it’s tempting to eat them right away. But if you don’t chill the base, the chocolate will just sink into the oats. That 15-minute freeze is non-negotiable for clean bars.
- Use Flaky Salt — Table salt dissolves too fast. Flaky sea salt stays crunchy and adds those little salty bursts that make you crave more. I buy a big jar of Maldon and keep it on the counter.
- Don’t Overheat the Chocolate — Chocolate seizes if it gets too hot. If you see little clumps, it’s too hot. Let it cool for a minute before stirring. You want it glossy, not grainy.
- Press Firmly — If the base is loose, the bars will fall apart. Press it down hard. If your hands are sticky, wet them with water first. It makes pressing so much easier.
- Store Properly — These keep in the fridge for up to two weeks. In the freezer, they last up to three months. I usually keep them in the fridge because I want them ready to grab. If you freeze them, let them thaw for 10 minutes before eating.
Common Mistake: Bars are crumbly. Fix: You didn’t press them down enough, or you used too much oat. Next time, add a teaspoon more honey or peanut butter to bind it better.
Common Mistake: Chocolate is too thick. Fix: You didn’t add enough coconut oil, or the chocolate was overheated. Next time, add an extra teaspoon of coconut oil or a drop of warm water to thin it.
Variations & Substitutions
Once you’ve nailed the basic version, here’s how you can mix it up. I’ve tried all of these, and they’re all winners.
Nutty Version — Stir ½ cup chopped peanuts into the oat mixture before pressing. It adds extra crunch and peanut flavor. My kids love this version.
M&M Bars — Stir ½ cup mini M&Ms into the oat mixture. It makes them look festive and adds little bursts of color. Perfect for holidays.
Almond Butter Swap — Replace the peanut butter with almond butter. It tastes more sophisticated and less sweet. Great if you’re tired of peanut butter fatigue.
Dark Chocolate — Use 70% dark chocolate chips for a less sweet, more intense chocolate flavor. Pair with sea salt for a grown-up treat.
Coconut Version — Add ½ cup shredded coconut to the oat mixture and use coconut oil in the chocolate. It tastes like a tropical candy bar.
Gluten-Free — Just use certified gluten-free oats. Everything else is naturally gluten-free. These are safe for celiacs if you check your labels.
Dairy-Free — Use coconut oil instead of butter, and check that your chocolate chips are dairy-free. Many dark chocolate chips are naturally dairy-free.
Protein Boost — Add a scoop of vanilla protein powder to the oat mixture. It changes the texture slightly, making it denser, but it adds protein. I like this for post-workout snacks.
If you’re looking for other keto peanut butter cup fat bombs, these bars are a great alternative if you’re not strictly low-carb but still want something satisfying.
Serving & Storage
How to Serve: I usually serve these straight from the fridge. They’re firm and cold, which makes the chocolate snap. But they’re also good at room temperature if you prefer a softer texture. I often pack them in lunch boxes because they don’t melt easily (thanks to the oats and peanut butter).
Side Dishes: These go well with a glass of cold milk, a cup of coffee, or even a slice of fudgy peanut butter brownies if you’re having a chocolate party. I also like them with a side of fresh fruit to balance the sweetness.
Storage: Store in an airtight container in the fridge for up to two weeks. In the freezer, they last up to three months. I usually keep them in the fridge because I want them ready to grab. If you freeze them, let them thaw for 10 minutes before eating.
Reheating: You don’t need to reheat these. In fact, I don’t recommend it. They’re best cold or room temperature. If you accidentally left them out all day, just put them in the fridge for 30 minutes to firm them back up.
Nutrition Information
I’m not a nutritionist, but here’s the breakdown if you’re tracking. Please note that these are estimates and can vary based on the specific brands you use.
| Per Bar (1 of 12) | Amount |
|---|---|
| Calories | 180 |
| Protein | 6g |
| Carbs | 22g |
| Fiber | 3g |
| Sugar | 14g |
| Fat | 9g |
| Sodium | 90mg |
What’s Good: Decent protein from the peanut butter and oats. Fiber from the oats helps keep you full. No flour or refined sugar (just honey).
What to Know: Higher in calories due to the peanut butter and chocolate. Contains dairy (unless substituted). Not suitable for vegans (unless dairy-free swaps are used).
My Take: Look, these are a treat. They’re not a health food. But they’re better than a candy bar, and they have some nutritional value. When I make them, I use a mix of dark and milk chocolate to control the sugar. But usually? I just enjoy them as a delicious snack.
Final Thoughts
So that’s my go-to no-bake chocolate peanut butter oat bars! I’ve probably talked your ear off at this point, but when you make a recipe this often, you have a lot to say about it.
These bars have saved me more times than I can count. They’re my answer to “what’s for dessert?” when I’m tired, broke, or just lazy. And they always, always impress people. My kids beg for them. My husband eats them straight out of the pan. My friends ask for the recipe.
Make it yours! Try different add-ins, swap in your favorite chocolate, adjust the salt to your liking. The best recipes are the ones you adapt to your family’s tastes. If you make these, drop a comment and let me know what you think! I love hearing how recipes turn out in your kitchen. And if something doesn’t work, tell me that too—I’m here to help troubleshoot.
Happy baking (well, no-baking)! And I hope your kitchen smells half as good as mine does right now.
Frequently Asked Questions
Can I use crunchy peanut butter?
Yes! Crunchy peanut butter adds a nice extra texture. Just make sure it’s well-stirred if the oil has separated. The bars will have more crunch, which I actually prefer. If you like a smoother bar, stick with creamy.
Why are my bars crumbly?
This usually happens if you didn’t press the mixture down firmly enough, or if you used too many oats. Next time, press down hard with a wet spatula or your hands. You can also add a teaspoon more honey or peanut butter to bind it better. Make sure you’re using old-fashioned oats, not instant.
Can I freeze these bars?
Absolutely. These freeze beautifully. Place them in a single layer on a baking sheet to freeze solid, then transfer to an airtight container or freezer bag. They’ll last up to three months. Let them thaw at room temperature for 10-15 minutes before eating. They taste almost as good frozen as they do fresh.
Can I use maple syrup instead of honey?
You can, but the bars will be slightly softer. Honey is thicker and acts as a better binder. If you use maple syrup, make sure to chill the bars longer in the fridge (at least 2 hours) to ensure they set properly. The flavor will be slightly different, but still delicious.
How do I store these bars?
Store them in an airtight container in the fridge for up to two weeks. If your kitchen is very hot, keep them in the fridge to prevent the chocolate from melting. In the freezer, they last up to three months. Avoid leaving them out at room temperature for more than a few hours.
Can I make these bars gluten-free?
Yes! Just use certified gluten-free rolled oats. Everything else in the recipe is naturally gluten-free. Make sure to check your chocolate chips and peanut butter labels to ensure they’re processed in a gluten-free facility if you have celiac disease.
Why is my chocolate topping too thick?
This happens if you don’t add enough coconut oil, or if the chocolate overheats. Next time, add an extra teaspoon of coconut oil or a drop of warm water to thin it out. If it’s already too thick, you can microwave it for 10 seconds and stir to loosen it up.
Pin This Recipe!
No-Bake Chocolate Peanut Butter Oat Bars
- Total Time: 20 minutes active plus 45 minutes chill time
- Yield: 12 servings 1x
Description
These easy 5-ingredient no-bake bars are the perfect balance of sweet peanut butter and rich chocolate with a chewy oat base. They require zero oven time, are ready in about 20 minutes of active work, and are perfect for meal prep or satisfying late-night cravings.
Ingredients
- 3 cups old-fashioned rolled oats
- 1 cup creamy peanut butter
- 1/2 cup honey
- 2 tablespoons unsalted butter
- 1 teaspoon vanilla extract
- 1 cup semi-sweet chocolate chips
- 1 tablespoon coconut oil
- Flaky sea salt (for topping)
Instructions
- Line an 8×8 inch baking pan with parchment paper or aluminum foil and spray lightly with cooking spray.
- In a medium saucepan over medium-low heat, combine peanut butter, honey, butter, and vanilla extract. Stir constantly for 3-4 minutes until smooth and glossy. Do not let it boil. Remove from heat.
- Immediately add the rolled oats to the warm mixture and stir vigorously until every oat is coated.
- Pour the mixture into the prepared pan and press down firmly and evenly using a spatula or wet hands to compact it.
- Place the pan in the freezer for 15 minutes to firm up the base.
- While the base chills, melt the chocolate chips and coconut oil in a microwave-safe bowl in 30-second intervals, stirring between each, until smooth.
- Remove the pan from the freezer and pour the melted chocolate over the chilled base. Spread evenly.
- Drizzle with extra peanut butter if desired and sprinkle with flaky sea salt.
- Return the pan to the freezer for 30 minutes or the fridge for 1 hour until completely firm.
- Lift the bars out of the pan using the overhang and cut into squares or rectangles.
Notes
Do not use instant oats or steel-cut oats; old-fashioned rolled oats are required for the correct texture. Ensure peanut butter is standard creamy (not natural separated oil) for proper binding. If using maple syrup instead of honey, chill bars longer as they will be softer. Bars keep in the fridge for two weeks or freezer for three months.
- Prep Time: 10 minutes
- Cook Time: 5 minutes
- Category: Dessert
- Cuisine: American
Nutrition
- Serving Size: 1 bar
- Calories: 180
- Sugar: 14
- Sodium: 90
- Fat: 9
- Saturated Fat: 3
- Carbohydrates: 22
- Fiber: 3
- Protein: 6
Keywords: no-bake, peanut butter, chocolate, oat bars, easy dessert, gluten-free option, meal prep, 5-ingredient recipe


