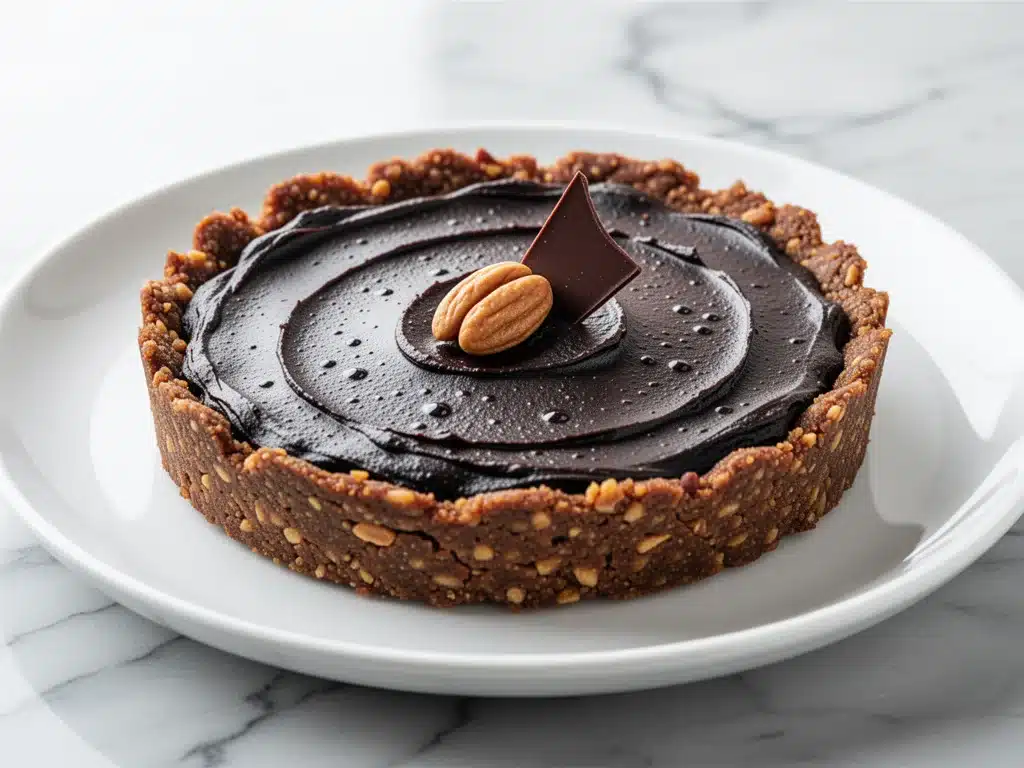
It was 11:30 PM on a Tuesday, and I was standing in my kitchen, staring into the open refrigerator like it owed me money. My husband was asleep. My dog was asleep. But my brain was wide awake, screaming for something sweet. Specifically, it was screaming for chocolate. Not a salad. Not a piece of fruit. A thick, rich, gooey chocolate dessert.
The problem? I had zero energy to bake. I didn’t want to turn on the oven, I didn’t want to wash a dozen mixing bowls, and I definitely didn’t want to wait three hours for a cake to cool. I wanted something that tasted like I’d spent all day in a patisserie, but required the effort of opening a jar.
So I threw together what I thought would be a mediocre compromise. I dumped some peanut butter, cocoa powder, maple syrup, and coconut oil into a bowl. I pressed it into a crust I made from crushed nuts and dates. I chilled it. Ten minutes later, I took a bite, and I literally gasped. It was creamy. It was fudgy. It was decadent. And it was entirely vegan.
I ate the whole thing. Yes, the whole thing. In one sitting. (Don’t tell my abs.)
That midnight snack became a ritual. I started making this vegan no-bake peanut butter chocolate tart every week. It’s become my secret weapon for dinner parties, my go-to gift for friends, and my answer to “what’s for dessert?” when I have absolutely no patience left. The best part? It uses ingredients you probably already have, or can grab on the way home from the store. No fancy aquafaba, no rare nut flours, no hours of prep.
This is the recipe I’ve tested at least fifteen times to get the ratio of creamy peanut butter to rich chocolate just right. It’s not just a dessert; it’s a hug in a tart shell. And once you try it, you’ll never go back to baked goods for a quick fix.
Why You’ll Love This Vegan No-Bake Peanut Butter Chocolate Tart
I’m not exaggerating when I say this tart has saved my social life. Here’s why it’s become a permanent fixture in my kitchen:
- Zero Baking Required — Seriously. If you can blend and press, you can make this. No oven, no timing anxieties, no burning the edges. Just mix, chill, and eat.
- Ready in 30 Minutes (Plus Chill Time) — The active time is about 15 minutes. The rest is just waiting for the fridge to do its job. Perfect for last-minute guests or those 10 PM cravings.
- Actually Vegan (And Delicious) — Too many vegan desserts taste like cardboard or health food. This tastes like a candy bar. My non-vegan friends always ask if I’m “sure” it’s dairy-free because it’s so rich.
- Gluten-Free Option — The crust uses nuts and dates, so it’s naturally gluten-free. I use certified GF oats if I need to bulk it up, but the nut base is the star.
- Make-Ahead Friendly — This tart actually tastes better the next day. The flavors meld together, and the texture firms up to that perfect sliceable consistency. I often make it the night before a party.
- Only 6 Ingredients — Simplicity is the goal. Peanut butter, cocoa, maple syrup, coconut oil, vanilla, and nuts. That’s it. No weird chemical additives.
Real talk: this is the only dessert I make when I’m tired. It requires no skill, no cleanup, and delivers maximum satisfaction. It’s my “I love you” food for friends and my “I love me” food for late nights.
Ingredients You’ll Need
Here’s the thing about this vegan no-bake peanut butter chocolate tart: the quality of your ingredients matters more than the quantity. Since there are so few of them, each one needs to shine. I’m particular about these:
For the Crust
Raw cashews or almonds (1 cup / 140g) — I prefer cashews for a buttery, neutral base, but almonds work if you like a slightly crunchier texture. You’ll need to pulse these into a fine meal. Don’t use peanut butter here; you want the nut flavor to be subtle.
Pitted Medjool dates (½ cup / 75g) — These are the glue. They add sweetness and stickiness. Make sure they’re soft. If they’re dry and hard, soak them in warm water for 10 minutes first. I use Medjool because they’re sweet and chewy; Deglet Noor are too dry and bitter for this.
Vanilla extract (1 teaspoon) — Just a hint to round out the flavors. Use pure vanilla, not imitation. The difference is noticeable in a crust this simple.
Pinch of salt — Essential. It makes the sweet flavors pop. Don’t skip it.
For the Filling
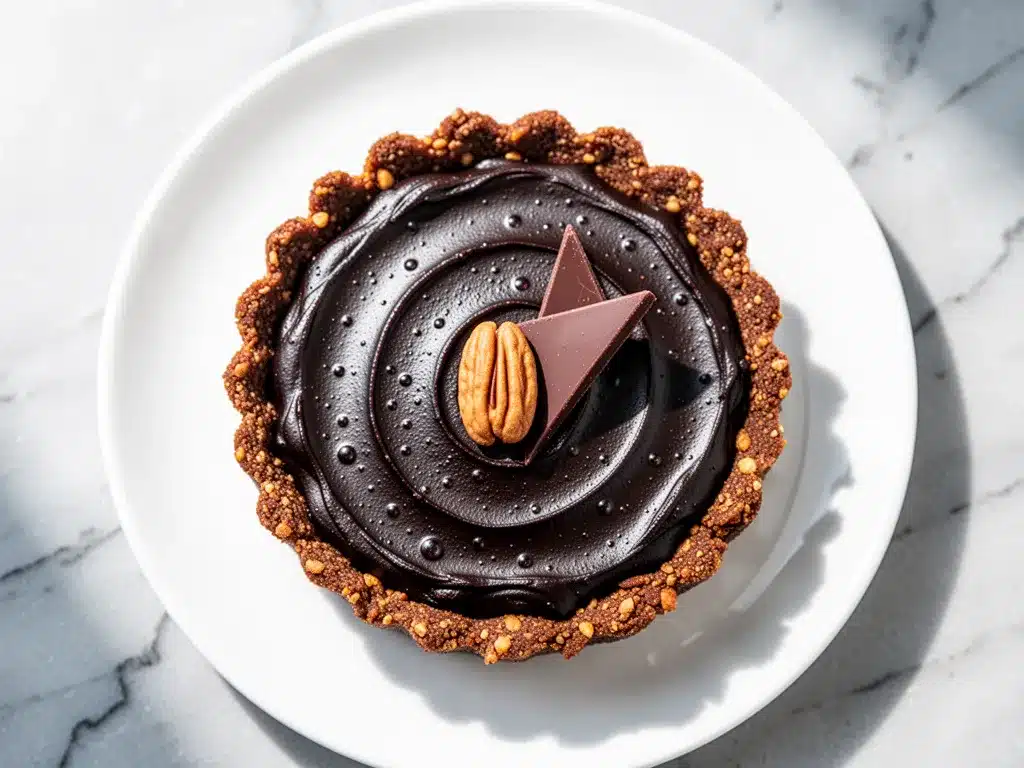
Creamy natural peanut butter (1 cup / 250g) — This is the star. Look for a brand with just peanuts and salt. No added sugar or hydrogenated oils. Skippy or Jif won’t work here because of the stabilizers. I use Maranatha or homemade peanut butter. It needs to be smooth, not crunchy, for this filling.
Unsweetened cocoa powder (½ cup / 50g) — High-quality cocoa makes a huge difference. I use Guittard or Valrhona. Dutch-processed cocoa gives a darker, richer color, but natural cocoa works too. Just avoid “processed” cocoa mixes with sugar in them.
Maple syrup (⅓ cup / 80ml) — Pure maple syrup, grade A or B. Grade B has a stronger flavor that pairs well with chocolate. Agave nectar works but is less flavorful. Avoid corn syrup; it makes the filling too stiff.
Coconut oil (¼ cup / 60ml) — This is what makes the filling set. Use refined coconut oil if you don’t want a coconut taste. Unrefined will leave a subtle coconut flavor. Melt it before adding—it needs to be liquid.
Vanilla extract (1 teaspoon) — Again, pure vanilla. It ties the chocolate and peanut butter together.
Pinch of salt — Just like in the crust. It balances the sweetness.
Optional: Sea salt flakes — For topping. A few flakes on each slice elevate the presentation and add a nice crunch.
Equipment Needed
You don’t need fancy gadgets for this. Here’s what I actually use:
Food processor — Essential for both the crust and the filling. You need a fine, smooth consistency. A blender can work for the filling, but it’s harder to get the crust right without over-processing. I use a Cuisinart, but any standard food processor works.
8-inch springform pan — This is the easiest way to get the tart out intact. If you don’t have one, a regular 8-inch cake pan lined with parchment paper works, but removal is trickier. I’ve ruined tarts trying to lift them out of round pans.
Parchment paper — Line the bottom of the pan. It makes cleanup a breeze and helps with removal.
Measuring cups and spoons — Standard stuff. Accuracy matters here because there’s no baking to correct mistakes.
Small saucepan or microwave-safe bowl — For melting the coconut oil. Don’t boil it; just melt it until liquid.
How to Make It: Step-by-Step
Alright, let’s make this! I’m walking you through exactly how I do it, including the little tricks I’ve picked up.
Step 1: Prep the Pan (1 minute)
Line your 8-inch springform pan with parchment paper. I like to leave a little overhang on the sides so I can lift the tart out later. Spray it lightly with coconut oil spray if you want extra insurance, though it’s usually not needed.
Step 2: Make the Crust (5 minutes)
Add the raw cashews (or almonds) to your food processor. Pulse until you have a fine, flour-like consistency. It should look like coarse sand, not butter. If you process it too long, you’ll make nut butter, and the crust won’t bind. Next, add the pitted dates, vanilla, and salt. Process again until the mixture sticks together when you pinch it. If it’s too dry, add a teaspoon of water. If it’s too wet, add a few more nuts. Press the mixture firmly into the bottom and up the sides of the pan. Use the bottom of a measuring cup to pack it down tight. This is crucial; if the crust is loose, it’ll crumble.
Step 3: Make the Filling (5 minutes)
In a medium bowl, combine the melted coconut oil, maple syrup, vanilla, and salt. Whisk until smooth. In a separate bowl, sift the cocoa powder to remove lumps. Add the cocoa to the wet ingredients and whisk vigorously until you have a smooth, glossy chocolate sauce. Add the creamy peanut butter and whisk again until fully combined. The mixture should be thick but pourable. If it’s too thick, warm it slightly in the microwave for 10 seconds. If it’s too thin, add a teaspoon more cocoa powder.
Step 4: Assemble and Chill (20 minutes active, 2 hours chill)
Pour the filling over the crust. Use a spatula to smooth the top, making sure it reaches all the edges. Tap the pan gently on the counter to release any air bubbles. Place the pan in the freezer for 30 minutes to set the crust, then move it to the fridge for at least 2 hours, or overnight. The longer it chills, the firmer it gets. I usually make it the night before, but if you’re in a hurry, 2 hours is the minimum.
Step 5: Slice and Serve
Once set, run a thin knife around the edge of the pan to loosen it, then release the springform ring. Slice with a sharp knife. For clean cuts, wipe the knife between slices. Sprinkle with sea salt flakes if using. Serve immediately.
Expert Tips & Tricks
Here’s everything I’ve learned from making this dozens of times. These tips will save you from my mistakes.
Use Natural Peanut Butter — This is non-negotiable. If you use processed peanut butter with stabilizers, the filling will be grainy and won’t set properly. Natural peanut butter separates, so stir it well before measuring.
Melt the Coconut Oil Correctly — Don’t boil it. Just melt it until it’s liquid. If it’s too hot, it might melt the crust when you pour the filling. Let it cool slightly before mixing.
Don’t Skip the Salt — Salt is the secret ingredient in chocolate desserts. It enhances the sweetness and adds depth. I use a pinch in the crust and a pinch in the filling. Don’t be shy.
Chill, Don’t Freeze — You can freeze it, but it changes the texture. The filling becomes harder and icier. For the best creamy texture, chill in the fridge. If you must freeze, thaw in the fridge for an hour before serving.
Soft Dates Are Key — If your dates are hard, the crust will have chunks. Soak them in warm water for 10 minutes, then drain well before processing. This ensures a smooth, even crust.
Use a Springform Pan — Trying to get this out of a regular pan is a nightmare. The springform pan makes removal easy and keeps the shape intact. It’s worth the investment if you make desserts often.
Variations & Substitutions
Once you’ve nailed the basic version, here’s how you can mix it up. I’ve tried all of these.
Almond Butter Version — Swap the peanut butter for almond butter. It’s slightly more expensive but has a richer, more complex flavor. Great for a fancy touch.
Sunflower Seed Butter Version — For a nut-free option, use sunflower seed butter. It’s lighter in color and has a milder taste. The filling will be less chocolatey in appearance but still delicious.
Dark Chocolate Chip Add-In — Stir in ½ cup of dairy-free dark chocolate chips after mixing the filling. It adds chunks of chocolate for extra texture.
Espresso Boost — Add 1 teaspoon of instant espresso powder to the filling. It deepens the chocolate flavor without tasting like coffee. Perfect for coffee lovers.
Coconut Layer — Add a layer of coconut cream between the crust and filling. Whip ½ cup of coconut cream with a teaspoon of vanilla and spread it on the crust before adding the chocolate layer.
Gluten-Free Oat Crust — If you have nuts, you can use gluten-free oats. Pulse 1 cup of GF oats with ½ cup of dates and 2 tablespoons of maple syrup. Press into the pan. It’s less buttery but still tasty.
Serving & Storage
How to serve this vegan no-bake peanut butter chocolate tart is half the fun.
How to Serve: I usually serve it straight from the fridge. It’s firm and sliceable. Top with fresh berries, a drizzle of peanut butter, or a sprinkle of sea salt. It looks beautiful on a plate.
Side Dishes: It’s rich, so it doesn’t need much. A few fresh raspberries or a dollop of coconut whipped cream balances the sweetness. I also like it with a cup of black coffee or tea.
Storage: Store in an airtight container in the fridge for up to 5 days. It gets firmer in the fridge, so let it sit at room temperature for 10 minutes before serving if you prefer a softer texture.
Freezing: You can freeze slices for up to 3 months. Wrap them individually in plastic wrap, then put them in a freezer bag. Thaw in the fridge overnight. The texture might be slightly icier, but it’s still good.
Pro Tip: If you’re taking it to a party, keep it in the springform pan until you’re ready to serve. It holds its shape better and looks impressive on the table.
Nutrition Information
I’m not a nutritionist, but here’s the breakdown if you’re tracking.
Per Serving (based on 8 slices):
| Nutrient | Amount |
|---|---|
| Calories | 280 |
| Protein | 8g |
| Carbs | 22g |
| Fiber | 4g |
| Sugar | 14g |
| Fat | 18g |
| Saturated Fat | 6g |
| Sodium | 50mg |
What’s Good: High in healthy fats from nuts and coconut oil. Good source of protein from peanut butter. Dairy-free and gluten-free (if using GF oats).
What to Know: It’s calorie-dense because of the nuts and oils. It’s not a light snack, so portion control is key. The sugar comes from maple syrup and dates, so it’s refined-sugar-free.
My Take: Look, this is a dessert. It’s rich and indulgent. But it’s made with whole food ingredients, so it’s better than most baked goods. When I eat it, I enjoy it fully. It’s a treat, not a diet food.
Final Thoughts
So that’s my go-to vegan no-bake peanut butter chocolate tart! I’ve probably talked your ear off at this point, but when you make a recipe this often, you have a lot to say about it.
This has saved weeknight desserts more times than I can count. It’s my answer to “what’s for dessert?” when I’m tired, don’t want takeout, and still want something that tastes really good. My friends are happy, my husband’s happy, and I’m happy because I’m not stressed about cooking.
Make it yours! Try different nut butters, add chocolate chips, or top with berries. The best recipes are the ones you adapt to your tastes.
If you make this, drop a comment and let me know what you think! I love hearing how recipes turn out in your kitchen. And if something doesn’t work, tell me that too—I’m here to help troubleshoot.
Happy cooking! And I hope your kitchen smells half as good as mine does right now.
Frequently Asked Questions
Can I use crunchy peanut butter?
You can, but the filling will have chunks of peanut. If you want a smooth, creamy texture, use creamy peanut butter. If you like texture, crunchy works fine. Just blend it well to distribute the pieces.
Why did my filling stay soft?
Usually, this means the coconut oil wasn’t melted enough, or the filling wasn’t chilled long enough. Make sure the coconut oil is liquid before mixing. Also, chill for at least 2 hours. If it’s still soft, freeze it for 30 minutes.
Can I make this ahead for a party?
Absolutely. This tart is even better the next day. Make it the night before, and it will be perfectly set and flavorful. It’s ideal for meal prep.
Can I use agave instead of maple syrup?
Yes, but the flavor will be less complex. Maple syrup has a distinct taste that pairs well with chocolate and peanut butter. Agave is neutral. If you use agave, the tart will be sweeter, so adjust to taste.
How do I store leftovers?
Store in an airtight container in the fridge for up to 5 days. It will get firmer in the fridge. Let it sit at room temperature for 10 minutes before serving for a softer texture.
Can I freeze this tart?
Yes, you can freeze slices for up to 3 months. Wrap them individually in plastic wrap. Thaw in the fridge overnight. The texture might be slightly icier, but it’s still good.
Is this tart gluten-free?
Yes, if you use nuts for the crust and no gluten-containing add-ins. If you use GF oats, make sure they are certified gluten-free. The filling is naturally gluten-free.
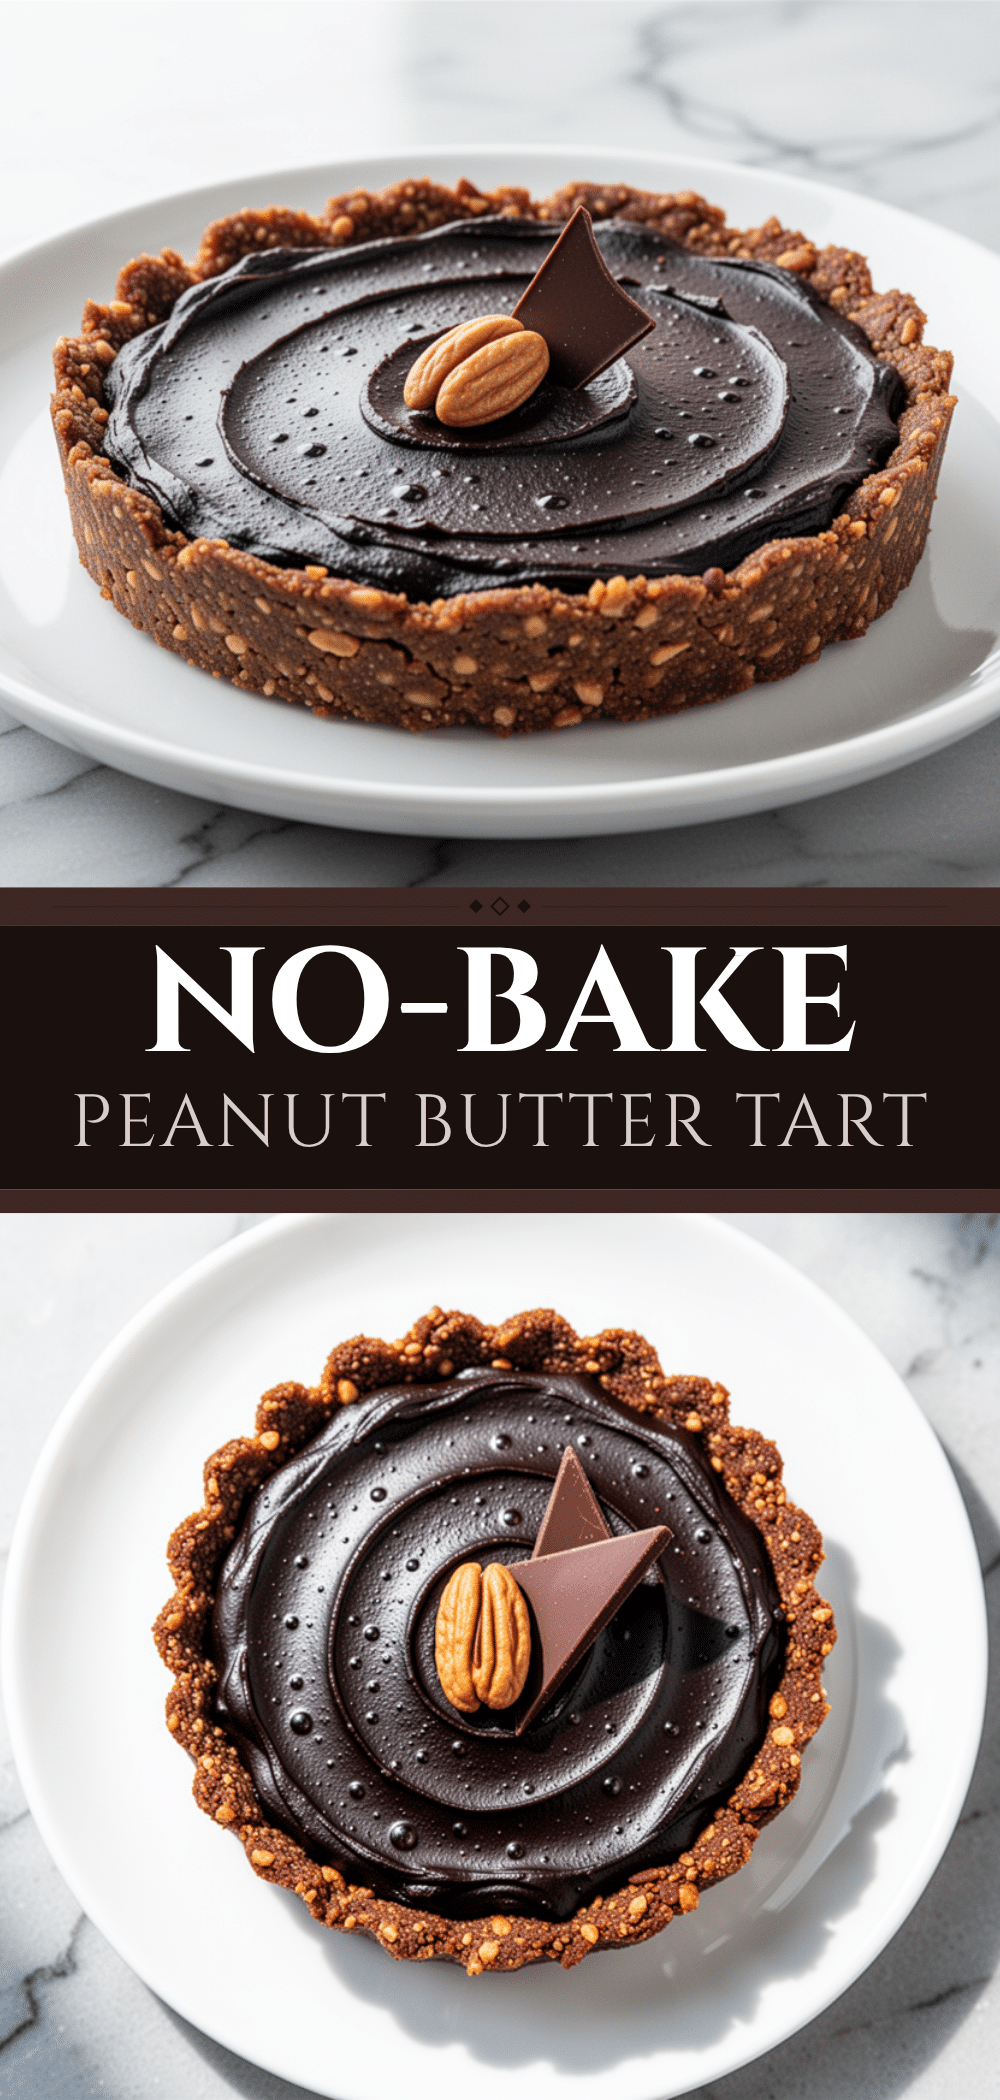
Pin This Recipe!
Vegan No-Bake Peanut Butter Chocolate Tart
- Total Time: 2 hours 15 minutes
- Yield: 8 servings 1x
Description
A rich, fudgy, and decadent vegan dessert that requires no baking. This easy tart features a nut and date crust with a creamy peanut butter and chocolate filling, ready in just 30 minutes of active time.
Ingredients
- 1 cup raw cashews or almonds (140g)
- 1/2 cup pitted Medjool dates (75g)
- 1 teaspoon vanilla extract
- Pinch of salt
- 1 cup creamy natural peanut butter (250g)
- 1/2 cup unsweetened cocoa powder (50g)
- 1/3 cup pure maple syrup (80ml)
- 1/4 cup coconut oil (60ml), melted
- 1 teaspoon vanilla extract
- Pinch of salt
- Sea salt flakes (optional, for topping)
Instructions
- Line an 8-inch springform pan with parchment paper, leaving an overhang on the sides for easy removal.
- In a food processor, pulse the cashews or almonds until they reach a fine, flour-like consistency.
- Add the pitted dates, 1 teaspoon vanilla extract, and a pinch of salt to the food processor. Process until the mixture sticks together when pinched. If too dry, add a teaspoon of water; if too wet, add more nuts.
- Press the crust mixture firmly into the bottom and up the sides of the prepared pan. Use the bottom of a measuring cup to pack it down tight.
- In a medium bowl, whisk together the melted coconut oil, maple syrup, 1 teaspoon vanilla extract, and a pinch of salt until smooth.
- Sift the cocoa powder to remove lumps, then add it to the wet ingredients. Whisk vigorously until you have a smooth, glossy chocolate sauce.
- Add the creamy peanut butter to the chocolate mixture and whisk until fully combined. The mixture should be thick but pourable.
- Pour the filling over the crust and smooth the top with a spatula. Tap the pan gently on the counter to release air bubbles.
- Place the pan in the freezer for 30 minutes to set the crust, then transfer to the fridge for at least 2 hours (or overnight) until firm.
- Once set, run a thin knife around the edge to loosen, release the springform ring, and slice. Sprinkle with sea salt flakes if desired and serve.
Notes
Use natural peanut butter without stabilizers for the best texture. Ensure dates are soft; soak in warm water if hard. Do not boil the coconut oil, just melt it. For best results, chill overnight to allow flavors to meld. Can be frozen for up to 3 months.
- Prep Time: 15 minutes
- Cook Time: 0 minutes
- Category: Dessert
- Cuisine: American
Nutrition
- Serving Size: 1 slice (1/8 of tart
- Calories: 280
- Sugar: 14
- Sodium: 50
- Fat: 18
- Saturated Fat: 6
- Carbohydrates: 22
- Fiber: 4
- Protein: 8
Keywords: vegan dessert, no-bake tart, peanut butter chocolate, gluten-free, healthy dessert, quick dessert, nut-free option


