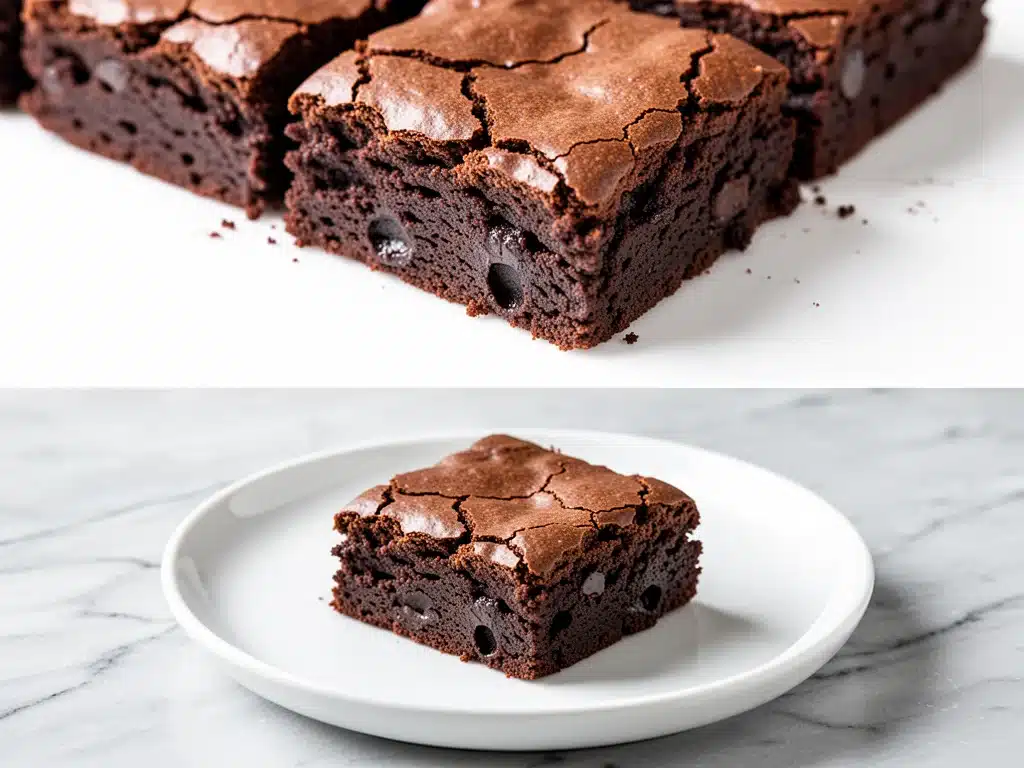
I have a confession to make. For years, I was a dessert snob. I thought “fudgy” was just a buzzword baker’s used to justify using too much sugar, and I firmly believed that any brownie worth eating had to be baked in a 9×13 pan with a crisp, paper-thin crust and a cake-like interior. Then, one rainy Tuesday in November, I was sitting in a takeout container from that fancy chocolate shop downtown, eating a brownie that was supposed to be “artisanal.” It was dry. It was crumbly. It was, frankly, disappointing.
That night, fueled by stubbornness and a bag of dark chocolate chips I already had in the pantry, I threw together what I thought would be a quick fix. I didn’t have the energy for sifting, creaming butter, or washing three separate bowls. I just wanted chocolate. So, I melted the butter and chocolate together, whisked in the sugar and eggs in the same bowl, folded in the flour, and baked it. The result? A brownie so dense, so moist, and so intensely chocolatey that I literally gasped when I took the first bite. It wasn’t cakey. It wasn’t dry. It was the kind of brownie that sticks to your teeth and makes you forget your own name.
I’ve since made these ultra-fudgy one-bowl chocolate brownies probably fifty times. I’ve tested them with different chocolates, different sugars, and different baking times. I’ve even tried to “fix” them by adding more flour (big mistake) or more baking powder (disaster). Every time I deviated from this specific method, the texture suffered. This isn’t just a recipe; it’s a lesson in restraint and the power of simple ingredients done right. If you are looking for that bakery-quality, gooey-center, crackly-top brownie without the hassle, you have found the holy grail.
What makes these better than takeout isn’t just the taste—it’s the control. When you order out, you’re gambling on how long they’ve been sitting under a heat lamp. When you make these one-bowl chocolate brownies, you get them fresh from the oven, warm and soft, with that irresistible aroma filling your kitchen. Plus, there is something deeply satisfying about dumping everything into one bowl and pulling out perfection. Let’s get into why this method works and how you can make them tonight.
Why You’ll Love This Recipe
There are a million brownie recipes online, but this one sticks around for a reason. It solves the biggest problem home bakers face: inconsistency. Here is why this specific version has earned a permanent spot in my rotation:
- Zero Cleanup Stress — Seriously. One bowl. One spoon. One pan to wash. I’ve made these while half-asleep on the couch, and they still came out perfect. If you can whisk, you can make these.
- Actual Fudgy Texture — Not “chewy” like a granola bar, and not “cakey” like a muffin. These are dense, moist, and rich. They hold together when you cut them but melt in your mouth. I know the difference because I’ve spent years trying to nail it.
- Fast and Flexible — From start to finish, it takes about 35 minutes. But here’s the best part: you can make the batter ahead of time. I often mix the batter on Sunday, cover it, and bake it fresh on Wednesday night. The flavor actually gets deeper.
- Better Than Store-Bought — I’ve compared these side-by-side with brownies from high-end bakeries. The homemade ones win every time because you control the chocolate quality and the moisture level. No stale edges, no dry centers.
- Customizable — Want nuts? Add them. Want sea salt? Sprinkle it on top. Want to add a layer of peanut butter swirl? Go for it. This base recipe is a blank canvas for your chocolate cravings.
This is the recipe I pull out when I need to impress a date, comfort a friend, or just treat myself after a long week. It’s reliable, it’s delicious, and it’s incredibly easy to make.
Ingredients You’ll Need
Here’s the thing about brownies: you don’t need fancy, obscure ingredients. You need good basics, measured correctly. I’m particular about three things here, and I’ll tell you exactly why.
The Chocolate Base
Bittersweet Chocolate Chips (12 ounces / 340g) — This is the most important ingredient. Don’t use chocolate chunks with nuts unless you want nuts in your brownies. And please, avoid the cheapest baking chips if you can help it. Look for a bar with at least 60% cacao. I use Ghirardelli 60% Bittersweet or Lindt 70%. The higher the quality of chocolate, the better the brownie. Melting a bar of chocolate works too, but chips hold their structure slightly better for that fudgy texture.
Unsalted Butter (1 cup / 226g) — Full fat, room temperature. You need the fat for the richness. If you try to use margarine or light butter, these will fail. Don’t do it. I measure this out so it’s ready to go.
The Sweeteners
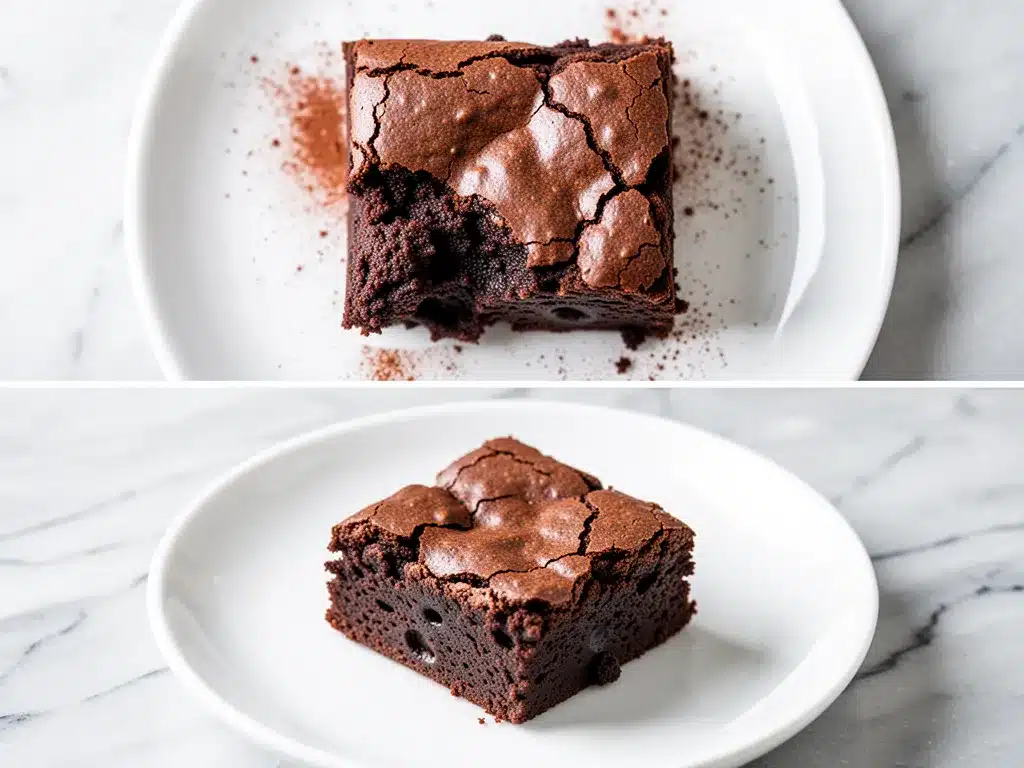
Granulated Sugar (2 cups / 400g) — Yes, two full cups. This seems like a lot, but it’s necessary for that shiny, crackly top. The sugar creates the crust. Don’t reduce this, or you’ll get a matte, cakey top.
Brown Sugar (1 cup / 200g) — This adds moisture and a hint of molasses depth. Light brown sugar is fine. Dark brown sugar will make them taste a bit more like toffee, which is also delicious if you want to experiment.
The Binders and Flavor
Eggs (4 large) — Room temperature eggs emulsify better into the chocolate mixture. If your eggs are cold, just set them in warm water for five minutes. Don’t skip this; it affects the texture.
Vanilla Extract (2 teaspoons) — Pure vanilla, not imitation. It rounds out the chocolate flavor. If you don’t have vanilla, you can skip it, but it really ties everything together.
The Dry Mix
All-Purpose Flour (1 cup / 125g) — Just regular flour. Do not use cake flour or whole wheat flour. We want structure, not tenderness. Spoon and level this one. Don’t scoop and pack, or you’ll add too much flour and dry out your brownies.
Cocoa Powder (½ cup / 50g) — Unsweetened cocoa powder adds an extra punch of chocolate flavor. Use natural cocoa powder (like Hershey’s) or Dutch-process (like Valrhona). Natural is more common, but Dutch-process gives a darker, deeper color. I use whatever is on sale.
Salt (½ teaspoon) — Essential. It makes the chocolate taste more like chocolate. Don’t skip it.
Equipment Needed
You don’t need a stand mixer or a food processor. Here’s what I actually use:
- Medium Saucepan — For melting the butter and chocolate. I use a small one that fits in my microwave if I’m lazy, but a saucepan on the stove gives you more control. Low and slow is the key.
- Large Mixing Bowl — Something big enough to hold all the ingredients without spilling. Glass or ceramic is nice because you can see the mixture, but stainless steel works too.
- Whisk — A simple balloon whisk is perfect for beating the eggs and sugar until they’re glossy.
- 9×13 Inch Baking Pan — Standard size. Line it with parchment paper, leaving an overhang on the sides. This is non-negotiable for easy removal. Grease the parchment too.
- Offset Spatula — For spreading the batter evenly. A regular spoon works in a pinch, but a spatula gives you a flat, even surface.
- Wire Cooling Rack — For cooling the brownies. You can do it on the counter, but a rack prevents the bottoms from getting soggy from steam.
That’s it. If you have these five things, you’re ready to go.
How to Make It: Step-by-Step
Alright, let’s make this! I’m walking you through exactly how I do it, including the little tricks I’ve picked up over the years.
Step 1: Prep Your Pan and Oven (5 minutes)
Preheat your oven to 350°F (175°C). This is a standard temperature for brownies—it cooks them through without drying them out. Line your 9×13 inch baking pan with parchment paper. I like to lay it down like a bed sheet, then grease the top of the parchment with a little butter or cooking spray. This ensures they don’t stick, no matter how fudgy they are.
Step 2: Melt the Chocolate and Butter (5 minutes)
In your medium saucepan over low heat, combine the butter and chocolate chips. Stir constantly. If you’re using a microwave, do it in 30-second intervals, stirring in between. The goal is a smooth, glossy mixture. Do not burn the chocolate! If it gets too hot, it will seize up and become grainy. Once it’s smooth, remove it from the heat and let it cool for about 5 minutes. You don’t want to cook the eggs when you add them, so warm chocolate is fine, but hot chocolate is a no-go.
Step 3: Whisk the Sugar and Eggs (3 minutes)
In your large mixing bowl, combine the granulated sugar, brown sugar, eggs, and vanilla extract. Whisk vigorously for about 2-3 minutes. This step is crucial for that crackly top. You want the mixture to become pale, glossy, and slightly thickened. It’s okay if it’s not perfectly smooth; tiny sugar crystals are what create the crust later. This is the “secret” to bakery-style tops.
Step 4: Combine Wet Ingredients (2 minutes)
Pour the melted chocolate-butter mixture into the sugar-egg mixture. Whisk gently but thoroughly until combined. The batter will look dark, shiny, and thick. This is where you can see the richness building. It should look like thick syrup.
Step 5: Add Dry Ingredients (2 minutes)
Sift the flour, cocoa powder, and salt over the wet mixture. If you don’t have a sifter, just whisk the dry ingredients together in a separate small bowl and then add them. Use a spatula to fold the dry ingredients into the wet. Stop as soon as you no longer see streaks of flour. Do not overmix. Overmixing develops gluten, which makes brownies cakey, not fudgy. A few tiny lumps of flour are okay. I’ve made the mistake of mixing too much before, and the texture was off. Trust me, stop when it looks mostly combined.
Step 6: Bake (25-30 minutes)
Pour the batter into your prepared pan. Spread it out evenly with your spatula. Bake for 25-30 minutes. Here’s the tricky part: check them at 25 minutes. You want the edges to be set and pulling slightly away from the sides, but the center should still look slightly underbaked and shiny. If you insert a toothpick, it should come out with moist crumbs attached, not clean. A clean toothpick means overbaked, dry brownies. For ultra-fudgy brownies, underbake slightly. They will continue to cook in the pan as they cool.
Step 7: Cool and Cut (1 hour)
Let the brownies cool in the pan on a wire rack for at least 30 minutes, preferably an hour. This is the hardest part, I know. But if you cut them while they’re hot, they’ll be a mess. They need to set. Once cooled, lift them out of the pan using the parchment overhang, place them on a cutting board, and slice into squares. Dust with sea salt if you’re feeling fancy.
Expert Tips & Tricks
Here’s everything I’ve learned from making this dozens of times. These tips will save you from my mistakes.
- Don’t Skip the Whisking — I know it’s tedious, but whisking the eggs and sugar for a full 3 minutes creates the shiny crust. It’s a chemical reaction, and it works. I tried skipping it once, and the top was matte and dull.
- Room Temperature Eggs — Cold eggs can cause the melted chocolate to solidify into little chunks. If you forget to take them out, run them under warm water for a minute. It’s worth it.
- Underbake on Purpose — This is the #1 rule of fudgy brownies. They look done before they are done. Pull them when the center still jiggles slightly. They will firm up as they cool.
- Quality Matters — If you use cheap, waxy chocolate chips, you’ll get a waxy texture. Use real chocolate. It’s worth the extra dollar.
- Let Them Rest — I want to emphasize this again. Cutting hot brownies is a recipe for disaster. Wait at least 30 minutes. The texture improves dramatically as they cool.
Variations & Substitutions
Once you’ve nailed the basic version, here’s how you can mix it up. I’ve tried all of these.
- Chocolate Chip Boost — Add ½ cup of semi-sweet chocolate chips to the batter at the end. For extra gooeyness, press a few more on top before baking.
- Walnut or Pecan — Fold in 1 cup of toasted nuts for crunch. Toasting them in a dry pan for 3-4 minutes brings out their flavor. I love walnuts in these.
- Sea Salt Topping — Sprinkle flaky sea salt (like Maldon) over the hot brownies right out of the oven. The salt enhances the chocolate and adds a sophisticated touch.
- Peanut Butter Swirl — Drop spoonfuls of peanut butter on top of the batter and swirl with a knife before baking. My kids go crazy for this version.
- Gluten-Free — Swap the all-purpose flour for a 1:1 gluten-free flour blend (like Bob’s Red Mill). The texture remains fudgy. Don’t use almond flour; it changes the structure too much.
- Dairy-Free — Use dairy-free butter and dairy-free chocolate chips. The texture might be slightly less rich, but it still works well.
Serving & Storage
How to Serve:
I usually serve these straight from the pan at a gathering, but for a nicer presentation, lift them out and cut them into neat squares. A dollop of whipped cream or a scoop of vanilla ice cream is classic. I also love them with a cold glass of milk.
Storage:
Store leftovers in an airtight container at room temperature for up to 4 days. They actually stay moist longer than most cakes. If your kitchen is hot, you might want to refrigerate them, but they’ll firm up a bit. Bring them to room temperature before eating for the best texture.
Freezing:
These freeze beautifully. Wrap individual squares in plastic wrap, then place them in a freezer bag. They’ll last for 3 months. Thaw at room temperature for 30 minutes. I make a double batch just for this reason.
Reheating:
If you want that warm, fresh-from-the-oven feel, microwave a square for 10-15 seconds. It gets gooey and soft. Don’t overdo it, or it’ll become soup.
Nutrition Information
I’m not a nutritionist, but here’s the breakdown if you’re tracking. Please remember this is an estimate and can vary based on brands and exact measurements.
Per Serving (based on 16 squares):
- Calories: 320
- Protein: 4g
- Carbs: 42g
- Fiber: 2g
- Sugar: 32g
- Fat: 16g
- Saturated Fat: 9g
Look, this is a rich dessert. It’s not a health food. But it’s better than takeout because you know exactly what’s in it. No preservatives, no weird additives. Just chocolate, butter, sugar, and eggs. When I make these, I enjoy one square with a cup of coffee and feel satisfied. That’s the goal.
Final Thoughts
So that’s my go-to ultra-fudgy one-bowl chocolate brownie! I’ve probably talked your ear off at this point, but when you make a recipe this often, you have a lot to say about it. This has saved my dessert game more times than I can count. It’s my answer to “what can I bring to the potluck?” or “how do I comfort my partner after a bad day?”
Make it yours! Try different chocolates, add nuts, or just enjoy them plain. The best recipes are the ones you adapt to your tastes. If you make this, drop a comment and let me know what you think! I love hearing how recipes turn out in your kitchen. And if something doesn’t work, tell me that too—I’m here to help troubleshoot.
Happy baking! And I hope your kitchen smells half as good as mine does right now.
Frequently Asked Questions
Why are my brownies cakey instead of fudgy?
This usually happens for two reasons: overmixing the batter or overbaking. If you mix the flour in too much, you develop gluten, which leads to a cake-like texture. Also, if you bake them until a toothpick comes out clean, they will be dry. Pull them out when the toothpick has moist crumbs on it. They will set as they cool.
Can I use milk chocolate instead of bittersweet?
You can, but the brownies will be much sweeter and less intense. Milk chocolate also has more milk solids, which can affect the texture. If you use milk chocolate, reduce the granulated sugar by ¼ cup to balance the sweetness. I prefer bittersweet for that rich, adult flavor.
Why did my brownies not have a crackly top?
The crackly top comes from whipping the eggs and sugar together vigorously. If you just mixed them gently, you won’t get the crust. Make sure you whisk for at least 2-3 minutes until the mixture is pale and glossy. Also, using granulated sugar (not just brown sugar) is key for the crust formation.
Can I make these in a square pan instead of rectangular?
Yes! If you use an 8×8 inch pan, the brownies will be thicker. You’ll need to increase the baking time by about 5-10 minutes. Keep an eye on them, as thicker brownies take longer to cook in the center.
How do I store brownies with add-ins like nuts or chips?
Store them the same way. Just make sure the add-ins are fully incorporated into the batter. If you’re adding chocolate chips, press a few more on top before baking so they don’t sink to the bottom.
Can I double this recipe?
Absolutely. Use a 9×13 pan (which is already the size in the recipe) or two 8×8 pans. If using two pans, bake them for the same amount of time, but check them a few minutes early since smaller batches bake faster.
What is the best chocolate for these brownies?
I recommend using a bar of high-quality bittersweet chocolate (60-70% cacao) chopped into pieces, or semi-sweet chocolate chips. Brands like Ghirardelli, Lindt, and Guittard work well. Avoid chocolate chips with added stabilizers if you can help it, as they might not melt as smoothly.
Pin This Recipe!
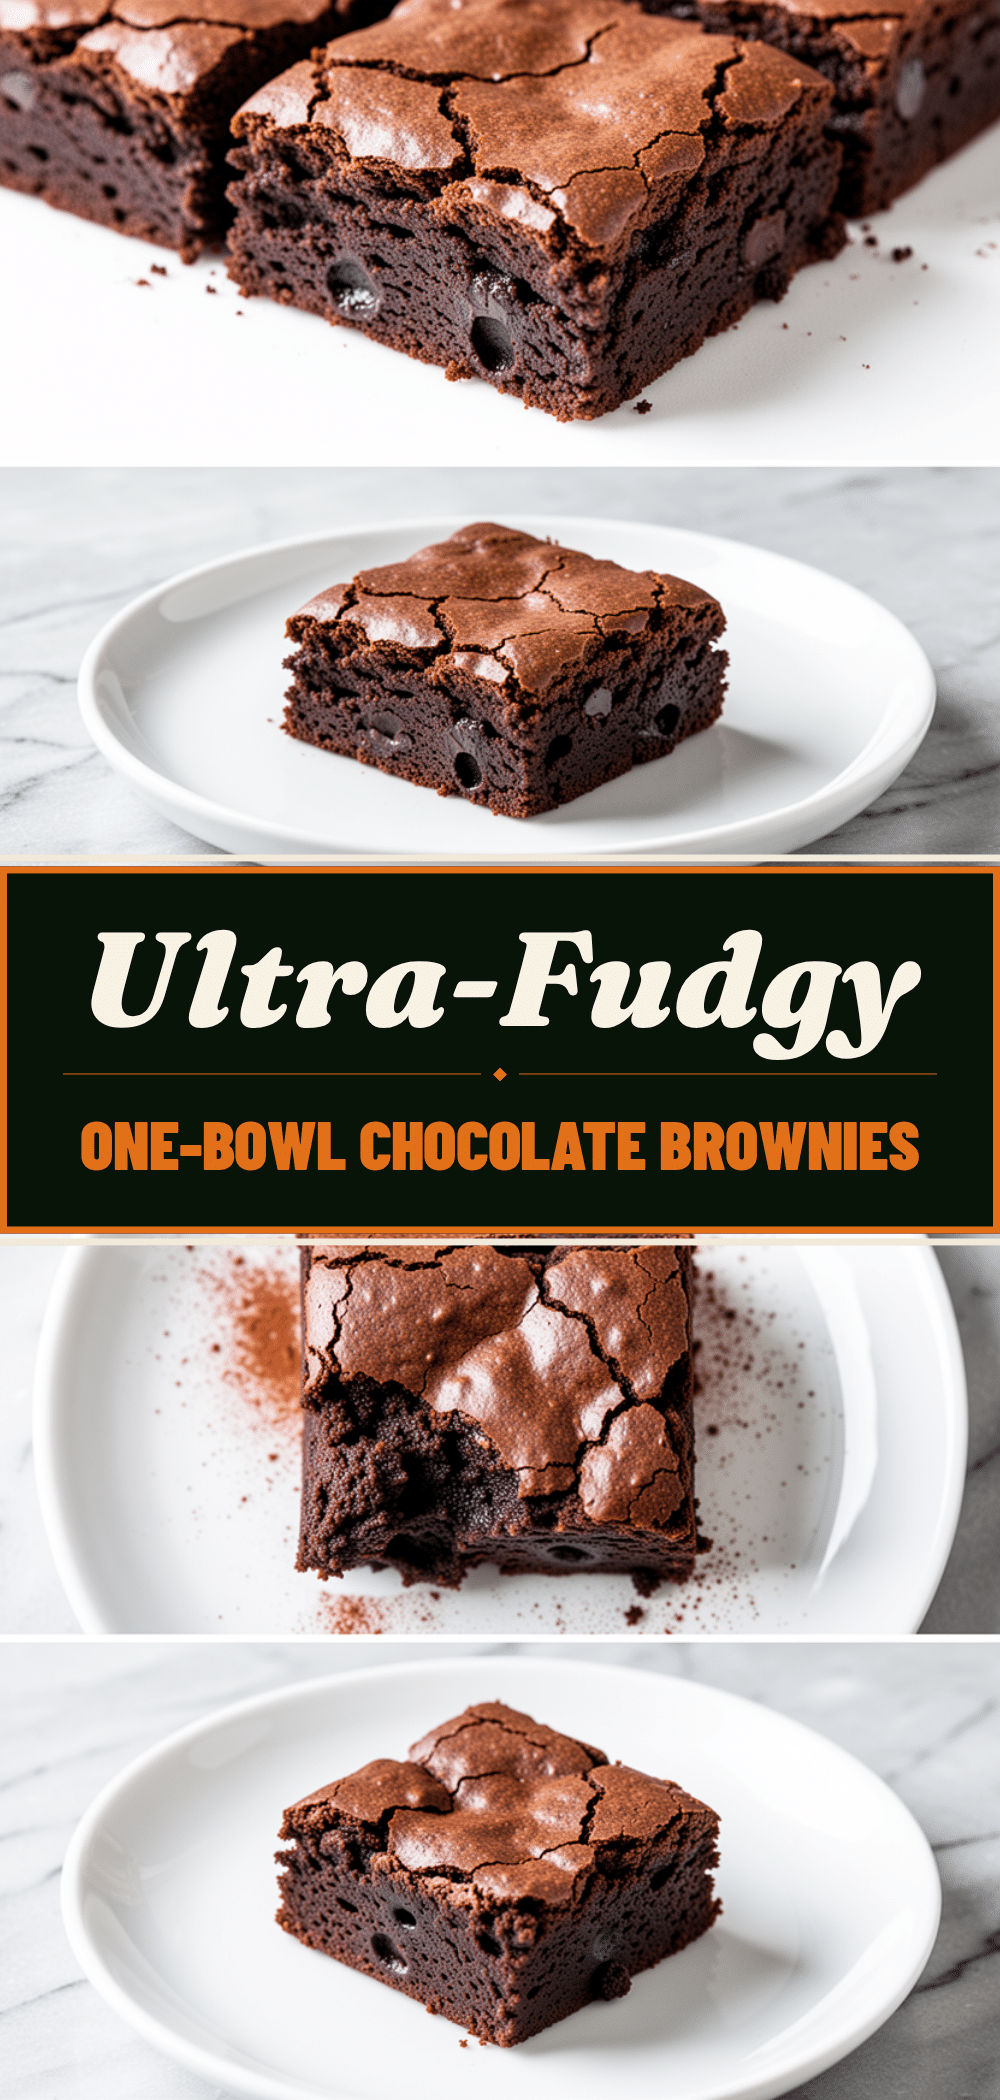
Ultra-Fudgy One-Bowl Chocolate Brownies
- Total Time: 45 minutes
- Yield: 16 servings 1x
Description
These ultra-fudgy one-bowl chocolate brownies are dense, moist, and intensely chocolatey with a crackly top. They require minimal cleanup and deliver bakery-quality results every time.
Ingredients
- 12 ounces bittersweet chocolate chips (at least 60% cacao)
- 1 cup unsalted butter (room temperature)
- 2 cups granulated sugar
- 1 cup brown sugar (light or dark)
- 4 large eggs (room temperature)
- 2 teaspoons vanilla extract
- 1 cup all-purpose flour
- ½ cup unsweetened cocoa powder
- ½ teaspoon salt
Instructions
- Preheat oven to 350°F (175°C). Line a 9×13 inch baking pan with parchment paper, leaving an overhang on the sides, and grease the parchment.
- In a medium saucepan over low heat (or microwave in 30-second intervals), melt the butter and chocolate chips together until smooth. Let cool for 5 minutes.
- In a large mixing bowl, whisk granulated sugar, brown sugar, eggs, and vanilla extract vigorously for 2-3 minutes until pale, glossy, and slightly thickened.
- Pour the melted chocolate-butter mixture into the sugar-egg mixture and whisk gently until combined.
- Sift flour, cocoa powder, and salt over the wet mixture. Fold in with a spatula until just combined; do not overmix.
- Pour batter into the prepared pan and spread evenly.
- Bake for 25-30 minutes. The edges should be set, but the center should still look slightly underbaked and shiny. A toothpick should come out with moist crumbs.
- Cool in the pan on a wire rack for at least 30 minutes to 1 hour before lifting out and slicing.
Notes
Ensure eggs are room temperature to prevent chocolate from seizing. Do not overmix the batter to maintain a fudgy texture. Underbake slightly for the best fudgy consistency. Brownies must cool completely before cutting to set properly.
- Prep Time: 10 minutes
- Cook Time: 30 minutes
- Category: Dessert
- Cuisine: American
Nutrition
- Serving Size: 1 square
- Calories: 320
- Sugar: 32
- Fat: 16
- Saturated Fat: 9
- Carbohydrates: 42
- Fiber: 2
- Protein: 4
Keywords: chocolate brownies, fudgy brownies, one-bowl recipe, easy dessert, homemade brownies, gluten-free option


