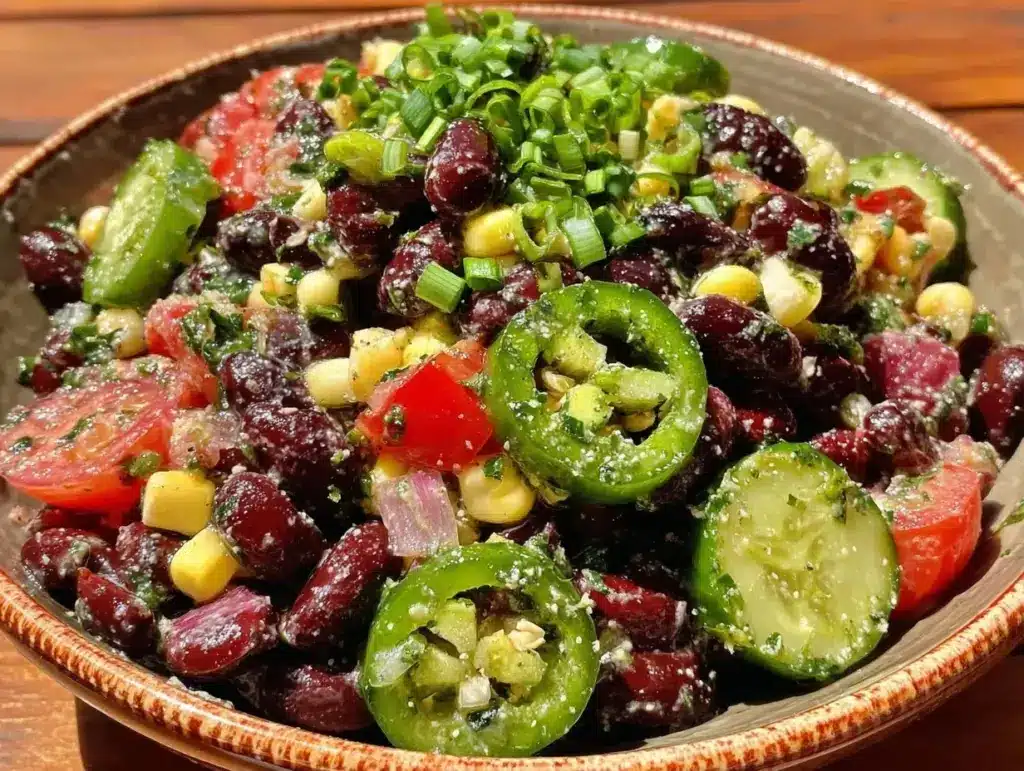
I still remember the first time I brought this Tailgate Cowboy Caviar to a game. It was a freezing cold Sunday in January, the kind where your nose hurts if you breathe too hard, and the stadium parking lot looked like a frozen wasteland. I was standing there in my oversized team jacket, holding a Styrofoam bowl that was slowly turning into ice, trying to eat chips and dip while shivering.
Then, I saw it. Next to me, someone else had pulled out a container of something vibrant, colorful, and actually warm from the sun. It was loaded with corn, black beans, peppers, and a zesty lime dressing that smelled like summer. I took one bite. It was crunchy, bright, and honestly? Way better than the sad, store-bought salsa I’d been eating for years.
That was the moment I realized I didn’t need to buy fancy dips anymore. I could make something better at home in ten minutes flat. Now, this Tailgate Cowboy Caviar with Zesty Lime Cilantro Dressing is my go-to for every gathering, from Super Bowl parties to last-minute Tuesday night cravings. It’s colorful, it’s crunchy, and it tastes like a vacation on a chip.
I’ve tested this recipe enough times to know exactly how to keep the veggies crisp and the dressing punchy. No soggy beans. No bland corn. Just pure, zesty flavor that disappears fast. And the best part? It’s ready before the game even starts.
Why You’ll Love This Recipe
Look, I get it. You have a million things to do when you’re preparing for a game day or a busy weeknight dinner. You don’t need another complicated recipe that requires twelve steps and a mountain of dirty dishes. This Tailgate Cowboy Caviar is different. Here’s why it’s become a staple in my kitchen:
Stupid Simple Prep — Seriously, if you can open a can and chop an onion, you can make this. I don’t even cook the corn; I just use fresh or frozen kernels. It takes about 10 minutes from start to finish. I’ve made this while helping my kids with homework, and it turned out perfect every time.
Lightning Fast — No baking. No simmering. No waiting for the oven to preheat. You chop, you toss, you serve. If you’re running around the house trying to figure out dinner at 5pm, this is your answer. It’s ready in the time it takes to watch one commercial break.
Make-Ahead Magic — This dip actually gets better as it sits. The flavors meld together overnight, making the lime really penetrate the beans and corn. I often make this the day before a party because it saves me stress. I just pull it out of the fridge and serve it cold.
Zero Waste — I hate throwing away half a bag of chips or a container of dip that nobody touched. This recipe makes just enough for a crowd without going overboard. Plus, if you have leftovers, they keep in the fridge for days. I eat it for lunch the next day with a spoon, and it’s just as good.
Vegetarian Friendly — Not everyone at your party eats meat. This dip is naturally vegetarian (just skip the optional bacon garnish), so everyone can dig in without worrying. It’s hearty enough to be a snack, light enough to be a side.
This is my secret weapon for when I need to impress people without spending hours in the kitchen. It’s reliable, it’s delicious, and it’s always a hit.
Ingredients You’ll Need
Here’s the best part: you probably have most of this already in your pantry or fridge. This Tailgate Cowboy Caviar relies on fresh, simple ingredients that pack a huge flavor punch. I’m particular about a few things here, so pay attention to the details.
Black Beans (1 can, 15oz / 425g) — Rinsed and drained. I use low-sodium so I can control the saltiness. If you’re in a hurry, canned is fine. But if you have time, soak dried black beans overnight for a firmer texture. I usually grab the can because life is busy.
Corn (1 cup / 150g) — Fresh off the cob is amazing, but frozen corn works too. I thaw it quickly under warm water. Canned corn is okay, but it can be mushy. I avoid it. Sweet corn kernels add the perfect crunch.
Red Bell Pepper (1 medium, diced / about 150g) — This adds sweetness and color. Any color pepper works, but red looks the prettiest in the bowl. Make sure you dice it small so every bite has a bit of crunch.
Green Bell Pepper (1 medium, diced / about 150g) — This adds that classic “caviar” bite. If you’re sensitive to bitter flavors, use less green pepper or swap it for extra red. I love the contrast of colors.
Red Onion (1 small, finely diced / about 100g) — Red onion is milder than yellow, which is perfect for a raw dip. If you hate onions, you can skip it, but I think the sharpness balances the lime. Finely dice it so you don’t get huge chunks.
Jalapeño (1 small, seeded and minced / about 20g) — Optional, but recommended. Remove the seeds and white ribs if you want less heat. I leave some seeds in for a little kick. Fresh jalapeño is best—no jarred stuff here.
Cilantro (½ cup, chopped / about 30g) — Fresh is non-negotiable. Dried cilantro tastes like dust. Chop it roughly and fold it in at the end so it stays bright green and fragrant.
For the Zesty Lime Cilantro Dressing:
Lime Juice (3 tablespoons / 45ml) — Freshly squeezed. Bottled lime juice tastes bitter and artificial. Grab three limes and squeeze them yourself. It’s worth the extra minute.
Olive Oil (3 tablespoons / 45ml) — Extra virgin works well here because it adds flavor. If you’re watching calories, you can use less, but the oil helps carry the lime flavor.
Cumin (1 teaspoon) — Ground cumin adds that warm, earthy depth that makes this taste like a real dip and not just chopped veggies. Don’t skip it.
Garlic (2 cloves, minced / about 1 teaspoon) — Fresh garlic is key. If you’re being lazy, you can use a tiny bit of jarred, but fresh tastes so much better. Minced finely so it dissolves into the dressing.
Salt and Pepper — To taste. I start with ½ teaspoon salt and adjust from there. Black pepper adds a nice bite.
Optional Add-ins:
Avocado (1, diced) — Add right before serving so it doesn’t brown. It adds creaminess that contrasts with the crunchy veggies.
Cherry Tomatoes (1 cup, halved) — Adds juiciness. I love these in the summer.
Cooked Bacon Bits (¼ cup) — For the meat-eaters. Crumble it up and sprinkle on top. It’s like a loaded baked potato in dip form.
Equipment Needed
You don’t need any fancy gadgets for this. Here’s what I actually use when I’m making this Tailgate Cowboy Caviar.
Large Mixing Bowl — I use a 3-quart bowl. It needs to be big enough to toss everything without spilling. I have a big ceramic one that looks nice on the table.
Sharp Knife — For chopping peppers, onions, and jalapeño. A dull knife makes you cry more—especially with onions. Learn to sharpen it.
Colander — For rinsing the beans and corn. Or just drain it in the sink. I do this when I’m rushing.
Small Bowl — For whisking the dressing separately. This ensures the lime and oil emulsify before hitting the veggies.
Measuring Spoons — For the cumin and salt. I eyeball the lime and oil, but I measure the spices to be consistent.
Serving Spoon — A big wooden spoon or a ladle. I like serving it straight from the mixing bowl to keep it rustic.
How to Make It: Step-by-Step
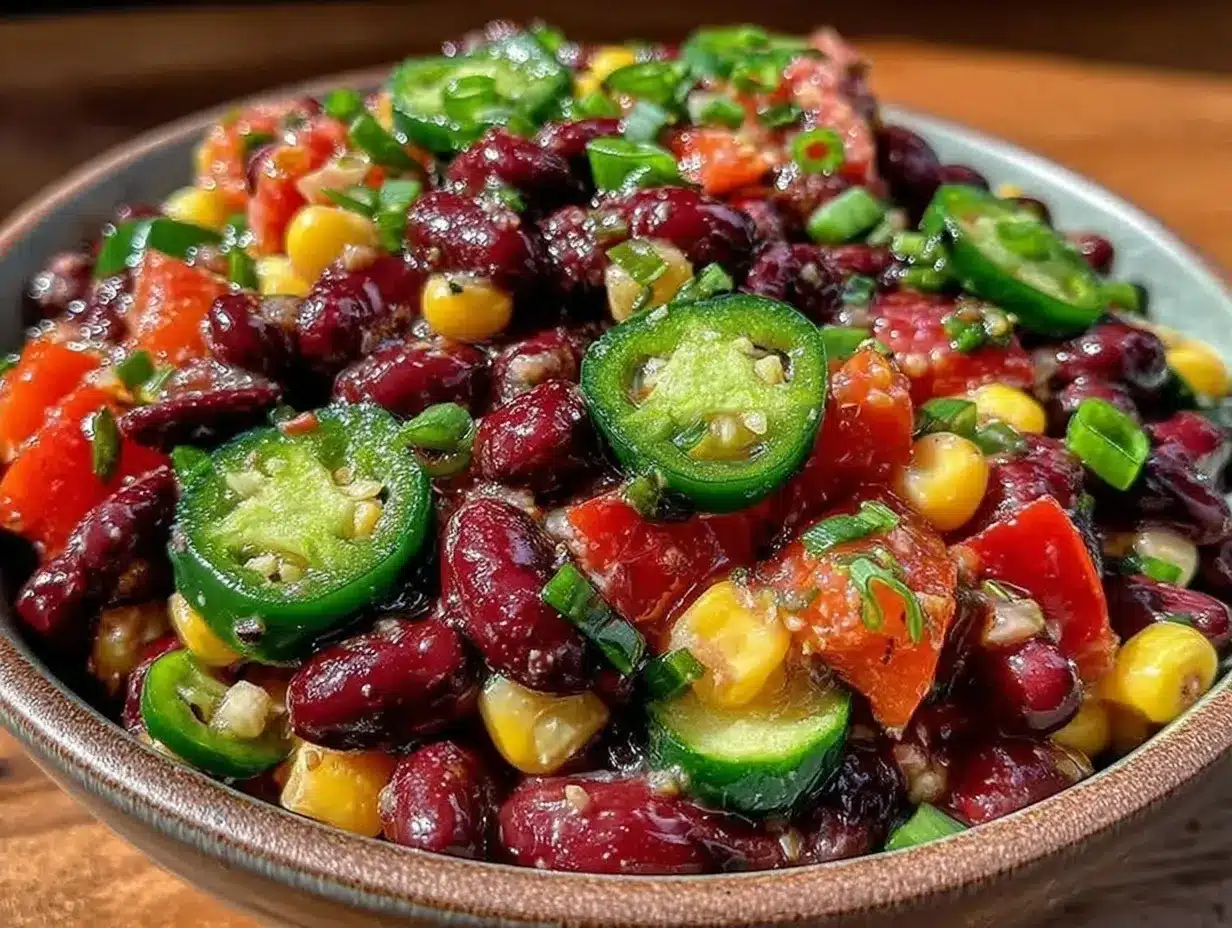
Alright, let’s make this! I’m walking you through exactly how I do it, including the little tricks I’ve picked up over the years.
Step 1: Prep Your Veggies (5 minutes)
Wash and dry all your vegetables. Dice the red and green bell peppers into small, uniform pieces. I aim for about ¼-inch chunks so every bite is balanced. Finely dice the red onion. If you’re worried about onion breath, soak the diced onion in cold water for 5 minutes, then drain. It mellows the flavor. Mince the jalapeño and remove seeds if you want it mild. Chop the cilantro and set it aside.
Step 2: Drain the Beans and Corn (2 minutes)
Open your can of black beans and pour them into a colander. Rinse them under cold water until the suds are gone. This removes the starchy liquid that can make the dip slimy. Shake off excess water. If you’re using frozen corn, thaw it and drain well. You want everything as dry as possible so the dressing clings instead of pooling at the bottom.
Step 3: Make the Zesty Lime Cilantro Dressing (2 minutes)
In a small bowl, whisk together the fresh lime juice, olive oil, minced garlic, ground cumin, salt, and black pepper. Whisk vigorously until the mixture looks slightly cloudy and emulsified. This means the oil and lime are blending properly. Taste it. It should be tangy and salty. If it’s too sour, add a pinch more salt or a tiny drizzle of oil.
Step 4: Combine Everything (1 minute)
In your large mixing bowl, add the drained black beans, corn, diced peppers, red onion, and jalapeño. Pour the dressing over the top. Use a large spoon or your hands (if you don’t mind getting messy) to toss everything together. Make sure every piece of vegetable is coated in the lime dressing.
Step 5: Add the Cilantro and Rest (5 minutes)
Fold in the chopped cilantro last. This keeps it bright green and fresh-tasting. Let the mixture sit for at least 5 minutes before serving. This gives the flavors a chance to meld. If you can wait 30 minutes, even better. The beans will absorb some of the lime, and the corn will get a nice zing.
Total Time: About 10 minutes (5 minutes active, 5 minutes resting)
Troubleshooting:
Dip is too dry: Add a splash more lime juice or olive oil. Toss again.
Dip is too acidic: Add a pinch of sugar or a bit more oil to balance it out.
Onion is too strong: Next time, soak the diced onion in ice water for 10 minutes before adding.
Expert Tips & Tricks
Here’s everything I’ve learned from making this dozens of times. These tips will save you from my mistakes.
Keep It Dry — The biggest mistake people make is adding wet ingredients. Make sure your beans and corn are thoroughly drained. Waterlogged dip tastes bland and ruins the crunch. I always give the colander a good shake.
Don’t Over-Chop — You want distinct pieces of vegetable, not a puree. Keep your chunks small but visible. If you chop too finely, it turns into a salad dressing rather than a dip.
Fresh Lime is Key — Bottled lime juice has preservatives that taste metallic. Fresh lime juice is bright and floral. It makes a huge difference in the final flavor. Buy extra limes just in case.
Let It Marinate — I know you want to eat it now. But waiting 10 minutes makes it better. The salt draws out moisture from the veggies, which mixes with the dressing to create a more cohesive flavor. Patience pays off.
Add Avocado Last — If you’re adding avocado, do it right before serving. Avocado browns quickly when exposed to air. Toss it in gently so it doesn’t get mashed.
Customize the Heat — Jalapeño heat varies. If you’re serving kids or people who don’t like spice, remove all the seeds and membranes. For extra heat, leave some seeds in or add a pinch of cayenne pepper to the dressing.
Pro Trick: Toast the Cumin — If you have an extra minute, toast your ground cumin in a dry pan for 30 seconds before adding it to the dressing. It releases the oils and makes the flavor deeper and nuttier. It’s a small step that makes a big difference.
Variations & Substitutions
Once you’ve nailed the basic version, here’s how you can mix it up. I’ve tried all of these, and they’re all winners.
Tex-Mex Style — Add ½ cup of diced cooked chicken or shredded beef. This turns it into a hearty dip perfect for serving with tortilla chips. I love this version for game day.
Southwest Corn — Swap the black beans for pinto beans. It changes the texture slightly and gives it a creamier feel. Or add ½ cup of roasted poblano peppers for a smoky flavor.
Fruit Twist — Add ½ cup of diced mango or pineapple. It adds a sweet contrast to the spicy jalapeño. This is great for summer parties.
Gluten-Free — This recipe is naturally gluten-free. Just make sure your canned beans and corn are certified gluten-free if you have celiac disease, as cross-contamination can happen in factories.
Dairy-Free — This recipe is naturally dairy-free. No cheese or cream needed. It’s perfect for vegans if you skip the bacon garnish.
Low-Carb — Reduce the corn to ¼ cup and add extra peppers and beans. Or serve it with cucumber slices or celery sticks instead of chips.
Protein Boost — Add ½ cup of cooked quinoa or black-eyed peas. It makes the dip more filling and adds a nice texture contrast.
Serving & Storage
How to Serve:
I usually serve this straight from the mixing bowl with a big spoon. It looks rustic and inviting. Pair it with sturdy tortilla chips that won’t break under the weight of the dip. I also like serving it with pita chips or even as a topping for chicken and quinoa bowls for a light lunch.
Side Dishes:
Grilled corn on the cob, guacamole, or a simple green salad. It pairs well with almost anything.
Wine Pairing:
A crisp Sauvignon Blanc or a light Pinot Grigio cuts through the richness of the chips and complements the lime. I’m not a wine expert, but these always work for me.
Storage Instructions:
Refrigerator: Store in an airtight container for up to 4 days. The flavors will continue to develop, making it even better on day two. Stir it up before serving.
Freezing: I don’t recommend freezing this dip. The raw vegetables will get mushy and watery when thawed. It’s best eaten fresh or chilled.
Meal Prep: Make the base (beans, corn, peppers) on Sunday. Store in the fridge. Make the dressing on Wednesday. Combine on Thursday night. It’s a great way to prep ahead for busy weeks.
Nutrition Information
I’m not a nutritionist, but here’s the breakdown if you’re tracking. This is per serving (based on 8 servings).
– Calories: 120
– Protein: 4g
– Carbs: 18g
– Fiber: 5g
– Sugar: 3g
– Fat: 4g
– Sodium: 180mg
What’s Good: High in fiber from the beans and veggies. Low in sugar. Good source of vitamin C from the peppers and lime.
What to Know: Sodium can vary depending on the beans. Use low-sodium beans to keep it lower. If you add bacon or avocado, the calories and fat will increase.
My Take: This is a healthy, light dip that feels indulgent because of the crunch and flavor. It’s a great way to get more vegetables into your diet without feeling like you’re eating “diet food.”
Final Thoughts
So that’s my Tailgate Cowboy Caviar! I’ve talked your ear off, but when you make a recipe this often, you have a lot to say about it. This dip has saved me more times than I can count. It’s my answer to “what’s for the party?” when I’m tired, don’t want takeout, and still want something that tastes really good.
My family loves it, my friends ask for the recipe, and I love how easy it is to make. It’s colorful, it’s zesty, and it’s always a crowd-pleaser. Make it yours! Try different add-ins, swap in your favorite vegetables, or adjust the spice level. The best recipes are the ones you adapt to your tastes.
If you make this, drop a comment and let me know what you think! I love hearing how recipes turn out in your kitchen. And if something doesn’t work, tell me that too—I’m here to help troubleshoot.
Happy snacking! And I hope your party smells half as good as my kitchen does right now.
Frequently Asked Questions
Can I use canned corn instead of fresh?
Yes, you can. I actually use canned corn most of the time because it’s easier. Just make sure to drain it really well. Fresh corn is sweeter, but canned works fine in a pinch. Frozen corn is also a great option if you thaw and drain it properly.
Why did my dip turn out watery?
This usually happens if the beans and corn weren’t drained thoroughly, or if you added watery veggies like tomatoes too early. Make sure to rinse and shake the beans dry. If you add tomatoes, add them right before serving. Also, let the dip sit in the fridge for a few hours so the excess moisture can be absorbed or drained off.
Can I make this ahead for a party?
Absolutely! This dip is better when made ahead. I recommend making it the night before. The flavors meld together overnight, and the lime really penetrates the beans. Just add the avocado and cilantro right before serving to keep them fresh.
How long does this dip last in the fridge?
It lasts up to 4 days in an airtight container. After that, the vegetables may start to get soft and lose their crunch. If you notice it getting watery, drain off the excess liquid before serving.
Can I use lime juice from a bottle?
You can, but fresh lime juice tastes so much better. Bottled lime juice has a metallic, bitter taste that can ruin the freshness of the dip. If you must use bottled, use half the amount and taste carefully. But really, squeeze the limes. It’s worth it.
Is this dip gluten-free?
Yes, this recipe is naturally gluten-free. Just make sure your canned beans and corn are certified gluten-free if you have celiac disease, as cross-contamination can happen during processing. Also, check your chips to ensure they’re gluten-free.
Can I add meat to this dip?
Yes! I often add cooked chicken, shredded beef, or crumbled bacon. If you’re adding meat, make sure it’s cooked and cooled before adding it to the dip. It adds a nice protein boost and makes the dip more filling.
Pin This Recipe!
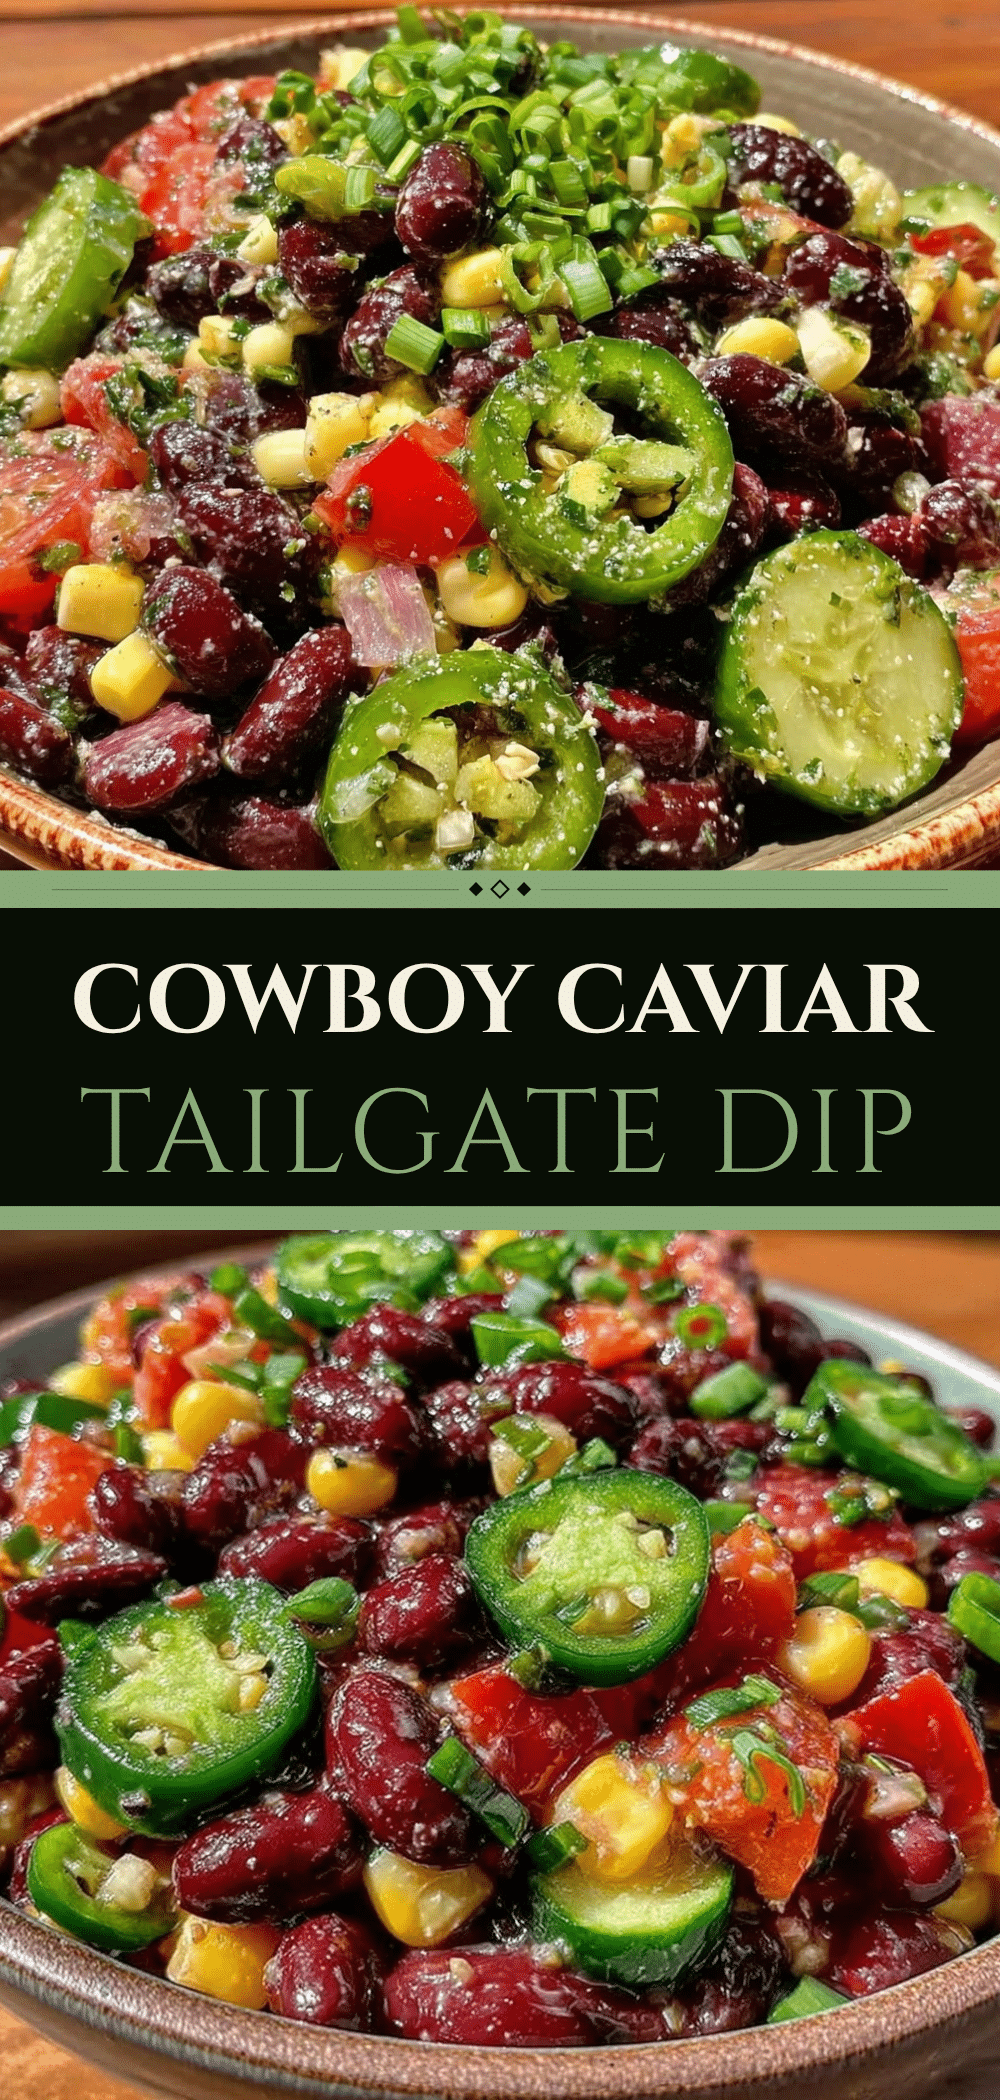
Tailgate Cowboy Caviar: 10-Min Zesty Lime Dip
- Total Time: 10 minutes
- Yield: 8 servings 1x
Description
A vibrant, crunchy, and zesty vegetarian dip made with black beans, corn, fresh vegetables, and a lime-cilantro dressing. Ready in just 10 minutes, it’s perfect for game days, parties, or quick weeknight snacks.
Ingredients
- 1 can (15oz / 425g) black beans, rinsed and drained
- 1 cup (150g) corn (fresh, frozen/thawed, or canned)
- 1 medium red bell pepper, diced
- 1 medium green bell pepper, diced
- 1 small red onion, finely diced
- 1 small jalapeño, seeded and minced
- ½ cup (30g) fresh cilantro, chopped
- 3 tablespoons (45ml) fresh lime juice
- 3 tablespoons (45ml) extra virgin olive oil
- 1 teaspoon ground cumin
- 2 cloves garlic, minced
- Salt and black pepper to taste
- Optional: 1 avocado, diced
- Optional: 1 cup cherry tomatoes, halved
- Optional: ¼ cup cooked bacon bits
Instructions
- Wash and dry all vegetables. Dice red and green bell peppers into small, uniform pieces (about ¼-inch). Finely dice the red onion. Mince the jalapeño and remove seeds if you prefer less heat. Chop the cilantro and set aside.
- Pour the black beans into a colander and rinse under cold water until clean. Drain well. If using frozen corn, thaw and drain thoroughly. Ensure all ingredients are as dry as possible to prevent a watery dip.
- In a small bowl, whisk together the fresh lime juice, olive oil, minced garlic, ground cumin, salt, and black pepper until emulsified. Taste and adjust seasoning if needed.
- In a large mixing bowl, combine the drained black beans, corn, diced peppers, red onion, and jalapeño. Pour the dressing over the top and toss gently to coat everything evenly.
- Fold in the chopped cilantro last to keep it bright. Let the mixture sit for at least 5 minutes to allow flavors to meld (30 minutes is ideal). Add avocado or tomatoes right before serving if using.
- Serve immediately with tortilla chips or store in the refrigerator.
Notes
[‘Ensure beans and corn are thoroughly drained to prevent a watery dip.’, ‘Use fresh lime juice for the best flavor; bottled juice can taste metallic.’, ‘Add avocado right before serving to prevent browning.’, ‘The dip tastes better after marinating for 30 minutes or overnight.’, ‘Do not freeze this dip as raw vegetables will become mushy upon thawing.’]
- Prep Time: 5 minutes
- Cook Time: 0 minutes
- Category: Appetizer
- Cuisine: Tex-Mex
Nutrition
- Serving Size: 1/8 of the recipe
- Calories: 120
- Sugar: 3
- Sodium: 180
- Fat: 4
- Saturated Fat: 0.5
- Carbohydrates: 18
- Fiber: 5
- Protein: 4
Keywords: cowboy caviar, tailgate dip, lime dip, vegetarian appetizer, game day food, 10 minute recipe, black bean dip, zesty lime dressing, make ahead dip


