Last November, I was standing in my kitchen at 11 PM, staring at a completely burnt pie crust. It was my third attempt at a traditional apple pie for my in-laws’ visit, and my patience had officially evaporated. My mother-in-law loves “fancy” desserts, and I, for the life of me, couldn’t figure out how to make a crust that wasn’t either a brick or a soggy mess. I was about to order a cake from the grocery store—yes, the one with the fake flowers on top—when I spotted a bag of bruised pears in the fridge. They were soft, slightly brown, and perfect for something rustic.
I dumped them on the counter, grabbed some puff pastry I’d thawed by mistake, and decided to throw together what I thought would be a desperate, ugly compromise. I slathered on some almond paste, drizzled honey over the fruit, and folded the pastry over in the messiest way possible. It looked like a disaster. It smelled incredible. And when I pulled it out of the oven, golden and bubbling, my mother-in-law took one bite and asked for the recipe before I could even wipe the flour off my hands.
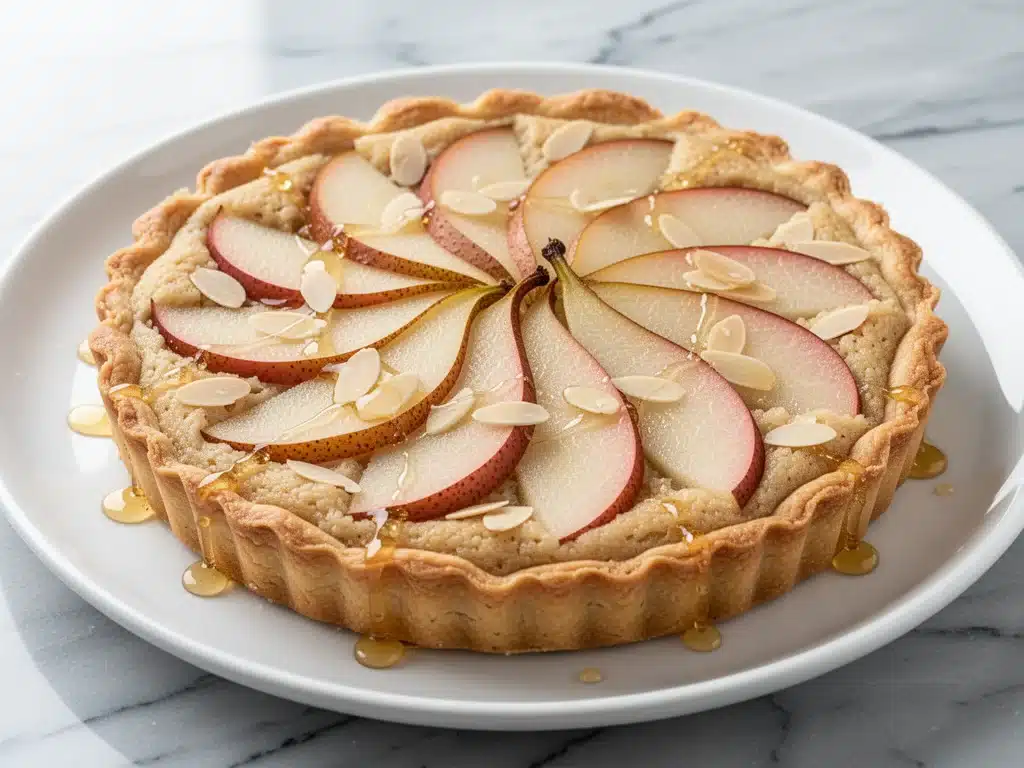
That was the birth of this rustic fall pear almond tart with honey glaze. It’s not fussy. It doesn’t require a rolling pin or a food processor. It doesn’t demand you be a pastry chef to make it work. In fact, the more “rustic” (read: messy) you make it, the better it looks. It’s the ultimate crowd-pleaser because it tastes like autumn in every single bite—warm spices, sweet fruit, and that nutty richness from the almond filling.
I’ve made this tart at least a dozen times since that chaotic night. I’ve served it to brunch guests, holiday dinners, and just because it was Tuesday. Every. Single. Time. It impresses. People assume you spent hours on it, but the truth is, it takes about 45 minutes from start to finish. If you’re looking for an easy apple pie alternative that feels elevated without the headache, this is your new best friend. It’s better than any store-bought dessert, and honestly? It’s easier than making a chocolate torte if you’re worried about gluten, though I don’t think you’ll miss the flour here.
Why You’ll Love This Rustic Fall Pear Almond Tart
There’s a reason this tart has migrated from a “desperation dinner party save” to my regular rotation. It hits all the right notes for comfort food without weighing you down like a heavy sponge cake. Here’s why it works so well:
- Zero Pastry Stress — Seriously. You don’t need to make a crust. You use store-bought puff pastry (the frozen kind, thawed). You just fold it over. If you can fold a blanket, you can make this tart. I’ve made it while talking on the phone with my sister.
- Uses Overripe Fruit — This is the secret weapon. Pears that are too soft to eat raw are perfect here. They break down slightly in the oven, creating natural juices that mix with the honey to create a syrup. It’s zero waste cooking at its finest.
- Almond Flavor Magic — The almond filling (frangipane-style, but easier) adds a sophisticated depth that makes it taste like it came from a French patisserie. But it’s just almond flour, sugar, butter, and an egg. No weird ingredients.
- Gluten-Free Friendly — Because the filling is naturally gluten-free (almond flour) and the pastry is wheat-based, you can easily swap in a gluten-free puff pastry sheet if needed. Or, if you want to go fully GF, just skip the pastry and serve the filling in ramekins like a custard. It’s that versatile.
- Make-Ahead Winner — This tart actually tastes better the next day. The flavors meld, the honey glaze sets into a sticky coating, and it’s even easier to slice. I make it on Sunday and eat it for breakfast all week.
It’s the kind of dessert that makes you feel like a genius baker with minimal effort. And let’s be real, we all need those moments.
Ingredients You’ll Need
Here’s the good news: you probably have most of the filling ingredients already. The only “specialty” item is puff pastry, and even that is just a quick trip to the freezer aisle. I’m particular about three things here, and I’ll tell you exactly why.
For the Filling
Almond flour (1 cup / 100g) — Not almond meal. Almond flour is finely ground and makes the filling smooth. Almond meal is chunky and will make the texture gritty. You can find it in the baking aisle or near the specialty flours.
Granulated sugar (½ cup / 100g) — Just regular white sugar. It helps caramelize the edges. If you’re using brown sugar, it’ll make the filling darker and more molasses-heavy, which is fine, but white keeps it light and nutty.
Unsalted butter (½ cup / 115g, softened) — This needs to be room temperature. Softened butter mixes into the almond flour to create that creamy, spreadable paste. Cold butter won’t blend properly.
Egg (1 large) — Just one. It binds the filling together. Don’t overbeat it; just whisk it in.
Vanilla extract (1 teaspoon) — Pure vanilla, please. I don’t use the cheap stuff here; the flavor needs to shine through the almonds.
Cinnamon (½ teaspoon) — Warmth. Essential for fall vibes. Nutmeg works too, but cinnamon is the classic pairing with pears.
For the Fruit
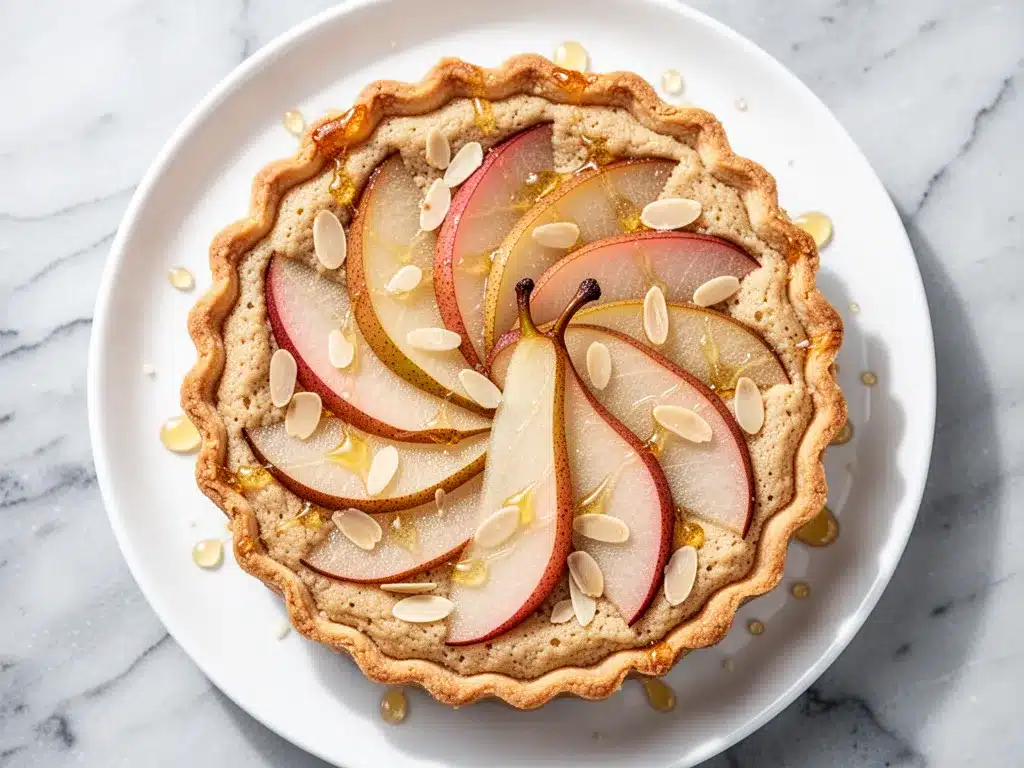
Pears (4-5 medium, sliced) — Bosc or Anjou pears hold their shape best. I used Bartlett last time and they turned into mush (delicious mush, but messy). Look for pears that are ripe but still firm. If they’re rock hard, they won’t cook down nicely. If they’re too soft, they’ll disintegrate.
Honey (3 tablespoons) — This is your glaze. Use a mild honey like clover or wildflower. Stronger honeys like buckwheat will overpower the delicate pear flavor.
For the Crust
Puff pastry sheets (1 or 2 sheets, thawed) — I usually buy a box with two sheets and freeze one for later. Thaw it in the fridge overnight or on the counter for 30-40 minutes. It should be pliable but still cold.
Extra egg wash (1 egg beaten with 1 tbsp water) — This is for brushing the pastry before baking. It gives it that beautiful, shiny, golden-brown finish. Skip it if you’re lazy, but the color difference is noticeable.
Flaked sea salt (optional) — A pinch on top after baking. It contrasts the sweetness beautifully. I add it because it makes the dessert taste more complex.
Equipment Needed
You don’t need a fancy kitchen for this. Here’s what I actually use:
Baking sheet — I use a standard half-sheet pan. Make sure it’s large enough to hold the tart with room for the folded edges. If your tart is huge, you might need two sheets or a large roasting pan.
Parchment paper — Line your baking sheet. Puff pastry can stick, and honey drips are sticky nightmares. Parchment saves your pan and makes cleanup instant.
Small bowl — For mixing the almond filling. A ramekin works too.
Pastry brush — For the egg wash and honey glaze. A silicone one is easy to clean. A regular paintbrush works in a pinch (just make sure it’s clean!).
Sharp knife — For slicing the pears. A serrated knife works well if the pears are a bit soft.
Spreader — A butter knife or small offset spatula to spread the almond filling. You don’t need to be perfect; rustic is the goal.
How to Make It: Step-by-Step
Alright, let’s make this! I’m walking you through exactly how I do it, including the little tricks I’ve picked up so your tart doesn’t end up a soggy mess.
Step 1: Prep Your Oven and Pears (5 minutes)
Preheat your oven to 400°F (200°C). This needs to be hot enough to puff the pastry quickly. While it heats, peel and slice your pears. I like to leave the peels on for color and texture, but if your pears are thick-skinned, peel them. Slice them into thin wedges, about ¼-inch thick. If some slices are huge, cut them in half so they cook evenly.
Step 2: Make the Almond Filling (3 minutes)
In a small bowl, mix the softened butter and sugar until creamy. Add the almond flour, egg, vanilla, and cinnamon. Stir until it forms a thick, paste-like consistency. It should look like wet sand. If it’s too dry, add a teaspoon more butter. If it’s too wet, add a sprinkle more almond flour.
Step 3: Roll and Fold the Pastry (5 minutes)
Place your thawed puff pastry sheet on a parchment-lined baking sheet. Don’t roll it out; just unfold it if it was rolled up. Spread the almond filling evenly over the pastry, leaving a 1-inch border around the edges. This border is crucial—it’s where you’ll fold the crust over. If you spread it to the edge, the filling will leak out and burn.
Step 4: Arrange the Pears (5 minutes)
Place the pear slices on top of the almond filling. You can arrange them in concentric circles or just pile them in the center like a rustic mound. I usually just scatter them, but if you want it to look pretty, overlap them slightly. Don’t worry about perfection; the folding will hide most of it.
Step 5: Fold the Crust (3 minutes)
This is the fun part. Take the 1-inch border of pastry and fold it over the pears, pinching the edges to seal. You don’t need to fold it all the way around neatly. Just pull up sections of the crust over the fruit, leaving some pear exposed in the middle. It should look like a messy, beautiful nest. Tuck the ends under if they’re sticking out.
Step 6: Egg Wash and Bake (25-30 minutes)
Brush the folded pastry edges with the egg wash. This ensures they turn golden and crisp. Bake for 25-30 minutes. You’ll know it’s done when the pastry is puffed and deep golden brown, and the filling is bubbling through the gaps. If the edges are browning too fast, cover them with a strip of foil.
Step 7: Honey Glaze (2 minutes)
While the tart bakes, warm the honey in the microwave for 15 seconds so it’s runny. As soon as you pull the tart out of the oven, brush the warm honey over the pears and the pastry. The heat will make the honey soak in slightly and create a glossy sheen. Let it cool for 10 minutes before slicing. The filling will be molten hot!
Expert Tips & Tricks
Here’s everything I’ve learned from making this dozens of times. These tips will save you from my mistakes.
- Keep the Pastry Cold — If your pastry gets warm and soft while you’re working, pop it in the fridge for 10 minutes before baking. Warm pastry doesn’t puff; it just melts. Cold pastry = flaky layers.
- Don’t Skip the Egg Wash — I know it’s one more bowl to wash, but the egg wash is what gives that professional bakery shine. Without it, the pastry looks pale and doughy.
- Use a Baking Sheet, Not a Pie Plate — This is a rustic tart, not a pie. You want the filling exposed and the crust free-standing. A baking sheet allows the bottom to crisp up. If you use a pie plate, the bottom stays soggy.
- Watch the Honey — Honey burns easily. If your tart is done but the honey hasn’t been added yet, wait until the very end. Don’t put it in before baking unless you want caramelized, almost burnt pears (which some people love, but it’s risky).
- Slice with a Sawing Motion — Because of the puff pastry layers, a regular knife can crush the tart. Use a serrated knife and saw gently through the crust. Clean the blade between slices for neat pieces.
Variations & Substitutions
Once you’ve nailed the basic version, here’s how you can mix it up. I’ve tried all of these.
Apple Version — Swap pears for thinly sliced apples. Use Granny Smith for tartness or Honeycrisp for sweetness. Apples take slightly longer to cook, so you might need an extra 5 minutes in the oven.
Rhubarb Twist — Mix sliced rhubarb with the pears. Rhubarb is tart, so add an extra tablespoon of sugar to the almond filling. This is a classic fall combination.
Maple Glaze — Swap the honey for pure maple syrup. It adds a deeper, woodsy flavor that pairs amazingly with almonds. Use maple syrup instead of honey for the glaze.
Gluten-Free Crust — Use a gluten-free puff pastry sheet. Brands like Dufour make excellent ones. The rest of the recipe stays the same.
Vegan Option — Use vegan butter for the filling and a flax egg (1 tbsp ground flax + 3 tbsp water) instead of the regular egg. Use maple syrup for the glaze. The texture will be slightly different but still delicious.
Add Nuts — Sprinkle sliced almonds or chopped walnuts over the almond filling before adding the pears. Adds extra crunch.
Serving & Storage
How to Serve:
I usually serve this warm, right out of the oven. It’s fantastic with a dollop of whipped cream or a scoop of vanilla ice cream. The contrast of hot tart and cold cream is life-changing. For a lighter option, serve it with a dollop of Greek yogurt.
Side Dishes:
This is a dessert, so keep sides simple. A crisp apple cider or a glass of Moscato wine pairs beautifully. If you’re serving it for brunch, it goes great with sourdough focaccia if you’re making a savory-sweet spread, or alongside some fresh fruit jam.
Storage:
Store leftovers in an airtight container at room temperature for up to 2 days. The pastry will soften slightly, which some people prefer. If you want it crisp, reheat slices in a toaster oven for 5 minutes.
Refrigerator:
You can refrigerate it for up to 4 days, but the pastry will lose its flakiness. Bring to room temperature before serving.
Freezing:
This tart doesn’t freeze well after baking. The pastry becomes soggy upon thawing. You can freeze the unbaked tart on the baking sheet, then transfer to a bag. Bake from frozen, adding 5-10 minutes to the cook time.
Nutrition Information
I’m not a nutritionist, but here’s the breakdown if you’re tracking. This is a rich dessert, so portion control is key.
Per Serving (based on 8 slices):
– Calories: 320
– Protein: 5g
– Carbs: 35g
– Fiber: 3g
– Sugar: 18g
– Fat: 18g
– Saturated Fat: 8g
– Cholesterol: 45mg
– Sodium: 120mg
What’s Good:
– Almond flour provides healthy fats and protein.
– Pears offer fiber and vitamins.
– It’s naturally gluten-free if you use GF pastry.
What to Know:
– High in calories due to butter and pastry.
– Contains dairy and nuts.
– Moderate sugar content from honey and fruit.
Final Thoughts
So that’s my go-to rustic fall pear almond tart with honey glaze! I’ve probably talked your ear off at this point, but when you make a recipe this often, you have a lot to say about it. This tart has saved me more times than I can count. It’s my answer to “what’s for dessert” when I want something that looks impressive but requires zero stress. My guests are always blown away, and I’m just happy I didn’t have to make a pie crust.
Make it yours! Try different fruits, swap the honey for maple, or add extra nuts. The best recipes are the ones you adapt to your tastes. If you make this, drop a comment and let me know what you think! I love hearing how recipes turn out in your kitchen. And if something doesn’t work, tell me that too—I’m here to help troubleshoot.
Happy baking! And I hope your kitchen smells half as good as mine does right now.
Frequently Asked Questions
Can I use frozen pears?
You can, but they’ll release a lot of water. Thaw them first and pat them dry with a paper towel. You might need to bake it a few minutes longer to evaporate the excess moisture. Fresh is always better for texture, but frozen works in a pinch.
Why did my puff pastry not puff?
Usually, this means the pastry got too warm before baking. The butter layers need to stay cold so they create steam in the oven. Also, make sure your oven was fully preheated. A cold oven = flat pastry.
Can I make this ahead of time?
You can assemble it the night before and keep it in the fridge covered. Take it out 30 minutes before baking to let the pastry warm up slightly. Or, bake it fully and reheat slices in the morning. It tastes great either way.
What kind of pears are best?
Bosc pears are my top choice because they hold their shape well. Anjou pears are also good. Avoid very soft pears like Conference unless you’re okay with a mushier filling. Look for pears that yield slightly to pressure.
Can I use almond meal instead of almond flour?
You can, but the texture will be coarser. Almond flour is finely ground and makes the filling smooth. Almond meal is more like coarse sand. If that’s all you have, it’ll still taste good, just not as silky.
How do I reheat leftovers?
The best way is a toaster oven or regular oven at 350°F for 10 minutes. This restores the flakiness. The microwave works but makes the pastry soft. If you use the microwave, do it in short bursts so it doesn’t get chewy.
Pin This Recipe!
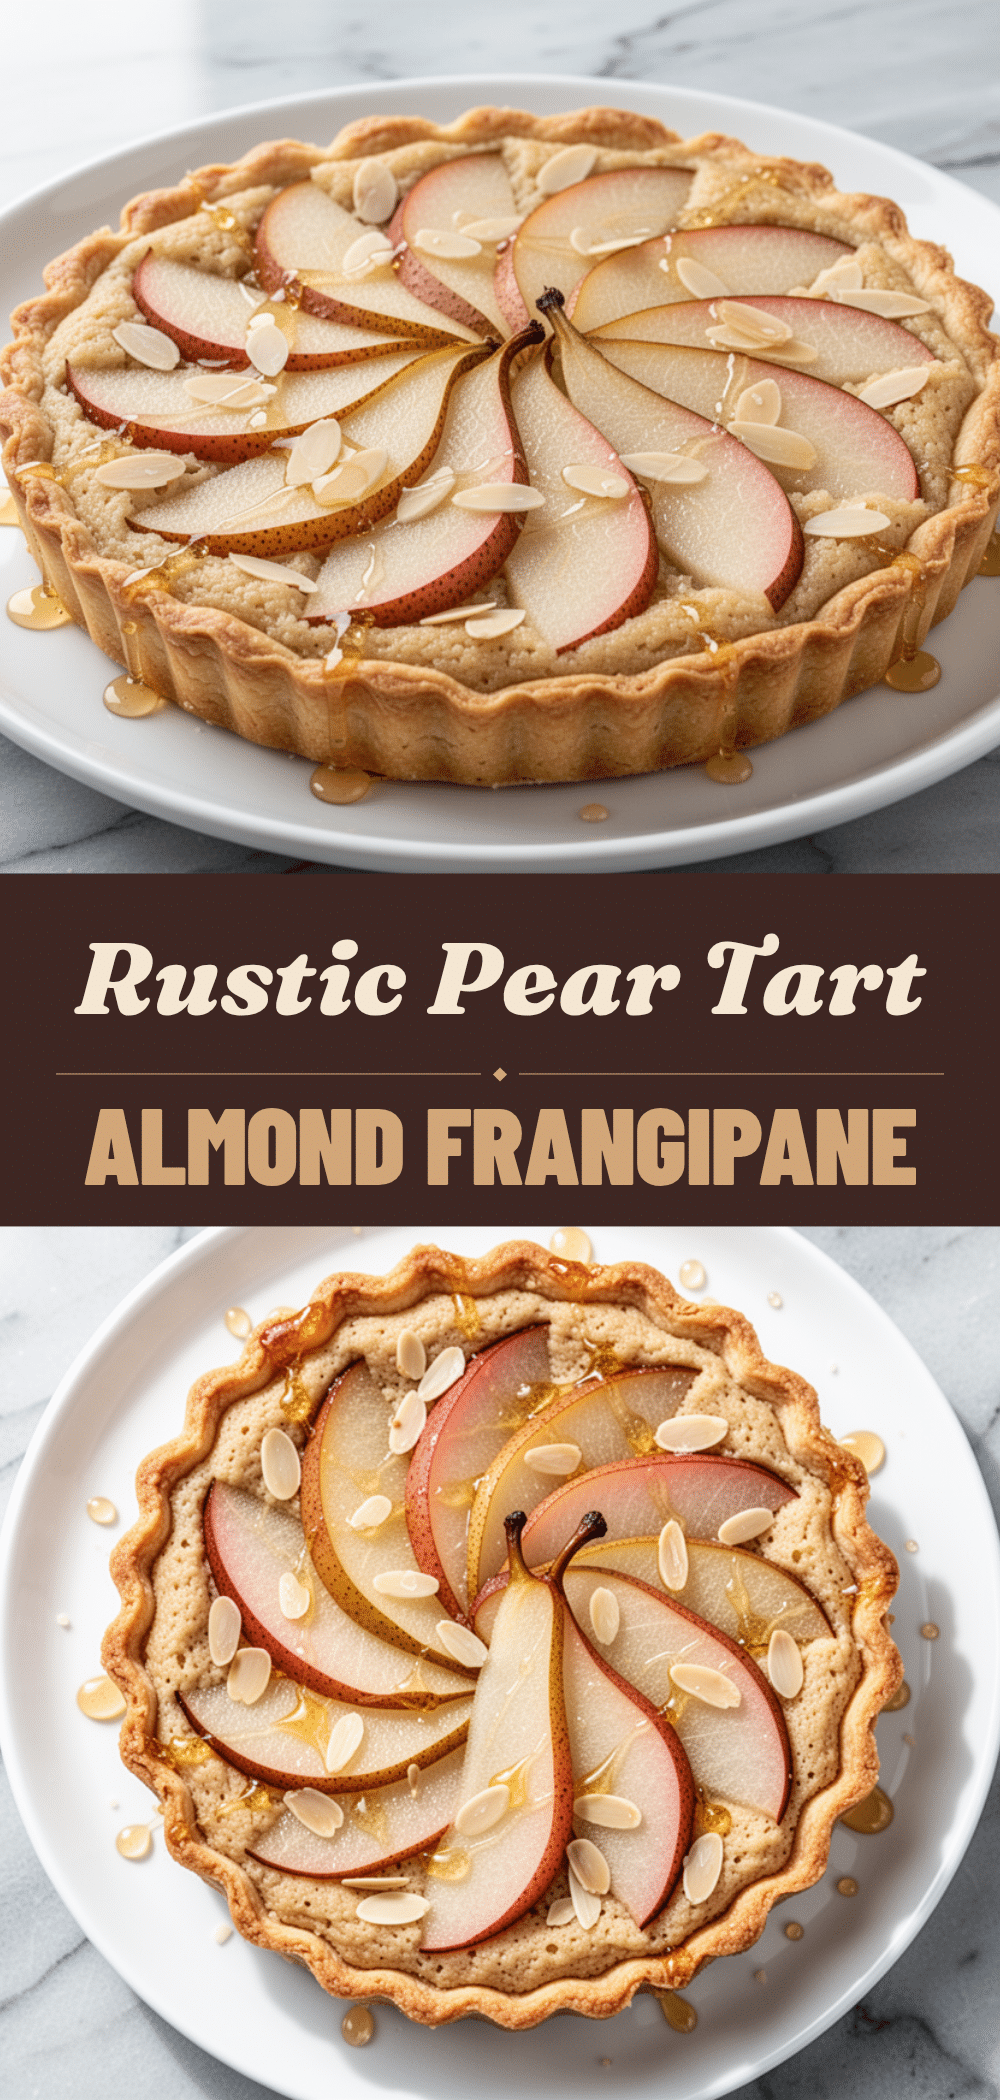
Rustic Fall Pear Almond Tart: Easy Apple Pie Alternative
- Total Time: 48 minutes
- Yield: 8 servings 1x
Description
A stress-free, rustic tart using store-bought puff pastry, almond filling, and ripe pears. It requires no rolling pin or food processor and tastes like autumn in every bite.
Ingredients
- 1 cup (100g) almond flour
- 1/2 cup (100g) granulated sugar
- 1/2 cup (115g) unsalted butter, softened
- 1 large egg
- 1 teaspoon vanilla extract
- 1/2 teaspoon cinnamon
- 4–5 medium pears (Bosc or Anjou), sliced
- 3 tablespoons honey
- 1 or 2 sheets puff pastry, thawed
- 1 egg beaten with 1 tbsp water (for egg wash)
- Flaked sea salt (optional)
Instructions
- Preheat oven to 400°F (200°C). Peel and slice pears into 1/4-inch thick wedges.
- In a small bowl, mix softened butter and sugar until creamy. Add almond flour, egg, vanilla, and cinnamon; stir until a thick paste forms.
- Place thawed puff pastry on a parchment-lined baking sheet. Spread almond filling evenly over the pastry, leaving a 1-inch border.
- Arrange pear slices on top of the filling in concentric circles or a rustic mound.
- Fold the 1-inch pastry border over the pears, pinching edges to seal and leaving some fruit exposed.
- Brush folded pastry edges with egg wash. Bake for 25-30 minutes until golden brown and bubbling.
- While baking, warm honey in the microwave for 15 seconds. Brush warm honey over the hot tart immediately after removing from oven.
- Let cool for 10 minutes before slicing.
Notes
Keep pastry cold to ensure flaky layers. Use a serrated knife to slice without crushing the crust. The tart tastes better the next day as flavors meld. Can be made gluten-free by using GF puff pastry.
- Prep Time: 18 minutes
- Cook Time: 30 minutes
- Category: Dessert
- Cuisine: American
Nutrition
- Serving Size: 1 slice
- Calories: 320
- Sugar: 18
- Sodium: 120
- Fat: 18
- Saturated Fat: 8
- Carbohydrates: 35
- Fiber: 3
- Protein: 5
Keywords: rustic tart, pear tart, almond tart, puff pastry dessert, fall dessert, easy dessert, gluten-free option, honey glaze