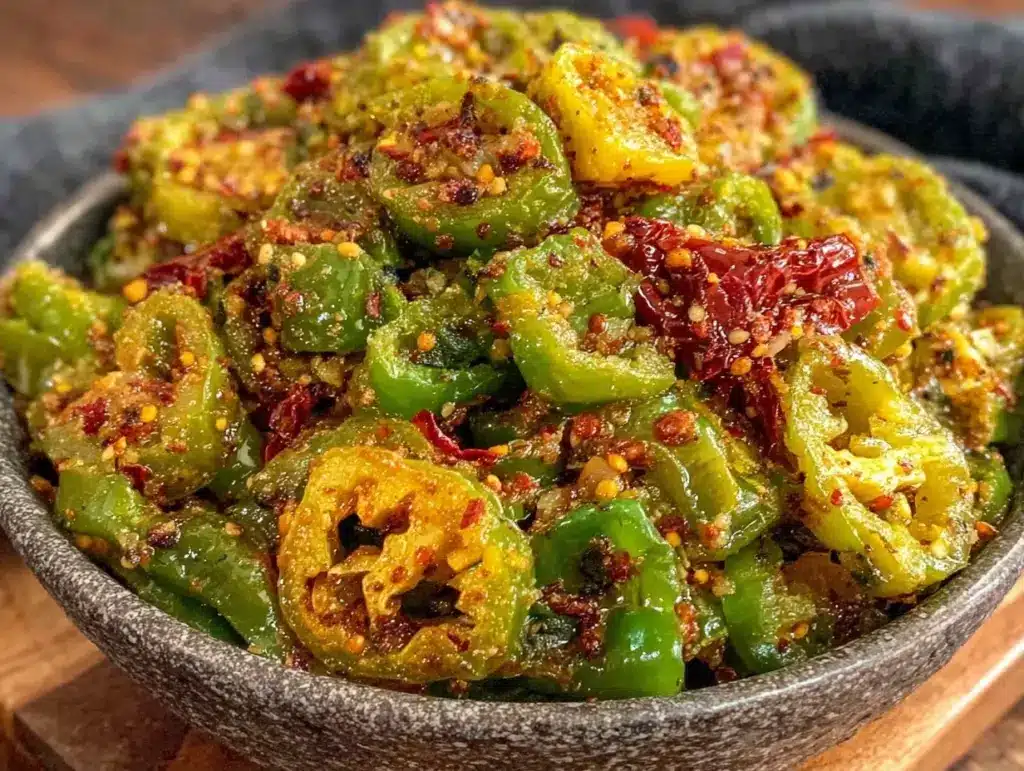
Last year, I was standing in front of my grill, sweating through a linen shirt, trying to salvage a batch of burgers that had dried out faster than I could flip them. The heat was brutal, the guests were arriving in ten minutes, and I had absolutely nothing to put on them except ketchup. Can you imagine? The shame.
Then my sister-in-law showed up with a Tupperware container that smelled like smoke and heaven. It was her roasted Hatch green chile salsa. I took one bite of a burger slathered in that bright, smoky, slightly sweet green goodness, and I forgot about the dry patties entirely. Everyone rushed the container. People were scraping the sides with tortilla chips.
That was the moment I realized I needed this recipe in my life. Not just for holidays, but for any time I wanted to turn a simple dinner into a celebration. This roasted Hatch green chile salsa is gluten-free by nature, requires only three core ingredients, and tastes like a summer vacation in a bowl.
I’ve tested this salsa at least a dozen times over the last two summers. I’ve burned batches. I’ve under-roasted them. I’ve even tried using jarred peppers once (don’t do it). Each time, I got closer to that perfect balance of char, brightness, and depth. Now, I make this salsa weekly. It’s the secret weapon in my grilling arsenal, and it’s about to become yours too.
Why You’ll Love This Roasted Hatch Green Chile Salsa
This isn’t just another dip. It’s a flavor bomb that changes everything it touches. Here’s why I keep making it, and why you will too:
Stupid Simple Ingredients — Seriously, three main ingredients. Hatch green chiles, onions, and salt. Maybe some garlic if you’re feeling fancy. I don’t need a pantry full of spices to make this work. If you can roast vegetables, you can make this.
Gluten-Free & Clean — No hidden thickeners, no preservatives, no mystery powders. It’s naturally gluten-free, dairy-free, and vegan. I’ve served this to my celiac friend, and she was so happy she cried. It’s proof that you don’t need processed junk to get great flavor.
Smoky & Bright — The roasting process caramelizes the natural sugars in the chiles, giving you this incredible smoky sweetness, while the fresh onions keep it bright and fresh. It’s not just hot; it’s complex. It’s the kind of salsa that makes people ask, “What is this magic?”
Grill-Ready — If you’re already firing up the grill for burgers, steaks, or corn, this salsa is the perfect companion. It cuts through the richness of fatty meats and adds a refreshing kick. I pair it with everything from grilled salmon to simple chicken thighs.
Makes Amazing Leftovers — It tastes even better the next day. The flavors meld together overnight. I deliberately make extra so I have something cool and tangy for lunch the next day. It’s great on tacos, eggs, or just with chips.
Budget-Friendly — Hatch chiles are seasonal, which means they’re affordable when they’re in season. I buy them in bulk when they’re at their peak and roast them all at once. It’s way cheaper than buying artisanal salsa at the store.
This is my go-to when I want to impress without stress. No complicated techniques, no weird ingredients, just reliable, delicious food that makes everyone happy.
Ingredients You’ll Need
Here’s the best part: you probably have most of this already, except for the star of the show. Let’s talk about what goes into this roasted Hatch green chile salsa and why each piece matters.
The Star: Hatch Green Chiles
Hatch Green Chiles (2-3 pounds, fresh) — These are the meat and potatoes of this recipe. If you’re in New Mexico or nearby during August, you know the deal. If you’re not, look for them in the produce section of larger grocery stores or online. They have a unique flavor—earthy, slightly sweet, with a gentle heat that builds. Tip: Look for chiles that are firm and have a few char marks already. This means they’ve been roasted by the farmers, saving you a step! If you can’t find fresh, frozen roasted Hatch chiles work in a pinch, but fresh is best for texture.
The Aromatics
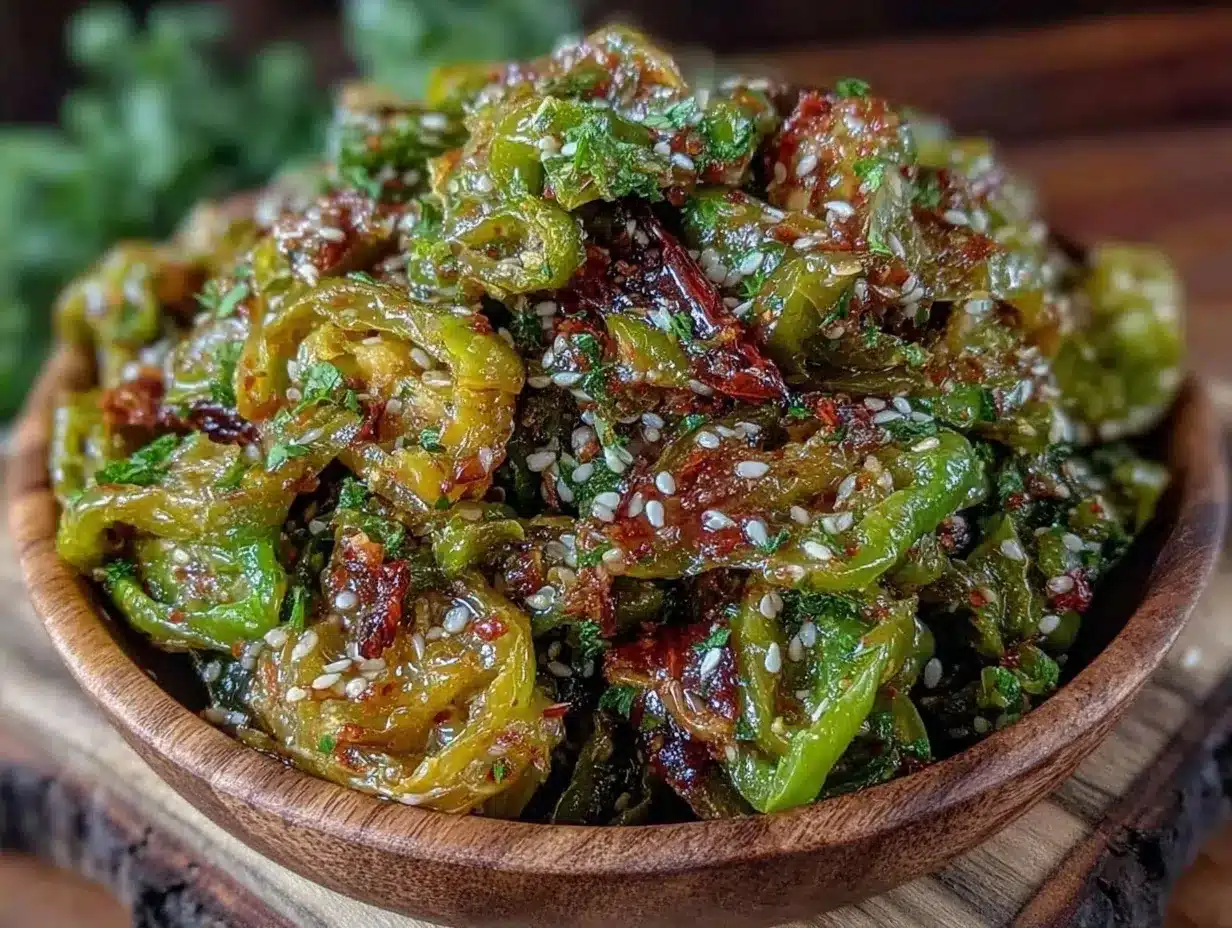
Yellow Onion (1 large, chopped / about 300g) — I use yellow onion because it’s sweet and savory. It balances the heat of the chiles perfectly. White onion is too sharp. Red onion changes the color too much. Yellow is the gold standard here.
Garlic (4 cloves, minced / about 2 tablespoons) — Fresh garlic only. Do not use jarred garlic. It has a metallic taste that clashes with the smoky chiles. Mince it finely so it disperses evenly. If you’re sensitive to raw garlic, you can roast the cloves whole with the chiles, but I prefer the punch of raw minced garlic added at the end.
Fresh Cilantro (½ cup, chopped / about 15g) — This adds that fresh, citrusy note that lifts the heavy roasted flavors. I use a good handful. If you hate cilantro (genetic taste aversion, I get it), substitute with fresh parsley or basil. It won’t be traditional, but it’ll still be good.
The Seasoning
Sea Salt (1 teaspoon / 6g) — I use kosher salt or sea salt. It’s crucial for bringing out the flavors. Taste as you go. You want it to be seasoned well, not bland.
Lime Juice (2 tablespoons / 30ml) — Freshly squeezed lime juice. Bottled juice tastes flat and waxy. Squeeze it yourself. It adds acidity that cuts through the richness of the roasted peppers.
Optional: Cumin (½ teaspoon) — If you like a little earthy warmth, add a pinch of ground cumin. It’s not traditional in every Hatch salsa, but I love it. Skip it if you want the pure chile flavor.
Optional: Olive Oil (1 tablespoon) — I usually don’t add oil because the chiles release their own moisture, but if your salsa seems dry, a drizzle of good olive oil can help emulsify it.
Equipment Needed
You don’t need fancy equipment for this. Here’s what I actually use:
Charcoal or Gas Grill — I prefer charcoal for the extra smoky flavor, but gas works fine. You need high heat to char the peppers properly.
Large Bowl — For covering the chiles after grilling. This steams them, making the skins easy to peel. A large mixing bowl works perfectly.
Cutting Board & Knife — For chopping onions and garlic. Sharp knife recommended—charred chile skins can be slippery and tricky to handle.
Food Processor or Blender — I use a food processor for a chunkier texture. If you want a smoother salsa, use a blender. For a rustic, hand-chopped style, just use your knife.
Peeling Bowl — The large bowl mentioned above is key. Don’t skip this step; it makes peeling the chiles so much easier.
How to Make It: Step-by-Step
Alright, let’s make this! I’m walking you through exactly how I do it, including the little tricks I’ve picked up over the years.
Step 1: Prep Your Grill (5 minutes)
Get your grill hot. I like medium-high heat, around 400-450°F. You want enough heat to char the outside of the chiles without burning them to a crisp. If you’re using a gas grill, turn all burners to high. If charcoal, spread the coals out for direct heat.
Step 2: Grill the Hatch Chiles (10-15 minutes)
Place the whole Hatch green chiles directly on the grill grates. Let them sit for 3-4 minutes until the skin blisters and blackens. Flip them and char the other side. Rotate every few minutes to get an even char all over. You want them blackened but still soft. Don’t rush this. If they’re still hard, they’ll be tough to peel. If they’re too mushy, they’ll turn into soup. Aim for tender with charred skin. Transfer the charred chiles to your large bowl.
Step 3: Steam and Peel (10 minutes)
Cover the bowl tightly with plastic wrap or a lid. Let the chiles steam in their own heat for 10 minutes. This loosens the skins. After 10 minutes, take a chile and gently rub off the charred skin with your fingers. It should slip right off. Some pieces of skin might stick—that’s okay. Leave the seeds in for heat, or remove them if you want it milder. I usually leave most of the seeds in because I like the kick. Place the peeled chiles in a bowl.
Step 4: Chop the Aromatics (5 minutes)
While the chiles are steaming, chop your onion and mince your garlic. Keep the onion chunks small—about ¼ inch pieces. You want them to be distributed evenly throughout the salsa. Chop the cilantro roughly.
Step 5: Combine and Blend (5 minutes)
Add the peeled chiles, chopped onion, minced garlic, and cilantro to your food processor. Pulse a few times to chop everything up. I like a chunky texture, so I pulse about 10-15 times. Don’t puree it into a smooth paste unless you want that. Add the salt and lime juice. Pulse once or twice to mix. Taste it. Does it need more salt? More lime? Adjust now.
Step 6: Rest and Serve
Transfer the salsa to a serving bowl. Let it sit for at least 15 minutes before serving. This allows the flavors to meld. The raw garlic and onion will mellow out, and the lime juice will integrate. Serve with tortilla chips, on tacos, or alongside grilled meats.
Total Time: About 45 minutes (mostly hands-off grilling and steaming)
Built-in Troubleshooting:
Skins won’t come off? They didn’t steam long enough. Cover them again for another 5 minutes.
Salsa too watery? Your chiles were very juicy. Drain excess liquid before blending, or let the salsa sit in a strainer for 10 minutes.
Too spicy? Remove some of the seeds and membranes from the chiles before blending. Or add a bit more onion or lime juice to balance it.
Too bland? Add more salt and lime juice. Taste again. It’s easy to adjust.
Expert Tips & Tricks
Here’s everything I’ve learned from making this dozens of times. These tips will save you from my mistakes.
Don’t Skip the Steam — This is the #1 tip. If you try to peel hot chiles without steaming them, you’ll burn your fingers and struggle. The steam is your friend. Be patient.
Save the Chile Oil — After peeling, there’s often some flavorful liquid left in the bowl. Don’t throw it away! Add a spoonful to the salsa for extra depth. Or use it to marinade chicken.
Roast Extra Onions — For a deeper flavor, roast the onion wedges on the grill alongside the chiles. It adds a smoky sweetness that’s incredible. Just chop them finely before adding.
Make It Ahead — This salsa actually improves after a day in the fridge. Make it the night before your party. It’ll be ready to go.
Adjust the Heat — Hatch chiles can vary in heat. If you want it milder, remove all seeds. If you want it hotter, add a jalapeño or a dash of cayenne.
Use a Food Processor for Chunky, Blender for Smooth — I prefer the food processor because it gives me control over the texture. A blender tends to puree everything too finely.
Variations & Substitutions
Once you’ve nailed the basic version, here’s how you can mix it up. I’ve tried all of these.
Roasted Red Pepper Salsa — Swap half the Hatch chiles for roasted red peppers. Adds sweetness and a different color. Great for kids.
Jalapeño Kick — Add 1-2 fresh jalapeños (seeds removed) to the grill. Increases the heat significantly.
Cilantro-Free — Use parsley or basil if you’re in the cilantro anti-group.
Avocado Lime — Fold in 1 diced avocado right before serving. Adds creaminess. Best eaten immediately.
Smoky Chipotle — Add 1 chipotle pepper in adobo sauce for a deeper, smokier heat.
Dietary Modifications:
Gluten-Free: Naturally gluten-free. Just check your tortilla chips.
Dairy-Free: Naturally dairy-free.
Vegan: Naturally vegan.
Low-Carb: Skip the onion if you’re strict, but a little onion is fine for most low-carb diets.
Serving & Storage
How to Serve: I usually serve this straight from the bowl at the dinner table. It looks rustic and fresh. But here are other ways I’ve enjoyed it:
Side Dishes: Grilled corn, black beans, rice, or turkey chili for a winter twist.
Toppings Bar: When I have guests, I put out: extra cilantro, lime wedges, crushed tortilla chips, and sour cream (if they eat dairy).
Wine Pairing: Not a wine expert, but my friend says a crisp Sauvignon Blanc or a light Rosé works great with this.
Storage Instructions:
Refrigerator: Store in an airtight container for up to 5 days. The flavors will deepen. It’s best eaten within 3 days for peak freshness.
Freezing: Yes, this freezes well! Portion it into freezer bags or containers. It’ll keep for 3 months. Thaw in the fridge overnight. The texture might be slightly softer, but the flavor is still great. Use it in cooked dishes like soups or stews if it gets too watery.
Pro tip: If the salsa separates in the fridge, just stir it well. It’s normal.
Nutrition Information
I’m not a nutritionist, but here’s the breakdown if you’re tracking.
Per Serving (based on 8 servings):
- Calories: 45
- Protein: 1g
- Carbs: 8g
- Fiber: 2g
- Sugar: 4g
- Fat: 0g
- Sodium: 150mg
What’s Good: Low calorie, high in Vitamin C from the chiles and lime, good source of fiber.
What to Know: Very low fat, naturally gluten-free and dairy-free. Sodium comes from added salt; reduce if needed.
My Take: Look, this is a vegetable-based salsa. It’s not a diet recipe per se, but it’s light and refreshing. It’s way better than store-bought salsa, which is often loaded with preservatives. When I want to make it richer, I add avocado or sour cream. But usually? I just eat it straight from the bowl with chips.
Final Thoughts
So that’s my roasted Hatch green chile salsa! I’ve probably talked your ear off at this point, but when you make a recipe this often, you have a lot to say about it.
This has saved summer dinners more times than I can count. It’s my answer to “what’s for dip?” when I’m tired, don’t want to buy processed snacks, and still want something that tastes really good. My kids are happy, my husband’s happy, and I’m happy because I’m not stressed about cooking.
Make it yours! Try different add-ins, swap in your favorite herbs, adjust the heat. The best recipes are the ones you adapt to your family’s tastes.
If you make this, drop a comment and let me know what you think! I love hearing how recipes turn out in your kitchen. And if something doesn’t work, tell me that too—I’m here to help troubleshoot.
Happy grilling! And I hope your backyard smells half as good as mine does right now.
Frequently Asked Questions
Can I use canned Hatch chiles instead of fresh?
You can, but the texture and flavor will be different. Canned chiles are softer and less smoky. If you use canned, drain them well and skip the grilling step. You’ll miss the charred flavor, but it’ll still be tasty. Fresh is always best for this recipe.
Why did my salsa turn out watery?
Hatch chiles have a high water content. If you didn’t drain them well after peeling, or if you blended them too long, it can get watery. Let the salsa sit in a fine-mesh strainer for 10-15 minutes to drain excess liquid. Or just accept it as a “salsa juice” and use it for drizzling!
How spicy is this salsa?
Hatch chiles range from mild to medium-hot. This recipe is moderately spicy. If you want it milder, remove all the seeds and membranes. If you want it hotter, add a jalapeño or leave more seeds in. Taste a raw chile before grilling to gauge the heat level.
Can I make this without a grill?
Yes! You can roast the chiles under the broiler in your oven. Place them on a baking sheet, broil on high for 5-7 minutes per side until charred. Then steam and peel as usual. The flavor won’t be as smoky, but it’ll still be delicious.
How long does this salsa last in the fridge?
It lasts up to 5 days in an airtight container. The flavors get better after a day, so it’s great to make ahead. If it starts to smell off or get moldy, discard it.
Can I freeze this salsa?
Absolutely. Freeze it in portions for up to 3 months. Thaw in the fridge overnight. The texture might be slightly softer, but the flavor remains excellent. Great for adding to soups, stews, or scrambled eggs.
Is this salsa gluten-free?
Yes, this roasted Hatch green chile salsa is naturally gluten-free. Just make sure your tortilla chips are certified gluten-free if you have celiac disease. Most corn tortilla chips are, but always check the label.
Pin This Recipe!
Roasted Hatch Green Chile Salsa: 3-Ingredient Gluten-Free Grilling Dip
- Total Time: 45 minutes
- Yield: 8 servings 1x
Description
A bright, smoky, and slightly sweet salsa made with roasted Hatch green chiles, onions, and lime juice. This naturally gluten-free, vegan, and dairy-free dip is perfect for grilling season and requires only a few simple ingredients.
Ingredients
- 2–3 pounds fresh Hatch green chiles
- 1 large yellow onion, chopped (about 300g)
- 4 cloves garlic, minced (about 2 tablespoons)
- 1 teaspoon sea salt or kosher salt
- 2 tablespoons fresh lime juice
- ½ cup fresh cilantro, chopped (about 15g)
- Optional: ½ teaspoon ground cumin
- Optional: 1 tablespoon olive oil
Instructions
- Preheat your charcoal or gas grill to medium-high heat (400-450°F).
- Place whole Hatch green chiles directly on the grill grates. Char for 3-4 minutes per side, rotating occasionally, until the skin is blackened and the chiles are tender but not mushy.
- Transfer the charred chiles to a large bowl and cover tightly with plastic wrap or a lid. Let them steam for 10 minutes to loosen the skins.
- While chiles steam, chop the yellow onion into small pieces (about ¼ inch) and mince the garlic.
- After steaming, rub the charred skins off the chiles with your fingers. Leave seeds in for heat or remove them for a milder salsa.
- Add the peeled chiles, chopped onion, minced garlic, and cilantro to a food processor.
- Pulse 10-15 times for a chunky texture (or blend longer for a smoother consistency).
- Add salt and lime juice. Pulse once or twice to mix. Taste and adjust seasoning as needed.
- Transfer to a serving bowl and let rest for at least 15 minutes before serving to allow flavors to meld.
- Serve with tortilla chips, on tacos, or alongside grilled meats.
Notes
If skins won’t come off, steam for another 5 minutes. If salsa is too watery, drain excess liquid before blending. For deeper flavor, roast onion wedges on the grill alongside the chiles. This salsa improves after sitting in the fridge for a day.
- Prep Time: 15 minutes
- Cook Time: 30 minutes
- Category: Appetizer
- Cuisine: Mexican
Nutrition
- Serving Size: Approximately 1/8 of
- Calories: 45
- Sugar: 4
- Sodium: 150
- Carbohydrates: 8
- Fiber: 2
- Protein: 1
Keywords: Hatch green chile salsa, roasted salsa, gluten-free dip, vegan salsa, grilling recipes, summer dips, New Mexican cuisine, 3-ingredient recipes


