My grandmother Rose didn’t believe in shortcuts. If she was making a cake, she didn’t just open a box and follow the instructions. She measured the flour twice. She creamed the butter until her arm actually ached. And she always, always made sure the pantry was stocked with the good stuff, not the cheap substitutes. I remember sitting on the kitchen counter in her small house in Ohio, watching her work, while the radio played low in the background. She was a woman who believed that love was an ingredient, but so was patience.
When I first started baking, I tried to make my grandmother’s Reese’s Peanut Butter Poke Cake using the quickest methods I could find online. I used a fork to poke holes. I microwaved the fudge. I rushed it. The result was a soggy, uneven mess that tasted nothing like the rich, indulgent dessert she used to make for Sunday suppers. It took me years to realize that the “poke” cake wasn’t just a gimmick; it was a technique that required respect for the ingredients and the process.
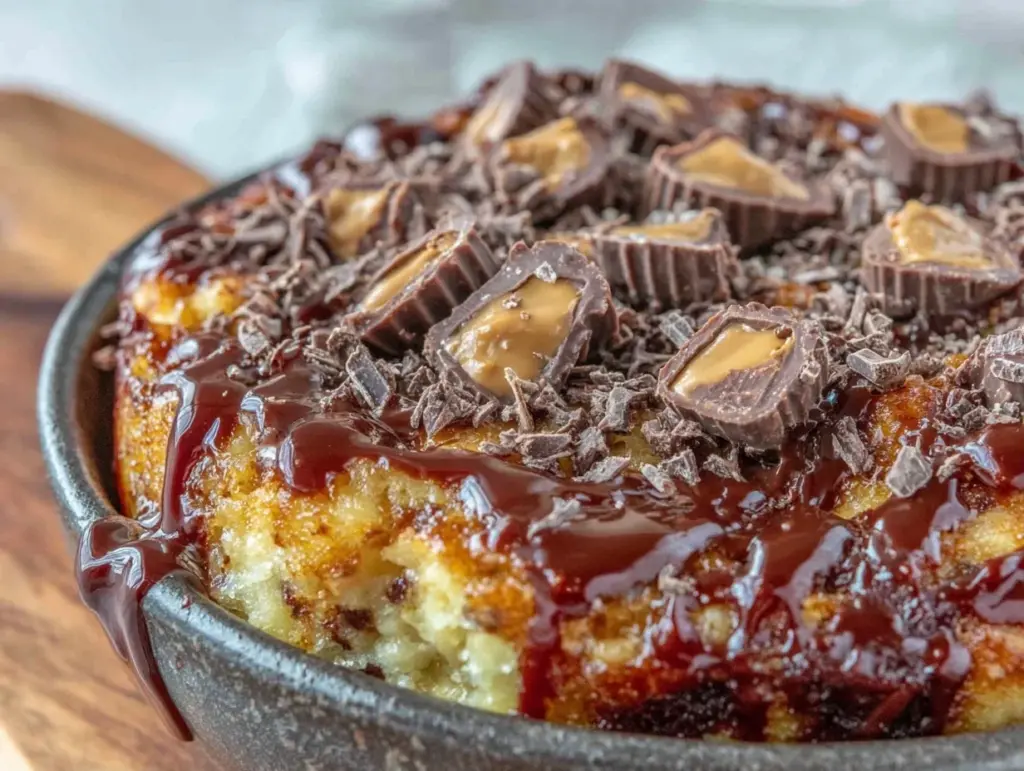
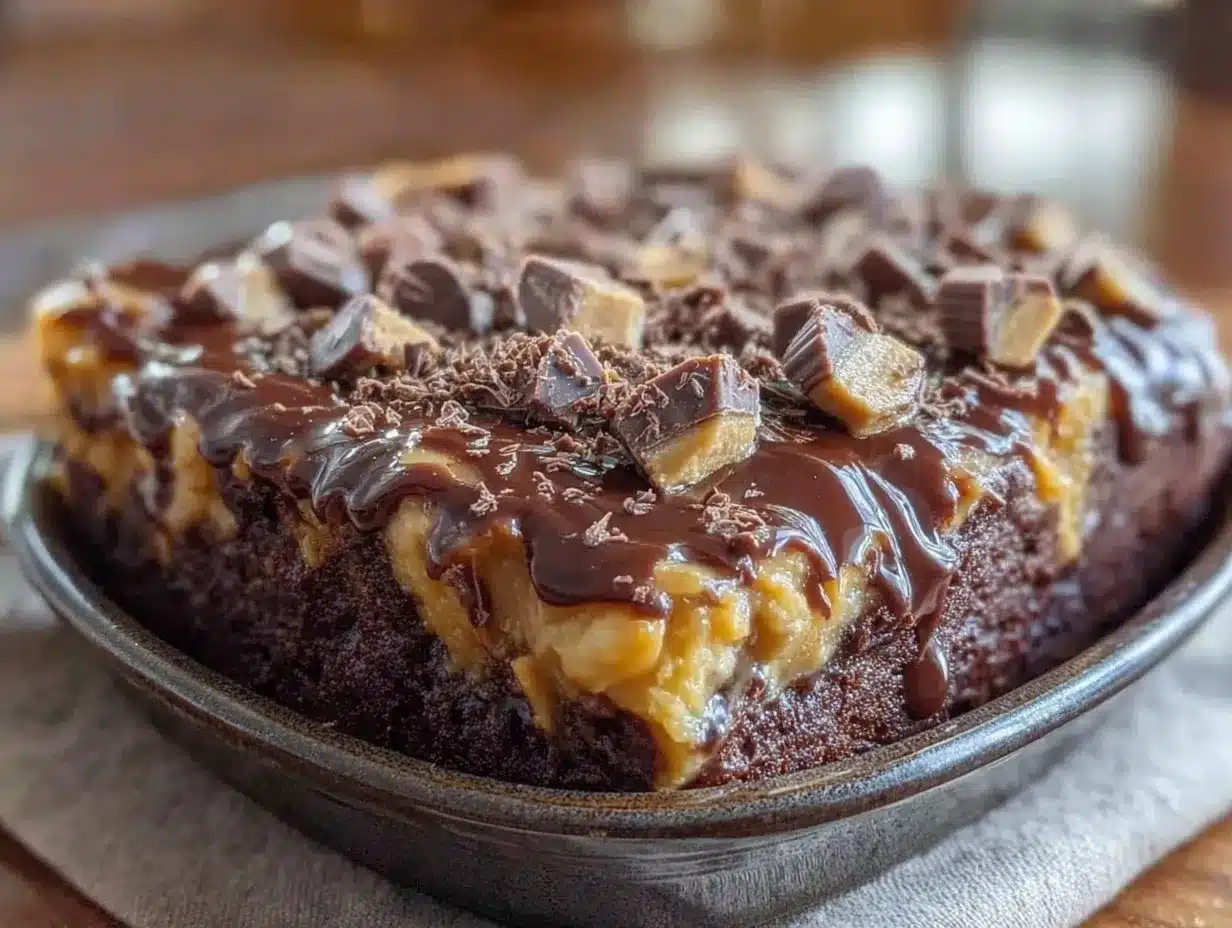
This Reese’s Peanut Butter Poke Cake with Fudge Drizzle is the real way. It’s not the fastest way. It’s not the hacky way. It’s the way I learned from watching Rose, and the way I’ve perfected over hundreds of tests in my own kitchen. It’s a cake that demands you slow down, that rewards you with a moist, peanut-buttery crumb soaked in sweet fudge and topped with a creamy, salty-sweet finish. It’s the dessert that stops conversations at the dinner table. It’s the one people ask for when they want to be impressed. And it’s absolutely worth the effort.
Why You’ll Love This Reese’s Peanut Butter Poke Cake
There are a lot of cakes out there. You can buy them in boxes, you can order them from fancy bakeries, you can even find them in the freezer aisle. But this Reese’s Peanut Butter Poke Cake with Fudge Drizzle is different. It’s a cake that feels like a hug from the inside out. Here’s why it has become the centerpiece of every celebration in my family, from birthdays to holiday dinners.
It’s Moist, Not Just Wet — There’s a fine line between a moist cake and a soggy one. I’ve made this cake enough times to know exactly where that line is. The key is in the timing of the poke and the temperature of the fudge. When done right, every bite is tender and rich, but the cake holds its structure. It doesn’t fall apart on the plate. It’s substantial. It feels like a real dessert, not a snack.
The Fudge Soaks In Perfectly — Most poke cake recipes fail here because the liquid just sits on top or makes the bottom dense. I’ve developed a method for poking the holes at the exact right depth and pouring the fudge at the perfect temperature so it seeps down into the crumb without flooding it. The result is a cake that is infused with chocolate flavor from the top all the way to the bottom. It’s a game-changer. If you’ve ever wondered why your cakes sometimes turn out dry, check out my fudgy pumpkin brownies for a similar technique on moisture control.
It Tastes Like Childhood — Let’s be honest. This cake tastes like Reese’s Peanut Butter Cups. But better. Because it’s fresh. Because it’s made with real butter and real chocolate. Because it’s not wrapped in foil. It brings back that specific joy of eating a treat that feels forbidden but is actually just made with love. It’s the kind of dessert that reminds people of their own childhoods, even if they don’t say it out loud.
It’s a Crowd-Pleaser — I’ve served this to picky eaters, to chocolate snobs, and to people who claim they “don’t really like cake.” Everyone loves it. The combination of peanut butter and chocolate is a classic for a reason. It’s comforting. It’s familiar. But the presentation—drizzled with extra fudge, topped with crushed peanuts and maybe a few Reese’s Pieces—makes it feel special. It feels like you went to the trouble. And people notice that.
Ingredients You’ll Need
Before we get to the mixing and poking, let’s talk about what goes into this cake. I’m particular about a few things here, not because I’m fancy, but because I want this cake to taste the way it’s supposed to taste. You can substitute things, but you’ll notice the difference. I’ve listed the specifics below so you can make informed choices.
For the Cake Base
Yellow Cake Mix (1 box, 15.25 oz / 432g) — I know, I know. Using a box mix sounds like cheating. But for a poke cake, a good yellow cake mix provides the perfect neutral, buttery base that lets the fudge and peanut butter shine. Don’t use vanilla cake mix; it’s too light. Use a sturdy yellow cake. I prefer Wilton or Krusteaz because they have a richer flavor. If you want to make it from scratch, that’s fine, but you’ll need to adjust the liquid ratios. For this recipe, the box is the reliable choice.
Chocolate Pudding Mix (1 box, 3.4 oz / 96g) — This is the secret weapon. Adding dry instant chocolate pudding to your cake mix makes the cake denser, moister, and more chocolatey. It’s not optional if you want that rich, bakery-style texture. I use Jell-O brand because it dissolves evenly. Make sure it’s the dry mix, not the instant pudding cups.
Vegetable Oil (½ cup / 120ml) — Butter can make a cake tender, but oil keeps it moist for days. This is a cake you might store for a bit, and oil ensures it doesn’t dry out. Use a neutral oil like canola or vegetable. Olive oil will change the flavor too much.
Water (1 cup / 240ml) — Some recipes call for milk, but water helps the cake rise higher and stay lighter. If you use milk, the cake might be too dense for poking. Water is the right balance here.
Eggs (3 large) — Room temperature eggs are best. They blend into the batter more smoothly. I take them out of the fridge about 30 minutes before I start baking.
For the Fudge Soak
Chocolate Fudge Icing (1 jar, 16 oz / 454g) — Do not make your own fudge from scratch for this step unless you want to spend hours. I use a jar of Pillsbury or Wilton chocolate fudge icing. It’s designed to be spreadable and pourable. Warm it up before pouring. Cold fudge will seize and not soak in. This is non-negotiable.
Milk (2-3 tablespoons) — You’ll add a little milk to the warm fudge to thin it out just enough so it flows through the holes. Don’t overdo it. You want it pourable, not watery.
For the Peanut Butter Frosting
Butter (½ cup / 115g, softened) — Unsalted butter is best so you can control the salt. Make sure it’s truly softened, not melted. Melted butter will make the frosting greasy.
Peanut Butter (½ cup / 128g) — Use creamy, smooth peanut butter. Jif or Skippy work well. Do not use natural peanut butter with oil separation; it will make the frosting runny and weird. You want that classic, processed peanut butter flavor and texture here.
Powdered Sugar (3-4 cups / 360-480g) — Sift this! I can’t stress this enough. Lumpy powdered sugar will ruin your frosting. Sift it once, or twice if it’s really clumpy. You want it light and airy.
Heavy Cream (2-3 tablespoons) — Add this slowly to get the right consistency. You want a frosting that is spreadable but holds its shape. If it’s too stiff, add more cream. If it’s too thin, add more sugar.
Salt (½ teaspoon) — A pinch of salt cuts the sweetness. It’s essential for balancing the peanut butter and chocolate.
For the Topping
Crushed Peanuts (½ cup) — Roasted, salted peanuts are best. Crush them roughly. You don’t want powder; you want texture. You can buy them crushed or crush them in a bag with a rolling pin.
Reese’s Pieces or Mini Peanut Butter Cups (1 cup) — For garnish. This is where you can get fancy or keep it simple. Reese’s Pieces are easier to sprinkle evenly. Mini cups look more indulgent. I use both.
Equipment Needed
You don’t need a fancy kitchen for this. Here’s what I actually use.
9×13 Inch Baking Pan — A metal pan is best. Glass pans retain heat differently and can overcook the edges. I use a standard aluminum 9×13 pan. Make sure to grease it well with butter or non-stick spray.
Hand Mixer or Stand Mixer — You need to beat the frosting until it’s light and fluffy. A hand mixer works fine. A stand mixer is easier but not required.
Tuning Fork or Wooden Spoon Handle — For poking the holes. A fork works, but a tuning fork gives you more control and makes cleaner holes. I use the handle of a wooden spoon because it’s round and smooth. Don’t use a knife; you’ll tear the cake.
Measuring Cups and Spoons — Accuracy matters. Use metal measuring cups for dry ingredients and liquid measuring cups for wet.
Spatula — A rubber spatula is essential for scraping the bowl and folding in ingredients.
Colander or Sieve — For sifting the powdered sugar. If you don’t have one, just sift through your fingers into the bowl.
How to Make It: Step-by-Step
Alright, let’s make this. I’m walking you through exactly how I do it, including the little tricks I’ve picked up over the years. This isn’t a race. Take your time.
Step 1: Prep Your Oven and Pan (5 minutes)
Preheat your oven to 350°F (175°C). Grease your 9×13 inch baking pan thoroughly. I like to use butter and then dust it with a little flour, tapping out the excess. This ensures the cake doesn’t stick. If you’re using a non-stick pan, just greasing is fine. Set the pan aside.
Step 2: Mix the Cake Batter (5 minutes)
In a large bowl, combine the yellow cake mix and the dry chocolate pudding mix. Whisk them together briefly to distribute the pudding powder evenly. Add the vegetable oil, water, eggs, and salt. Beat with a hand mixer on medium speed for about 2 minutes. The batter should be smooth and thick. Don’t overmix after this point, or the cake will be tough. Pour the batter into the prepared pan and spread it evenly.
Step 3: Bake the Cake (30-35 minutes)
Place the pan in the center of the oven. Bake for 30-35 minutes. The cake is done when a toothpick inserted into the center comes out clean or with just a few moist crumbs. Do not overbake. You want this cake to be tender. If it’s dry, it won’t absorb the fudge properly. Let the cake cool in the pan for 10 minutes. It needs to be warm, not hot, for the next step.
Step 4: Poke the Holes (5 minutes)
This is the crucial step. Use your tuning fork or wooden spoon handle to poke holes all over the cake. Space them about 1 inch apart. Go all the way to the bottom of the pan. Don’t be shy. If you’re worried about making a mess, just do it over the sink or on a baking sheet. The goal is to create channels for the fudge to flow into. I’ve seen people poke too few holes, and the fudge just sits on top. That’s not what we want. We want every bite to have fudge.
Step 5: Pour the Fudge Soak (5 minutes)
In a microwave-safe bowl, warm the jar of chocolate fudge icing for 20-30 seconds. Stir in 2 tablespoons of milk until it’s smooth and pourable. If it’s still too thick, add another tablespoon. The consistency should be like warm honey. Pour the warm fudge evenly over the warm cake. It will soak in immediately. If you see puddles, gently tilt the pan to distribute it. Let the cake cool completely to room temperature. This can take 1-2 hours. Do not skip this. If the cake is warm when you add the frosting, the frosting will melt and slide off.
Step 6: Make the Peanut Butter Frosting (10 minutes)
In a large bowl, beat the softened butter until creamy. Add the peanut butter and beat until combined. Add the salt. Gradually add the sifted powdered sugar, one cup at a time, beating on low speed. Once all the sugar is added, beat on high for 2 minutes until light and fluffy. Add the heavy cream, one tablespoon at a time, beating until you reach a spreadable consistency. The frosting should be smooth and hold its shape but still be soft enough to spread easily.
Step 7: Frost and Garnish (10 minutes)
Spread the peanut butter frosting evenly over the cooled cake. Use an offset spatula for a smooth finish, or leave it rustic with swirls. Sprinkle the crushed peanuts over the top. Drizzle with extra warm fudge icing if you want that extra indulgence. Top with Reese’s Pieces or mini peanut butter cups. This is where you get creative. You can make a pattern, or just scatter them. I like to scatter them generously.
Step 8: Chill and Serve (30 minutes)
Refrigerate the cake for at least 30 minutes to set the frosting. This makes it easier to cut. Slice into squares and serve. The cake is best eaten the same day, but it will keep in the fridge for up to 3 days. If you’re making it for a party, make it the night before. It tastes even better the next day as the flavors meld.
Expert Tips & Tricks
Here’s everything I’ve learned from making this dozens of times. These tips will save you from my mistakes.
The Cake Must Be Warm, Not Hot — When you poke the holes, the cake should be warm. If it’s hot, it will tear. If it’s cold, the fudge won’t soak in as well. The 10-minute cool-down is perfect. If you’re in a rush, you can poke it when it’s slightly cooler, but you’ll need to let the fudge sit longer to absorb.
Warm the Fudge Properly — Cold fudge is like concrete. It won’t soak in. Warm it until it’s pourable. But don’t overheat it, or it might separate. Stir it well after heating.
Don’t Skimp on the Peanut Butter — Use real, creamy peanut butter. Natural peanut butter will make the frosting oily. This is a specific texture we’re going for, and natural PB just doesn’t deliver.
Sift Your Sugar — I can’t say this enough. Lumpy frosting is the enemy. Sift the powdered sugar. It takes two minutes and makes a huge difference in the final texture.
Chill Before Cutting — This cake is soft. If you cut it warm, it will be messy. Chill it for at least 30 minutes. This also helps the flavors set.
Variations & Substitutions
Once you’ve nailed the basic version, here’s how you can mix it up. I’ve tried all of these.
Chocolate Peanut Butter Cup Cake — Instead of Reese’s Pieces, top with chopped mini peanut butter cups. It looks more elegant and tastes even richer.
Gluten-Free Version — Use a gluten-free yellow cake mix. Make sure the pudding mix is also gluten-free. Most are, but check the label. The rest of the ingredients are naturally gluten-free.
Vegetarian Option — This recipe is already vegetarian. Just make sure your chocolate fudge icing doesn’t contain gelatin. Most commercial fudge icings are gelatin-free, but check the label.
Vegan Version — This is harder. You’d need a vegan cake mix, vegan fudge icing, and a vegan peanut butter frosting (using coconut oil instead of butter and coconut cream instead of heavy cream). It’s doable, but it won’t taste exactly the same. I haven’t perfected the vegan version yet, but I’m working on it.
Less Sweet — Reduce the powdered sugar in the frosting by ½ cup. Use dark chocolate fudge icing instead of milk chocolate. It cuts the sweetness significantly.
Serving & Storage
How to Serve: — I usually serve this straight from the fridge. It’s best cold. The frosting firms up, and the fudge sets. Cut into squares with a sharp knife. Wipe the knife between cuts for clean edges.
Side Dishes: — This cake is rich, so it doesn’t need much. A simple green salad or some fresh fruit balances it well. I also like it with a cup of hot coffee or tea.
Storage: — Store in an airtight container in the fridge for up to 3 days. The cake will stay moist. Do not freeze this cake. The frosting will separate and become grainy when thawed. It’s best fresh.
Meal Prep: — You can make the cake and frost it up to 24 hours ahead. Just cover it tightly with plastic wrap. This is great for parties.
Nutrition Information
I’m not a nutritionist, but here’s the breakdown if you’re tracking. This is a rich dessert, so a little goes a long way.
Per Serving (based on 16 squares):
Calories: 450
Protein: 6g
Carbs: 65g
Fiber: 2g
Sugar: 45g
Fat: 20g
Saturated Fat: 8g
Cholesterol: 35mg
Sodium: 250mg
What’s Good: — It has some protein from the peanut butter. It’s satisfying.
What to Know: — It’s high in sugar and calories. Enjoy it as a special treat, not a daily snack.
Final Thoughts
So that’s my Reese’s Peanut Butter Poke Cake with Fudge Drizzle. It’s not the fastest cake in the world. It takes time. It takes patience. But it’s worth it. Every time I make it, I think of my grandmother Rose, and I know she’d approve. It’s a cake that brings people together. It’s a cake that says, “I care enough to make this for you.”
Make it for your family. Make it for your friends. Make it for yourself. And when you take that first bite, you’ll understand why I keep making it. It’s the real way. And it’s the best way.
If you make this, drop a comment and let me know how it turned out. I love hearing from you. And if you need more dessert inspiration, check out my fall caramel apple sheet cake for another crowd-pleasing option.
Frequently Asked Questions
Can I use homemade fudge instead of jarred icing?
You can, but homemade fudge is often too thick to pour through the holes. If you want to use homemade fudge, thin it out with a little milk or cream until it’s pourable. Jarred icing is designed for this purpose, so it’s the easier choice.
Why is my cake soggy at the bottom?
This usually happens if you pour too much fudge or if the cake isn’t baked all the way through. Make sure your cake is baked until a toothpick comes out clean. Also, don’t pour more fudge than the cake can absorb. If you have leftover fudge, save it for drizzling on top.
Can I make this cake ahead of time?
Yes, this cake is actually better the next day. Make it the night before, cover it tightly, and refrigerate. The flavors will meld, and the frosting will set. Just take it out of the fridge 30 minutes before serving so the frosting softens slightly.
What kind of peanut butter should I use?
Use creamy, processed peanut butter like Jif or Skippy. Natural peanut butter has oil that separates, which will make the frosting greasy and difficult to spread. You want that classic, smooth texture.
Can I freeze this cake?
I don’t recommend freezing this cake. The peanut butter frosting can become grainy and separate when thawed. It’s best eaten fresh or stored in the fridge for up to 3 days.
Can I use a different flavor of cake mix?
You can, but yellow cake is the best base for this recipe. It provides a neutral, buttery flavor that complements the peanut butter and chocolate. Chocolate cake mix would make it too heavy. White cake mix might be too light. Stick with yellow.
How do I get clean cuts when slicing?
Chill the cake thoroughly before cutting. Use a sharp knife, and wipe it clean between cuts. You can also dip the knife in hot water and dry it before each cut for very clean slices.
Pin This Recipe!
Reeses Peanut Butter Poke Cake: The Real Way
- Total Time: 55 minutes
- Yield: 16 servings 1x
Description
A rich, moist Reese’s Peanut Butter Poke Cake with a fudge soak and creamy peanut butter frosting, perfected through traditional baking techniques for a crowd-pleasing dessert.
Ingredients
- 1 box (15.25 oz / 432g) yellow cake mix
- 1 box (3.4 oz / 96g) dry instant chocolate pudding mix
- 1/2 cup (120ml) vegetable oil
- 1 cup (240ml) water
- 3 large eggs, room temperature
- 1 jar (16 oz / 454g) chocolate fudge icing
- 2–3 tablespoons milk
- 1/2 cup (115g) unsalted butter, softened
- 1/2 cup (128g) creamy peanut butter
- 3–4 cups (360-480g) powdered sugar, sifted
- 2–3 tablespoons heavy cream
- 1/2 teaspoon salt
- 1/2 cup crushed roasted salted peanuts
- 1 cup Reese’s Pieces or mini peanut butter cups
Instructions
- Preheat oven to 350°F (175°C). Grease a 9×13 inch baking pan thoroughly with butter and dust with flour, tapping out excess.
- In a large bowl, whisk together the yellow cake mix and dry chocolate pudding mix. Add vegetable oil, water, eggs, and salt. Beat on medium speed for 2 minutes until smooth and thick.
- Pour batter into the prepared pan and spread evenly.
- Bake for 30-35 minutes or until a toothpick inserted into the center comes out clean. Let the cake cool in the pan for 10 minutes until warm.
- Using a tuning fork or wooden spoon handle, poke holes all over the cake, spacing them about 1 inch apart and going to the bottom of the pan.
- In a microwave-safe bowl, warm the chocolate fudge icing for 20-30 seconds. Stir in 2 tablespoons of milk until smooth and pourable. Pour evenly over the warm cake.
- Let the cake cool completely to room temperature (1-2 hours).
- In a large bowl, beat softened butter until creamy. Add peanut butter and salt, beating until combined.
- Gradually add sifted powdered sugar, one cup at a time, beating on low speed. Once added, beat on high for 2 minutes until light and fluffy.
- Add heavy cream one tablespoon at a time, beating until a spreadable consistency is reached.
- Spread peanut butter frosting evenly over the cooled cake. Sprinkle with crushed peanuts and top with Reese’s Pieces or mini peanut butter cups.
- Refrigerate for at least 30 minutes to set the frosting before slicing into squares.
Notes
The cake must be warm, not hot, when poking holes to prevent tearing. Ensure the fudge icing is warmed and thinned with milk so it soaks in properly. Do not use natural peanut butter as the oil separation will make the frosting greasy. Sift powdered sugar to avoid lumps in the frosting. Chill the cake before cutting for clean slices.
- Prep Time: 20 minutes
- Cook Time: 35 minutes
- Category: Dessert
- Cuisine: American
Nutrition
- Serving Size: 1 square
- Calories: 450
- Sugar: 45
- Sodium: 250
- Fat: 20
- Saturated Fat: 8
- Carbohydrates: 65
- Fiber: 2
- Protein: 6
Keywords: Reese's Peanut Butter Poke Cake, poke cake, peanut butter cake, fudge drizzle, dessert recipe, crowd pleaser, chocolate and peanut butter


