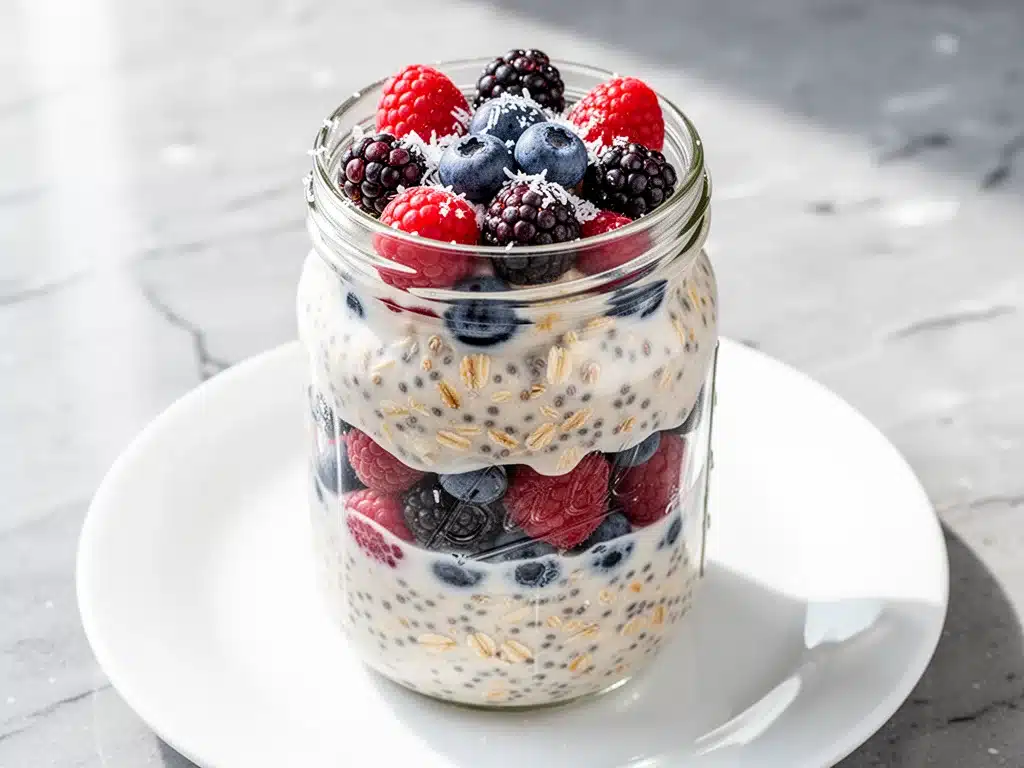
It’s 5:45 AM. The house is silent, which is suspicious, and my eyes are still glued shut. I’m already dreading the day ahead. Back-to-school season is supposed to be exciting—new notebooks, fresh sneakers, that crisp autumn energy—but for us? It’s just a logistical nightmare. I’m trying to find two pairs of missing socks, pack lunches that won’t get soggy by third period, and somehow, some way, get three humans out the door before the bus arrives at 7:30.
Last Tuesday, I was running on four hours of sleep and a cup of coffee that had gone cold twenty minutes ago. I rushed to the kitchen, grabbed a granola bar, and stuffed it in my oldest’s backpack. He looked at me with those huge, tired eyes and said, “Mom, I’m hungry.” I snapped. I didn’t mean to, but I did. I felt terrible. I didn’t have time to cook. I didn’t have time to think. I just wanted them to have something better than dry crumbs.
That was the moment I decided to stop treating breakfast like an afterthought. I needed something that was nutritious, portable, and—crucially—ready before my brain even turned on. That’s when I fully committed to these back-to-school overnight oats jars. Not the messy mason jar experiment from Pinterest, but the real, reliable, grab-and-go breakfast that actually tastes good.
I’ve tested this base recipe and variations about fifteen times over the last month. I’ve made them for picky eaters, for kids who claim they “hate oatmeal,” and for myself when I need a serious protein boost. The secret isn’t just the oats. It’s the layering. It’s the balance of creamy yogurt, hearty oats, and those fresh berries that keep things bright and interesting. By Sunday night, the jars are sitting in the fridge, waiting for us. By 7:15 AM, we’re out the door with breakfast in hand, no stress, no mess, and no morning arguments.
If you’re drowning in the morning rush like I was, trust me: this is the fix. These overnight oats jars are the only reason I’m not serving cereal for dinner anymore.
Why You’ll Love This Back-to-School Breakfast Routine
Look, I know what you’re thinking. “Oatmeal? Again?” Hear me out. This isn’t the microwaved, mushy, bland stuff you probably associate with school cafeterias. This is a different beast entirely. It’s creamy, it’s sweet, it’s packed with protein, and it keeps you full until lunch. Here’s why these jars have completely taken over our mornings:
Zero Morning Stress — Seriously. The cooking happens on Sunday night. In the morning, there is no cooking. There is no waiting for the toaster. There is no washing a pot. You grab the jar, put it in the lunch bag (or eat it on the go), and you’re done. I’ve walked my kids to the bus stop eating these out of the jar. Yes, really. It works.
Customizable for Picky Eaters — My youngest hates berries. My oldest loves chocolate chips. This recipe is a blank canvas. I keep the base oats the same, but let them pick their mix-ins. If they don’t like blueberries, we do strawberries. If they hate nuts, we skip them. Everyone gets something they like, and I only have to make one big batch of base mixture.
Actually Nutritious — I’m not a nutritionist, but I know what hungry teenagers need. These jars are loaded with fiber from the oats, protein from the Greek yogurt, and antioxidants from the fresh fruit. It’s a balanced meal that doesn’t spike their blood sugar like a donut would. They feel full. They feel good. And I feel like a good mom.
Costs Pennies — Let’s talk money. A typical breakfast burrito from the drive-thru is $4.50. These oats cost about $0.75 per jar. That’s a massive difference over a school year. Plus, you’re using ingredients you probably already have. Oats, milk, yogurt, fruit. It’s pantry-friendly and budget-smart.
Meal Prep Magic — I make six jars on Sunday. It takes me 15 minutes. That’s it. Fifteen minutes for six days of breakfast. I spend that time listening to a podcast, sipping my coffee, and feeling like I’ve already won the day. It’s the only meal prep that doesn’t feel like work.
This routine has saved our mornings. It’s turned the chaotic 7:00 AM rush into a smooth, predictable process. If you need one less thing to worry about in the morning, this is it.
Ingredients You’ll Need for the Perfect Base
Here’s the thing about overnight oats: you don’t need a fancy ingredient list. You need the right *balance* of ingredients. Too much liquid, and you get soup. Too little, and you get dry cardboard. Here’s exactly what I use and why each part matters.
Old-Fashioned Rolled Oats (1 ½ cups total) — This is non-negotiable. Do not use quick oats; they turn to mush. Do not use steel-cut oats; they don’t soak soft enough. You need old-fashioned rolled oats. They hold their texture and get creamy without disintegrating. I buy the store-brand big container—it’s the same stuff as the fancy brands.
Chia Seeds (2 tablespoons) — I know, they look like little alien eggs. But they’re crucial. They absorb liquid and create that thick, pudding-like texture. Without them, your oats are just wet cereal. They also add a nice omega-3 boost. If you’re allergic, you can skip them, but the texture will be looser.
Plain Greek Yogurt (1 cup) — This is the protein powerhouse. It makes the oats creamy and tangy. I use full-fat 2% or whole milk Greek yogurt because it tastes richer. Low-fat versions can be a bit tart and watery. Plain is best so you can control the sweetness.
Milk of Choice (1 ½ cups) — Dairy milk, almond milk, oat milk, soy milk—it doesn’t matter. Use what your family drinks. I usually use a mix of half dairy, half almond, just to stretch it. The liquid ratio is key: 1 ½ cups milk to 1 ½ cups oats is my sweet spot.
Maple Syrup (3 tablespoons) — I use pure maple syrup, not pancake syrup. It adds a warm, rich sweetness that balances the tart yogurt. Honey works too, but maple feels more “breakfast-y” to me. Adjust this based on how sweet your fruit is.
Vanilla Extract (1 teaspoon) — Just a splash. It makes everything taste like dessert. Don’t skip it. It’s the secret flavor booster.
Fresh Berries (2 cups total, divided) — I use a mix of blueberries, raspberries, and strawberries. Blueberries are the classic. Raspberries add a nice tartness. Strawberries are sweet and soft. You can use frozen berries, but fresh ones hold their shape better and look prettier on top. I save the frozen ones for smoothies.
Optional Crunch — I love adding a sprinkle of granola or chopped walnuts on top right before eating. It adds texture. Without crunch, oats can feel a bit one-dimensional.
Equipment Needed
You don’t need any special gadgets for this. I’m not going to lie to you and say you need a $50 meal prep kit. Here’s what I actually use in my kitchen:
4-6 Glass Jars with Lids — I use standard 16-ounce mason jars or reusable glass meal prep containers. Glass is better than plastic because it doesn’t stain from the berries and it’s easier to clean. The lids are essential for keeping them fresh in the fridge. I bought a set of four at the thrift store for $5.
Large Mixing Bowl — You need a bowl big enough to mix all the oats, chia seeds, yogurt, and milk together. I use a 4-quart stainless steel bowl. It’s heavy-duty and easy to whisk in.
Measuring Cups and Spoons — Standard stuff. I keep them on the counter. Accuracy helps, but this recipe is forgiving. If you’re a little off on the milk, it’s fine.
Whisk or Fork — To mix everything together. A whisk is faster, but a fork works if you’re being lazy. I usually just use a fork.
Small Spoon or Ladle — To portion the mixture into the jars evenly. I don’t measure each jar individually; I just eyeball it. They all end up roughly the same.
Knife and Cutting Board — For slicing the strawberries or chopping the walnuts. Nothing fancy.
Refrigerator Space — Okay, this is technically equipment. Make sure you have room in your fridge. These jars take up space, so clear out some room on Sunday night. I usually put them on the middle shelf, where the temperature is most consistent.
How to Make It: Step-by-Step
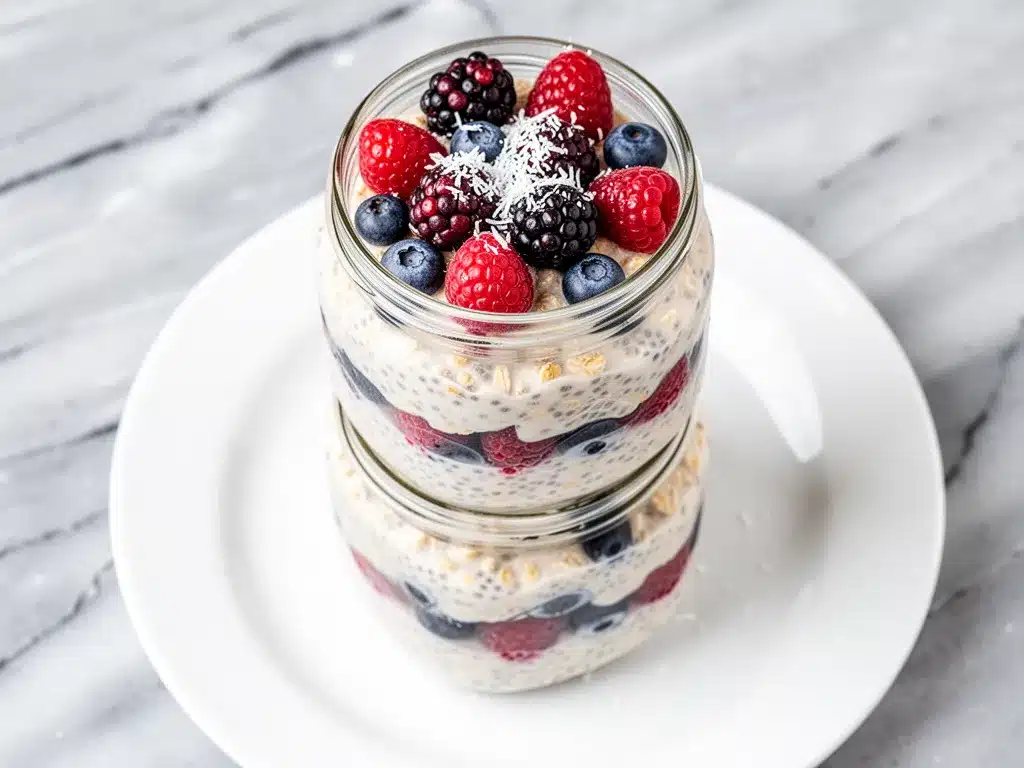
Alright, let’s get these jars together. I’m going to walk you through my exact process, including the little tricks I’ve picked up so you don’t end up with a soupy mess.
Step 1: Mix the Base (5 minutes)
In your large mixing bowl, combine the old-fashioned oats and chia seeds. Whisk them together so the chia seeds are distributed evenly. This is important so you don’t get a clump of chia seeds in one jar.
Step 2: Add the Wet Ingredients (3 minutes)
Pour in the Greek yogurt, milk, maple syrup, and vanilla extract. Whisk everything together vigorously. You want the yogurt to break down and blend with the milk. It will look a bit lumpy at first, but keep whisking. The mixture should be thick and creamy, like a thick pancake batter. If it’s too thick, add a splash more milk. If it’s too thin, add a sprinkle more oats.
Step 3: Portion into Jars (5 minutes)
Divide the oat mixture evenly among your glass jars. I use a ladle or a large spoon. Aim for about 1 ½ cups of mixture per jar. Smooth the tops with the back of your spoon. Tap the jars gently on the counter to settle the oats and remove any air pockets.
Step 4: Add the Mix-Ins (5 minutes)
This is the fun part. Layer your berries and other add-ins into the jars. I like to put half the berries in the middle of the oat mixture, so they’re suspended inside. This looks beautiful when you eat it. Save the other half of the berries for the top, to garnish. If you’re adding nuts or granola, sprinkle a little on top of each jar now. It might get soggy, but it adds flavor.
Step 5: Seal and Chill (Overnight)
Put the lids on tightly. Place the jars in the fridge. They need to sit for at least 4 hours, but overnight is best. I usually make them Sunday night and eat them Monday through Saturday. The oats will soften and absorb the liquid, becoming creamy and pudding-like.
Step 6: Serve and Enjoy
When you’re ready to eat, take the jar out of the fridge. Give it a good stir. If it’s too thick for your liking, add a splash of milk. Top with the reserved fresh berries, a drizzle of extra maple syrup if you want, and that crunch of granola or nuts. Eat it cold, right out of the jar. No microwaving required.
Total Prep Time: About 15-20 minutes on Sunday. Total Cook Time: 0 minutes. Total Time: Overnight.
Expert Tips & Tricks for Success
I’ve made hundreds of jars now. Here’s everything I’ve learned to make them perfect every single time.
Don’t Skip the Whisk
It’s tempting to just dump everything in and stir, but the yogurt needs to be fully incorporated into the milk. If you don’t whisk well, you’ll get chunks of yogurt in your oats. It’s fine, but it’s not as creamy. Take the extra 30 seconds to whisk.
The Liquid Ratio is Key
Oats absorb different amounts of liquid depending on their age and brand. If you live in a humid climate, oats might absorb more. If you like your oats thicker, use less milk. If you like them looser, use more. My 1 ½ cups milk to 1 ½ cups oats ratio works for me, but tweak it to your taste.
Layering for Visual Appeal
If you’re taking photos for Instagram or just want to feel fancy, layer your ingredients. Oats, then berries, then oats, then berries. It looks like a professional pastry. But if you’re in a rush, just mix it all up. Taste is the same.
Keep the Crunch Separate
If you’re packing these for school or work, the granola or nuts will get soggy if they’re in the jar all night. I recommend keeping the crunch separate in a small baggie or container. Add it right before eating. This is a game-changer for texture.
Use Frozen Berries in a Pinch
Fresh berries are expensive out of season. Frozen berries work great too! Just thaw them slightly before adding them, or add them frozen—they’ll thaw in the jar overnight. The flavor is the same, and they’re often cheaper.
Variations & Substitutions
Once you’ve mastered the base, here’s how you can mix it up. I rotate these variations so we don’t get bored.
Peanut Butter Banana
Swap the berries for sliced bananas. Add 2 tablespoons of peanut butter to the base mixture. Top with a sprinkle of cinnamon. My kids love this one. It tastes like a PB&J sandwich.
Apple Cinnamon
Use diced apples instead of berries. Add a teaspoon of cinnamon to the base. Top with chopped walnuts. This tastes like apple pie. Great for fall.
Tropical Paradise
Use coconut milk instead of dairy milk. Add shredded coconut and diced mango. Top with toasted coconut flakes. It’s refreshing and sweet.
Chocolate Chip Cookie Dough
Add a tablespoon of cocoa powder to the base. Use chocolate chips instead of berries. Top with a sprinkle of oats. It’s like dessert for breakfast.
Gluten-Free
Use certified gluten-free oats. Everything else is naturally gluten-free. Just check your yogurt and syrup labels to be sure.
Dairy-Free
Use coconut yogurt instead of Greek yogurt. Use almond or oat milk. Use maple syrup. It’s still creamy and delicious, just slightly tangier.
Serving & Storage
How Long Do They Last?
These jars last up to 5 days in the fridge. I usually make them Sunday and finish them by Friday. After 5 days, the oats start to get too soft and the berries might get mushy. If you’re meal prepping for a longer week, make them in smaller batches.
Storage Tips
Keep the jars in the back of the fridge, where it’s coldest. Make sure the lids are tight to prevent them from absorbing other fridge smells. I’ve had oats taste like leftover pizza before. Not a good combination.
Can You Freeze Them?
Honestly, I don’t recommend it. The texture of the oats changes when frozen and thawed. They can get grainy. It’s better to make them fresh. If you have leftovers, eat them within 2 days.
Packing for School
If you’re packing these for school, use an insulated lunch bag with an ice pack. These are safe at room temperature for a few hours, but the berries and yogurt are best kept cool. If your school has a fridge, put it in there. If not, the ice pack is essential.
Nutrition Information
I’m not a nutritionist, but here’s a rough breakdown per jar (based on 6 servings). These numbers are estimates, so they might vary based on your specific ingredients.
| Nutrient | Per Serving |
|---|---|
| Calories | 320 |
| Protein | 12g |
| Carbs | 45g |
| Fiber | 8g |
| Sugar | 15g |
| Fat | 10g |
What’s Good: High fiber, good protein, healthy fats from the chia seeds and yogurt. It’s a balanced meal that keeps you full.
What to Know: The sugar comes from the fruit and maple syrup. If you’re watching sugar, reduce the syrup and use unsweetened yogurt. It’s still sweet from the fruit.
Final Thoughts
So that’s my go-to back-to-school overnight oats jars routine. I’ve probably talked your ear off at this point, but when you’re in the thick of the morning rush, you need all the help you can get.
This has saved our mornings more times than I can count. It’s my answer to “what’s for breakfast” when I’m tired, stressed, and running late. My kids are happy, my husband is happy, and I’m happy because I’m not stressing about cooking.
Make it yours! Try different mix-ins, swap in your favorite fruit, adjust the sweetness. The best recipes are the ones you adapt to your family’s tastes. If you make these, drop a comment and let me know what you think! I love hearing how recipes turn out in your kitchen. And if something doesn’t work, tell me that too—I’m here to help troubleshoot.
Happy cooking! And I hope your mornings are half as calm as mine are now.
Frequently Asked Questions
Can I use quick oats instead of rolled oats?
You can, but the texture will be different. Quick oats absorb liquid faster and turn mushier. If you use quick oats, reduce the milk by about ¼ cup. But honestly, old-fashioned rolled oats are worth the extra texture. They hold up better overnight.
Why are my oats too watery?
This usually means you added too much milk or didn’t let them sit long enough. The oats need time to absorb the liquid. If they’re still watery after 4 hours, let them sit for another hour. Next time, reduce the milk slightly. Also, check your oats—old oats absorb more liquid than fresh ones.
Can I make these ahead for the whole week?
I recommend making them for up to 5 days. After that, the texture starts to break down, and the berries might get too soft. If you need meals for 7 days, make two batches. One on Sunday, one on Wednesday. It’s worth it for the freshness.
Can I heat these up in the microwave?
You can, but they’re designed to be eaten cold. If you heat them, the oats will get softer and the texture will change. If you prefer warm oats, heat them for 30-60 seconds, stirring halfway through. Add a splash of milk to loosen them up.
What if I don’t have chia seeds?
You can skip them, but the oats won’t be as thick and pudding-like. They’ll be more like wet cereal. If you have flax seeds, you can use those instead. They work similarly. Or just add a little more yogurt to thicken it up.
Can I use dried fruit instead of fresh berries?
You can, but dried fruit doesn’t add the same freshness or moisture. It’s sweeter and chewier. If you use dried fruit, soak it in the milk for a few minutes before adding it to the oats. It’ll plump up. But fresh berries are really the star here.
Pin This Recipe!
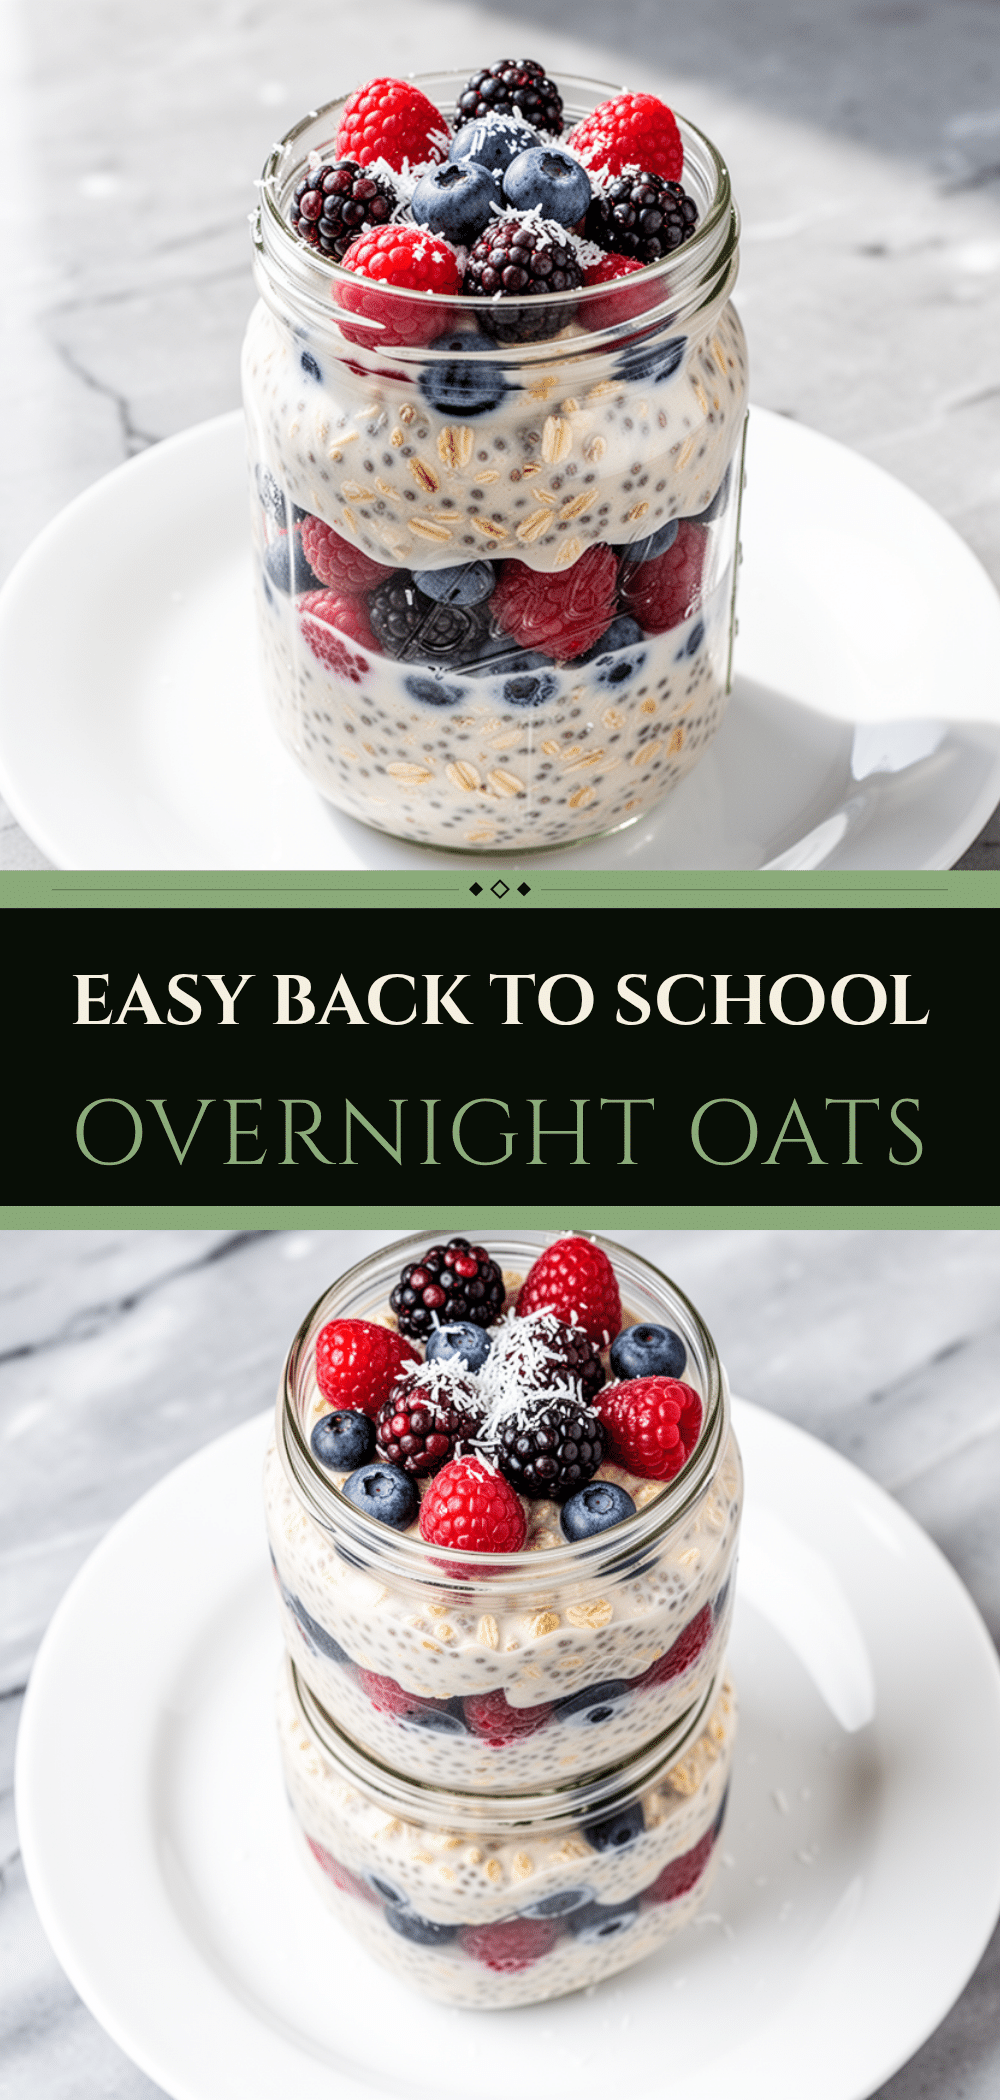
Overnight Oats Jars: 5 Easy Back-to-School Breakfasts
- Total Time: Overnight
- Yield: 6 servings 1x
Description
A reliable, grab-and-go overnight oats recipe designed for busy mornings. This customizable base combines creamy yogurt, hearty rolled oats, and chia seeds for a nutritious, high-fiber breakfast that requires zero morning cooking.
Ingredients
- 1 ½ cups Old-Fashioned Rolled Oats
- 2 tablespoons Chia Seeds
- 1 cup Plain Greek Yogurt (full-fat or 2%)
- 1 ½ cups Milk of Choice (dairy, almond, oat, or soy)
- 3 tablespoons Pure Maple Syrup
- 1 teaspoon Vanilla Extract
- 2 cups Fresh Berries (blueberries, raspberries, strawberries), divided
- Optional: Granola or chopped walnuts for crunch
Instructions
- In a large mixing bowl, combine the old-fashioned oats and chia seeds. Whisk to distribute evenly.
- Add the Greek yogurt, milk, maple syrup, and vanilla extract. Whisk vigorously until the yogurt is fully incorporated and the mixture resembles thick pancake batter.
- Divide the oat mixture evenly among 4-6 glass jars (approx. 1 ½ cups per jar). Smooth the tops and tap gently to settle.
- Layer half of the fresh berries into the middle of the oat mixture in each jar. Save the remaining berries for garnish.
- Seal the jars with lids and refrigerate for at least 4 hours, preferably overnight.
- To serve, stir the oats. If too thick, add a splash of milk. Top with reserved fresh berries, extra maple syrup, and optional crunchy toppings like granola or nuts.
Notes
Do not use quick oats as they turn to mush; use old-fashioned rolled oats. Do not use steel-cut oats as they do not soften enough. For best texture, keep crunchy toppings like granola separate until serving time to prevent sogginess. These jars last up to 5 days in the fridge. If packing for school, use an insulated lunch bag with an ice pack.
- Prep Time: 15 minutes
- Cook Time: 0 minutes
- Category: Breakfast
- Cuisine: American
Nutrition
- Serving Size: 1 jar (approx. 1 ½ c
- Calories: 320
- Sugar: 15
- Sodium: 60
- Fat: 10
- Saturated Fat: 3
- Carbohydrates: 45
- Fiber: 8
- Protein: 12
Keywords: overnight oats, back-to-school breakfast, meal prep, healthy breakfast, grab-and-go, high fiber, gluten-free option, dairy-free option


