Last Sunday, I found myself in the kitchen at 6:45 PM, staring into the abyss of my pantry. The Super Bowl was kicking off in fifteen minutes. The house smelled faintly of burnt popcorn from my attempt to get ahead, and I had zero actual snacks prepared. My husband looked at me with that specific expression that says, “We can order pizza, but please try not to cry about it.” I didn’t want pizza. I wanted something salty, sweet, crunchy, and chocolatey, all at once. I wanted a snack that wouldn’t leave grease on my hands for three hours.
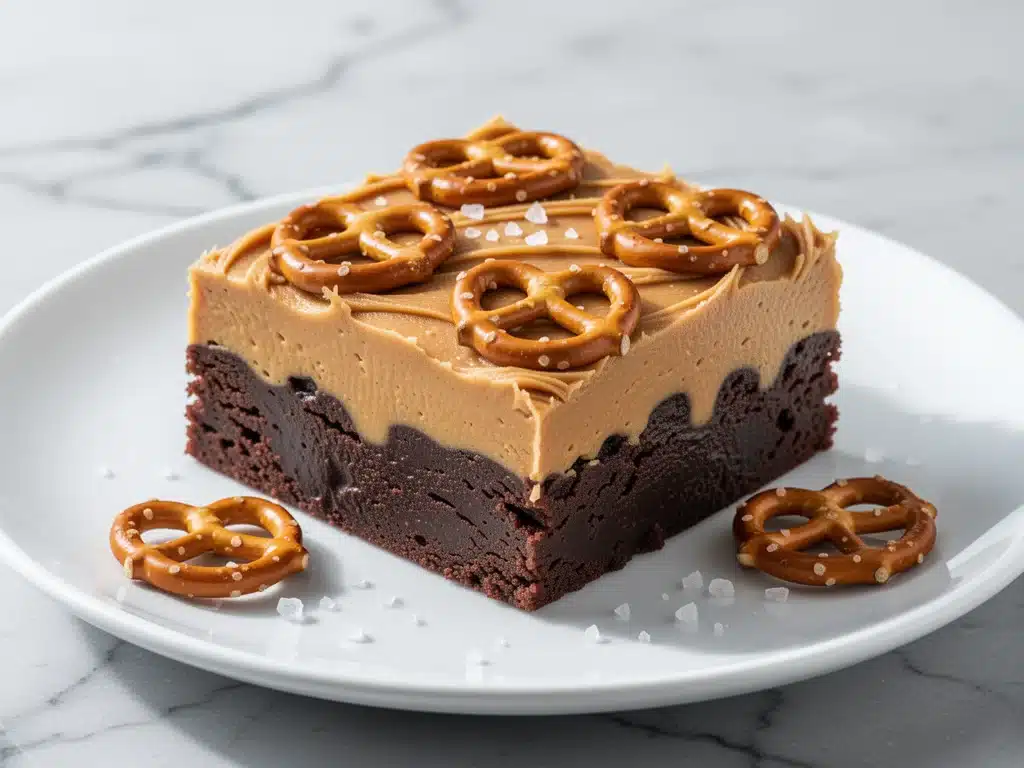
That was the moment these no-bake peanut butter pretzel brownie bars were born. Not out of a desire to be healthy, and definitely not out of a desire to impress a food critic. I just wanted something fast that tasted like a cheat day but felt manageable to make in a panic. I threw together some melted chocolate, a tub of peanut butter, a bag of mini pretzels, and whatever brownie mix I had lying around (though I’ll tell you later why homemade is better, even if it’s still no-bake). The result? Absolute chaos in the best way possible. Crunchy, salty, chewy, and rich enough to make my husband forget he was hungry before the game even started.
These no-bake peanut butter pretzel brownie bars have since become my secret weapon for every game day, tailgate, and last-minute party. I’ve made them for my neighbor’s watch party, my office’s birthday celebration, and my own couch-bound Sundays. They’re sturdy enough to hold their shape, sweet enough to satisfy a chocolate craving, and salty enough to make you reach for another one before you’ve even finished the first bite. And the best part? You don’t even need to turn on the oven. If you can melt chocolate and press it into a pan, you can make these. Seriously. I’ve made them while helping my kids with homework, while on a video call with my sister, and while the TV was blaring in the background. They are the ultimate low-effort, high-reward treat.
Why You’ll Love This Recipe
Look, I’m not going to sit here and tell you these are gourmet. They’re not. But they are the perfect intersection of convenience and flavor. I’ve tested this recipe over a dozen times, adjusting the ratio of pretzels to chocolate until it hit that sweet spot. Here’s why these bars keep showing up in my kitchen rotation:
- Zero Baking Required — Seriously, no oven. No preheating. No waiting for cookies to cool. If you have a microwave or a double boiler, you’re good to go. I made these on a humid July afternoon when the idea of turning on the oven felt like a personal attack. It was a lifesaver.
- Salty-Sweet Perfection — This is the flavor profile that wins every time. The pretzels provide that sharp, salty crunch, while the peanut butter and chocolate layers bring the sweetness and richness. It’s the same vibe as a Reese’s cup, but denser, chewier, and way more satisfying. If you love Reese’s peanut butter chocolate cake, you’ll understand exactly what I mean.
- Sturdy Enough for Transport — I’ve driven these in my car to a friend’s house, and they didn’t turn into a melted mess. They hold their shape well, making them perfect for potlucks, office snacks, or tossing into a cooler for a tailgate. They’re not as fragile as a delicate cookie or as messy as a slice of pie.
- Make-Ahead Friendly — These bars actually taste better after they’ve chilled in the fridge for a few hours. The flavors meld together, and the texture firms up. I love making them the night before a party so I can just pull them out and serve. It’s one less thing to stress about when guests start arriving.
- Customizable for Any Crowd — Need a gluten-free version? Swap in gluten-free pretzels. Want to add nuts? Throw in some chopped peanuts or pecans. My kids love adding M&Ms, while my husband insists on a drizzle of caramel. These bars are a blank canvas for your cravings.
This is my go-to when I need a dessert or snack that just works. No complicated techniques, no weird ingredients, just reliable, delicious food that makes everyone happy. It’s the kind of recipe that feels like a hug in bar form.
Ingredients You’ll Need
Here’s the best part: you probably have most of this already. I’m particular about three ingredients here, and I’ll tell you exactly why. Don’t skimp on the quality, especially for the chocolate and peanut butter, because you’re tasting them directly.
For the Pretzel Base
- Mini Pretzels (10 oz / 280g) — I use mini pretzels because they’re uniform and easier to mix evenly. Regular pretzel rods work, but you’ll need to break them into smaller pieces first. Look for salty pretzels, not sweet ones. The salt is crucial for balancing the chocolate.
- Unsalted Butter (4 tablespoons / 60g) — This helps bind the pretzels together slightly, though the real binding agent is the chocolate layer on top. I use unsalted so I can control the total saltiness. If you only have salted butter, reduce any added salt in the chocolate layer.
For the Peanut Butter Layer
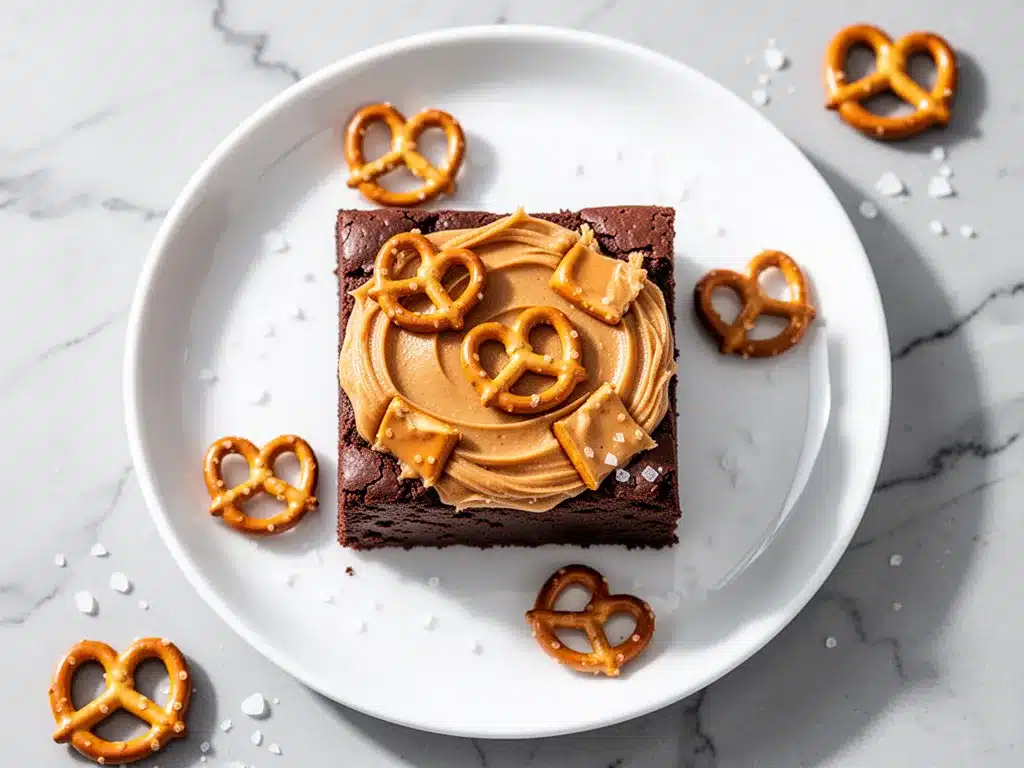
- Creamy Peanut Butter (1 cup / 250g) — I use standard creamy peanut butter, like Jif or Skippy, because it mixes smoothly with the chocolate. Natural peanut butter can be too oily and separate, which makes the layer runny. If you must use natural, make sure it’s well-stirred and not too loose. This is the heart of the flavor, so don’t buy the cheap stuff.
- Powdered Sugar (1 cup / 120g) — This thickens the peanut butter and adds sweetness. It’s what gives the layer that fudge-like texture. Sift it if it’s clumpy; nobody wants a lumpy peanut butter layer.
For the Chocolate Layer
- Semi-Sweet Chocolate Chips (12 oz / 340g) — I prefer semi-sweet because it’s not too sweet, which balances the salty pretzels. Dark chocolate chips work too if you want a richer, less sweet bar. Avoid milk chocolate unless you have a serious sweet tooth; it can get cloying with the peanut butter.
- Coconut Oil (1 tablespoon / 15ml) — Optional but recommended. This helps the chocolate layer set faster and gives it a slight sheen. If you don’t have coconut oil, you can skip it, but the bars might take longer to firm up in the fridge.
Optional Add-ins
- Sea Salt Flakes — Sprinkle on top after the chocolate layer is set. It elevates the flavor and makes it look fancy. I always do this now.
- Chopped Peanuts — Sprinkle on top for extra crunch. If you’re a peanut lover, this is a must.
- White Chocolate Chips — Drizzle on top for a marble effect. It looks pretty and adds a bit of sweetness.
Shopping Tips: I always buy my pretzels from the snack aisle, not the baking aisle—they’re cheaper and come in bigger bags. For chocolate chips, I stick to my usual brand, but Ghirardelli or Lindt work great too. Avoid the cheapest chocolate chips you can find; they often contain fillers that make the texture waxy.
Equipment Needed
You don’t need fancy equipment for this. Here’s what I actually use:
- 9×13 Inch Baking Pan — Line it with parchment paper, leaving an overhang on the sides. This is crucial for lifting the bars out later. I use Reynolds Parchment Paper because it doesn’t stick.
- Microwave-Safe Bowl — Or a double boiler if you’re more comfortable with stovetop melting. I use a large glass bowl in the microwave for ease.
- Large Mixing Bowl — For mixing the pretzels and butter. Any size works, as long as it’s big enough to toss everything without spilling.
- Spatula — A silicone spatula is best for scraping the bowl and spreading the layers. I love my rubber spatula from IKEA—it’s cheap and lasts forever.
- Measuring Cups and Spoons — Standard stuff. Dollar store versions work fine.
- Knife — For cutting the bars. A sharp chef’s knife works best. Wipe the blade between cuts for clean edges.
Tool Tips: Don’t have a 9×13 pan? An 8×8 pan will work, but the bars will be thicker. Adjust the chilling time accordingly. I’m obsessed with my parchment paper liners—they make cleanup a breeze. No one wants to scrub a sticky pan after a party.
How to Make It: Step-by-Step
Alright, let’s make this! I’m walking you through exactly how I do it, including the little tricks I’ve picked up. This recipe is straightforward, but there are a few key moments where attention matters.
Step 1: Prep Your Pan (2 minutes)
Line your 9×13 inch baking pan with parchment paper. Leave a generous overhang on the long sides—this will act as handles to lift the bars out later. I don’t bother greasing the pan because the parchment does all the work. If you’re in a rush, you can just grease the pan, but the parchment makes cleanup infinitely easier. Trust me.
Step 2: Mix the Pretzel Base (3 minutes)
In your large mixing bowl, combine the mini pretzels and melted butter. Toss everything together until the pretzels are evenly coated. The butter helps them stick together slightly, but don’t worry if it looks dry. This layer is mostly for crunch. Press the mixture firmly and evenly into the bottom of your prepared pan. Use the bottom of a measuring cup to pack it down tightly. If it’s loose, the bars will fall apart when you cut them. I press hard—like, really hard. It takes about a minute, but it’s worth it.
Step 3: Make the Peanut Butter Layer (5 minutes)
In a separate bowl, mix the creamy peanut butter and powdered sugar. Stir until it forms a thick, smooth paste. It might look crumbly at first, but keep stirring. It will come together. Spread this mixture evenly over the pretzel base. Use a spatula to smooth it out. If it’s too stiff to spread, microwave it for 10-15 seconds to soften it up. Don’t overheat it, or it’ll become runny. Just enough to make it spreadable. This layer should be about ¼ inch thick. Don’t skimp on the thickness; it’s the star of the show.
Step 4: Melt the Chocolate (3 minutes)
In a microwave-safe bowl, combine the chocolate chips and coconut oil. Microwave in 30-second intervals, stirring between each, until the chocolate is completely smooth. This usually takes about 1-2 minutes total. Be careful not to overheat the chocolate, or it can seize up. If it looks lumpy, keep stirring; residual heat will melt the rest. If you’re using a double boiler, melt the chocolate over low heat, stirring constantly. Once smooth, pour the chocolate over the peanut butter layer.
Step 5: Spread and Set (10 minutes active + chilling)
Use your spatula to spread the chocolate evenly over the peanut butter layer. Go all the way to the edges. If you miss a spot, the pretzels will show through, and that’s fine, but try to cover it up. Sprinkle with sea salt flakes or chopped peanuts if you’re using them. Now, the hard part: wait. Place the pan in the fridge for at least 2 hours, or until the chocolate is completely firm. I usually put it in overnight. If you’re impatient (like me), you can speed this up by putting it in the freezer for 30 minutes, but keep an eye on it so the chocolate doesn’t crack. Once set, lift the bars out using the parchment paper overhang.
Step 6: Cut and Serve
Place the block of bars on a cutting board. Use a sharp knife to cut into squares or rectangles. I like 24 bars, but adjust based on how hungry your crowd is. Wipe the knife clean between cuts for neat edges. Serve immediately, or store in an airtight container. These bars are best eaten cold, right out of the fridge.
Total Time: About 20 minutes active, plus 2 hours chilling.
Troubleshooting Tips:
- Pretzel layer is too loose: Press harder! Or add a tablespoon more melted butter.
- Peanut butter layer is too runny: Add more powdered sugar, a tablespoon at a time.
- Chocolate layer is grainy: You overheated it. Next time, microwave for shorter intervals and stir more.
- Bars won’t cut cleanly: Make sure the chocolate is fully set. If it’s still soft, chill longer. A warm knife can also help cut through the chocolate without smudging.
Expert Tips & Tricks
Here’s everything I’ve learned from making this dozens of times. These tips will save you from my mistakes.
- Don’t Skip the Chilling Time — I know you want to eat them now. But if you don’t let them set, the layers will mix together, and you’ll get a messy, crunchy mess. Patience pays off. I’ve made the mistake of cutting them too early, and it was a disaster. Now I set a timer and ignore the kitchen.
- Use Good Chocolate — Since the chocolate is a major component, don’t use the cheapest chips you can find. They often contain palm oil or other fillers that make the texture waxy and dull. Good chocolate melts smoother and tastes richer. I usually buy Ghirardelli or Lindt for this recipe.
- Peanut Butter Consistency Matters — If your peanut butter is too thick, it’ll be hard to spread. If it’s too thin, it’ll mix with the chocolate. Standard creamy peanut butter is the sweet spot. If you’re using natural peanut butter, make sure it’s well-stirred and not separated.
- Add Sea Salt for Flavor — A sprinkle of flaky sea salt on top isn’t just for looks. It enhances the chocolate and pretzel flavors, making them pop. I use Maldon sea salt flakes because they dissolve nicely but still provide a crunch.
- Store in the Fridge — These bars contain peanut butter and chocolate, which can melt or soften at room temperature. Store them in the fridge in an airtight container. They’ll last up to two weeks. If you’re taking them to a party, keep them in a cooler until serving time.
Pro Tricks I’ve Learned:
- For Clean Cuts: Dip your knife in hot water and wipe it dry before each cut. This helps the knife slice through the chocolate without smudging the layers below.
- For Extra Crunch: Add a layer of crushed pretzels on top of the chocolate before it sets. It adds an extra textural element that I love.
- For Meal Prep: Make a double batch. These bars freeze well too! Wrap individual bars in plastic wrap and store in a freezer bag for up to three months. Thaw in the fridge before serving.
Variations & Substitutions
Once you’ve nailed the basic version, here’s how you can mix it up. I’ve tried all of these, and they’re all winners.
Flavor Variations
- Caramel Pretzel Bars — Drizzle caramel sauce on top of the chocolate layer before it sets. It adds a gooey sweetness that’s irresistible. I use store-bought caramel sauce for ease, but homemade is better if you have time.
- Cookie Butter Pretzel Bars — Swap the peanut butter layer for Biscoff cookie butter mixed with powdered sugar. It adds a spiced, gingerbread-like flavor that’s amazing with the pretzels.
- Nutty Pretzel Bars — Add chopped pecans or walnuts to the pretzel base. It adds a different kind of crunch and a richer flavor. I love this version for fall.
- White Chocolate Pretzel Bars — Use white chocolate chips instead of semi-sweet. It’s sweeter and creamier. Great for kids who don’t like dark chocolate.
Dietary Modifications
- Gluten-Free — Use gluten-free pretzels. Everything else is naturally gluten-free. I’ve used pretzels from the gluten-free aisle, and they work just as well. Just make sure they’re salty!
- Dairy-Free — Use dairy-free chocolate chips and coconut oil. For the peanut butter layer, use dairy-free butter or skip it entirely. The chocolate layer will still work fine.
- Reduced Sugar — Use sugar-free chocolate chips and reduce the powdered sugar in the peanut butter layer by half. It won’t be as sweet, but it’s still tasty. You can also use a sugar substitute like erythritol.
- Low-Carb/Keto — This is tricky because of the pretzels and powdered sugar. Use low-carb pretzels (like those made with almond flour) and sugar-free powdered sugar. Swap the peanut butter for a keto-friendly version. It’s not the same, but it works if you’re watching carbs.
Protein Boost
Want to make these bars more filling? Add a scoop of protein powder to the peanut butter layer. It’ll change the texture slightly, making it more cake-like, but it adds a nice protein punch. I use vanilla protein powder, but chocolate works too.
Serving & Storage
How to Serve:
I usually serve these straight from the fridge, cut into small squares. They’re rich, so you don’t need much. I pair them with cold milk or coffee. For parties, I put them on a platter with some fruit or veggie sticks to balance the sweetness. They’re also great as a dessert bar after a meal.
Side Dishes:
These bars are a standalone treat, so they don’t need sides. But if you’re serving them as part of a larger spread, they go well with salty snacks like chips or nuts. They also pair nicely with a cold beer or a glass of red wine.
Storage Instructions:
- Refrigerator: Store in an airtight container for up to two weeks. Layer them with parchment paper to prevent sticking. They’ll stay fresh and firm.
- Freezer: Wrap individual bars in plastic wrap and store in a freezer-safe bag for up to three months. Thaw in the fridge before serving. They freeze well!
- Room Temperature: I don’t recommend storing them at room temperature for more than a few hours, as the chocolate and peanut butter can soften or melt. If you’re serving them at a party, keep them in a cool place or a cooler.
Pro Tip: If the bars get too hard from the fridge, let them sit at room temperature for 5-10 minutes before eating. This softens the chocolate slightly and makes them easier to chew.
Nutrition Information
I’m not a nutritionist, but here’s the breakdown if you’re tracking. Keep in mind that these bars are rich and dense, so portion control is key.
Per Bar (based on 24 bars):
- Calories: 180
- Protein: 4g
- Carbs: 22g
- Fiber: 1g
- Sugar: 14g
- Fat: 10g
- Saturated Fat: 5g
- Sodium: 150mg
What’s Good:
They provide a quick energy boost from the carbs and sugar, and the peanut butter adds some protein and healthy fats. The pretzels offer some crunch and satisfaction.
What to Know:
They’re high in sugar and saturated fat. If you’re watching your intake, enjoy them in moderation. They’re a treat, not a health food. But hey, life’s short, and they taste amazing.
Final Thoughts
So that’s my go-to no-bake peanut butter pretzel brownie bars! I’ve probably talked your ear off at this point, but when you make a recipe this often, you have a lot to say about it. These bars have saved me on countless game days, last-minute parties, and lazy afternoons. They’re my answer to “what should I bring?” when I don’t want to spend hours in the kitchen.
Make them yours! Try different add-ins, swap in your favorite chocolate, or adjust the salt to your liking. The best recipes are the ones you adapt to your tastes. If you make these, drop a comment and let me know what you think! I love hearing how recipes turn out in your kitchen. And if something doesn’t work, tell me that too—I’m here to help troubleshoot.
Happy cooking! And I hope your kitchen smells half as good as mine does right now (which is basically chocolate heaven).
Frequently Asked Questions
Can I use crunchy peanut butter instead of creamy?
Yes, you can! Crunchy peanut butter will add an extra layer of texture, which some people love. Just be aware that the layer might be a bit harder to spread evenly. If you use crunchy, make sure the peanut butter is well-mixed so the chunks don’t separate.
Why did my chocolate layer crack?
This usually happens if the chocolate was overheated or if the bars were chilled too quickly in the freezer. When chocolate cools too fast, it can contract and crack. To avoid this, melt the chocolate gently and chill the bars in the fridge rather than the freezer. If they crack, it doesn’t affect the taste, so don’t worry!
Can I make these ahead for a party?
Absolutely! These bars are actually better made ahead of time. They’ll last in the fridge for up to two weeks. I usually make them 1-2 days before a party so the flavors have time to meld. Just keep them in an airtight container until serving time.
Can I freeze these bars?
Yes! These bars freeze very well. Wrap individual bars in plastic wrap and store them in a freezer-safe bag for up to three months. Thaw them in the fridge before serving. They’ll taste just as good as fresh.
What if I don’t have powdered sugar?
You can use granulated sugar, but it won’t dissolve as well in the peanut butter, so the texture might be grainy. If you must use granulated sugar, blend it in a food processor until it’s fine, or use a little less liquid in the peanut butter layer to compensate.
Can I use dark chocolate instead of semi-sweet?
Of course! Dark chocolate will make the bars less sweet and more rich. If you use dark chocolate, you might want to add a little extra powdered sugar to the peanut butter layer to balance the bitterness. It’s a great option if you prefer less sweetness.
How do I cut the bars without them sticking to the knife?
Wipe your knife with a damp cloth or dip it in hot water and dry it before each cut. This helps the knife slice through the chocolate smoothly without smudging. Also, make sure the bars are fully chilled before cutting. If they’re soft, the chocolate will smear.
Pin This Recipe!
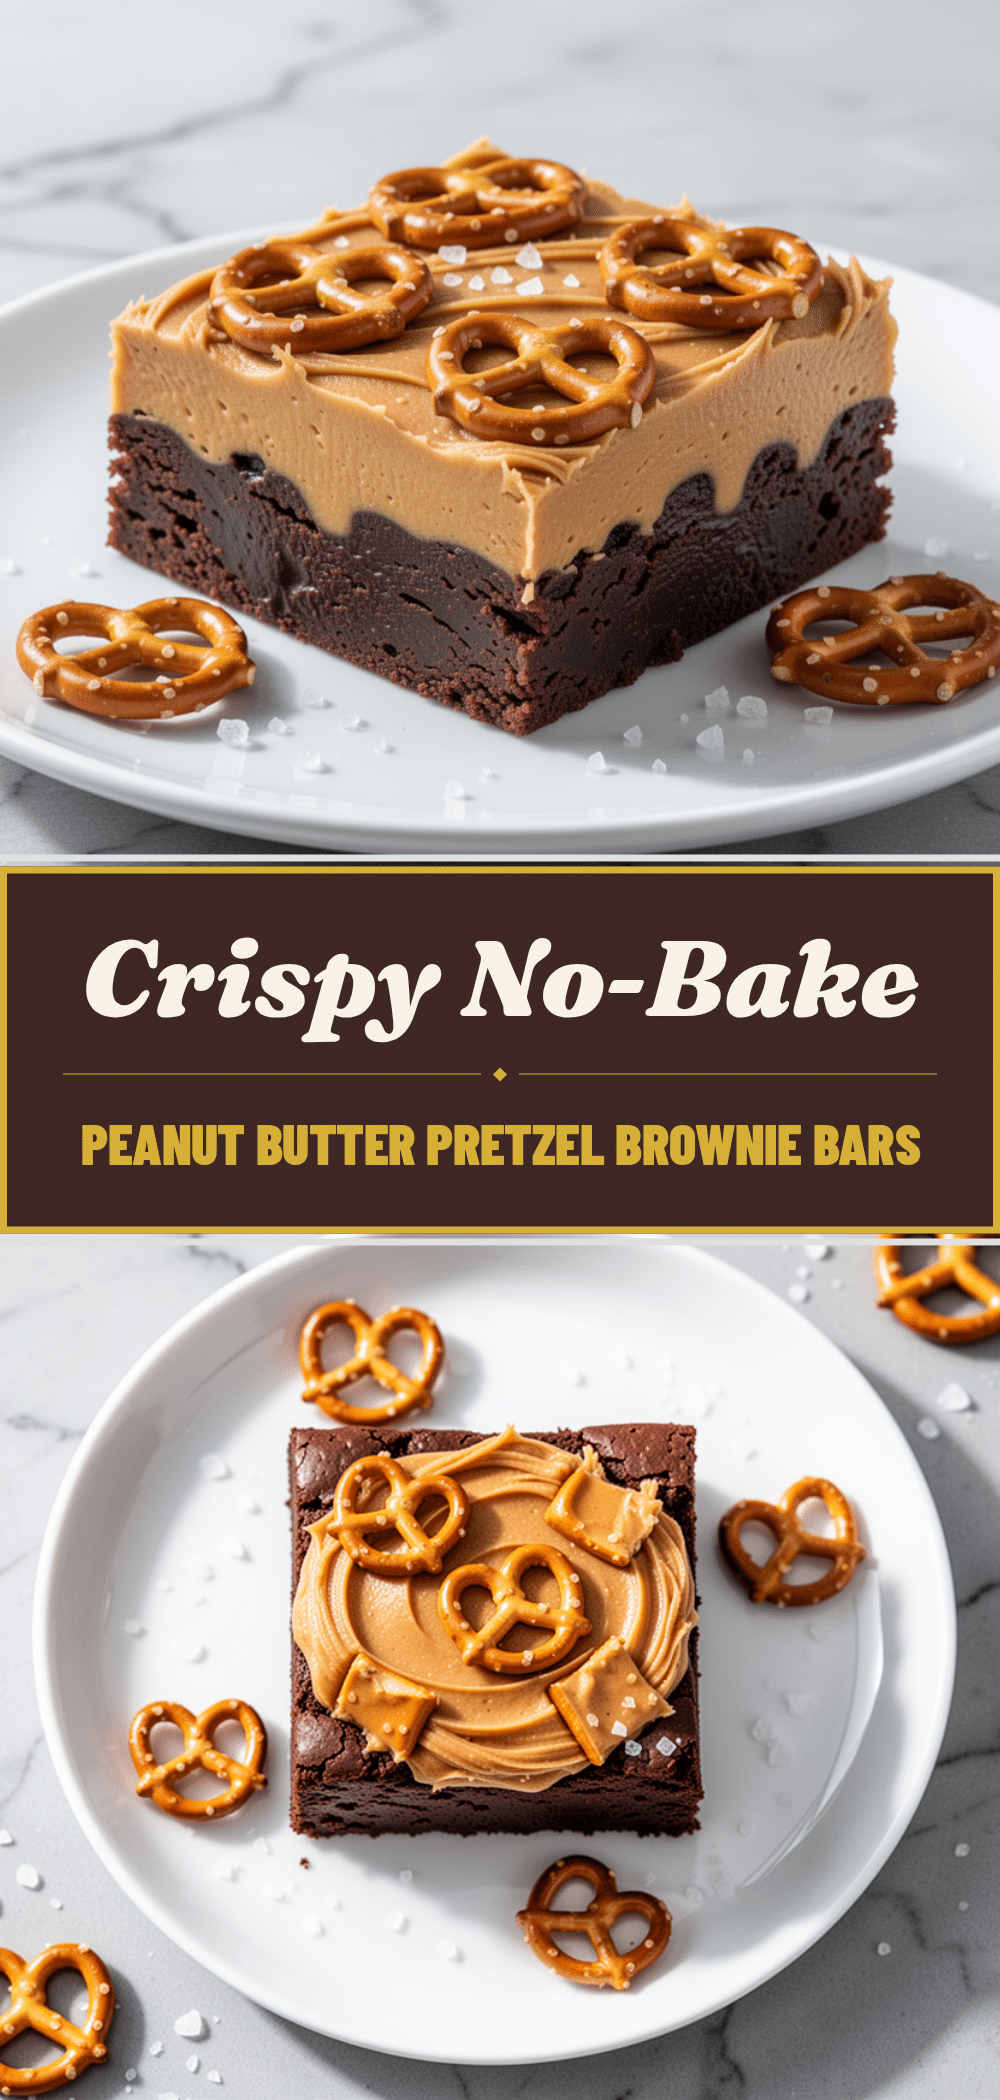
No-Bake Peanut Butter Pretzel Brownie Bars
- Total Time: 2 hours 20 minutes
- Yield: 24 servings 1x
Description
These easy no-bake bars combine a salty pretzel base, a creamy peanut butter layer, and a rich chocolate topping for the perfect sweet and salty game day snack.
Ingredients
- 10 oz (280g) mini pretzels
- 4 tablespoons (60g) unsalted butter, melted
- 1 cup (250g) creamy peanut butter
- 1 cup (120g) powdered sugar
- 12 oz (340g) semi-sweet chocolate chips
- 1 tablespoon (15ml) coconut oil
- Sea salt flakes (optional, for topping)
- Chopped peanuts (optional, for topping)
Instructions
- Line a 9×13 inch baking pan with parchment paper, leaving an overhang on the sides for easy removal.
- In a large mixing bowl, combine the mini pretzels and melted butter. Toss until evenly coated.
- Press the pretzel mixture firmly and evenly into the bottom of the prepared pan using the bottom of a measuring cup.
- In a separate bowl, mix the creamy peanut butter and powdered sugar until a thick, smooth paste forms. If too stiff, microwave for 10-15 seconds to soften.
- Spread the peanut butter mixture evenly over the pretzel base, aiming for about ¼ inch thickness.
- In a microwave-safe bowl, combine chocolate chips and coconut oil. Microwave in 30-second intervals, stirring between each, until smooth.
- Pour the melted chocolate over the peanut butter layer and spread evenly to the edges.
- Sprinkle with sea salt flakes or chopped peanuts if desired.
- Refrigerate for at least 2 hours, or until the chocolate is completely firm.
- Lift the bars out of the pan using the parchment paper overhang.
- Cut into squares or rectangles (yields 24 bars) using a sharp knife. Wipe the knife between cuts for clean edges.
Notes
For clean cuts, dip your knife in hot water and wipe it dry before each cut. These bars are best stored in the refrigerator in an airtight container for up to two weeks. They can also be frozen for up to three months; wrap individually in plastic wrap and thaw in the fridge before serving.
- Prep Time: 20 minutes
- Cook Time: 0 minutes
- Category: Dessert
- Cuisine: American
Nutrition
- Serving Size: 1 bar
- Calories: 180
- Sugar: 14
- Sodium: 150
- Fat: 10
- Saturated Fat: 5
- Carbohydrates: 22
- Fiber: 1
- Protein: 4
Keywords: no-bake, peanut butter, pretzels, chocolate, game day snack, easy dessert, party food, sweet and salty