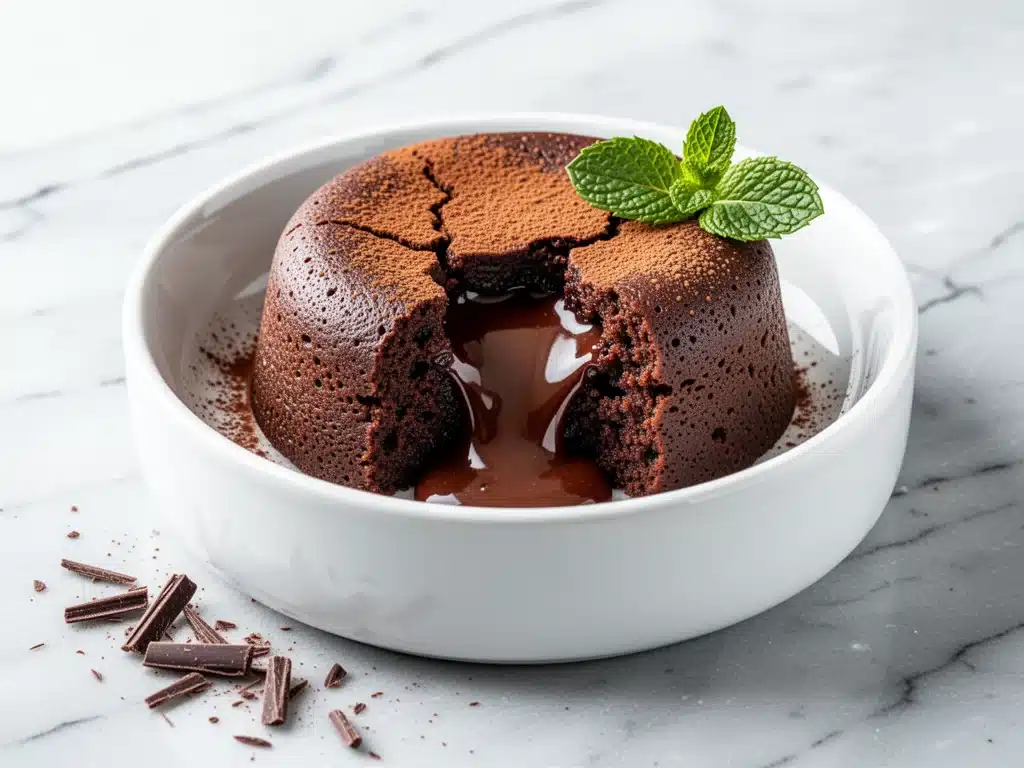
It was 8:30 PM on a Tuesday, and I was standing in my kitchen, staring into the open fridge like it held the secrets to the universe. My husband had just walked in the door, exhausted from work, and our two kids were in the middle of a low-grade civil war over who got the last slice of apple. The house was loud, my energy was at zero, and my sugar cravings were screaming at me. I didn’t want to order takeout. I didn’t want to eat a sad piece of cheese. I wanted something warm, rich, and deeply chocolatey that would make the chaos outside the kitchen door feel like a distant memory.
I opened the freezer and pulled out a bag of almond flour. It was my emergency backup. I’ve made this keto chocolate lava cake with almond flour dozens of times since that night, and it has become my absolute favorite way to end a long day. It’s not just because it’s low-carb (though that helps the guilt stay at zero). It’s because it feels like cheating. You get that molten, gooey, restaurant-quality chocolate center in fifteen minutes flat, using ingredients I already keep in my pantry. No fancy gadgets, no hours of prep, and definitely no judgment from my kids when they sneak a bite.
Most keto dessert recipes promise the world but deliver a dry, crumbly disappointment. I’ve tested enough of them to know the difference. This one? It’s the real deal. The almond flour gives it this incredible nutty richness that regular flour just can’t match, and the key is getting the timing down so the center stays liquid while the outside sets. I’ve made this for dinner parties, for late-night cravings, and for when I just needed a hug in dessert form. It works every single time, as long as you trust the process. And trust me, once you taste that first warm spoonful, you’ll be making it every week.
Why You’ll Love This Keto Chocolate Lava Cake
Let’s be real: giving up chocolate on a keto diet feels like torture. But this recipe changes the game completely. It’s not just “good for keto”—it’s just damn good, period. Here’s why this almond flour lava cake has earned a permanent spot in my weekly rotation:
Lightning Fast — Seriously, if you can microwave water, you can make this. It takes about 15 minutes from start to finish. I’ve made this after putting the kids to bed, and it’s done before I’ve even found a serving spoon. It’s the ultimate quick fix for those nights when you want something special but have zero energy.
Gluten-Free and Grain-Free — Because it uses almond flour instead of wheat, it’s naturally gluten-free. But more importantly, it’s grain-free. My husband is sensitive to grains, and this dessert is one of the few things he’ll happily eat without complaining. It has that dense, fudgy texture that you miss when you cut out bread and pasta.
Rich and Fudgy — I’ve tried using coconut flour, oat flour, and even soy flour in keto desserts, and they all end up tasting like cardboard or sponges. Almond flour is the winner. It adds fat and moisture, which is crucial for that gooey center. The result is a cake that feels indulgent and luxurious, not like a diet food substitute.
Minimal Cleanup — This is made in a single bowl and cooked in ramekins (or a mug). That’s it. No mixer, no separate bowls for eggs and sugar, no flour-dusted counters. I can have dessert ready, eaten, and the bowl washed before my husband finishes his second cup of coffee. If you’re busy, you’ll appreciate this.
Customizable — Want to add berries? Go for it. Want to swap the chocolate for sugar-free dark chocolate chips? Done. I like to keep it simple, but this recipe is a blank canvas. I’ve added a pinch of sea salt on top sometimes, which makes the chocolate flavor pop in a way that feels fancy but is actually just smart cooking.
This is my go-to when I need comfort food that aligns with my health goals. It’s reliable, it’s delicious, and it doesn’t require me to be a professional pastry chef. Just a person who wants chocolate and fifteen minutes of free time.
Ingredients You’ll Need
Here’s the best part: you probably have most of these ingredients already. This isn’t a recipe that requires a trip to three different specialty stores. I’m particular about a few things, but overall, it’s very accessible. Let’s break down what you need and why.
Sugar-Free Dark Chocolate (4 ounces / 113g) — This is the star of the show. I use a bar of high-quality sugar-free dark chocolate, usually 70% cocoa or higher. Brands like Lily’s or Ghirardelli (check the label for sugar content) work great. Avoid chocolate chips if you can; bars melt more evenly and give you a smoother texture. If you’re using chips, chop them up first.
Butter (2 tablespoons / 30g) — Unsalted butter is best so you can control the saltiness. It adds richness and helps create that silky lava texture. Don’t substitute with oil here; you need the fat content and the flavor butter provides.
Almond Flour (¼ cup / 25g) — This is the base. Make sure it’s fine-textured almond flour, not almond meal. Almond meal is chunkier and will make the cake gritty. I buy mine pre-ground to save time, but if you have a food processor, you can grind blanched almonds yourself. It’s easy.
Eggs (2 large) — Room temperature eggs are ideal. They incorporate better into the batter and help the cake rise evenly. I usually take them out of the fridge while the chocolate is melting.
Egg Yolks (2 large) — This is the secret ingredient for the gooey center. The extra yolks add fat and richness, which is crucial for that molten texture. Don’t skip them, even if you’re worried about cholesterol. In keto, we’re not counting carbs, and the fat is what makes this taste amazing.
Almond Butter (2 tablespoons / 32g) — I use creamy almond butter, not crunchy. It adds moisture and helps bind the batter. If you don’t have almond butter, you can use peanut butter, but the flavor will change. Almond butter keeps it neutral and chocolate-forward.
Keto Sweetener (2-3 tablespoons / 25-35g) — I prefer erythritol or allulose. Allulose gives a softer, chewier texture, which I love for lava cakes. Erythritol can sometimes crystallize, so if you use it, make sure it’s finely ground. Monk fruit blends work too, but check the fillers. Avoid stevia if you can; it can have a bitter aftertaste in chocolate.
Cocoa Powder (1 tablespoon / 5g) — Unsweetened cocoa powder adds depth. It’s not strictly necessary if your chocolate is very strong, but I find it makes the chocolate flavor more intense. Use a good quality cocoa powder, not a sweetened drink mix.
Vanilla Extract (½ teaspoon) — Pure vanilla extract. Not the imitation stuff. It enhances the chocolate flavor and adds a warm aroma. It’s a small amount, but it makes a big difference.
Salt (a pinch) — Salt is flavor’s best friend. It balances the sweetness and makes the chocolate taste more chocolatey. Don’t skip it.
Optional: Sea Salt Flakes — For sprinkling on top after baking. It looks beautiful and adds a nice crunch.
Tip: I always measure my almond flour by weight if I have a scale, but volume works fine too. Just make sure to spoon it into the cup and level it off—don’t pack it down.
Equipment Needed
You don’t need fancy equipment for this. Here’s what I actually use in my kitchen:
Microwave-Safe Bowls — I use two 6-ounce ramekins or custard cups. Ceramic or glass work best. If you don’t have ramekins, you can use a single large mug or two small microwave-safe bowls. Just adjust the cooking time accordingly.
Microwave — Yes, this is a microwave recipe. It’s fast and it works. You can bake it in an oven at 350°F (175°C) for 12-14 minutes if you prefer, but the microwave is my go-to for speed. It heats the center quickly, creating that lava effect.
Microwave-Safe Bowl for Melting — A medium bowl to melt the chocolate and butter. I use a glass bowl because it’s easy to see when it’s melted.
Small Mixing Bowl — For whisking the eggs and sweetener.
Whisk or Fork — A small whisk is nice, but a fork works perfectly fine. You’re not making a meringue; you just need to combine ingredients.
Measuring Spoons and Cups — Standard stuff. I keep a set on my counter for easy access.
Spatula — A silicone spatula is great for scraping the bowl and folding in the almond flour. It ensures you get all the batter into the ramekins.
Tip: If you’re making multiple cakes at once, make sure your ramekins are the same size and shape so they cook evenly. I’ve learned this the hard way when I used mismatched cups.
How to Make It: Step-by-Step
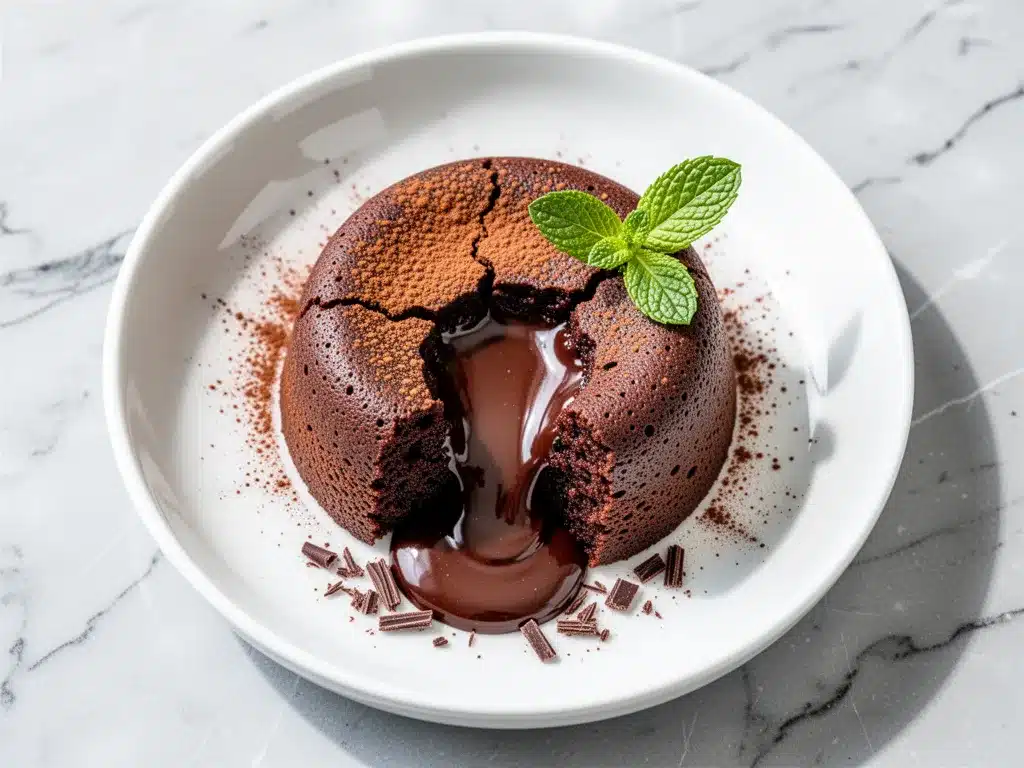
Alright, let’s make this! I’m walking you through exactly how I do it, including the little tricks I’ve picked up over time. It’s simple, but there are a few key steps to get that perfect gooey center.
Step 1: Melt the Chocolate and Butter (2 minutes)
Break the sugar-free dark chocolate into chunks and place it in a microwave-safe bowl with the butter. Microwave on high in 30-second intervals, stirring between each interval, until completely smooth. This usually takes about 1-2 minutes total. Be careful not to overheat it; chocolate burns easily. If it’s too hot, it can seize up. Let it cool slightly for a minute.
Step 2: Whisk the Eggs and Sweetener (1 minute)
In a separate small bowl, whisk together the eggs, egg yolks, and keto sweetener until well combined. You don’t need to whip it into a foam; just make sure the sweetener is dissolved and the eggs are uniform. Add the vanilla extract and salt here.
Step 3: Combine Wet Ingredients (1 minute)
Pour the melted chocolate mixture into the egg mixture. Add the almond butter and whisk everything together until smooth. The mixture should look glossy and thick. If it looks separated, keep whisking; it will come together.
Step 4: Fold in the Almond Flour and Cocoa (1 minute)
Add the almond flour and cocoa powder to the wet mixture. Use a spatula to gently fold them in. Don’t overmix; you just want to incorporate the flour. The batter will be thick and sticky. This is normal. If it’s too dry, add a teaspoon of water or milk. If it’s too wet, add a teaspoon more almond flour.
Step 5: Prepare the Ramekins (1 minute)
Lightly grease your ramekins with butter or cooking spray. This prevents sticking and makes cleanup easier. You can also dust them with a little extra almond flour or cocoa powder for a nicer finish, but it’s not necessary.
Step 6: Fill and Microwave (3-4 minutes)
Divide the batter evenly between the prepared ramekins. They should be about ¾ full. Microwave on high for 3 minutes. Then, check the edges: they should be set, but the center should still look soft and slightly jiggly. If it’s still very liquid, microwave for another 30-60 seconds. Do not overcook! The residual heat will continue to cook the center as it rests. For a true lava cake, you want the center to be runny.
Step 7: Rest and Serve (2 minutes)
Let the cakes rest in the ramekins for 2 minutes. This allows them to set slightly and makes them easier to handle. Run a knife around the edge to loosen if needed. Invert them onto plates or serve them right in the ramekins if you’re feeling lazy (which I often am). Sprinkle with sea salt flakes if using. Serve immediately while warm.
Total Time: About 15 minutes (5 minutes prep, 3-4 minutes cooking, 2 minutes resting).
Expert Tips & Tricks
Here’s everything I’ve learned from making this dozens of times. These tips will save you from my mistakes and ensure your lava cake is perfect every time.
Don’t Overcook It
This is the #1 mistake people make. If the center looks fully set in the microwave, it’s overcooked. You want it to look slightly underdone. The residual heat will finish it off. I usually take mine out when the center still looks a bit glossy. If you’re unsure, start with 3 minutes and add time in 15-second increments.
Room Temperature Ingredients
Make sure your eggs and almond butter are at room temperature. Cold ingredients can cause the chocolate to seize when you mix them. I usually take the eggs out of the fridge while the chocolate is melting. It’s a small step, but it makes a big difference in texture.
Use Quality Chocolate
Since chocolate is the main flavor, use the best sugar-free chocolate you can find. Cheap sugar-free chocolate often has a waxy texture and artificial aftertaste. A good bar of 70% cocoa sugar-free chocolate makes all the difference. I’ve tried many brands, and Lily’s and Ghirardelli are my favorites.
Almond Flour Matters
Use fine almond flour. If your almond flour is coarse or chunky, the cake will have a gritty texture. I’ve tried using almond meal, and it just doesn’t work. If you’re making your own, pulse blanched almonds in a food processor until they’re fine, but don’t over-process them into almond butter.
Adjust for Your Microwave
Microwaves vary in power. My microwave is 1100 watts, so 3 minutes works perfectly. If yours is weaker, you might need 3:30. If it’s stronger, start with 2:45. It’s worth doing a test run with one cake to dial in your timing. Once you know your microwave, it’s foolproof.
Make-Ahead Option
You can prep the batter ahead of time. Mix everything up to the point of filling the ramekins, cover them with plastic wrap, and refrigerate for up to 24 hours. When you’re ready to eat, microwave them as directed, but you might need to add 30 seconds to the cooking time since they’re cold from the fridge.
Common Mistakes (and how to avoid them)
Mistake: Cake is dry and crumbly
Fix: You overcooked it. Next time, reduce the microwave time by 15-30 seconds. Also, make sure you’re using enough fat (butter and almond butter). Keto desserts rely on fat for moisture.
Mistake: Center is raw batter
Fix: You undercooked it. Add 15-30 seconds to the microwave time. The center should be molten, not liquid batter. If it’s runny like soup, it needs more time.
Mistake: Cake stuck to ramekin
Fix: You didn’t grease it well enough. Be generous with the butter or spray. Let it rest for 2 minutes before trying to remove it.
Variations & Substitutions
Once you’ve nailed the basic version, here’s how you can mix it up. I’ve tried all of these, and they’re all delicious.
Peanut Butter Lava Cake
Swap the almond butter for peanut butter. The combination of chocolate and peanut butter is classic. You can also swirl a teaspoon of peanut butter into the batter before microwaving for a marbled effect.
Coffee Lava Cake
Add 1 teaspoon of instant espresso powder to the dry ingredients. It enhances the chocolate flavor and gives it a mocha kick. Perfect for those who need a caffeine boost with their dessert.
Berry Swirl
Add a tablespoon of fresh or frozen berries (raspberries, blackberries, or strawberries) to the center of the batter before microwaving. The berries burst open and create a fruity lava center. Just be aware that the extra moisture might require an extra 15 seconds of cooking.
Coconut Version
Swap the almond flour for coconut flour, but reduce the amount to 2 tablespoons. Coconut flour is much more absorbent, so you’ll need to add an extra egg yolk or a splash of coconut milk to keep it moist. It gives a nice tropical twist.
White Chocolate Lava Cake
Use sugar-free white chocolate chips instead of dark chocolate. It’s sweeter and creamier. I like to add a few raspberries on top for contrast.
Dietary Modifications:
Nut-Free
Swap the almond flour for sunflower seed flour or oat flour (if you’re not strict keto). Swap the almond butter for sunflower seed butter or tahini. It changes the flavor, but it works.
Egg-Free
This is tricky because eggs provide structure. You can try using flax eggs (1 tablespoon ground flaxseed + 3 tablespoons water per egg), but the texture will be denser. It won’t be a true lava cake, but it will be a fudgy brownie-like dessert.
Serving & Storage
How to Serve:
I usually serve this straight from the ramekin at the dinner table. It looks rustic and stays warm. But here are other ways I’ve enjoyed it:
Side Dishes:
– A dollop of whipped cream (heavy cream whipped with a little sweetener)
– A scoop of vanilla keto ice cream
– A few fresh raspberries or blackberries for a pop of color and acidity
Toppings Bar:
When I have guests, I put out: crushed nuts, sugar-free chocolate shavings, coconut flakes, and sea salt flakes. Everyone customizes their bowl.
Storage Instructions:
Refrigerator:
Store leftover batter in an airtight container for up to 3 days. Cook individual portions as needed. Do not store baked cakes in the fridge; they will dry out. If you must store them, keep them in an airtight container at room temperature for up to 12 hours.
Reheating:
If you have leftover baked cake, microwave it for 15-20 seconds to warm it up. It won’t be as gooey as fresh, but it’s still good.
Freezing:
I don’t recommend freezing baked lava cakes because the texture changes. The center can become grainy. If you want to freeze, freeze the batter in the ramekins. Thaw in the fridge overnight, then microwave as directed.
Pro tip: If leftovers are drying out, stir in a teaspoon of butter when reheating. It brings back some of the moisture.
Nutrition Information
I’m not a nutritionist, but here’s the breakdown if you’re tracking. This is per serving (one lava cake).
| Nutrient | Amount |
|---|---|
| Calories | 380 |
| Protein | 12g |
| Net Carbs | 4g |
| Fat | 34g |
| Fiber | 4g |
What’s Good:
– Very low in net carbs
– High in healthy fats from almonds and chocolate
– Good source of protein from eggs
– Satisfying and filling
What to Know:
– Higher in calories due to fat content
– Contains nuts
– Moderate sodium
My Take:
Look, this is a dessert. It’s rich and calorie-dense. But it fits perfectly into a keto lifestyle. I don’t eat this every day, but when I do, I savor it. It’s better than a candy bar and better than store-bought keto desserts. I know exactly what’s in it, and I control the quality.
Final Thoughts
So that’s my go-to keto chocolate lava cake with almond flour! I’ve probably talked your ear off at this point, but when you make a recipe this often, you have a lot to say about it.
This has saved my weeknight desserts more times than I can count. It’s my answer to “what’s for dessert” when I’m tired, don’t want to bake a whole cake, and still want something that tastes really good. My kids are happy, my husband’s happy, and I’m happy because I’m not stressed about cooking.
Make it yours! Try different add-ins, swap in your favorite sweetener, or adjust the cooking time to your microwave. The best recipes are the ones you adapt to your family’s tastes.
If you make this, drop a comment and let me know what you think! I love hearing how recipes turn out in your kitchen. And if something doesn’t work, tell me that too—I’m here to help troubleshoot.
Happy cooking! And I hope your kitchen smells half as good as mine does right now.
Frequently Asked Questions
Can I use coconut flour instead of almond flour?
You can, but you need to adjust the recipe. Coconut flour is much more absorbent, so use only 2 tablespoons instead of ¼ cup. You’ll also need to add an extra egg yolk or a splash of coconut milk to keep it moist. The texture will be slightly different—more brownie-like than cake-like—but it still works.
Why did my lava cake turn out solid instead of gooey?
Most likely, you overcooked it. Microwaves vary in power, so 3 minutes might be too long for yours. Start with 2:45 and check the center. It should look soft and slightly jiggly, not firm. Remember, the residual heat will continue to cook it after you take it out. If it’s still solid, next time reduce the time by 15 seconds.
Can I make this in the oven?
Yes! Preheat your oven to 350°F (175°C). Grease your ramekins and fill them with batter. Bake for 12-14 minutes. The edges should be set, but the center should still be soft. Check at 12 minutes to avoid overcooking. Baking takes longer but gives a more even texture.
Is this recipe safe for diabetics?
This recipe is low-carb and uses sugar-free sweeteners, so it has a minimal impact on blood sugar. However, everyone’s body reacts differently to sugar alcohols like erythritol. I recommend monitoring your blood sugar after eating it to see how your body responds. Always consult with your healthcare provider for personalized advice.
Can I double the recipe?
Absolutely! Double all the ingredients and use more ramekins. The cooking time stays the same, but make sure your ramekins are the same size so they cook evenly. I do this when I’m meal-prepping or feeding a crowd. Just make sure your microwave can handle multiple ramekins at once (you might need to cook them in batches).
What if I don’t have almond butter?
You can substitute with peanut butter, sunflower seed butter, or tahini. It will change the flavor slightly, but it still works. If you don’t have any nut or seed butter, you can omit it, but the cake will be less moist. Add an extra teaspoon of butter to compensate.
How do I reheat leftovers without it getting dry?
Add a splash of milk or cream to a skillet, add your leftover cake, and heat gently over low heat, stirring frequently. The extra liquid brings back the creamy texture. Microwave sort of works but tends to dry it out. If you do microwave, definitely add a splash of milk first and heat in short bursts, stirring between.
Pin This Recipe!
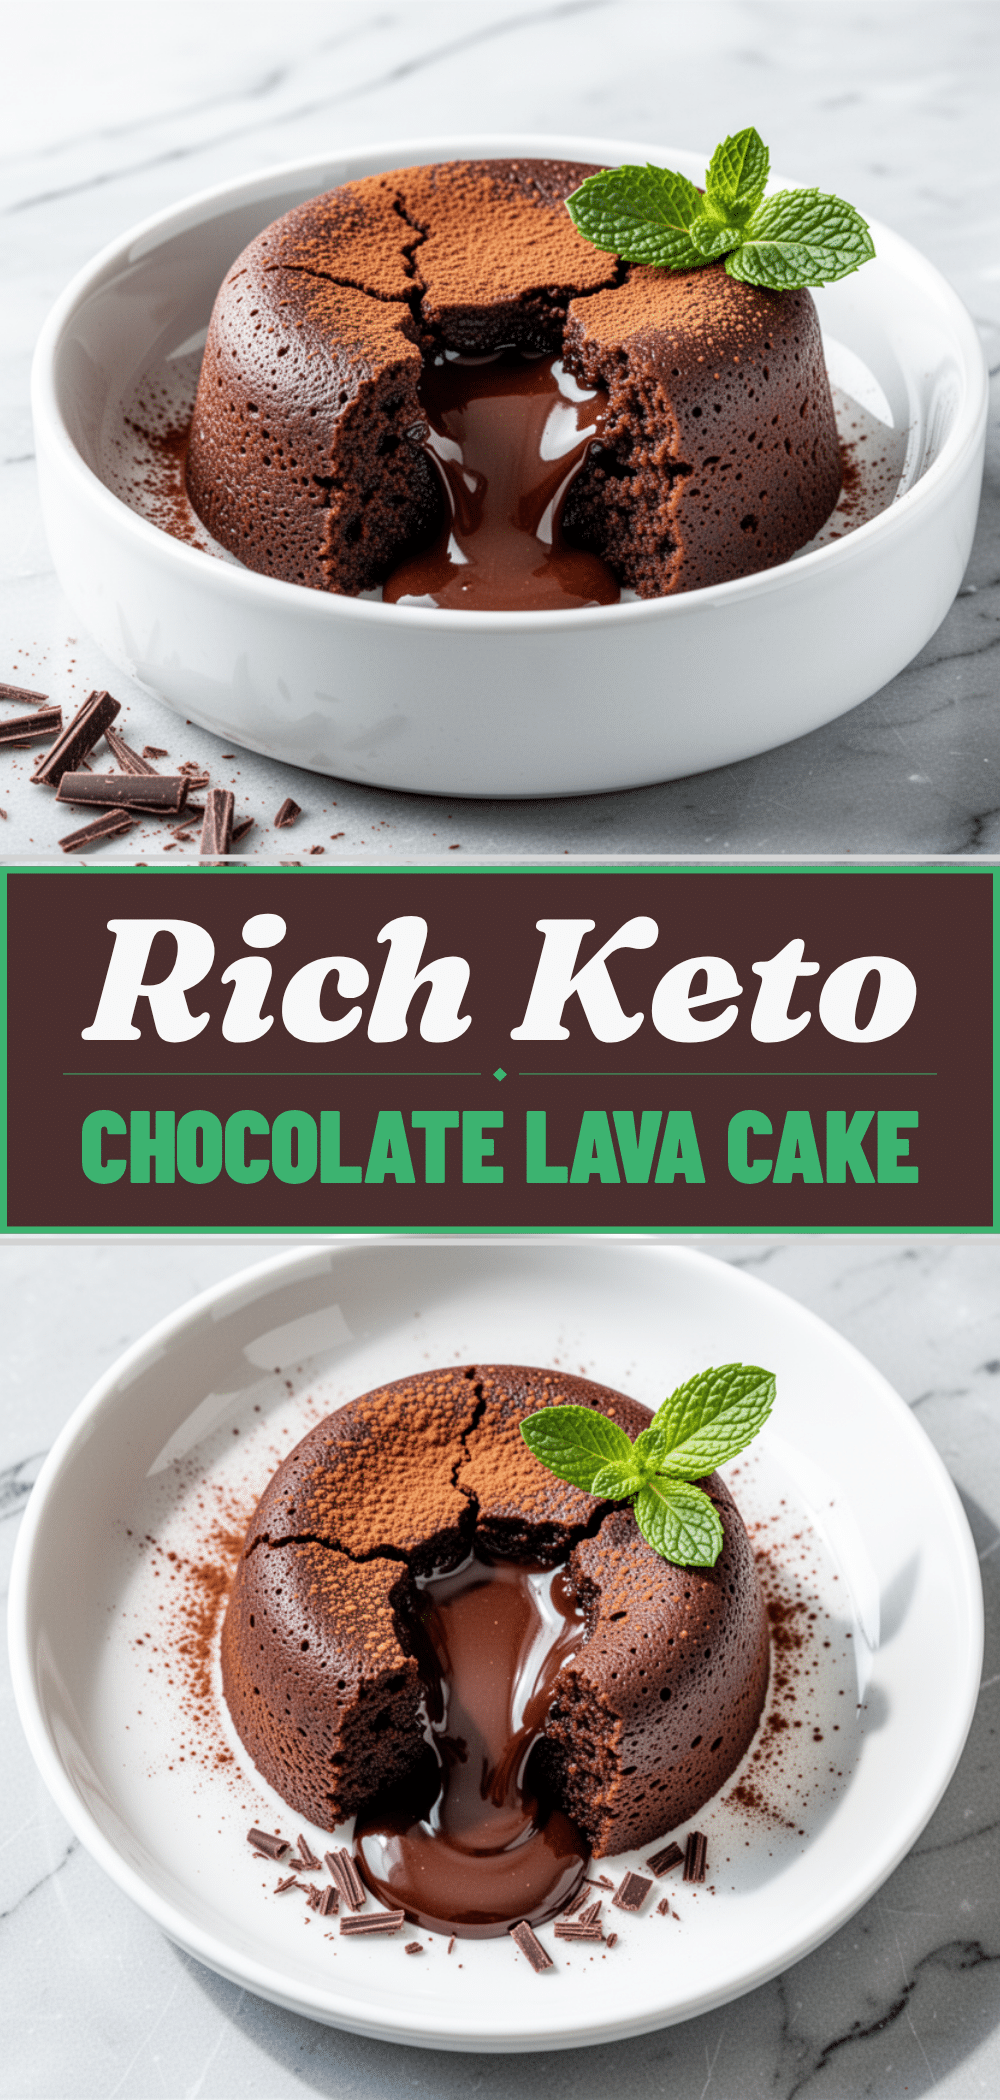
Keto Chocolate Lava Cake: Best Almond Flour Recipe
- Total Time: 15 minutes
- Yield: 2 servings 1x
Description
A quick, 15-minute keto chocolate lava cake made with almond flour that features a rich, molten center. This gluten-free, grain-free dessert is perfect for late-night cravings and requires minimal cleanup.
Ingredients
- 4 ounces (113g) sugar-free dark chocolate (70% cocoa or higher)
- 2 tablespoons (30g) unsalted butter
- ¼ cup (25g) fine-textured almond flour
- 2 large eggs (room temperature)
- 2 large egg yolks (room temperature)
- 2 tablespoons (32g) creamy almond butter
- 2–3 tablespoons (25-35g) keto sweetener (erythritol, allulose, or monk fruit blend)
- 1 tablespoon (5g) unsweetened cocoa powder
- ½ teaspoon pure vanilla extract
- 1 pinch salt
- Optional: Sea salt flakes for topping
Instructions
- Break the sugar-free dark chocolate into chunks and place it in a microwave-safe bowl with the butter. Microwave on high in 30-second intervals, stirring between each, until smooth. Let cool slightly.
- In a separate small bowl, whisk together the eggs, egg yolks, and keto sweetener until well combined and the sweetener is dissolved. Add the vanilla extract and salt.
- Pour the melted chocolate mixture into the egg mixture. Add the almond butter and whisk until smooth and glossy.
- Add the almond flour and cocoa powder to the wet mixture. Gently fold them in with a spatula until just incorporated. The batter will be thick and sticky.
- Lightly grease two 6-ounce ramekins with butter or cooking spray.
- Divide the batter evenly between the prepared ramekins, filling them about ¾ full.
- Microwave on high for 3 minutes. The edges should be set, but the center should still look soft and slightly jiggly. If necessary, microwave for another 30-60 seconds. Do not overcook.
- Let the cakes rest in the ramekins for 2 minutes to allow them to set slightly.
- Run a knife around the edge to loosen if needed. Invert onto plates or serve directly in the ramekins. Sprinkle with sea salt flakes if using and serve immediately.
Notes
Microwaves vary in power; start with 3 minutes and check the center. It should look slightly underdone as residual heat will finish cooking it. Ensure eggs and almond butter are at room temperature to prevent the chocolate from seizing. For oven baking, preheat to 350°F (175°C) and bake for 12-14 minutes.
- Prep Time: 5 minutes
- Cook Time: 3-4 minutes
- Category: Dessert
- Cuisine: American
Nutrition
- Serving Size: 1 lava cake
- Calories: 380
- Sugar: 1
- Sodium: 150
- Fat: 34
- Saturated Fat: 12
- Carbohydrates: 8
- Fiber: 4
- Protein: 12
Keywords: keto, chocolate lava cake, almond flour, gluten-free, grain-free, low-carb, microwave dessert, quick dessert, sugar-free


