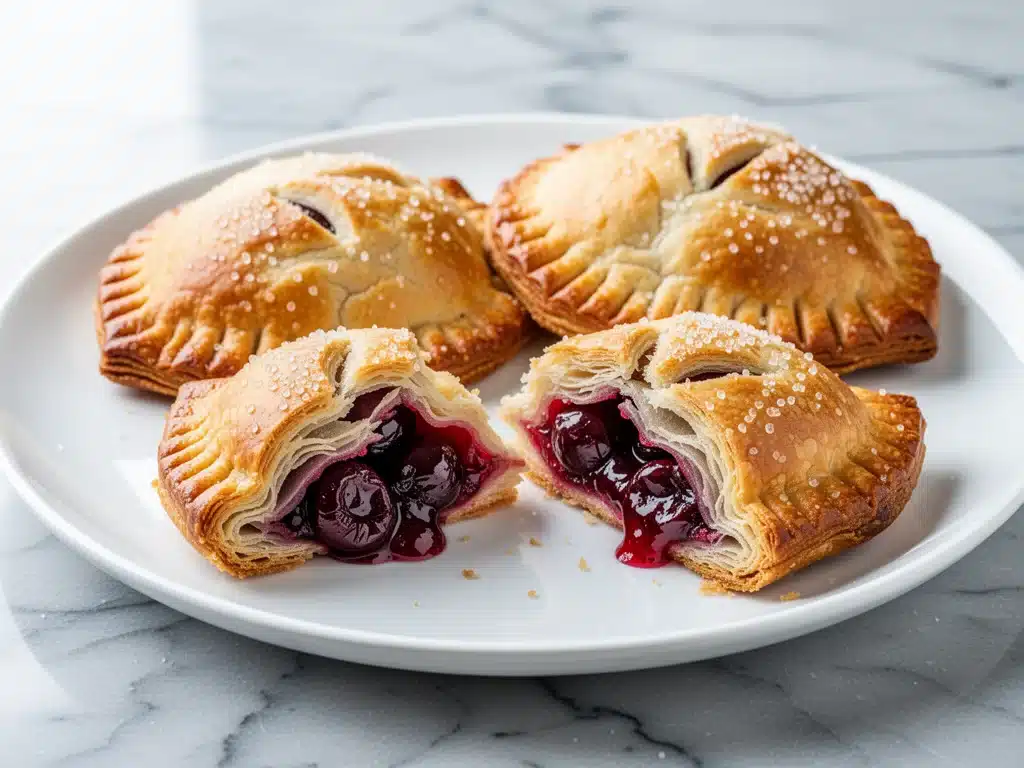
There is a specific kind of magic that happens when you bite into a homemade cherry hand pie. It’s not just the sweet, tart burst of the filling—it’s the crust. That shattering, golden, buttery crust that flakes off in delicate layers and lands on your shirt, your lap, and definitely on the floor because you’re eating it while walking out the door. I’ve spent years trying to replicate the cherry pies I used to buy at gas stations on long road trips with my family. You know the ones—slightly burnt edges, lukewarm centers, and a crust that felt more like cardboard than pastry. For a long time, I thought making a proper hand pie at home was too much work. Too much rolling, too much chilling, too much fuss.
Then I discovered the 3-ingredient crust hack that changed everything. Seriously. Three ingredients. No fancy pastry flour, no complicated techniques, and absolutely no patience required. I made these homemade cherry hand pies last Sunday afternoon while my kids were playing in the backyard. By the time the timer went off, the entire house smelled like summer, and we were lined up at the counter waiting for them to cool down enough to touch. I’ve tested this recipe over a dozen times now—sometimes with fresh cherries, sometimes with frozen, sometimes with a splash of bourbon in the filling—but the core method stays the same because it just works.
What makes these cherry hand pies special isn’t just the taste; it’s the simplicity. You don’t need a stand mixer. You don’t need a rolling pin if you use a bottle. You just need a little bit of cold butter and a willingness to get your hands a bit messy. Whether you’re looking for a quick summer dessert, a picnic treat, or just a way to use up those cherries from the farmers market, this recipe is your new best friend. It’s the kind of baking that feels indulgent but actually leaves you with more time to enjoy it than spend on it.
Why You’ll Love This Recipe
Let’s be real: most homemade pie recipes feel like a commitment. You spend an hour making dough, another hour chilling it, and then you’re praying the oven doesn’t burn the bottom. Not this one. These cherry hand pies are different. They’re designed for real life. Here’s why they’ve become a staple in my kitchen rotation:
- Stupidly Simple Crust — The 3-ingredient dough uses all-purpose flour, cold butter, and ice water. That’s it. I’ve made this dough while holding a crying baby, and it still turned out flaky. If you can cut butter into flour with a fork or your fingers, you can make this crust.
- Ready in 45 Minutes — From mixing to eating, you’re looking at about 45 minutes. That includes baking time. I’ve made these after dinner on a whim and had dessert ready before the dishes were done. It’s faster than ordering takeout.
- Perfectly Portable — These are the ultimate hand-held dessert. No plates needed. No forks required. I pack them in a lunchbox for work, throw them in a cooler for camping, and hand them to my kids as after-school snacks. They hold up beautifully and don’t get soggy.
- Impressive but Low-Key — Serve these at a potluck, a bridal shower, or just a Tuesday night, and people will ask for the recipe. They look like you spent hours in the kitchen, but you’ll be sipping coffee while they bake. It’s the perfect confidence booster for home bakers.
- Flexible Filling — Ran out of fresh cherries? Use frozen. Prefer pie filling? Go for it. Want to add a dash of almond extract or a spoonful of cream cheese? Do it. This recipe bends to your pantry, not the other way around.
This is my go-to when I want to impress without the stress. It’s sweet, it’s buttery, and it’s ridiculously easy to make. Plus, the leftovers taste amazing cold the next day—almost like a cherry turnover.
Ingredients You’ll Need
One of the best things about this recipe is how few ingredients you actually need. You probably have most of this already. Here’s the breakdown of what you’ll need for the crust and the filling, plus a few tips on what to look for.
For the Extra-Flaky Butter Crust
All-Purpose Flour (2 cups / 250g) — The base of your dough. Don’t swap this for pastry flour unless you want a different texture. All-purpose gives you that perfect balance of tender and sturdy. I use Gold Medal or King Arthur, but any brand works fine.
Cold Unsalted Butter (1 cup / 2 sticks / 226g) — This is the most important ingredient. The butter needs to be cold. Not room temperature. Not melted. Cold. I keep a stick in the freezer for a few minutes before using it if it’s not cold enough from the fridge. The cold butter creates steam pockets in the oven, which is what makes the crust flaky. If your butter gets warm while you’re working, pop the dough back in the fridge for 10 minutes.
Ice Water (6-8 tablespoons / 90-120ml) — Just enough to bring the dough together. Add it one tablespoon at a time. You don’t want a soupy dough. If it feels dry and won’t hold together, add another tablespoon. If it feels sticky, you’ve added too much. I keep a small bowl of ice water nearby so the water stays cold.
Salt (1 teaspoon) — Enhances the flavor and balances the sweetness. Don’t skip it.
For the Cherry Filling
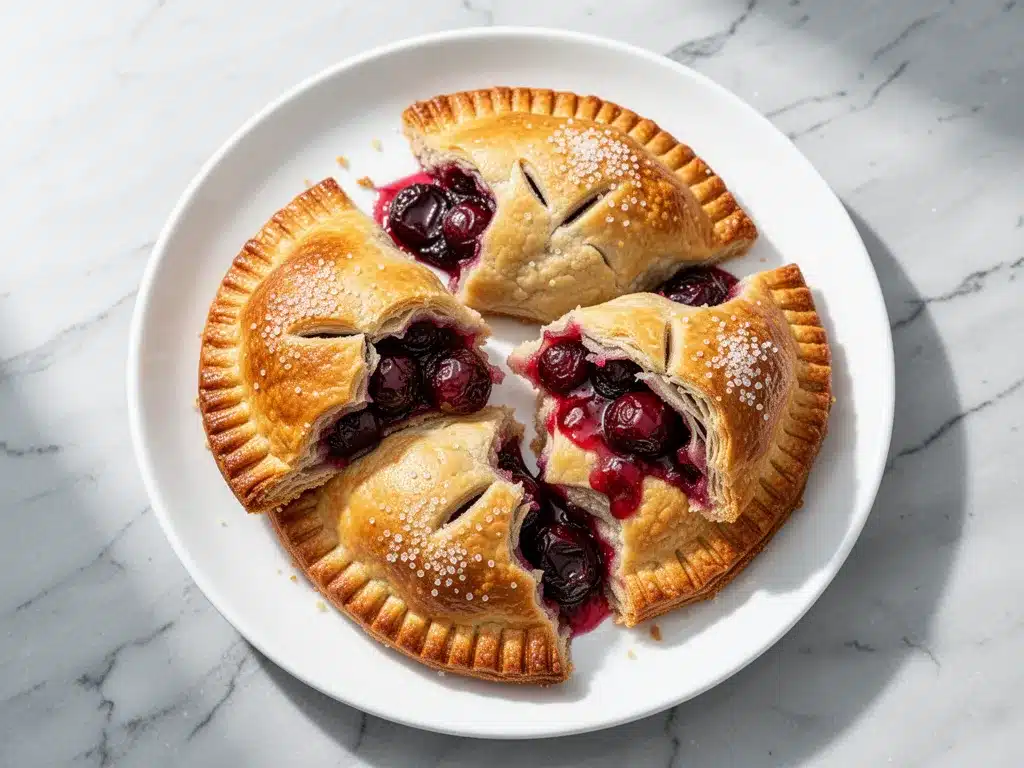
Cherries (4 cups / 600g, pitted) — Fresh cherries are best in season (late spring to early summer), but frozen pitted cherries work just as well. If using frozen, do not thaw them first; add them straight from the freezer to avoid a watery filling. I love Bing cherries for their deep flavor, but Rainier cherries are sweeter and more delicate.
Granulated Sugar (½ cup / 100g) — Adjust based on the sweetness of your cherries. Taste a few before adding. If they’re very tart, you might need up to ¾ cup. If they’re super sweet, ⅓ cup might be enough.
Cornstarch (2 tablespoons / 16g) — This thickens the juices so you don’t end up with a runny mess. It’s essential for hand pies. If you don’t have cornstarch, tapioca starch works too.
Lemon Juice (1 tablespoon) — Brightens the flavor and prevents the cherries from tasting flat. It also helps balance the sweetness.
Vanilla Extract (1 teaspoon) — Adds a warm, comforting background note. Pure vanilla is best here.
Optional: Almond Extract (½ teaspoon) — Cherry and almond are a classic pairing. A little bit goes a long way. Add this if you want that bakery-style flavor.
For the Egg Wash
Egg (1 large) — Beaten with 1 tablespoon of water or milk. This gives the crust that beautiful golden-brown shine. If you’re vegan, use a flax egg or just brush with milk for a softer finish.
Coarse Sugar (for sprinkling) — Adds a nice crunch and sparkle on top. Regular granulated sugar works too, but coarse sugar looks more professional.
Equipment Needed
You don’t need a fancy kitchen to make these. Here’s what I actually use and why:
Large Mixing Bowl — I use a wide bowl so I have room to cut in the butter. A standard 4-quart bowl works perfectly.
Fork or Pastry Cutter — To cut the butter into the flour. I use a fork because it’s easier to clean, but a pastry cutter is faster if you have one. You can even use your clean fingers if you’re in a hurry.
Rolling Pin or Large Bottle — To roll out the dough. I sometimes just use a clean wine bottle if I don’t want to dig out the rolling pin. It works surprisingly well.
Pie Cutter or Knife — To cut circles out of the dough. A 3-inch round cookie cutter is ideal, but a small bowl or glass works too. If you don’t have a round cutter, just cut squares and fold the corners over—no one will know the difference.
Baking Sheets — Two standard sheets. Line them with parchment paper for easy cleanup. I love parchment because the crust doesn’t stick, and the cleanup is just tossing the paper away.
Pastry Brush — For the egg wash. A silicone brush is easiest to clean. If you don’t have one, just dip your fingers in the egg wash and dab it on.
Cooling Rack — Essential for letting the pies cool so the filling sets. If you cut into a hot pie, the filling will run out everywhere. Trust me on this.
How to Make It: Step-by-Step
Alright, let’s make these! I’m walking you through exactly how I do it, including the little tricks that make the crust extra flaky and the filling perfectly thick.
Step 1: Make the Dough (10 minutes)
In your large mixing bowl, combine the flour and salt. Add the cold butter, cut into small cubes. Use a fork or your fingers to cut the butter into the flour until the mixture looks like coarse crumbs with some pea-sized pieces of butter remaining. Those pea-sized pieces are crucial—they create the flakes. Don’t overmix. If the butter is fully incorporated, your crust will be tough.
Gradually add the ice water, one tablespoon at a time, mixing gently with the fork until the dough just starts to come together. It should look shaggy and moist. Do not knead it. If it’s too dry, add another tablespoon of water. If it’s too sticky, add a sprinkle of flour. Gather the dough into a ball, divide it in half, and flatten each half into a disc. Wrap tightly in plastic wrap and refrigerate for at least 30 minutes. This step is non-negotiable—it relaxes the gluten and re-chills the butter.
Step 2: Prepare the Filling (5 minutes)
While the dough chills, mix your cherries, sugar, cornstarch, lemon juice, vanilla, and almond extract (if using) in a medium bowl. Stir gently until the cherries are evenly coated. Let this sit while the dough chills. The sugar will draw out some juice, which helps the cornstarch activate later. If you’re using frozen cherries, be gentle so they don’t break apart.
Step 3: Roll Out the Dough (10 minutes)
Preheat your oven to 375°F (190°C). Line two baking sheets with parchment paper. Take one disc of dough out of the fridge. On a lightly floured surface, roll it out to about 1/8-inch thickness. You don’t need it to be perfect. Just roll it into a large rectangle or circle.
Using your 3-inch cutter, cut out circles. Gather the scraps and reroll them to cut more circles. You should get about 12-14 circles from each disc. Keep the cut circles on the counter and the scraps in a pile.
Step 4: Assemble the Hand Pies (15 minutes)
Place a heaping tablespoon of cherry filling in the center of half of the dough circles. Leave a ½-inch border around the edge. Do not overfill, or the filling will leak out during baking.
Take the other half of the dough circles and place one on top of each filled circle. Press the edges together firmly with your fingers to seal. Then, use a fork to crimp the edges. This not only looks pretty but ensures the pie stays sealed. If you’re worried about leaks, you can also brush the edges with a little water before placing the top dough on.
Use a knife or fork to poke 2-3 small slits in the top of each pie. This lets steam escape so the crust doesn’t puff up weirdly.
Step 5: Egg Wash and Bake (20-25 minutes)
Brush the tops of the pies with the egg wash and sprinkle with coarse sugar. This is where they get that bakery shine. Place them on the prepared baking sheets, leaving a little space between each one.
Bake for 20-25 minutes, or until the crust is deep golden brown and the filling is bubbling through the vents. If the edges are browning too fast, cover them with a small piece of foil. Rotate the pans halfway through for even baking.
Step 6: Cool and Serve
Let the pies cool on a wire rack for at least 15 minutes before eating. I know, it’s hard to wait. But if you cut into them hot, the filling will be liquid and burn your mouth. Cooling allows the cornstarch to set, giving you that perfect jammy texture. Serve warm or at room temperature.
Expert Tips & Tricks
Here’s everything I’ve learned from making these dozens of times. These tips will save you from my mistakes.
Keep Everything Cold
This is the golden rule of pie crust. If your butter gets soft, your crust will be tough. If your kitchen is hot, chill your bowl before mixing. If the dough feels warm while you’re rolling, pop it back in the fridge for 5 minutes. Cold butter = flaky crust. It’s that simple.
Don’t Overwork the Dough
The less you handle the dough, the better. Overmixing develops gluten, which makes the crust chewy instead of tender. Mix just until it comes together. When rolling, use gentle, confident strokes. If the dough cracks, it’s too dry. Add a tiny bit of water. If it sticks, add a dusting of flour.
Chill Before Baking
After assembling the pies, put the baking sheet in the fridge for 10-15 minutes before baking. This re-chills the butter, which helps the crust rise and stay flaky in the oven. It’s an extra step, but it makes a noticeable difference.
Seal Those Edges
If you’re worried about leaks, press the edges firmly with your fingers, then crimp with a fork. You can also use a little egg wash on the bottom edge before adding the top dough to act as glue. I’ve had pies leak a little, but it just adds a caramelized crunch to the pan. Still delicious.
Use Frozen Cherries Wisely
If you’re using frozen cherries, do not thaw them. Thawing releases too much water, and your pies will be soggy. Add them frozen to the sugar mixture. The cornstarch will handle the extra liquid. Just make sure to bake them a minute or two longer if needed.
Variations & Substitutions
Once you’ve nailed the basic cherry version, here’s how you can mix it up. I’ve tried all of these, and they’re all winners.
Blueberry Lemon Hand Pies
Swap the cherries for blueberries and add the zest of one lemon to the filling. Blueberries and lemon are a classic combo. Add a tablespoon of cornstarch to handle the extra juice.
Apple Cinnamon Hand Pies
Use 4 cups of diced apples (Granny Smith works best) and add 1 teaspoon of cinnamon and ¼ cup of brown sugar. These taste like fall in your hands. Add a pinch of nutmeg for extra warmth.
Peach Ginger Hand Pies
Swap cherries for diced peaches and add ½ teaspoon of ground ginger. The ginger adds a nice spicy kick that balances the sweet peaches. This is my summer favorite.
Chocolate Cherry Hand Pies
Add 2 tablespoons of mini chocolate chips to the cherry filling. The chocolate melts into the cherries for a decadent treat. Great for when you want something extra indulgent.
Gluten-Free Option
Use a 1:1 gluten-free flour blend instead of all-purpose flour. The texture might be slightly more crumbly, but it still works. Make sure your filling thickener is cornstarch (which is GF) and not wheat-based.
Vegan Option
Use vegan butter (cold, just like regular butter) and skip the egg wash. Brush with almond milk and sprinkle with sugar. The crust will be slightly less golden, but still delicious.
Serving & Storage
These cherry hand pies are best enjoyed fresh, but they’re surprisingly good stored and reheated.
How to Serve
I usually serve these warm, right out of the oven, with a scoop of vanilla ice cream. The contrast of hot pie and cold ice cream is heavenly. But they’re also great at room temperature as a snack or packed in a lunchbox. They pair well with coffee, tea, or even a glass of cold milk.
Storing Leftovers
Store leftovers in an airtight container at room temperature for up to 2 days. They’ll stay fresh and the crust will remain somewhat flaky. If you need to store them longer, refrigerate them for up to 4 days. The crust might soften slightly, but the flavor stays great.
Reheating
To reheat, place the pies in a 350°F oven for 5-10 minutes. This restores the flakiness of the crust. Avoid the microwave, as it will make the crust soggy. If you’re in a rush, a quick 15-second zap in the microwave will warm the filling, but the crust won’t be crisp.
Freezing
You can freeze these pies, but I recommend freezing them before baking. Assemble the pies, place them on a baking sheet, and freeze until solid. Then transfer to a freezer bag. When you’re ready to eat, bake them straight from frozen, adding 5-10 minutes to the baking time. Thawed, baked pies don’t freeze well because the crust loses its texture.
Nutrition Information
I’m not a nutritionist, but here’s the breakdown if you’re tracking. Keep in mind that these are indulgent treats, so enjoy them in moderation.
| Nutrient | Per Pie (approx.) |
|---|---|
| Calories | 180 |
| Protein | 2g |
| Carbs | 24g |
| Fat | 9g |
| Fiber | 1g |
| Sugar | 14g |
These pies are higher in sugar and fat due to the butter crust and cherry filling. However, they’re a great alternative to store-bought pastries, which often contain preservatives and artificial ingredients. When you make them at home, you control what goes in. If you want to lighten them up, you can reduce the sugar in the filling by a quarter cup, and the flavor will still be great.
Final Thoughts
So that’s my go-to homemade cherry hand pie recipe! I’ve probably talked your ear off at this point, but when you make a recipe this often, you have a lot to say about it. These hand pies have saved my summer evenings. They’re my answer to “what’s for dessert” when I want something sweet but don’t want to spend hours in the kitchen. My kids are happy, my husband’s happy, and I’m happy because I’m not stressed about cooking.
Make it yours! Try different fruits, add different spices, or experiment with the crust. The best recipes are the ones you adapt to your family’s tastes. If you make these, drop a comment and let me know what you think! I love hearing how recipes turn out in your kitchen. And if something doesn’t work, tell me that too—I’m here to help troubleshoot.
Happy baking! And I hope your kitchen smells half as good as mine does right now.
Frequently Asked Questions
Can I use pie filling instead of fresh cherries?
Yes, you can! Use about 2 cups of cherry pie filling. Since pie filling is already thickened and sweetened, reduce the sugar in the recipe to ¼ cup and skip the cornstarch. Just mix the filling with the lemon juice and vanilla, then assemble as usual. It’s a great shortcut for busy weeknights.
Why did my crust turn out tough?
Usually, tough crust comes from overworking the dough or warm butter. Make sure your butter is cold and cut it into pea-sized pieces. Don’t knead the dough—just bring it together gently. If you roll it out too much, the gluten develops. Roll it out just enough to fit your cutter. Also, chill the dough before baking to keep the butter cold.
Can I make these ahead for a party?
Absolutely. Assemble the pies and freeze them on a baking sheet until solid. Then store them in a freezer bag for up to 3 months. When you’re ready to serve, bake them straight from frozen, adding 5-10 minutes to the baking time. They’ll taste fresh-baked.
Why did my filling leak out?
Leaks usually happen if the pies aren’t sealed properly or if they’re overfilled. Make sure to press the edges firmly with your fingers and crimp with a fork. Don’t overfill—leave a ½-inch border. Also, make sure you’re using enough cornstarch to thicken the juices. If you’re using frozen cherries, make sure not to thaw them first.
Can I use salted butter instead of unsalted?
You can, but you’ll need to reduce the salt in the recipe. Unsalted butter lets you control the salt level. If you use salted butter, cut the added salt in half or omit it entirely. Taste the dough before adding salt if you’re unsure.
How do I know when the pies are done?
The crust should be deep golden brown, and the filling should be bubbling through the vents. If the crust is browning too fast, cover it with foil. If the filling isn’t bubbling, the cornstarch might not have activated yet. Bake for a few more minutes. The internal temperature of the filling should be at least 165°F if you’re using a thermometer.
Pin This Recipe!


Homemade Cherry Hand Pies: Best 3-Ingredient Flaky Recipe
- Total Time: 45 minutes
- Yield: 24 hand pies 1x
Description
These homemade cherry hand pies feature a stupidly simple 3-ingredient flaky crust and a sweet-tart cherry filling. Ready in just 45 minutes, they are the perfect portable, handheld dessert for any occasion.
Ingredients
- 2 cups (250g) All-Purpose Flour
- 1 teaspoon Salt
- 1 cup (2 sticks / 226g) Cold Unsalted Butter, cubed
- 6–8 tablespoons Ice Water
- 4 cups (600g) Cherries, pitted (fresh or frozen)
- ½ cup (100g) Granulated Sugar
- 2 tablespoons (16g) Cornstarch
- 1 tablespoon Lemon Juice
- 1 teaspoon Vanilla Extract
- ½ teaspoon Almond Extract (optional)
- 1 large Egg, beaten with 1 tablespoon water or milk (for egg wash)
- Coarse Sugar, for sprinkling
Instructions
- In a large mixing bowl, combine flour and salt. Add cold cubed butter and cut it into the flour using a fork or fingers until the mixture resembles coarse crumbs with pea-sized butter pieces remaining.
- Gradually add ice water, one tablespoon at a time, mixing gently until the dough just starts to come together. Do not knead.
- Gather dough into a ball, divide in half, flatten into discs, wrap in plastic, and refrigerate for at least 30 minutes.
- While dough chills, mix cherries, sugar, cornstarch, lemon juice, vanilla, and almond extract in a medium bowl. Let sit to allow sugar to draw out juices.
- Preheat oven to 375°F (190°C) and line two baking sheets with parchment paper.
- On a lightly floured surface, roll out one disc of dough to 1/8-inch thickness. Cut out 12-14 circles using a 3-inch cutter.
- Place a heaping tablespoon of cherry filling in the center of half the dough circles, leaving a ½-inch border.
- Top with remaining dough circles, press edges firmly to seal, and crimp with a fork. Poke 2-3 slits in the top of each pie for steam vents.
- Brush tops with egg wash and sprinkle with coarse sugar.
- Bake for 20-25 minutes until crust is deep golden brown and filling is bubbling. Rotate pans halfway through.
- Cool on a wire rack for at least 15 minutes before serving to allow filling to set.
Notes
Keep all ingredients, especially butter, as cold as possible for a flaky crust. Do not overwork the dough. If using frozen cherries, do not thaw them before mixing. For best results, chill assembled pies in the fridge for 10-15 minutes before baking.
- Prep Time: 30 minutes
- Cook Time: 20-25 minutes
- Category: Dessert
- Cuisine: American
Nutrition
- Serving Size: 1 hand pie
- Calories: 180
- Sugar: 14
- Sodium: 150
- Fat: 9
- Saturated Fat: 5
- Carbohydrates: 24
- Fiber: 1
- Protein: 2
Keywords: cherry hand pies, homemade hand pies, flaky pie crust, 3 ingredient crust, easy dessert, portable dessert, cherry pie, summer baking


