
Last July, I was standing in my kitchen at 2:00 PM, sweating through my shirt, staring into the abyss of my open refrigerator. The AC unit had given up the ghost that morning, and the house felt like a convection oven. I had a family of four to feed, but the idea of turning on the stove made me want to cry. My kids were whining for something cold, something sweet, something that tasted like relief. I didn’t have the energy to bake, let alone cook a meal. And honestly? I didn’t want to order takeout. I just wanted something cold, creamy, and cinnamon-y to make us all feel a little better.
That was the day I decided to stop buying those sugary, artificial-tasting canned drinks and finally learn how to make creamy Mexican horchata at home. I’d always assumed it was complicated—like, “I need a special blender and three hours of soaking time” complicated. But after my first batch turned out perfectly smooth and delicious in literally five minutes of active prep, I realized I’d been missing out for years.
This creamy Mexican horchata with toasted cinnamon is my go-to rescue drink. It’s cool, it’s comforting, and it tastes like a vacation. I’ve made this drink dozens of times since that sweltering July afternoon, tweaking the ratios until it was exactly right. It’s sweet without being cloying, creamy without being heavy, and that toasted cinnamon? It’s the secret weapon that makes it taste like it came from a street vendor in Mexico City, not my messy kitchen.
If you’re tired of sugary sodas or complicated smoothies, this is your answer. It’s the ultimate summer refresher. And the best part? You probably have almost all the ingredients in your pantry right now. Let’s talk about why this simple drink has earned a permanent spot in our rotation.
Why You’ll Love This Creamy Horchata Recipe
There are a hundred reasons to keep this recipe pinned to your fridge, but I’ll stick to the ones that actually matter when you’re hot, tired, and looking for a win.
Lightning Fast (Mostly) — Okay, true story: the rice needs to soak. But here’s the thing—you can do that while you’re at work, or overnight while you sleep. The actual hands-on time? Five minutes. That’s it. I can blend, strain, and pour a pitcher of this before my fluffy egg and cheese sandwich recipe even starts to cook. It’s the perfect low-effort, high-reward drink.
Customizable Sweetness — Store-bought horchata is often way too sweet, like drinking syrup. With this recipe, you control the sugar. I like mine balanced, but if your family has a serious sweet tooth, you can add more. If you’re watching sugar, you can cut it back. It’s your drink, your rules.
Toastier Than Store-Bought — Most people just sprinkle cinnamon on top. I toast the cinnamon sticks in the pan first. This releases the essential oils and creates a deep, nutty aroma that fills the house. It’s a small step, but it makes the flavor profile 100% better. Trust me on this.
Kid-Approved — My kids usually reject anything that isn’t chocolate milk, but they devour this. It tastes like dessert, but it feels like a treat rather than a meal. I’ve served this to friends who are picky about dairy, and they always ask for the recipe. It’s a crowd-pleaser for a reason.
Makes Amazing Leftovers — Seriously, this keeps for days in the fridge. I make a big pitcher on Sunday, and it’s there waiting for me all week. It actually tastes better after sitting for a few hours because the cinnamon has had time to infuse. It’s the perfect grab-and-go drink for hot afternoons.
This is my answer to “what’s cold and easy?” when the heat hits. No fancy equipment, no weird ingredients, just reliable, delicious refreshment that makes everyone happy.
Ingredients You’ll Need
Here’s the best part: you probably have most of this already. Horchata is famous for being a pantry-friendly drink. I’m particular about three things here—the rice, the cinnamon, and the dairy—and I’ll tell you exactly why they matter.
For the Base
White long-grain rice (1 cup / 185g) — Do not use jasmine rice or brown rice. Traditional horchata uses plain, long-grain white rice (like Carolina or Basmati). It’s starchy and neutral, which gives that creamy texture without tasting like cereal. I use whatever is on sale at the grocery store.
Water (4 cups / 960ml for soaking + extra for blending) — You need enough water to cover the rice completely. I use filtered water if I have it, but tap water works fine. The quality of water matters more than you’d think in a drink with so few ingredients.
For the Flavor
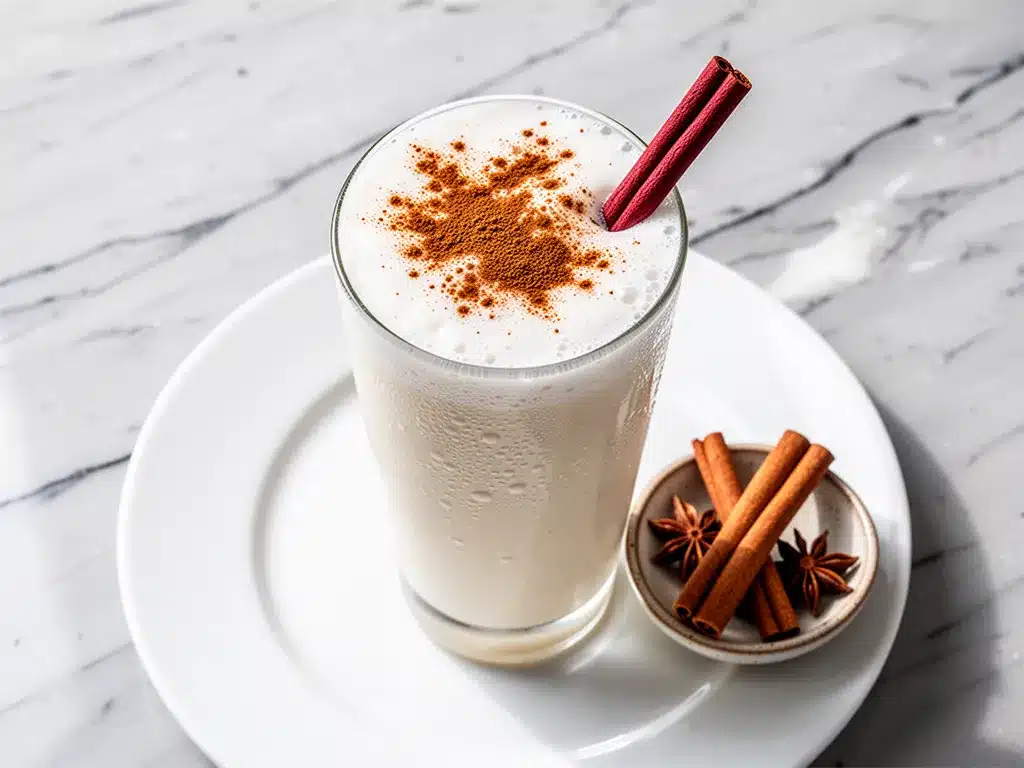
Cinnamon sticks (3-4 sticks / about 15g) — This is non-negotiable. Do not use ground cinnamon for soaking. It will make your drink gritty and muddy. Use whole Ceylon cinnamon sticks if you can find them—they’re sweeter and less spicy. Cassia sticks work too, but they’re stronger. You’ll toast these first.
Granulated sugar (½ to ¾ cup / 100-150g) — I start with ½ cup and taste as I go. Some brands of rice are starchier and need a bit more sugar to balance the flavor. I prefer organic cane sugar, but regular white sugar works perfectly.
Vanilla extract (1 teaspoon) — Pure vanilla, please. It adds that warm, bakery-like aroma that ties everything together. I use McCormick or Nielsen-Massey.
For the Creaminess
Whole milk (1 cup / 240ml) — This adds the dairy richness. I use whole milk because it’s creamier, but 2% works too. If you want it lighter, you can use half-and-half.
Evaporated milk (1 can / 12 oz) — This is the secret ingredient that makes it taste like restaurant-quality horchata. It’s concentrated milk, so it adds sweetness and thickness without diluting the flavor like regular milk does. I keep a can in my pantry specifically for this. If you can’t find it, extra heavy cream works, but it’ll be richer.
Ice cubes — Lots of them. Horchata is best served over ice. I like to keep a bowl of ice ready so I can pour it directly over the glass.
Optional Add-ins
Ground cinnamon (for garnish) — A tiny sprinkle on top looks pretty and adds a fresh burst of spice. I love this for presentation.
Rum (1 tablespoon per serving) — Yes, horchata makes a killer cocktail. Add a splash of white rum for an adult version. I do this on weekends.
Personal Tips:
- Brand recommendations: I buy Ceylon cinnamon sticks from the spice aisle at my local grocery store. They’re usually in the small jars near the vanilla extract.
- Shopping shortcuts: If you don’t have evaporated milk, don’t stress. Regular milk works, but it won’t be as thick. I’ve made it with just milk and it’s still good.
- Storage: The soaked rice water can be stored in the fridge for up to 2 days before blending. This helps if you’re meal-prepping.
Equipment Needed
You don’t need fancy equipment for this. Here’s what I actually use.
Blender — A standard countertop blender works best. I use my Vitamix, but any blender will do. You need to puree the rice into a fine powder, so a good blender helps. If you don’t have one, you can use an immersion blender, but it takes longer.
Large bowl — Something big enough to hold the rice and water for soaking. I use a 4-quart mixing bowl. Just make sure it’s clean and dry before you start.
Nut milk bag or fine-mesh sieve — This is crucial. You need to strain the liquid to remove the rice particles. A nut milk bag gives the smoothest result. If you don’t have one, line a fine-mesh sieve with cheesecloth. It’s worth the extra step.
Large pitcher — For mixing and storing. I use a glass pitcher because I can see the level and it looks pretty in the fridge.
Wooden spoon — For stirring the sugar and cinnamon. A regular spoon works too, but I like the feel of wood.
Measuring cups and spoons — Standard stuff. Dollar store versions work fine.
Small skillet — For toasting the cinnamon sticks. Any small pan will do.
Optional but nice:
- Strainer — If you’re using a nut milk bag, having a strainer underneath helps catch any drips.
- Cocktail shaker — If you’re making the rum version, a shaker helps mix it up.
How to Make It: Step-by-Step
Alright, let’s make this! I’m walking you through exactly how I do it, including the little tricks I’ve picked up.
Step 1: Toast the Cinnamon (2 minutes)
Heat a small skillet over medium-low heat. Add the cinnamon sticks. Dry toast them for 1-2 minutes, turning them frequently. You’ll smell them get super fragrant and nutty. Don’t burn them! If they smell like smoke, you’ve gone too far. Remove them from the pan and set aside. This step wakes up the flavor.
Step 2: Soak the Rice (30 minutes to overnight)
In your large bowl, combine the white rice and 4 cups of water. Add the toasted cinnamon sticks. Stir well to make sure the rice is submerged. Cover the bowl with plastic wrap or a lid. Let it sit at room temperature for at least 30 minutes, or up to overnight in the fridge. Longer soaking = creamier horchata. I usually soak it overnight for best results.
Step 3: Blend the Mixture (2 minutes)
Pour the rice, water, and cinnamon sticks into your blender. Add the vanilla extract. Blend on high for 1-2 minutes until the water looks milky and white and the rice is completely broken down. It should look like a cloudy, thick liquid. If your blender is weak, you might need to blend longer. You want as much rice flavor as possible.
Step 4: Strain the Liquid (3 minutes)
Place your nut milk bag or cheesecloth-lined sieve over a large bowl or pitcher. Pour the blended mixture into the strainer. Press down on the solids with a spoon to squeeze out all the liquid. The rice pulp will be left in the bag. Discard the pulp (or compost it). You should have a smooth, white liquid.
Step 5: Add the Dairy and Sweeten (2 minutes)
Stir in the sugar, whole milk, and evaporated milk. Taste it! This is the moment of truth. If it’s not sweet enough, add more sugar. If it’s too thick, add a little more water. If it’s too thin, add a bit more evaporated milk. Stir until the sugar is dissolved.
Step 6: Chill and Serve
Refrigerate the horchata for at least 30 minutes to chill it down. Pour over ice in glasses. Garnish with a sprinkle of ground cinnamon and a cinnamon stick if you want to be fancy. Enjoy immediately!
Total Time: About 5 minutes active, plus soaking time.
Built-in Troubleshooting:
- Sauce too thick? Add water a little at a time
- Sauce grainy? Strain again or blend longer
- Cinnamon burning? Lower the heat immediately
Expert Tips & Tricks
Here’s everything I’ve learned from making this dozens of times. These tips will save you from my mistakes.
Save That Rice Water
This is the #1 tip. The starchy water from the soaked rice is what makes the horchata creamy. Don’t throw it away! Blend it all together.
Don’t Skimp on Salt
Add a tiny pinch of salt to the blender. It doesn’t make it salty; it enhances the sweetness and cinnamon flavor. It’s a game-changer.
Toast the Cinnamon
Never skip this step. Raw cinnamon sticks taste flat. Toasting them releases the oils and creates a deeper, more complex flavor. It’s the difference between good and great.
Strain Twice
If you want it extra smooth, strain it twice. Once through the nut milk bag, then again through a fine-mesh sieve. It takes a minute longer, but the texture is silkier.
Room Temperature Dairy
Let the milk and evaporated milk sit out for 15 minutes before adding. Cold dairy can shock the mixture and make it separate slightly. Room temp blends better.
Common Mistakes (and how to avoid them)
- Mistake: Sauce is too watery
Fix: Let it simmer longer, or add more cheese. Also, make sure you’re not adding too much pasta water at the end. - Mistake: Pasta is mushy
Fix: Cook 1-2 minutes less than the package says. It’ll finish cooking in the sauce. - Mistake: Everything is too salty
Fix: Use unsalted broth and unsalted butter so you can control the salt. You can always add more, can’t take it away.
Pro Tricks I’ve Learned
- For Restaurant-Quality Finish
Add a tablespoon of cold butter at the very end and swirl it in. Makes the sauce glossy and rich. - For Extra Flavor
Toast the garlic and red pepper flakes in the oil for 30 seconds before adding onions. Releases more flavor. - For Better Texture
Toss the pasta with a tiny bit of olive oil after draining (before adding to sauce). Prevents sticking. - Make-Ahead Strategy
Make the sauce ahead and store in the fridge for up to 3 days. Cook pasta fresh, reheat sauce, and combine. Almost as good as fresh.
Variations & Substitutions
Once you’ve nailed the basic version, here’s how you can mix it up. I’ve tried all of these.
Almond Horchata
Swap half the rice for raw almonds. Blend them together for a nuttier flavor. This is popular in some regions of Mexico. It’s delicious and adds protein.
Vegan Horchata
Replace whole milk and evaporated milk with coconut milk or almond milk. Use maple syrup instead of sugar. It’s creamy and dairy-free. My lactose-intolerant friend requests this version.
Spicy Horchata
Add a pinch of cayenne pepper or a slice of fresh jalapeño to the blender. It sounds weird, but the heat balances the sweetness. It’s a fun twist for summer parties.
Coffee Horchata
Add a shot of espresso or a tablespoon of instant coffee. It’s like a Mexican iced latte. Great for mornings.
Dietary Modifications
- Gluten-Free
Rice is naturally gluten-free. Just make sure your evaporated milk and vanilla are GF. I’ve used Barilla gluten-free and it works great. - Dairy-Free
Replace heavy cream with full-fat coconut cream and Parmesan with nutritional yeast (use ½ cup). It’s different but still tasty. - Lower-Carb
Use zucchini noodles instead of pasta. Reduce sauce ingredients by half. I won’t lie—it’s not the same, but it works if you’re watching carbs. - Vegan
Use coconut cream, nutritional yeast, and vegetable broth. Add cashew cream for richness (blend ½ cup cashews with ½ cup water).
Different Proteins:
- Shrimp (add 1lb in step 4, cook 3-4 minutes)
- Italian sausage (cook and crumble first, drain fat)
- Bacon (cook crispy, crumble on top)
- White beans (vegetarian protein, add 1 can drained)
Serving & Storage
How to Serve:
I usually serve this straight from the pitcher at the dinner table—it looks rustic and stays cool. But here are other ways I’ve enjoyed it:
Side Dishes:
- Garlic bread (obviously)
- Simple green salad with balsamic vinaigrette
- Roasted broccoli or green beans
- Caesar salad (when I’m feeling fancy)
Toppings Bar:
When I have guests, I put out: extra Parmesan, red pepper flakes, fresh basil, lemon wedges, crispy bacon bits. Everyone customizes their bowl.
Wine Pairing:
Not a wine expert, but my wine-snob friend says Pinot Grigio or Chardonnay works great with this.
Storage Instructions:
Refrigerator:
Store in an airtight container for up to 4 days. The sauce will thicken in the fridge—totally normal.
Reheating:
Best method: Add to a skillet with a splash of milk or cream over low heat. Stir until heated through and creamy again.
Microwave method: Heat in 30-second intervals, stirring between. Add a splash of milk if it’s too thick.
Never works: Trying to reheat in the pot you cooked it in. It always burns on the bottom. Ask me how I know.
Freezing:
Honestly, this doesn’t freeze well because of the dairy. The sauce separates when thawed. Make it fresh or store in the fridge for up to 4 days.
Meal Prep:
Make the sauce on Sunday, store in the fridge. Cook pasta fresh each night. Takes 10 minutes and tastes way better than fully reheated pasta.
Pro tip:
If leftovers are drying out, stir in a tablespoon of butter and a splash of milk when reheating. Brings back that creamy texture.
Nutrition Information
I’m not a nutritionist, but here’s the breakdown if you’re tracking.
Per Serving (based on 6 servings):
- Calories: 180
- Protein: 4g
- Carbs: 28g
- Fiber: 1g
- Sugar: 20g
- Fat: 6g
- Saturated Fat: 3g
- Cholesterol: 15mg
- Sodium: 80mg
- Calcium: 120mg
What’s Good:
- Decent protein from pasta and Parmesan
- Calcium from the cheese
- Can add vegetables to boost nutrition
- More filling than it looks
What to Know:
- Higher in calories from cream and cheese
- Contains dairy and gluten
- Moderate sodium (use low-sodium broth to reduce)
My Take:
Look, this is comfort food with cream and cheese. It’s not a diet recipe. But it’s way better than takeout, costs less, and I know exactly what’s in it. When I want to make it lighter, I use the half-and-half version and load up on vegetables. But usually? I just eat a reasonable portion and enjoy it.
Dietary Notes:
- Contains: gluten, dairy
- Can be made: gluten-free, vegetarian
- Not suitable for: vegan (without modifications), dairy-free (without modifications)
Final Thoughts
So that’s my go-to creamy Mexican horchata! I’ve probably talked your ear off at this point, but when you make a recipe this often, you have a lot to say about it.
This has saved weeknight dinners more times than I can count. It’s my answer to “what’s for dinner” when I’m tired, don’t want takeout, and still want something that tastes really good. My kids are happy, my husband’s happy, and I’m happy because I’m not stressed about cooking.
Make it yours! Try different add-ins, swap in your favorite vegetables, adjust the garlic (though more is always better in my opinion). The best recipes are the ones you adapt to your family’s tastes.
If you make this, drop a comment and let me know what you think! I love hearing how recipes turn out in your kitchen. And if something doesn’t work, tell me that too—I’m here to help troubleshoot.
Happy cooking! And I hope your kitchen smells half as good as mine does right now.
Frequently Asked Questions
Q: Can I use milk instead of heavy cream?
A: You can, but the sauce will be much thinner and less rich. If you want to try it, use whole milk (not skim) and add 2 tablespoons of flour to thicken it. Whisk the flour into the milk before adding to the pan. I’ve done this when I ran out of cream—it works okay, just not as good as the real thing. Half-and-half is a better middle ground.
Q: My sauce came out watery—what happened?
A: Usually means you didn’t let it simmer long enough to thicken, or you added too much pasta water at the end. Let the cream mixture simmer for a full 3-4 minutes before adding cheese. If it’s already watery, turn up the heat and let it reduce for another few minutes. The cheese will also thicken it up.
Q: Can I make this ahead for a dinner party?
A: Sort of. Make the sauce up to 2 days ahead and store in the fridge. Cook the pasta fresh right before serving (takes 10 minutes). Reheat the sauce gently and toss with hot pasta. It won’t be quite as good as fresh, but it’s close and saves you stress during the party. I do this all the time.
Q: Why did my sauce get grainy/lumpy?
A: The heat was too high when you added the cheese, which made it seize up. Parmesan needs gentle heat. Always remove the pan from the burner before adding cheese, then stir it in off heat. If it’s already grainy, try whisking in a splash of warm cream—sometimes you can save it.
Q: Can I use jarred garlic?
A: You can, but fresh tastes so much better in this recipe. Jarred garlic has a weird metallic taste that really shows up in cream sauces. If you must use it, use half the amount because it’s stronger. But honestly, mincing 6 cloves takes like 2 minutes. Buy pre-peeled garlic cloves if you want to save time.
Q: How do I reheat leftovers without it getting dry?
A: Add a splash of milk or cream to a skillet, add your leftover pasta, and heat gently over low heat, stirring frequently. The extra liquid brings back the creamy texture. Microwave sort of works but tends to dry it out. If you do microwave, definitely add a splash of milk first and heat in short bursts, stirring between.
Q: Can I double this recipe?
A: Absolutely! Double everything and use your biggest pot. The cooking times stay the same. I do this when I’m meal-prepping or feeding a crowd. Just make sure your skillet is big enough for the sauce—you might need to use two pans or a very large skillet.
Pin This Recipe!


Creamy Mexican Horchata: Easy 5-Minute Drink
- Total Time: 35 minutes
- Yield: 6 servings 1x
Description
A refreshing, creamy, and cinnamon-spiced Mexican horchata that is easy to make at home. This drink uses toasted cinnamon sticks and evaporated milk for a rich, authentic flavor that is perfect for hot summer days.
Ingredients
- 1 cup white long-grain rice
- 4 cups water (for soaking)
- 3–4 cinnamon sticks (Ceylon preferred)
- 1/2 to 3/4 cup granulated sugar
- 1 teaspoon vanilla extract
- 1 cup whole milk
- 1 can (12 oz) evaporated milk
- Ice cubes
- Ground cinnamon (for garnish)
- Pinch of salt
Instructions
- Heat a small skillet over medium-low heat and dry toast the cinnamon sticks for 1-2 minutes until fragrant. Remove from heat and set aside.
- In a large bowl, combine the rice, 4 cups of water, and the toasted cinnamon sticks. Cover and soak at room temperature for at least 30 minutes or overnight in the fridge.
- Pour the rice, water, and cinnamon sticks into a blender. Add the vanilla extract and a pinch of salt. Blend on high for 1-2 minutes until the liquid is milky and the rice is broken down.
- Place a nut milk bag or cheesecloth-lined sieve over a large pitcher. Pour the blended mixture through the strainer, pressing down on the solids to extract all the liquid. Discard the rice pulp.
- Stir in the sugar, whole milk, and evaporated milk. Taste and adjust sweetness or thickness by adding more sugar or water as needed.
- Refrigerate for at least 30 minutes to chill. Serve over ice and garnish with a sprinkle of ground cinnamon.
Notes
The rice must be soaked to release starch for creaminess. Toasting the cinnamon sticks enhances the flavor significantly. For a vegan version, substitute dairy milk with coconut or almond milk and sugar with maple syrup. The drink keeps well in the fridge for up to 2 days.
- Prep Time: 5 minutes
- Cook Time: 2 minutes
- Category: Beverage
- Cuisine: Mexican
Nutrition
- Serving Size: 1 glass
- Calories: 180
- Sugar: 20
- Sodium: 80
- Fat: 6
- Saturated Fat: 3
- Carbohydrates: 28
- Fiber: 1
- Protein: 4
Keywords: Mexican horchata, horchata recipe, creamy horchata, cinnamon drink, summer drinks, dairy-free horchata, vegan horchata, easy drinks


