It was 5:15 PM on a Tuesday, and I was staring into the abyss of my pantry. The kids were already complaining about hunger, my husband was asking if we were ordering pizza (again), and I had exactly twenty minutes before the sun went down and the kitchen went dark. I didn’t want pizza. I didn’t want takeout. I wanted something warm, something that smelled like a bakery but tasted like home, and something that would shut everyone up for at least ten minutes.
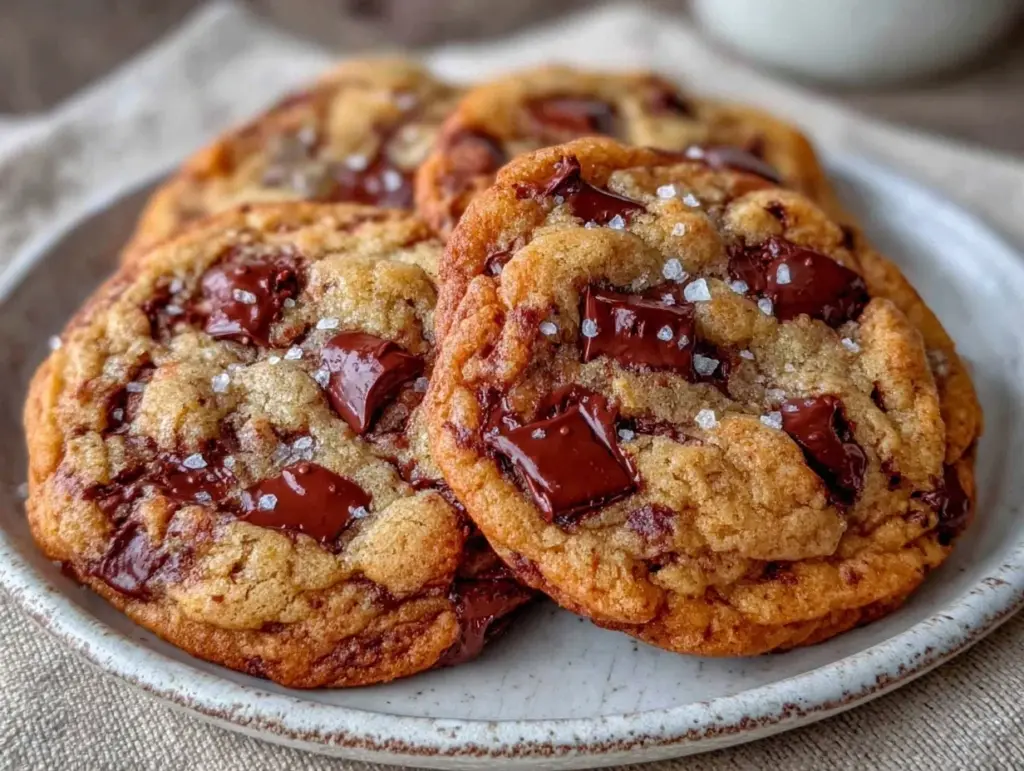
So, I made these chewy brown butter chocolate chip cookies.
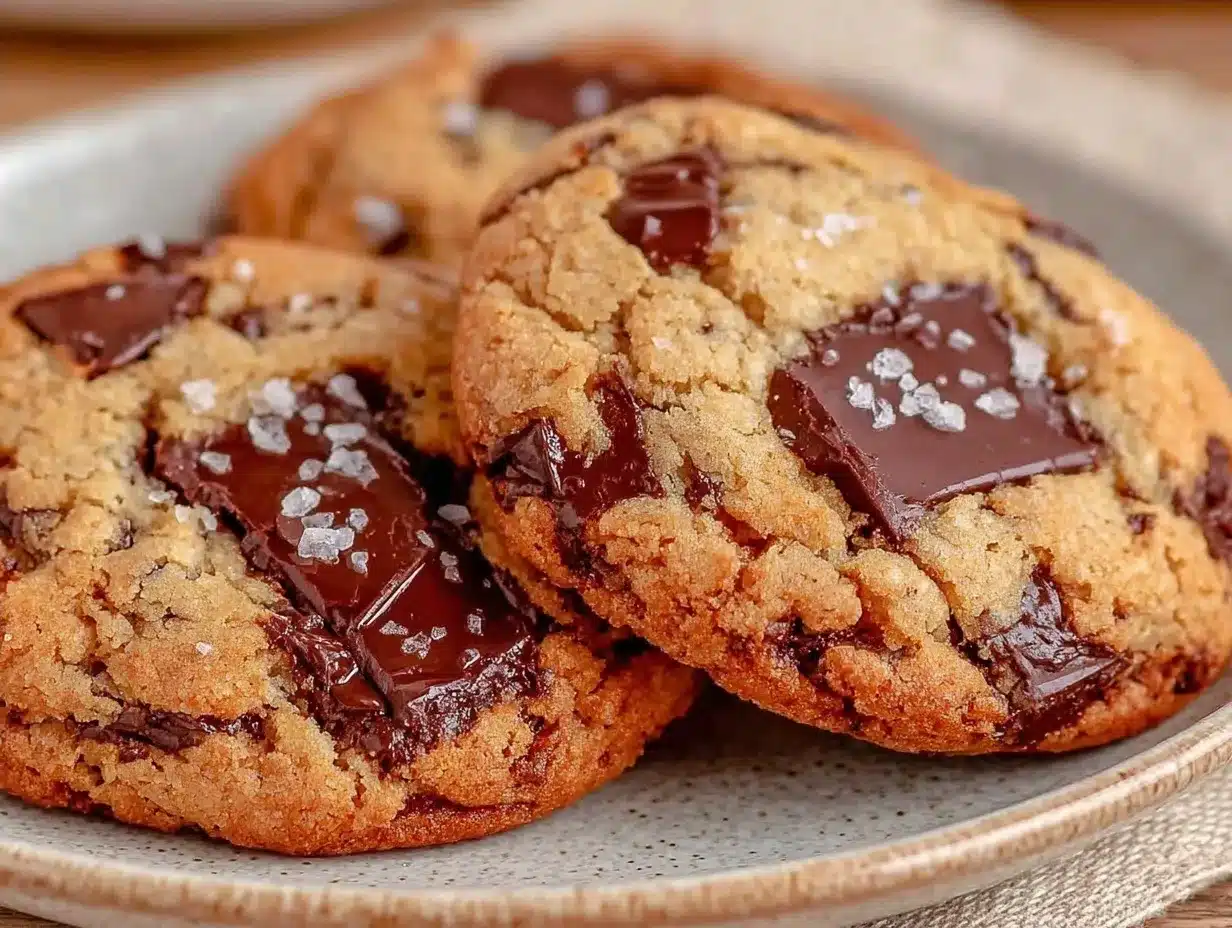
I know what you’re thinking. “Cookies? From scratch? At 5 PM?” Hear me out. This isn’t your grandmother’s cakey, dry cookie. These are the kind of cookies that have a crispy edge, a gooey center, and that deep, nutty flavor from browned butter that makes people stop mid-chew and ask, “What is in these? They taste different.” They are different. And they are stupidly easy to make, even when you’re running on empty.
I’ve tested this recipe about a dozen times over the last few months, tweaking the butter-browning time and the chilling duration until I got it perfect. The result? A cookie that is deeply flavorful, impossibly chewy, and ready to impress even the pickiest eaters. Whether you’re a last-minute host or just need a 5pm win to save your sanity, this is your answer.
Why You’ll Love This Recipe
There are a million cookie recipes out there. Why make this one? Because it solves the biggest problem with baking at home: the wait. Most cookies need hours of prep or days of chilling. These chewy brown butter chocolate chip cookies are designed for real life.
- The Flavor Bomb — Browned butter adds a toasty, caramel-like depth that regular melted butter just can’t match. It turns a basic chocolate chip cookie into something sophisticated. You don’t need fancy ingredients; you just need to cook the butter a little longer.
- Texture Perfection — I’ve struggled with cookies that are either too cakey or too hard. This recipe hits the sweet spot. The edges crisp up in the oven, while the center stays soft and chewy for days. Seriously, they stay chewy. I know because I eat one every day for a week.
- Minimal Cleanup — One bowl. That’s it. You brown the butter in the saucepan, mix everything in the same bowl, scoop, and bake. No stand mixer required. If you can whisk, you can make these.
- Impressive but Easy — When I bring these to work or hand them over at the door for a neighbor, people ask for the recipe immediately. They look like they came from a high-end bakery, but they took me 20 minutes of active time to make.
This is my go-to when I need to feel like a hero in the kitchen without the effort. It’s the ultimate 5pm rescue.
Ingredients You’ll Need
Here’s the best part: you probably have most of this already. The secret ingredient is time and heat, not rare spices. But getting the ratios right is key for that specific chewy texture.
For the Brown Butter Base
Unsalted butter (1 cup / 226g) — This is where the magic happens. You need to brown it. Use a light-colored saucepan so you can actually see the color change. If you use a dark pan, you might burn it before you know it. I prefer unsalted so I can control the saltiness of the final cookie.
Granulated sugar (¾ cup / 150g) — This helps create those crispy edges. Don’t skip it or swap it all for brown sugar if you want that contrast.
Brown sugar (1 cup / 200g, packed) — This is the chew factor. The molasses in brown sugar keeps the cookies soft and moist. Pack it down tightly when you measure it.
The Dry Mix
All-purpose flour (2 ¼ cups / 280g) — Standard flour works best. I like to spoon it into the cup and level it off. Scooping directly from the bag packs it down and can lead to dry cookies.
Baking soda (1 teaspoon) — Essential for that spread and browning. Make sure it’s fresh; old baking soda makes cookies dense.
Kosher salt (1 teaspoon) — Flavor enhancer. If you use table salt, reduce to ¾ teaspoon because it’s saltier.
The Good Stuff
Large eggs (2) — Room temperature eggs mix better into the butter-sugar mixture. If you’re in a rush, just drop them in a bowl of warm water for 5 minutes.
Vanilla extract (2 teaspoons) — Use the real stuff. I know it’s more expensive, but the flavor difference is huge in a recipe with few ingredients. Vanilla bean paste is amazing too if you want little specks.
Chocolate chips (2 cups / 340g) — I use a mix. Half semi-sweet chocolate chips for structure, and half chocolate chunks (like Ghirardelli or Lindt) for those melty pockets. Don’t use mini chips; they melt too fast and disappear.
Optional Finish
Flaky sea salt — Sprinkle this on top right after they come out of the oven. It’s the restaurant-style touch that makes everyone jealous.
Equipment Needed
You don’t need fancy gadgets for this. Here’s what I actually use:
Saucepan (light colored) — I use a 3-quart stainless steel saucepan. The light interior is non-negotiable for watching the butter brown. If you only have a dark non-stick pan, use a wooden spoon to check the color frequently.
Large mixing bowl — A glass or ceramic bowl works best. It won’t conduct heat like metal might if you add hot butter too quickly.
Whisk — For beating the butter and sugars together. A silicone spatula works too if you prefer, but a whisk incorporates air better.
Baking sheets — I use two half-sheet pans. Light-colored aluminum pans are best. Dark pans can cause the bottoms to burn.
Parchment paper — Lining your sheets makes cleanup a breeze. No scrubbing required.
Cooling rack — To stop the cooking process. If you don’t have one, just leave them on the pan for 5 minutes max, then move them to a counter.
Ice cream scoop — This is my secret weapon. It ensures every cookie is the exact same size, so they bake evenly. You can use a spoon, but the results won’t be as uniform.
How to Make It: Step-by-Step
Alright, let’s make these chewy brown butter chocolate chip cookies. I’m walking you through exactly how I do it, including the little tricks I’ve picked up so you don’t burn your butter.
Step 1: Brown the Butter (5-7 minutes)
Melt the butter in your saucepan over medium heat. Stir it constantly with a wooden spoon. It will foam up and bubble. Listen to it—it will go from a gentle simmer to a loud crackle. Watch the color. You want the butter to turn a golden amber color, like peanut butter. You’ll see little brown specks (milk solids) at the bottom. As soon as it smells nutty and toasty, take it off the heat immediately. Pour it into a heat-safe bowl to stop the cooking. Let it cool for 10 minutes until it’s just warm, not hot.
Step 2: Mix the Wet Ingredients (3 minutes)
To the warm brown butter, add the granulated sugar and brown sugar. Whisk vigorously for about 2 minutes. You want the mixture to look glossy and slightly lighter in color. This step is crucial for those crispy edges. Add the eggs and vanilla extract. Whisk again until fully combined. It should look like a smooth, shiny paste.
Step 3: Add the Dry Ingredients (2 minutes)
Stir in the flour, baking soda, and salt. Use a spatula or wooden spoon. Mix just until no dry flour streaks remain. Do not overmix! If you mix too much, you develop gluten, and your cookies will be tough. We want tender and chewy.
Step 4: Fold in the Chocolate (1 minute)
Throw in your chocolate chips and chunks. Fold them in gently. Reserve a small handful of chocolate chips to press onto the tops of the cookies later—that’s for presentation and extra chocolatey bites.
Step 5: Chill (Optional but Recommended)
If you have time, cover the bowl and chill the dough in the fridge for at least 30 minutes. This solidifies the fat, which means the cookies spread less and stay thicker. If you’re in a 5pm rush, you can skip this, but they will spread more. If you skip chilling, scoop them immediately.
Step 6: Scoop and Bake (12-14 minutes)
Preheat your oven to 350°F (175°C). Line two baking sheets with parchment paper. Scoop dough balls (about 2 tablespoons each) onto the sheets, spacing them 2 inches apart. Bake for 12-14 minutes. The edges should be golden brown, but the centers should still look slightly soft and underdone. They will firm up as they cool.
Step 7: The Final Touch
Take them out of the oven and immediately sprinkle with flaky sea salt. Let them sit on the hot baking sheet for 5 minutes. This is when they finish cooking. Then, transfer to a wire rack to cool completely. Or, eat them warm. I won’t judge.
Expert Tips & Tricks
Here’s everything I’ve learned from making these dozens of times. These tips will save you from my mistakes.
Don’t Burn the Butter
The difference between brown butter and burnt butter is about 30 seconds. Once you see the brown specks and smell the nuts, get it off the heat. The residual heat will keep cooking it. If it smells like burnt toast, start over. It’s not worth ruining a batch of cookies.
Cool the Butter
If you add the sugar to piping hot butter, it will seize up and become grainy. Let the brown butter cool until it’s warm to the touch before adding the sugars. This ensures a smooth, emulsified dough.
Measure Flour Correctly
Too much flour = dry, crumbly cookies. Spoon the flour into your measuring cup and level it off with a knife. Never scoop directly from the bag. This simple habit changes everything.
Underbake Slightly
I know it feels wrong to pull them out when they look soft. Trust me. They continue to cook on the hot pan. If you wait until they look fully set in the oven, they will be hard as rocks once cooled. Aim for golden edges and a soft center.
Use Room Temperature Eggs
Cold eggs can cause the warm butter to solidify into chunks. If your eggs are cold, whisk the dough vigorously for a minute or two to bring it back together. Or, just let the eggs sit out while you brown the butter.
Variations & Substitutions
Once you’ve nailed the basic version, here’s how you can mix it up. I’ve tried all of these.
Peanut Butter Swirl
Add ½ cup of creamy peanut butter to the dough. It adds a salty, rich flavor that pairs perfectly with the chocolate. It’s like a Reese’s cup in cookie form.
White Chocolate Macadamia
Swap the chocolate chips for white chocolate chunks and add 1 cup of toasted macadamia nuts. It’s tropical and sweet. Great for holidays.
Double Dark Chocolate
Use dark chocolate chips (60% cocoa or higher) instead of semi-sweet. This makes the cookies less sweet and more sophisticated. Perfect for coffee pairing.
Gluten-Free Version
I’ve used Bob’s Red Mill 1-to-1 Gluten Free Baking Flour with great success. The texture is almost identical. Just make sure your baking soda is certified GF.
Chewy Brown Butter Snickerdoodle Cookies
If you love the brown butter flavor, you might also enjoy my Chewy Brown Butter Snickerdoodle Cookies. They use the same technique but with cinnamon sugar instead of chocolate.
Serving & Storage
How to Serve:
These are best enjoyed warm, right out of the oven with a cold glass of milk. But they are also fantastic for gifting. They travel well in airtight containers.
Storage:
Store leftovers in an airtight container at room temperature for up to 5 days. Place a piece of bread in the container with the cookies—the cookies will absorb the moisture from the bread and stay chewy for days. I swear by this trick.
Freezing Dough:
You can freeze the dough balls! Scoop them onto a baking sheet, freeze until solid (2 hours), then transfer to a freezer bag. Bake from frozen, adding 1-2 minutes to the bake time. This is perfect for meal prepping desserts.
Reheating:
If you have leftovers, microwave a cookie for 10-15 seconds. It becomes gooey and warm again. Better than fresh leftovers, honestly.
Nutrition Information
I’m not a nutritionist, but here’s the breakdown if you’re tracking. Keep in mind, these are rich cookies, so portion control is key.
Per Cookie (makes approx. 24 cookies):
- Calories: 180
- Protein: 3g
- Carbs: 24g
- Fat: 9g
- Sugar: 16g
These are indulgent treats. I like to pair them with a cup of coffee or tea to slow down the eating. They are not a diet food, but they are definitely better than store-bought cookies which often contain weird preservatives.
Final Thoughts
So, there you have it. My go-to chewy brown butter chocolate chip cookies. I’ve probably talked your ear off at this point, but when you make a recipe this often, you have a lot to say about it.
This recipe has saved me more times than I can count. It’s my answer to “what’s for dessert?” when I’m tired, don’t want to order out, and still want something that tastes really good. My kids are happy, my husband’s happy, and I’m happy because I’m not stressed about cooking.
Make it yours! Try different chocolates, add nuts, or just enjoy them as is. The best recipes are the ones you adapt to your family’s tastes.
If you make these, drop a comment and let me know what you think! I love hearing how recipes turn out in your kitchen. And if something doesn’t work, tell me that too—I’m here to help troubleshoot.
Happy baking! And I hope your kitchen smells half as good as mine does right now.
Frequently Asked Questions
Can I use salted butter instead of unsalted?
You can, but you’ll need to reduce the added salt in the recipe. Since butter salt content varies by brand, I recommend using unsalted butter and adding the salt separately for better control. If you must use salted butter, cut the kosher salt in half.
Why did my cookies spread too much?
This usually happens if the butter was too warm when you mixed the dough, or if you didn’t chill the dough. If you skip the chill step, the butter melts too quickly in the oven. Also, make sure your baking soda is fresh. Old baking soda doesn’t provide enough lift.
Can I freeze the baked cookies?
Yes! Let them cool completely, then store them in an airtight container in the freezer for up to 3 months. Thaw at room temperature for 30 minutes. They taste almost as good as fresh.
Why did my cookies come out cakey?
Cakey cookies usually mean too much flour or too much baking powder/soda. Make sure you are measuring your flour correctly (spoon and level). Also, check your baking soda expiration date. If it’s old, it won’t work properly.
Can I make these without browning the butter?
Yes, you can use melted butter, but you won’t get that deep, nutty flavor. The brown butter is what makes these cookies special. If you’re short on time, melted butter works, but I highly recommend taking the extra 5 minutes to brown it. It’s worth it.
How do I know when the butter is browned?
Look for golden brown milk solids at the bottom of the pan and listen for the sizzling to quiet down. The smell will change from buttery to nutty/toasted. As soon as you smell the nuts, take it off the heat. It cooks very fast at the end.
Pin This Recipe!
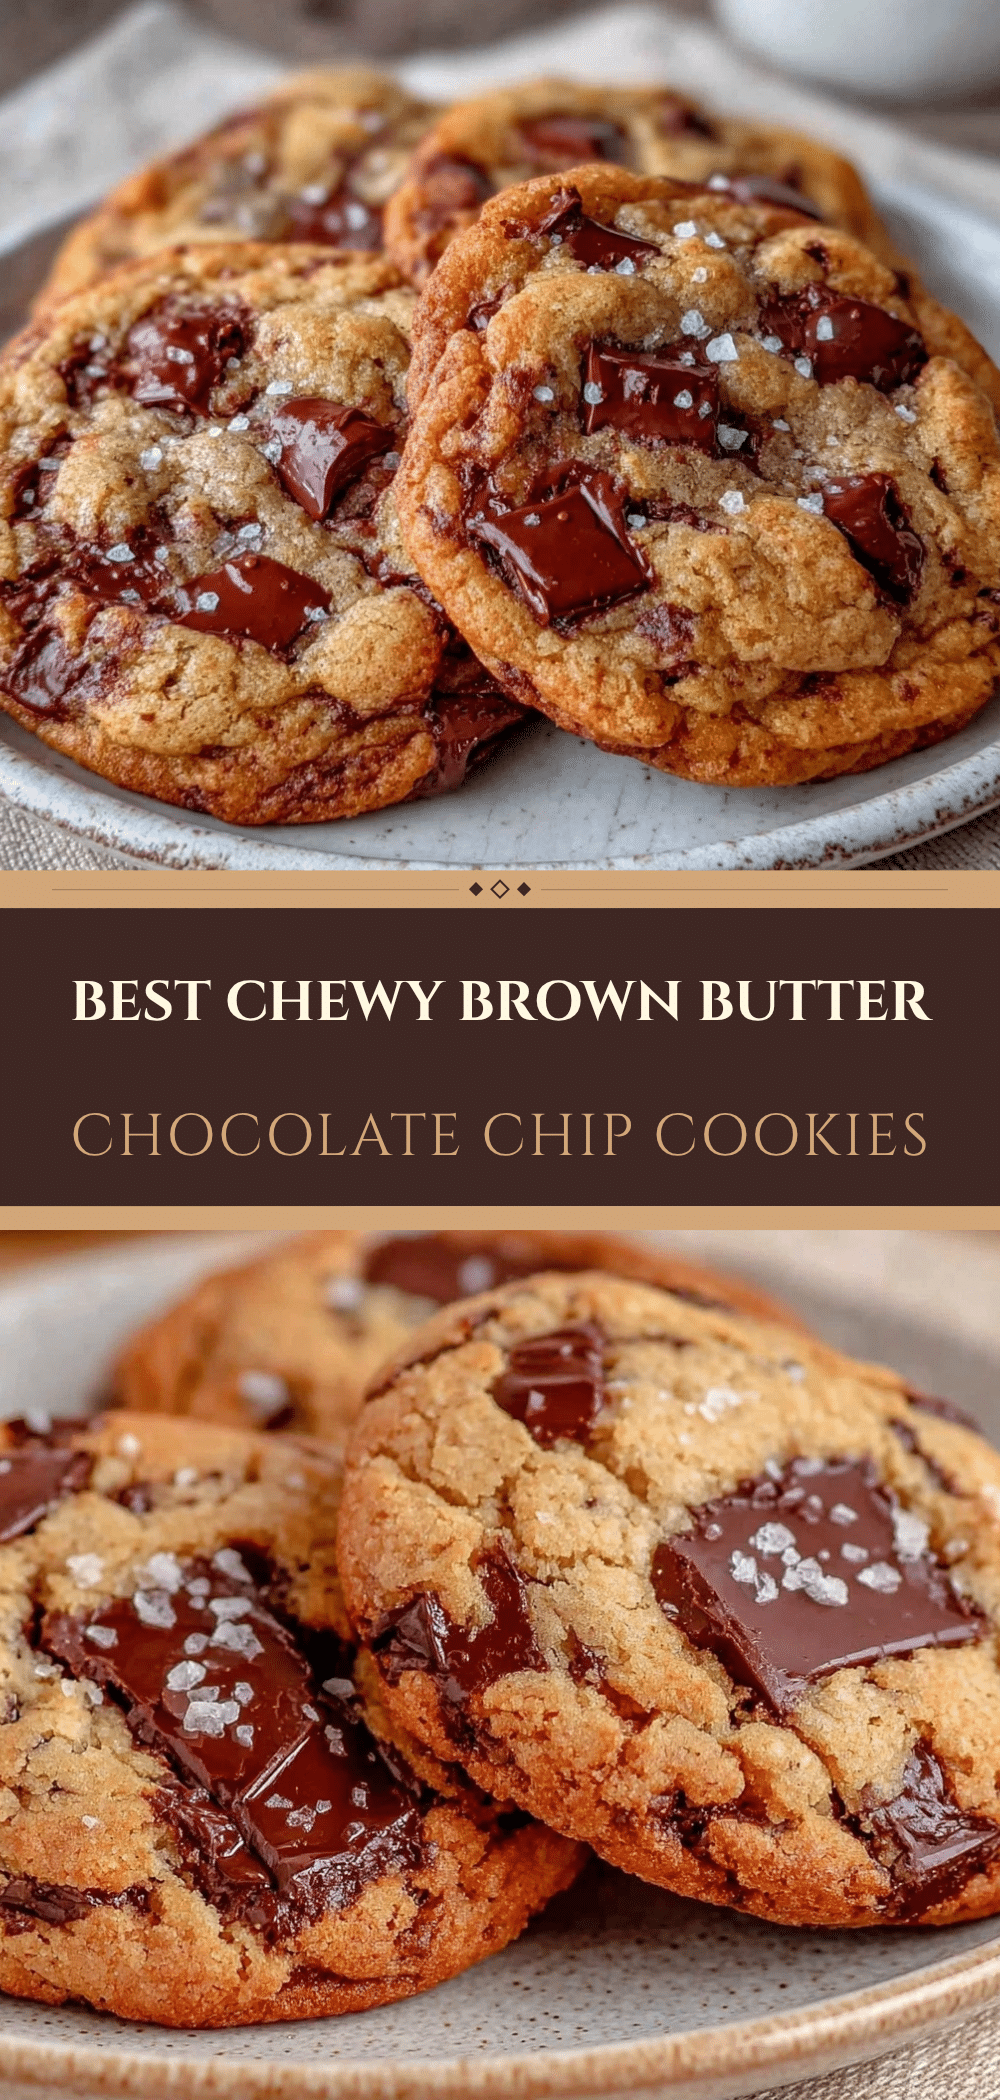
Chewy Brown Butter Chocolate Chip Cookies: Best 5pm Treat
- Total Time: 32-34 minutes
- Yield: 24 cookies 1x
Description
These chewy brown butter chocolate chip cookies feature crispy edges, a gooey center, and deep nutty flavor. They are designed for real life, requiring minimal cleanup and just 20 minutes of active time.
Ingredients
- 1 cup (226g) unsalted butter
- ¾ cup (150g) granulated sugar
- 1 cup (200g) packed brown sugar
- 2 ¼ cups (280g) all-purpose flour
- 1 teaspoon baking soda
- 1 teaspoon kosher salt
- 2 large eggs
- 2 teaspoons vanilla extract
- 2 cups (340g) chocolate chips (mix of semi-sweet chips and chunks)
- Flaky sea salt (optional, for topping)
Instructions
- Melt butter in a light-colored saucepan over medium heat, stirring constantly until it turns golden amber with brown specks and smells nutty (5-7 minutes). Pour into a heat-safe bowl and cool for 10 minutes until warm.
- To the warm brown butter, add granulated sugar and brown sugar. Whisk vigorously for 2 minutes until glossy and slightly lighter. Add eggs and vanilla extract, whisking until smooth.
- Stir in flour, baking soda, and salt using a spatula or wooden spoon just until no dry streaks remain. Do not overmix.
- Fold in chocolate chips and chunks, reserving a small handful for topping later.
- Chill dough in the fridge for at least 30 minutes if time permits (optional but recommended for thicker cookies).
- Preheat oven to 350°F (175°C). Line baking sheets with parchment paper. Scoop dough balls (about 2 tablespoons each) onto sheets, spacing 2 inches apart.
- Bake for 12-14 minutes until edges are golden brown but centers look slightly soft.
- Immediately sprinkle with flaky sea salt. Let cookies sit on the hot baking sheet for 5 minutes to finish cooking, then transfer to a wire rack to cool.
Notes
Do not burn the butter; remove from heat as soon as it smells nutty. Cool the butter before adding sugar to prevent seizing. Measure flour by spooning it into the cup and leveling off, rather than scooping directly from the bag. Underbake slightly for chewy texture. Store with a piece of bread to maintain moisture.
- Prep Time: 20 minutes
- Cook Time: 12-14 minutes
- Category: Dessert
- Cuisine: American
Nutrition
- Serving Size: 1 cookie
- Calories: 180
- Sugar: 16
- Sodium: 150
- Fat: 9
- Saturated Fat: 5
- Carbohydrates: 24
- Fiber: 1
- Protein: 3
Keywords: brown butter cookies, chocolate chip cookies, chewy cookies, easy dessert, 5pm treat, from scratch cookies