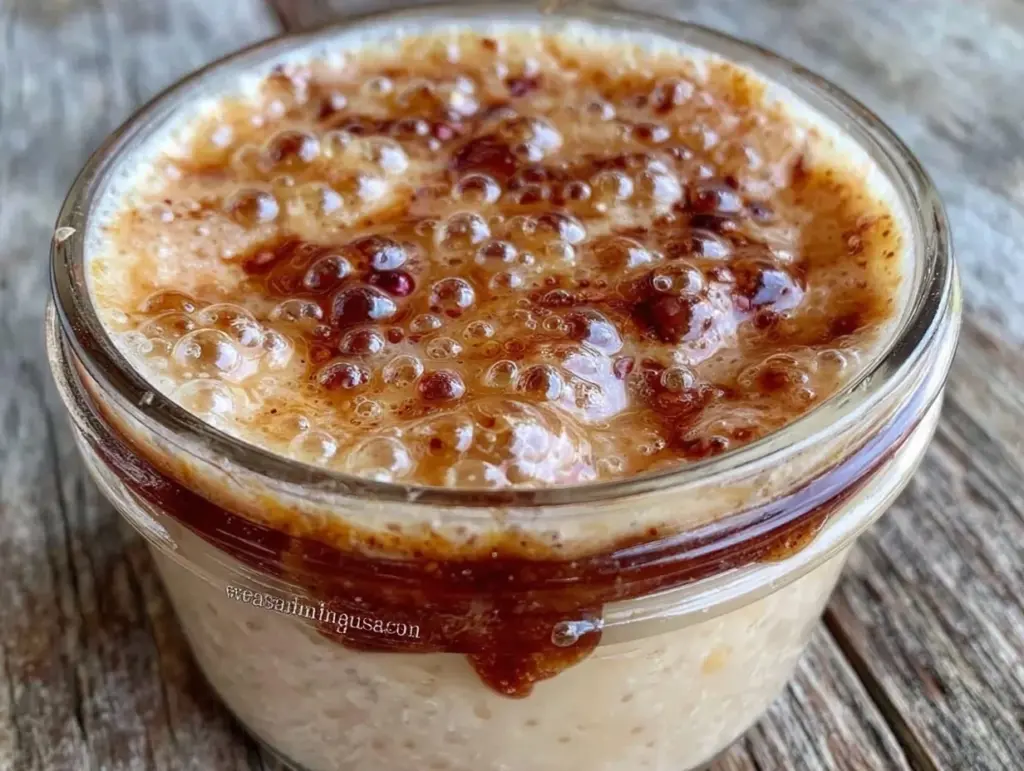
It was 2:00 AM on a Tuesday, and I was staring at a jar of gray, watery sludge that I had named “Steve.” Steve smelled like old gym socks and disappointment. I had been trying to make sourdough bread for six months. Six months! I had bought fancy flour, invested in a digital scale, and watched enough YouTube tutorials to qualify as a minor expert. And yet, every single time, my starter either died or grew a layer of hooch that looked like it was plotting my demise.
I was ready to throw in the towel. I was ready to accept that I was just a “store-bought bread person.” Then, I met a baker in Portland who looked at my jar, snorted, and said, “You’re feeding him too much. He’s bloated.” She didn’t give me a complex ritual or a special yeast strain. She gave me one simple adjustment to my ratio, and that was it. That was the one trick that changed everything.
Today, I’m sharing that exact method. This beginner friendly sourdough starter recipe is the one I use every single day. It’s not magic. It’s just math and patience. And once you get this going, you’ll never buy a loaf of bread from the store again. Seriously. I haven’t bought a decent loaf of sourdough in three years because I can make better in my own kitchen.
If you’ve ever felt intimidated by the idea of “wild yeast,” let me tell you: it’s just flour and water doing what flour and water do best—fermenting. It’s alive, sure, but it’s a low-maintenance pet. Unlike a cat, it doesn’t judge you if you forget to feed it for a few days (though it will get a bit sour, which is actually delicious in pancakes). This starter is the foundation of everything I bake, from my fall cranberry pecan sourdough focaccia to my weekend sourdough pancakes. But first, you need the base. Let’s get Steve out of the picture and start something beautiful.
Why You’ll Love This Starter
There are a million ways to make sourdough starter online. Some people say you need pineapple juice. Some say you need raisins. Some say you need to sing to it. (Please don’t sing to it. It’s weird.) This method is different because it’s based on consistency, not complexity.
The One Trick Ratio — Most beginners fail because they use too much flour and not enough water in their feedings. This creates a stiff, sluggish culture. By using a 1:1:1 ratio (1 part starter, 1 part flour, 1 part water by weight), you create a hydration level that encourages rapid, healthy yeast activity. It’s the sweet spot for flavor and vigor.
Simple Ingredients — You need two things: unbleached all-purpose flour and water. That’s it. No fancy spelt, no rye (unless you want to use it later), no pineapple juice. Just flour and water. If you have those in your pantry, you’re 90% done.
Forgiving Timeline — This method takes 5-7 days to get going, but it doesn’t demand your attention every hour. You feed it once a day. You can go to work, come home, feed it, and forget about it. It’s perfect for people who think they don’t have time for hobbies.
Ready for Anything — Once this starter is active, it’s not just for bread. It’s for pumpkin spice cinnamon rolls, for discard crackers, for thickening soups. It’s the most versatile ingredient in your kitchen. I use it constantly.
Cost Effective — Making your own starter costs pennies. Buying a jar of active starter online can cost $20-$30. Plus, once you have it, you never have to buy it again. It’s a one-time investment that pays for itself in the first loaf of bread.
This is my go-to method because it removes the guesswork. You don’t need to worry about temperature fluctuations or weird weather patterns. You just follow the ratio, and the yeast does the rest. It’s reliable, it’s repeatable, and it’s delicious.
Ingredients You’ll Need
Here’s the best part: you probably already have everything you need to start this today. I’m not asking you to go to a specialty store. I’m asking you to look in your pantry.
All-Purpose Flour (500g total for the first week) — I use King Arthur All-Purpose because it has a consistent protein content. But honestly, any unbleached all-purpose flour works. Avoid bleached flour if you can, as the chemicals can sometimes inhibit yeast growth. Whole wheat or rye flour is great for the first few days to kickstart the process, but stick to AP for the main culture to keep it mild and versatile.
Filtered Water (500g total for the first week) — Chlorine in tap water can kill the wild yeast you’re trying to cultivate. If your tap water smells like a swimming pool, let it sit out for an hour to off-gas, or use bottled/filtered water. If your water is soft and clean, tap water is fine. I just play it safe.
Your Starter Culture (50g to start) — You don’t need to buy this. You make it from scratch. But if you have a friend with a starter, you can take a small piece of theirs. Just know that starting from scratch gives you a clean slate and a predictable timeline.
Optional: Whole Wheat Flour (for days 1-3) — Whole wheat flour has more nutrients and wild yeast on the surface, which can help jumpstart the culture. I use it for the first three days, then switch to AP flour. It’s not necessary, but it’s helpful if your starter is being slow.
Measuring Tools — A digital kitchen scale is non-negotiable. I cannot stress this enough. Volume measurements (cups) are inaccurate for sourdough. A cup of flour can weigh anywhere from 120g to 150g depending on how packed it is. This inconsistency is why most starters fail. A scale removes the guesswork. Get a cheap one from Amazon. It’s worth every penny.
Equipment Needed
You don’t need fancy equipment for this. Here’s what I actually use.
2-Cup Glass Jar — I use a simple mason jar or a Pyrex measuring cup. Glass is best because it doesn’t hold odors and you can see the bubbles clearly. Avoid plastic if you can, as it can scratch and harbor bacteria. I have a specific jar just for my starter so I don’t get confused.
Plastic or Rubber Scraper — For stirring and cleaning the sides of the jar. A silicone spatula works too. You want to scrape the sides down every time you feed it to keep the culture uniform.
Cheesecloth or Paper Towel — To cover the jar. You need airflow, but you don’t want flies or dust getting in. I use a paper towel secured with a rubber band. It’s breathable and cheap.
Permanent Marker — To draw a line on the jar at the starting level. This is crucial for tracking how much the starter rises. I draw a line right where the mixture sits before feeding. It’s a simple visual cue that tells you if the yeast is active.
Small Spatula — For stirring. A small silicone spatula is perfect for getting into the corners of the jar.
Digital Scale — As mentioned, this is the most important tool. Get one that measures in grams. Accuracy is key.
How to Make It: Step-by-Step
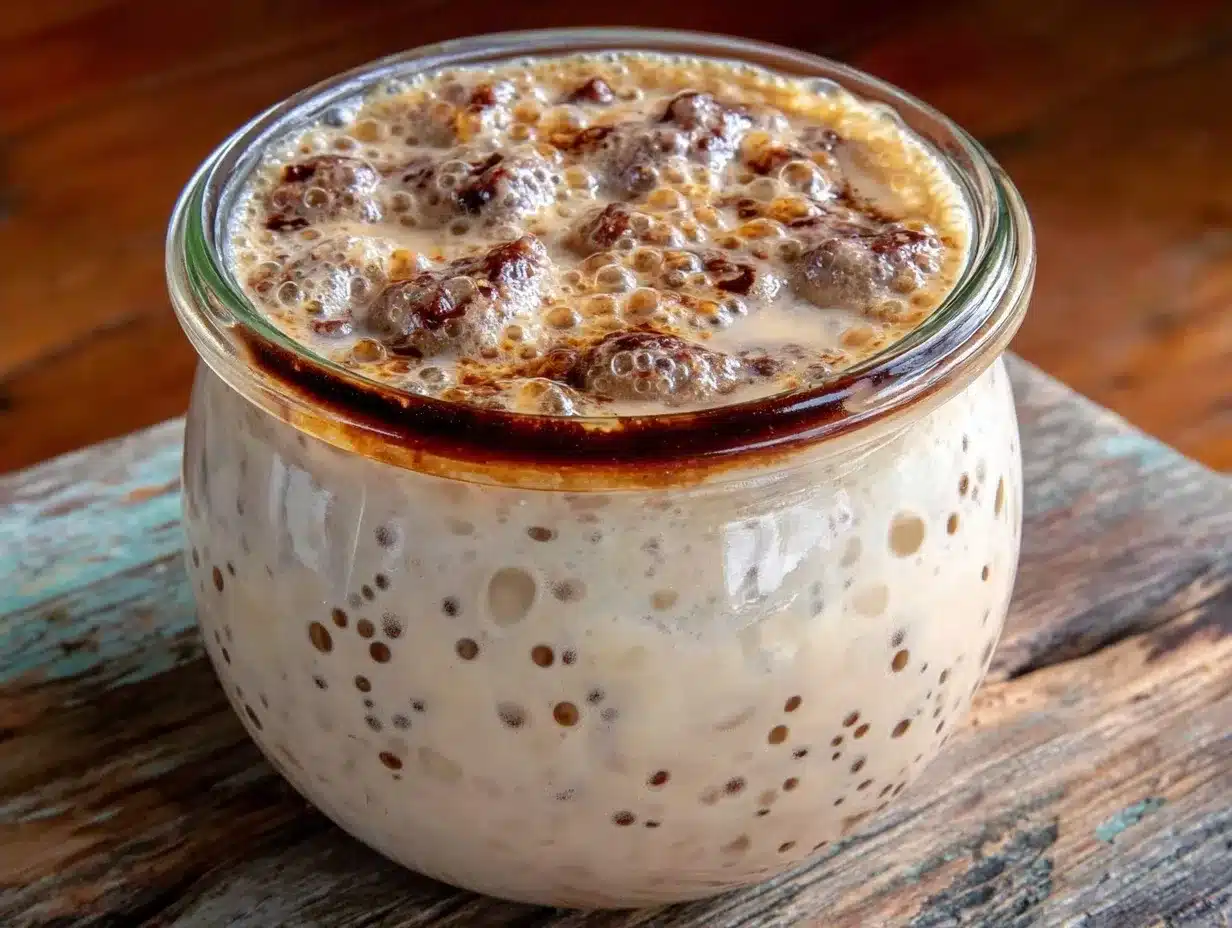
Alright, let’s make this! I’m walking you through exactly how I do it, including the little tricks I’ve picked up over the years. This process takes 5-7 days, but each day is only 5 minutes of work.
Day 1: The Beginning
Combine: In your clean jar, mix 50g of all-purpose flour and 50g of water. Stir vigorously until there are no dry pockets. It will look like thick paste.
Cover: Place the paper towel over the top and secure with a rubber band.
Rest: Leave it on your counter at room temperature (70-75°F is ideal) for 24 hours.
What to expect: Nothing much will happen. Maybe a few bubbles. Don’t panic. It’s just waking up.
Day 2: The First Feed
Discard: You don’t need to throw it all out, but you need to reduce the amount. Keep about 50g of the mixture in the jar. Throw away or save the rest for pancakes (more on that later).
Feed: Add 50g of flour and 50g of water. Stir well.
Mark: Draw a line on the jar at the current level.
Rest: Leave it on the counter for 24 hours.
What to expect: You might see some bubbles now. It might smell slightly tangy or like vinegar. This is normal. It’s starting to work.
Day 3: The Rise
Observe: Check for bubbles. If it’s risen significantly (doubled in size), it’s active. If not, give it another day.
Discard: Again, keep 50g in the jar.
Feed: Add 50g flour and 50g water. Stir.
Rest: Leave it on the counter.
What to expect: It should be more bubbly now. The smell will be stronger—sour, yeasty, maybe a bit alcoholic. This is good. It means the yeast is eating the flour.
Day 4: The Peak
Discard: Keep 50g.
Feed: Add 50g flour and 50g water.
Rest: Leave it on the counter.
What to expect: This is where the “one trick” comes in. Watch the rise. If it doubles in size within 4-6 hours of feeding, it’s ready. If it takes 12 hours, it’s still getting stronger. Keep feeding it daily.
Day 5-7: The Test
The Float Test: When you think your starter is ready, take a small spoonful of it and gently drop it into a glass of water. If it floats, it’s full of gas and ready to bake with. If it sinks, keep feeding it for another day or two.
Consistency: Once it passes the float test, it’s active. You can now use it for baking or switch to a refrigerator maintenance routine.
Expert Tips & Tricks
Here’s everything I’ve learned from making this dozens of times. These tips will save you from my mistakes.
The One Trick: The 1:1:1 Ratio
Most beginners fail because they feed their starter with too much flour. This creates a stiff culture that ferments slowly. By using equal parts flour and water (by weight), you create a hydration level that encourages rapid yeast activity. This is the secret to a starter that’s not just alive, but *excited* to be alive. It’s the difference between a sluggish culture and a vigorous one.
Temperature Matters
Yeast loves warmth. If your kitchen is cold (below 65°F), your starter will be slow. I keep mine near the stove or in a warm corner. If it’s too hot (above 80°F), it can ferment too quickly and become overly acidic. Room temperature is the sweet spot.
Don’t Panic About Smell
Your starter will smell weird. It will smell like vomit, cheese, or old socks. This is normal. It’s the bacteria doing their job. As long as it’s bubbly and rising, it’s healthy. The smell will mellow out as it matures.
Use a Scale
I can’t say this enough. Cups are inaccurate. Grams are precise. If you’re using cups, you’re guessing. If you’re using a scale, you’re baking. It’s that simple.
Discard is Delicious
Don’t throw away your discard! It’s liquid gold. Use it for pancakes, waffles, crackers, or apple cider donut muffins. It adds a tangy depth that regular batter can’t achieve. I make a batch of discard crackers every week.
Be Patient
Some starters take 3 days. Some take 10 days. It depends on your environment, your flour, and your yeast. Don’t rush it. If it’s not ready, it’s not ready. Keep feeding it, and it will get there.
Variations & Substitutions
Once you’ve nailed the basic version, here’s how you can mix it up. I’ve tried all of these.
Whole Wheat Starter
Use whole wheat flour instead of all-purpose. It has more nutrients and wild yeast, so it ferments faster. The flavor is stronger and more robust. Great for hearty breads.
Rye Starter
Rye flour is high in enzymes and can make a very active starter. But it can also become overly sour. I use a small amount of rye (10-20%) in my AP starter to boost activity without making it too sour.
Refrigeration Maintenance
Once your starter is active, you don’t need to feed it daily. You can keep it in the fridge and feed it once a week. Take it out, feed it, let it sit for an hour, then put it back. Before baking, take it out 1-2 days early and feed it twice a day to wake it up.
Gluten-Free Starter
You can make a gluten-free starter using rice flour or tapioca starch. It’s trickier because GF flours lack gluten, which traps gas. But it’s possible! I’ve made one with brown rice flour, and it works for flatbreads.
Serving & Storage
How to Store:
Keep your starter in a glass jar on the counter if you bake daily. If you bake less often, keep it in the fridge. In the fridge, it will slow down and may develop a dark liquid on top (hooch). That’s fine. Stir it in or pour it off. Feed it when you take it out.
How Long It Lasts:
A healthy starter can last forever. I’ve had mine for years. It’s a living culture that can be passed down through generations. My friend has a starter that’s been in her family for 40 years. Imagine the stories that starter could tell!
Rehydration:
If your starter has been in the fridge, it will be sluggish. Feed it 2-3 times a day for 2-3 days before baking to wake it up. It will regain its vigor and rise quickly.
Nutrition Information
I’m not a nutritionist, but here’s the breakdown if you’re tracking. Note that this is for the starter itself, not the bread made with it. The fermentation process breaks down some of the carbs and increases bioavailability of nutrients.
Per 50g of Starter:
– Calories: 150
– Protein: 4g
– Carbs: 30g
– Fiber: 1g
– Fat: 0g
– Sodium: 2g
What’s Good:
– Low fat
– Contains beneficial bacteria (probiotics)
– Easier to digest than regular bread due to fermentation
What to Know:
– High in carbs
– Contains gluten (unless using GF flour)
– Not a significant source of vitamins or minerals on its own
My Take:
Look, this is a tool, not a food. You don’t eat the starter; you eat the bread made with it. The starter is just the leavening agent. But it’s a healthy, living culture that adds flavor and nutrition to your baked goods.
Final Thoughts
So that’s my beginner friendly sourdough starter! I’ve probably talked your ear off at this point, but when you make a recipe this often, you have a lot to say about it. This starter has saved my weekends. It’s my answer to “what should I bake?” when I want something comforting and wholesome. My family loves the bread, my friends are jealous of my discard crackers, and I’m happy because I’m not stressed about baking.
Make it yours! Try different flours, adjust the feeding schedule, and experiment with recipes. The best recipes are the ones you adapt to your kitchen’s temperature and your family’s tastes. This starter is just the beginning of your sourdough journey.
If you make this, drop a comment and let me know how it goes! I love hearing how recipes turn out in your kitchen. And if something doesn’t work, tell me that too—I’m here to help troubleshoot. Happy baking! And I hope your kitchen smells half as good as mine does right now.
Frequently Asked Questions
Why is my starter not rising?
This usually means it’s not ready yet, or the temperature is too low. If it’s early in the process (days 1-3), it might just need more time. If it’s been a week and still not rising, check your water temperature. If your kitchen is cold, try moving the jar to a warmer spot. Also, ensure you’re feeding it with the correct 1:1:1 ratio. Too much flour can slow it down.
Can I use bread flour instead of all-purpose?
Yes, but bread flour has more protein, which can make the starter thicker and slower to rise. All-purpose is the sweet spot for most home bakers. If you use bread flour, you might need to feed it more frequently. I stick to AP for consistency.
What is hooch, and is it bad?
Hooch is the dark liquid that forms on top of the starter. It’s alcohol, a byproduct of fermentation. It’s not bad; it just means your starter is hungry. Stir it back in or pour it off before feeding. If you see a lot of hooch, your starter needs more frequent feedings.
How do I know when my starter is ready to bake with?
Perform the float test. Take a small spoonful of starter and drop it into a glass of water. If it floats, it’s full of gas and ready. If it sinks, it needs more time. It should also have doubled in size within 4-6 hours of feeding and have a pleasant, tangy smell.
Can I freeze my starter?
Yes! Feed your starter, let it peak, then spread it on a baking sheet and freeze it. Once frozen, break it into pieces and store in a bag. To revive, take a piece, thaw it, and feed it daily for a few days until it’s active again. It’s a great way to preserve your culture if you’re moving or traveling.
Why does my starter smell like vomit?
This is normal in the early stages. It’s the bacteria producing acids. As the starter matures and the yeast population grows, the smell will mellow out to a tangy, yeasty aroma. If it smells rotten (like garbage), it might be contaminated. In that case, start over. But a sour smell is good!
Can I use this starter for sweet breads?
Absolutely. In fact, the tanginess of sourdough balances well with sweet ingredients. I use it for pumpkin bread, banana bread, and cinnamon rolls. The fermentation adds a depth of flavor that yeast alone can’t achieve. Just remember to adjust the sugar in the recipe, as the starter adds a slight tang.
Pin This Recipe!

Beginner Friendly Sourdough Starter: The One Trick
- Total Time: 5-7 days
- Yield: Approximately 50g active starter (plus discard) 1x
Description
A simple, reliable method for creating a wild yeast sourdough starter using a consistent 1:1:1 ratio of starter, flour, and water by weight. This low-maintenance guide takes 5-7 days to establish a vigorous culture suitable for all types of baking.
Ingredients
- 50g unbleached all-purpose flour (for Day 1)
- 50g filtered water (for Day 1)
- 50g active starter culture (kept from previous day, starting Day 2)
- 50g unbleached all-purpose flour (for daily feedings)
- 50g filtered water (for daily feedings)
- Optional: Whole wheat flour (for days 1-3 to jumpstart culture)
Instructions
- Day 1: In a clean glass jar, combine 50g all-purpose flour and 50g filtered water. Stir vigorously until no dry pockets remain. Cover with a paper towel secured by a rubber band and rest at room temperature (70-75°F) for 24 hours.
- Day 2: Discard all but 50g of the mixture. Add 50g flour and 50g water. Stir well, mark the current level on the jar, and rest for 24 hours.
- Day 3: Check for bubbles and rise. Discard down to 50g, add 50g flour and 50g water, stir, and rest for 24 hours.
- Day 4: Discard down to 50g, add 50g flour and 50g water, stir, and rest. Watch for the starter to double in size within 4-6 hours.
- Days 5-7: Continue daily feedings (discard to 50g, add 50g flour, 50g water). Perform the float test: drop a spoonful in water; if it floats, the starter is ready.
- Store in a glass jar on the counter if baking daily, or in the refrigerator if baking weekly (feed once a week).
- To revive refrigerated starter, take out 1-2 days before baking and feed twice daily until active.
Notes
Use a digital scale for accuracy; volume measurements are inconsistent. Filtered water is recommended to avoid chlorine killing the yeast. The 1:1:1 ratio by weight is crucial for hydration and yeast activity. Don’t panic if the smell is sour or like old socks; this is normal bacterial activity. Whole wheat flour can be used for the first few days to help kickstart the culture.
- Prep Time: 5 minutes per day
- Cook Time: 0 minutes
- Category: Baking Basics
- Cuisine: American
Nutrition
- Serving Size: 50g of starter
- Calories: 150
- Sodium: 2
- Carbohydrates: 30
- Fiber: 1
- Protein: 4
Keywords: sourdough starter, wild yeast, baking basics, beginner sourdough, 1:1:1 ratio, homemade starter, discard recipes


