I still remember the first time I made these bars. It was late October, the kind of evening where the wind howls just enough to make you crave something warm and sweet, and my oven was already full of pies for my mother’s visit the next day. I needed a dessert that felt festive, rich, and distinctly “fall,” but didn’t require a 9-inch pie crust that was going to get soggy by noon. I grabbed a box of graham crackers, some maple syrup, and a bag of pecans, and threw them together on a whim.
The smell that came out of the oven thirty minutes later? Pure autumn. It was like walking into a bakery in Vermont on a crisp Saturday morning. I cut a square, let it cool for exactly five minutes (which, as any baker knows, is an eternity), and took a bite. The crunch of the pecans, the gooey chew of the bar, and that deep, woody flavor of real maple syrup… I knew right then that this was going to be my secret weapon for holiday parties.
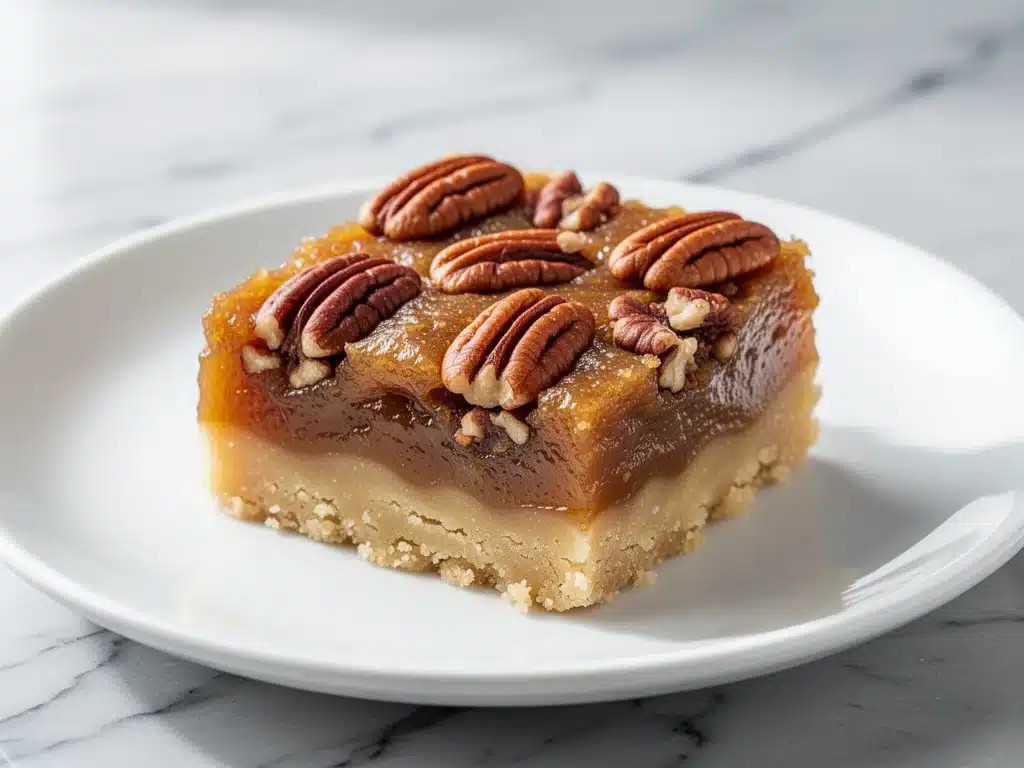
These autumn maple pecan pie bars are basically the lovechild of a classic pecan pie and a gooey brownie, but with a crust that actually stays crisp. They’re portable, they’re stunning on a plate, and they taste like the holidays are already here. I’ve made them for Thanksgiving, for office holiday parties, and even just because I wanted a Tuesday treat. Every single time, people ask for the recipe. And honestly? It’s the easiest thing I make all season.
If you’re looking for a dessert that’s less work than a traditional pie but just as impressive, these bars are it. They’re perfect for holiday baking sessions where you want to fill multiple trays without spending all day in the kitchen. Let’s get into why these are about to become your new favorite fall tradition.
Why You’ll Love These Maple Pecan Bars
There are a lot of holiday desserts out there, but these bars have earned a permanent spot in my rotation for a few specific reasons. Here’s why I keep coming back to this recipe:
Graham Cracker Crust That Actually Stays Crunchy — I’ve tried pie crusts that get soggy within an hour. Not these. The graham cracker base, mixed with a little butter and a touch of brown sugar, creates a sturdy foundation that holds up to the wet filling. I’ve packed these in tupperware for car rides, and the crust stays firm. It’s a game-changer for potlucks.
Real Maple Flavor (Not Just Syrup) — I’m picky about this. You need Grade B maple syrup for the deep, caramel-like notes that define true fall flavor. Light syrup just tastes sweet. Once you taste the difference, you’ll never go back. It gives the filling a complexity that vanilla extract just can’t match.
Perfectly Gooey, Not Messy — One of the biggest complaints about traditional pecan pie is that it’s too runny to eat neatly. These bars set up firm enough to pick up with your fingers but still have that signature chewy, fudge-like center. It’s the best of both worlds.
Make-Ahead Friendly — This is huge for holiday hosting. I can make these three days before the party, store them in the fridge, and they actually taste better after the flavors have had time to meld. No last-minute panic. Just pull them out, slice them, and serve.
Simple Ingredients — You don’t need fancy pantry items. You probably have graham crackers, butter, eggs, syrup, and pecans already. It’s accessible comfort food that feels gourmet.
Real talk: these bars solve the biggest problem of holiday baking—time. You get the sophisticated look and taste of a pecan pie with half the effort. Plus, they’re easier to serve than a slice of pie, which means less dishwashing for you later.
Ingredients You’ll Need
Here’s the best part: the ingredient list is short, sweet, and mostly things you already have. I’m particular about a couple of items here, though, so pay attention to the notes.
For the Crust:
Graham crackers (1 ½ cups / 150g, crushed) — I use regular honey graham crackers. Chocolate graham crackers work too if you want a mocha vibe, but honey is classic. Pulse them in a food processor until they look like coarse sand. If you’re lazy, put them in a bag and crush them with a rolling pin. Messy, but effective.
Unsalted butter (6 tablespoons / 85g, melted) — This binds the crust. Use real butter, not margarine. The flavor difference is noticeable in the crust. Melt it in the microwave or a small saucepan.
Brown sugar (2 tablespoons / 25g) — Adds a hint of molasses flavor and helps the crust crisp up. Light or dark brown sugar both work.
Pinch of salt — Just a tiny pinch to balance the sweetness.
For the Filling:
Grade B Maple Syrup (1 cup / 240ml) — This is the star. Look for “Grade B” or “Dark Robust” on the bottle. It’s darker, thicker, and has a stronger maple flavor than Grade A. If you can’t find it, real maple syrup is fine, but avoid “pancake syrup” (which is just corn syrup with flavoring). It won’t taste right.
Light corn syrup (½ cup / 120ml) — I know, I know, it’s processed. But it’s what gives pecan pie that signature stretchy, chewy texture. You can try agave or maple syrup only, but the texture will be softer and less “bar-like.” For the classic result, use corn syrup.
Granulated sugar (½ cup / 100g) — Adds sweetness and helps with the structure. Don’t skip it.
Large eggs (3 large) — Room temperature is best. They help the filling set. Crack them into a bowl and whisk them lightly before adding to the mix.
Vanilla extract (1 teaspoon) — Enhances the maple flavor. Use pure vanilla, not imitation.
Baking soda (½ teaspoon) — Helps the bars rise slightly and brown. It’s a small amount, but it makes a difference.
Cinnamon (½ teaspoon) — Adds that warm spice note that screams autumn. It’s subtle but essential.
Pecan halves (1 ½ cups / 170g) — Use raw pecans. Toasting them first adds extra flavor, but it’s optional. I usually skip toasting to save time, but if you have ten minutes, toast them in a dry pan until fragrant. It’s worth it.
Optional Topping:
Sea salt flakes — A sprinkle on top after baking adds a professional touch and cuts the sweetness.
Whipped cream — Serve with a dollop if you’re feeling fancy. I usually keep it simple, but guests love it.
Equipment Needed
You don’t need fancy gadgets for this. Here’s what I actually use:
8×8 Inch Baking Pan — This is the standard size for bars. Line it with parchment paper for easy removal. I use a square pan because it’s easier to cut into neat squares. You can use a 9×9, but the bars will be thinner and might bake too fast.
Parchment Paper — Essential. Leave an overhang on the sides so you can lift the entire block of bars out of the pan once they’re cool. This makes cutting so much cleaner.
Food Processor or Ziplock Bag — For crushing graham crackers. A food processor is fastest, but a rolling pin and a bag work if you want to get some exercise.
Large Mixing Bowl — You’ll need space to whisk the wet ingredients together. A bowl with a spout helps pour the filling evenly.
Whisk — For blending the eggs and syrups until smooth. No lumps allowed.
Pastry Brush or Spoon — To press the crust into the pan. Don’t worry about making it perfect; it doesn’t need to look like a magazine photo.
Cooling Rack — Let the bars cool completely before cutting. This is the hardest part, but it ensures clean slices.
How to Make Autumn Maple Pecan Pie Bars
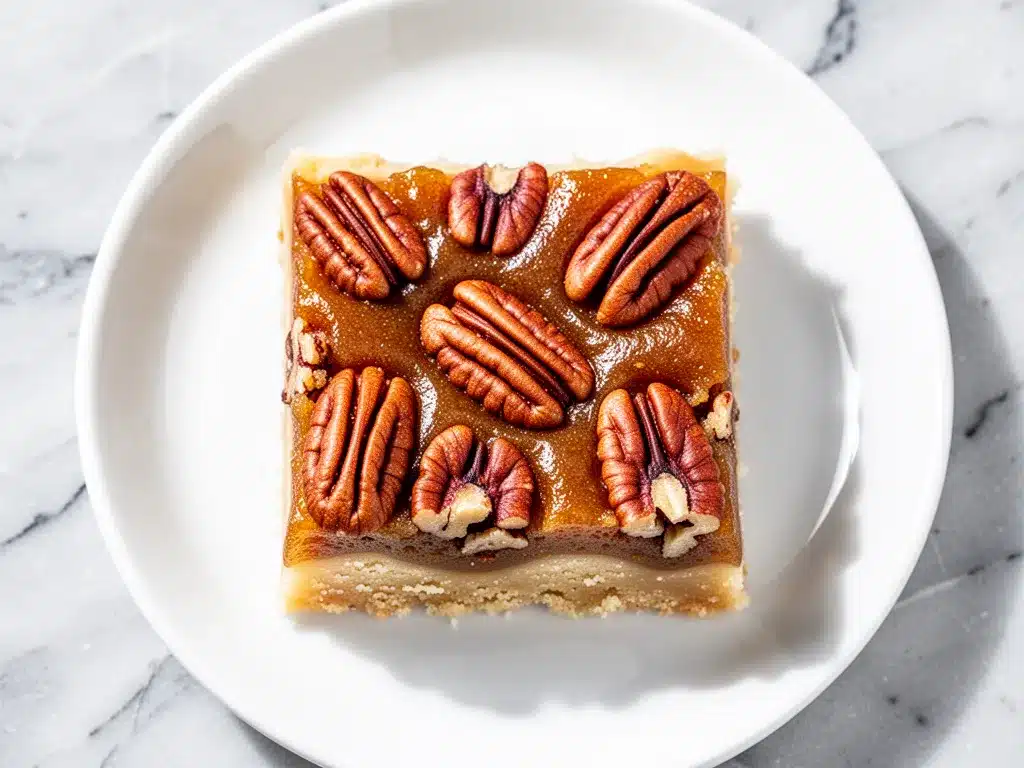
Alright, let’s make these! I’m walking you through the process, including the little tricks that keep them from getting too gooey or falling apart.
Step 1: Prep Your Pan and Oven (5 minutes)
Preheat your oven to 350°F (175°C). Line your 8×8 inch baking pan with parchment paper, leaving a slight overhang on the long sides. This is non-negotiable if you want to remove the bars easily. Grease the parchment lightly with butter or cooking spray.
Step 2: Make the Crust (5 minutes)
In a medium bowl, combine the crushed graham crackers, melted butter, brown sugar, and salt. Mix until it looks like wet sand. Pour this into your prepared pan. Use the bottom of a measuring cup or your fingers to press it down firmly and evenly. You want a solid base. Bake this for 8-10 minutes until it’s lightly golden and smells like cookies. This pre-bake helps prevent a soggy bottom.
Step 3: Make the Filling (5 minutes)
While the crust bakes, whisk together the maple syrup, corn syrup, granulated sugar, eggs, vanilla, baking soda, and cinnamon in a large bowl. Whisk vigorously for about a minute until the mixture is smooth and slightly frothy. Make sure there are no clumps of sugar left. The mixture should look like a thin, amber-colored liquid.
Step 4: Assemble (2 minutes)
Remove the crust from the oven. Reduce the oven temperature to 325°F (165°C). Sprinkle the pecan halves evenly over the hot crust. Pour the filling mixture over the pecans. The heat from the crust will start to toast the pecans slightly. Use a spatula to spread the filling evenly, making sure it reaches the corners.
Step 5: Bake (35-40 minutes)
Bake at 325°F for 35-40 minutes. The bars are done when the edges are set and slightly bubbling, and the center is just barely jiggly (like a cheesecake, not a soup). It should look firm but have a slight wobble in the middle. If it’s liquidy, bake for 5 more minutes. If it’s already set hard, it might be overbaked.
Step 6: Cool and Slice (1 hour)
Let the bars cool in the pan on a wire rack for at least 30 minutes. Then, lift them out using the parchment overhang and let them cool completely (about 1 hour). This cooling step is crucial. The filling will continue to set as it cools. If you cut them warm, they’ll be messy and fall apart. Once cool, sprinkle with sea salt flakes if using. Slice into 12-16 squares.
Total Time: About 1 hour 30 minutes (including cooling).
Expert Tips for Perfect Bars
I’ve made these dozens of times, and here’s what I’ve learned to avoid common pitfalls.
Don’t Skip the Pre-Bake — Baking the crust first ensures it stays crunchy. If you skip this, the bottom might be soft and gummy. It only adds 10 minutes, but it’s worth it.
Room Temperature Eggs — Cold eggs can shock the batter and cause uneven setting. Take them out of the fridge 15 minutes before you start.
Watch the Bake Time — Ovens vary. The visual cue is more important than the timer. Look for set edges and a center that jiggles slightly but doesn’t slosh. If the center is liquid, it needs more time. If it’s firm, it’s done.
Toast Your Pecans — If you have the time, toast the pecans in a dry skillet for 3-4 minutes before adding them to the crust. It brings out their nutty oils and adds a deeper flavor.
Cool Completely — I know it’s tempting to cut into them while they’re warm. Resist. They firm up significantly as they cool. For the cleanest cuts, chill them in the fridge for an hour before slicing.
Storage is Key — Store in an airtight container in the fridge. They last up to 5 days. They actually taste better after a day or two as the flavors meld.
Variations and Substitutions
Once you’ve nailed the basic version, here’s how you can mix it up. I’ve tried all of these.
Chocolate Chip Version — Add ½ cup of semi-sweet chocolate chips to the filling along with the pecans. The chocolate and maple are a classic combo.
White Chocolate Pecan — Swap half the pecans for white chocolate chips. It’s sweeter and richer, perfect for those who love dessert-style bars.
Gluten-Free — Use gluten-free graham crackers (like Kinnikinnick or Simple Mills). The rest of the ingredients are naturally gluten-free, so this works perfectly.
Nut-Free — Skip the pecans entirely. Add ½ cup of toasted sunflower seeds or just increase the graham cracker crust thickness. It won’t be “pecan pie” bars, but still delicious.
Maple Walnut — Swap pecans for walnuts. It’s a slightly more bitter nut, which balances the sweetness well. Good for people who find pecans too sweet.
Serving and Storage
How to Serve: I serve these at room temperature or slightly chilled. They’re rich, so a small square is usually enough. They pair beautifully with a cup of black coffee or a glass of milk. For holiday parties, I arrange them on a platter with a dusting of powdered sugar and a few fresh rosemary sprigs for a festive look.
Side Dishes: These are a dessert, so they stand alone. But if you’re making a full meal, they pair well with savory dishes like rich chocolate desserts if you want to offer variety.
Refrigerator: Store in an airtight container for up to 5 days. They keep best in the fridge because the filling is soft.
Freezing: Yes, these freeze well! Wrap individual squares in plastic wrap, then place them in a freezer bag. They’ll last for 2 months. Thaw in the fridge overnight. This is great for meal-prepping holiday desserts.
Pro Tip: If you’re transporting them, keep them chilled until the last minute. The cold helps them hold their shape in the car.
Nutrition Information
I’m not a nutritionist, but here’s the breakdown if you’re tracking. Keep in mind that these are rich, sweet bars, so portion control is key.
Per Serving (1 of 16 bars):
– Calories: 180
– Protein: 3g
– Carbs: 24g
– Fiber: 1g
– Sugar: 18g
– Fat: 9g
– Saturated Fat: 4g
– Cholesterol: 25mg
– Sodium: 110mg
What’s Good: They provide some energy from the nuts and carbs. Pecans have healthy fats. It’s a decent treat if you’re watching calories, but don’t eat the whole pan.
What to Know: High in sugar and saturated fat due to the syrup, butter, and cheese (if used). Contains nuts and dairy.
Final Thoughts
So that’s my go-to autumn maple pecan pie bars recipe! I’ve probably talked your ear off at this point, but when you make a recipe this often, you have a lot to say about it. These bars have saved me more holiday parties than I can count. They’re my answer to “what dessert should I bring?” when I’m tired, don’t want to bake a whole pie, and still want something that tastes amazing.
Make it yours! Try different nuts, add chocolate, or play with the spice levels. The best recipes are the ones you adapt to your family’s tastes. If you make these, drop a comment and let me know what you think! I love hearing how recipes turn out in your kitchen. And if something doesn’t work, tell me that too—I’m here to help troubleshoot.
Happy baking! And I hope your kitchen smells half as good as mine does right now.
Frequently Asked Questions
Can I use Grade A maple syrup instead of Grade B?
You can, but the flavor will be milder. Grade B is darker and has a stronger maple taste, which is what you want in these bars. If you only have Grade A, it will still work, but you might want to add a teaspoon of molasses to deepen the flavor.
Why did my bars turn out too gooey?
This usually means they weren’t baked long enough. The center should be set, not liquid. Also, make sure you’re using the correct pan size. A smaller pan will result in thicker bars that need more time. If they’re too gooey, return them to the oven for 5-10 minutes.
Can I make these ahead of time?
Yes! In fact, they taste better after a day. Make them 2-3 days before your event, store them in the fridge, and take them out 30 minutes before serving. This is perfect for holiday planning.
Can I freeze these bars?
Absolutely. Wrap individual squares tightly in plastic wrap and place them in a freezer-safe bag. They’ll last for up to 2 months. Thaw in the fridge overnight. They don’t freeze as well as cookies, but they’re still good.
What if I don’t have corn syrup?
You can substitute with an equal amount of honey or agave syrup, but the texture will be slightly different. Honey will add a distinct flavor, and agave will make it softer. Corn syrup is best for that classic chewy texture, but you can experiment.
How do I store leftovers?
Store in an airtight container in the refrigerator for up to 5 days. They can also be kept at room temperature for 1-2 days if your kitchen isn’t too warm, but the fridge is safer to keep the filling firm.
Can I use a 9×9 pan?
Yes, but the bars will be thinner. Reduce the baking time by 5-10 minutes. Keep an eye on them so they don’t overbake. The edges might set faster.
Pin This Recipe!
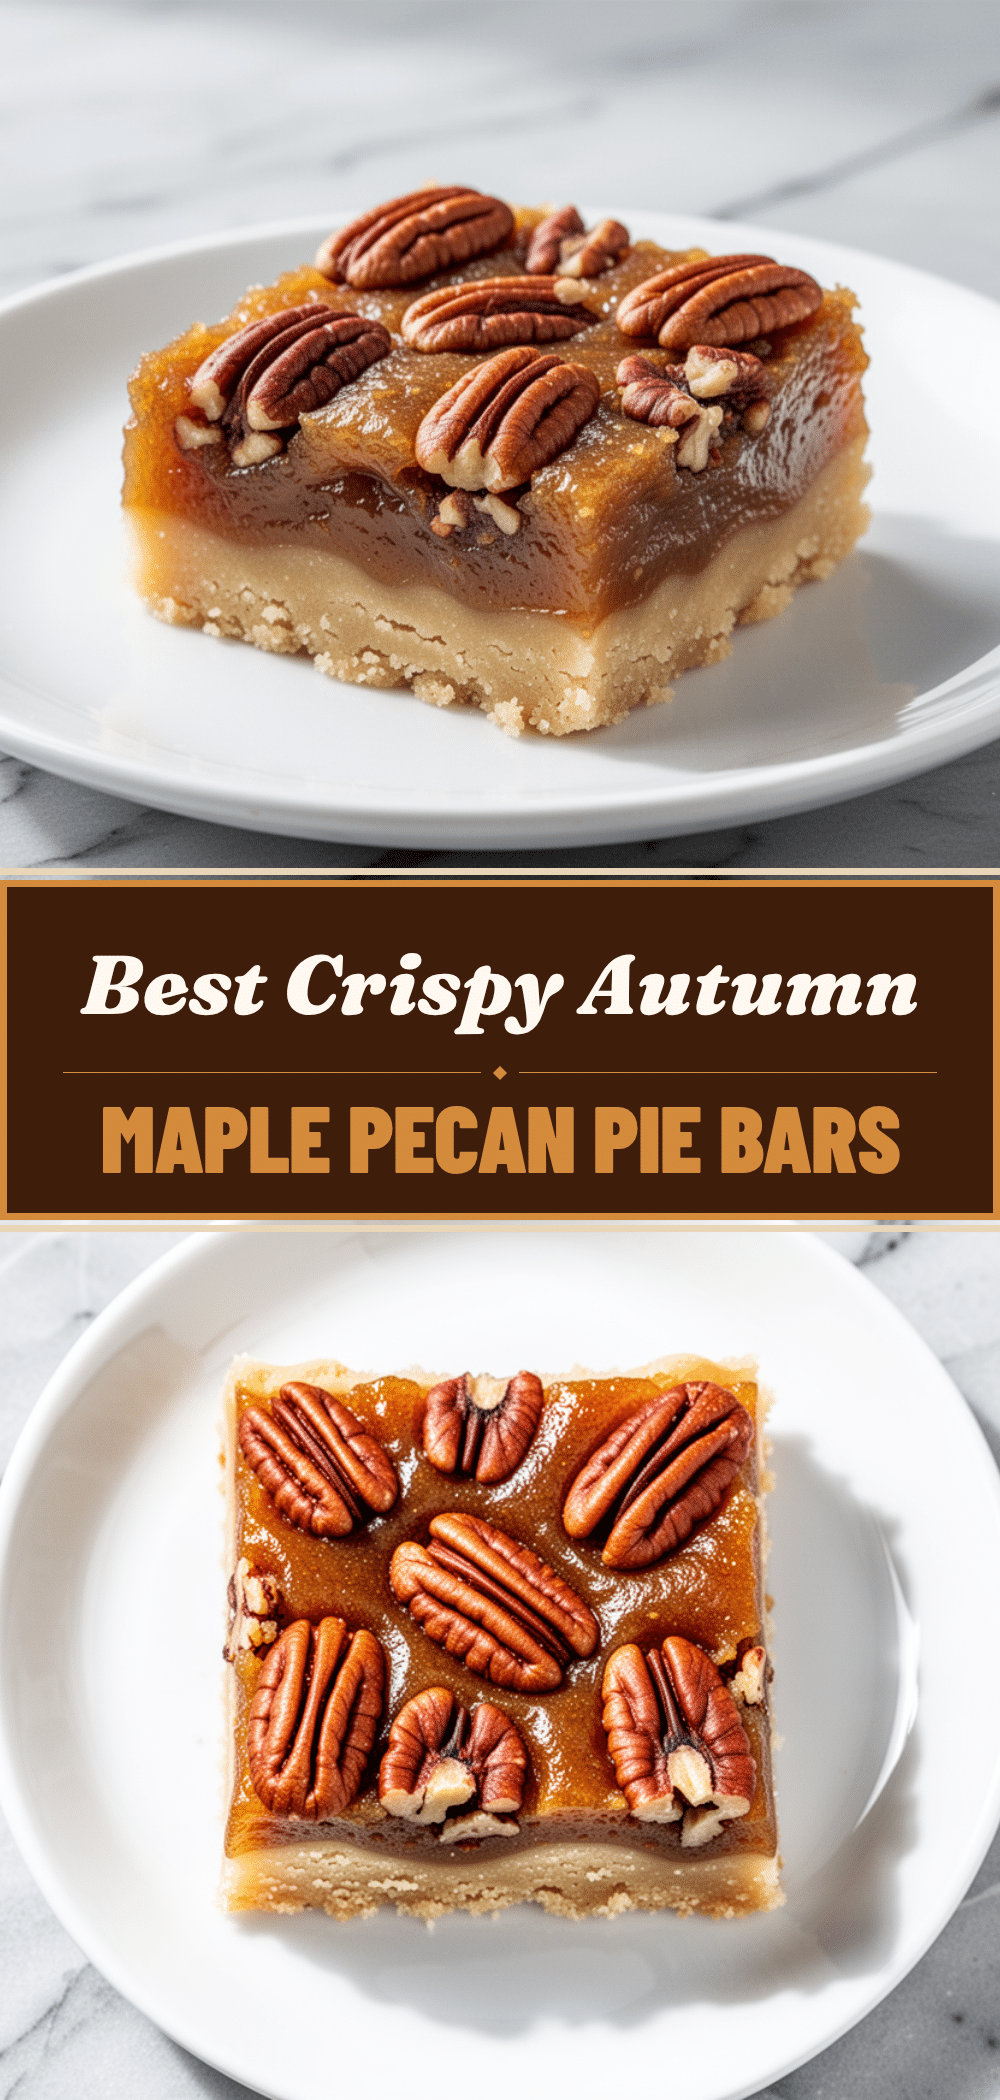
Autumn Maple Pecan Pie Bars
- Total Time: 1 hour 30 minutes
- Yield: 16 servings 1x
Description
These autumn maple pecan pie bars combine the rich flavors of classic pecan pie with the convenience of a bar cookie. Featuring a crunchy graham cracker crust and a gooey, maple-infused filling, they are an easy, make-ahead holiday dessert.
Ingredients
- 1 ½ cups (150g) graham crackers, crushed
- 6 tablespoons (85g) unsalted butter, melted
- 2 tablespoons (25g) brown sugar
- Pinch of salt
- 1 cup (240ml) Grade B maple syrup
- ½ cup (120ml) light corn syrup
- ½ cup (100g) granulated sugar
- 3 large eggs, room temperature
- 1 teaspoon vanilla extract
- ½ teaspoon baking soda
- ½ teaspoon cinnamon
- 1 ½ cups (170g) pecan halves
- Sea salt flakes (optional, for topping)
Instructions
- Preheat oven to 350°F (175°C). Line an 8×8 inch baking pan with parchment paper, leaving an overhang on the long sides, and grease lightly.
- In a medium bowl, combine crushed graham crackers, melted butter, brown sugar, and salt. Mix until it resembles wet sand.
- Press the crust mixture firmly and evenly into the prepared pan. Bake for 8-10 minutes until lightly golden, then remove from oven.
- Reduce oven temperature to 325°F (165°C).
- While the crust bakes, whisk together maple syrup, corn syrup, granulated sugar, eggs, vanilla, baking soda, and cinnamon in a large bowl until smooth and frothy.
- Sprinkle pecan halves evenly over the hot crust. Pour the filling mixture over the pecans and spread evenly.
- Bake at 325°F for 35-40 minutes, or until edges are set and bubbling, and the center is just barely jiggly.
- Cool in the pan on a wire rack for at least 30 minutes, then lift out using the parchment overhang and cool completely (about 1 hour).
- Sprinkle with sea salt flakes if desired, then slice into 12-16 squares.
Notes
For best results, use Grade B maple syrup for a deeper flavor. Ensure eggs are at room temperature for even setting. Do not skip pre-baking the crust to prevent sogginess. Bars must cool completely before slicing to ensure clean cuts. Store in an airtight container in the refrigerator for up to 5 days.
- Prep Time: 15 minutes
- Cook Time: 45 minutes
- Category: Dessert
- Cuisine: American
Nutrition
- Serving Size: 1 square
- Calories: 180
- Sugar: 18
- Sodium: 110
- Fat: 9
- Saturated Fat: 4
- Carbohydrates: 24
- Fiber: 1
- Protein: 3
Keywords: autumn, maple, pecan pie bars, holiday dessert, fall baking, graham cracker crust, make-ahead dessert, easy holiday treats