It was 5:15 PM on a Tuesday, and I was staring at the fridge with the kind of desperation that only comes from a long day. The kids were already complaining about being hungry, the dog was giving me that look that says “you forgot to feed me again,” and my brain was completely fried. I had zero energy for cooking a full dinner, let alone planning a dessert. But then I remembered I had a can of pumpkin puree, some cream cheese, and a box of graham crackers. It wasn’t fancy. It wasn’t complicated. But it was going to be good.
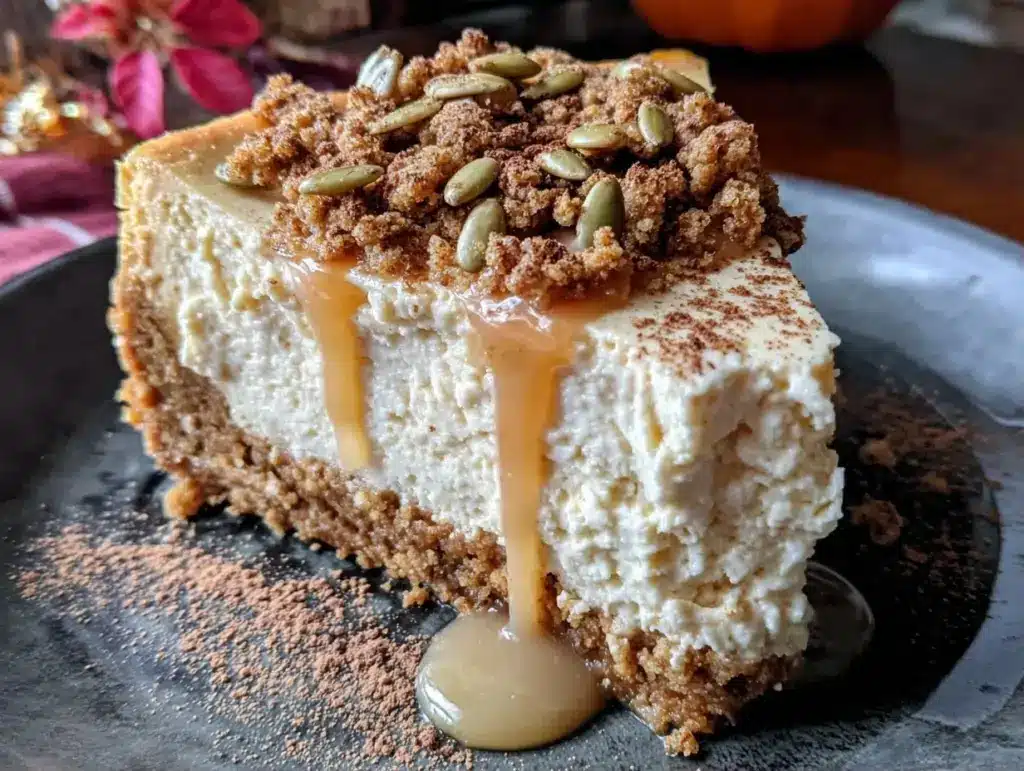
I whipped up this pumpkin spice cheesecake in under 30 minutes of active time, and it turned out to be the best thing I ate all week. It’s creamy, it’s spiced just right, and it tastes like something you’d order at a fancy dessert place—but it’s actually easier to make than crispy panko crusted chicken parmesan, which is saying something because that’s already my go-to for taking out nights.
This isn’t your typical, four-hour, water-bath-required cheesecake. This is the “I need to impress my family but I also need to sit down” version. It’s dense, it’s rich, and it’s got that cinnamon graham crust that makes you want to lick the plate. If you’re looking for a quick win that feels like a treat but doesn’t take all evening, this pumpkin spice cheesecake is your new best friend. Seriously. It’s better than takeout, and you’ll save money too.
Why You’ll Love This Recipe
Look, I’m not going to lie to you. Cheesecake usually feels like a project. You need special pans, you need to worry about cracks, you need to wait three days for it to set. But this version? It’s different. It’s my secret weapon for those nights when I want something special but have zero patience.
- Stupid Simple — Seriously, if you can mix ingredients in a bowl, you can make this. No water baths, no fancy techniques. I made this while my toddler was napping, and I didn’t even have to be quiet.
- Lightning Fast — 30 minutes from start to finish for the prep, and then it just needs to chill. I make this on weeknights when I get home at 7pm and still want dessert by 8.
- Pantry-Friendly — You probably have most of this already. Cream cheese, sugar, eggs, pumpkin puree (from a can, not a can of pie filling—read the label!), and graham crackers. I keep these stocked just so I can make this on a whim.
- Crowd-Pleaser — I’ve served this to my vegetarian sister, my gluten-free neighbor (using gluten-free crackers), and my I-only-eat-chicken dad (with modifications). Everyone loved it. Even the kids who usually only eat cookies asked for seconds.
- Makes Amazing Leftovers — Actually tastes better the next day. The flavors meld together overnight. I deliberately make extra for lunch throughout the week because it’s like eating dessert for breakfast.
- Budget-Smart — Feeds 8-10 people for under $12. That’s less than one meal at a fast-food place, and way more satisfying.
This is my go-to when I need dinner to just work. No complicated techniques, no weird ingredients, just reliable, delicious food that makes everyone happy. It’s the perfect answer to “what’s for dessert?” when you’ve already decided on labor-day grilled chicken salad for the main course because you’re too tired to grill again.
Ingredients You’ll Need
Here’s the best part: you probably have most of this already. I’m particular about three ingredients here, and I’ll tell you exactly why. Don’t skip the tips—they make all the difference between “okay” and “amazing.”
For the Crust
Graham crackers (1 ½ cups / 150g) — Crushed into fine crumbs. I use regular graham crackers for that classic sweetness. If you want a bit more flavor, try diabetic-friendly sugar-free pumpkin spice cookies crushed up for a lower-sugar option, but the regular ones are classic for a reason.
Unsalted butter (6 tablespoons / 85g) — Melted. This binds the crust together. Use good quality butter if you can—it makes the crust richer.
Granulated sugar (2 tablespoons / 25g) — Just a little bit to sweeten the crust. Don’t skip it, or it’ll taste bland.
Cinnamon (½ teaspoon) — Adds warmth. This is where the “pumpkin spice” vibe starts.
For the Filling
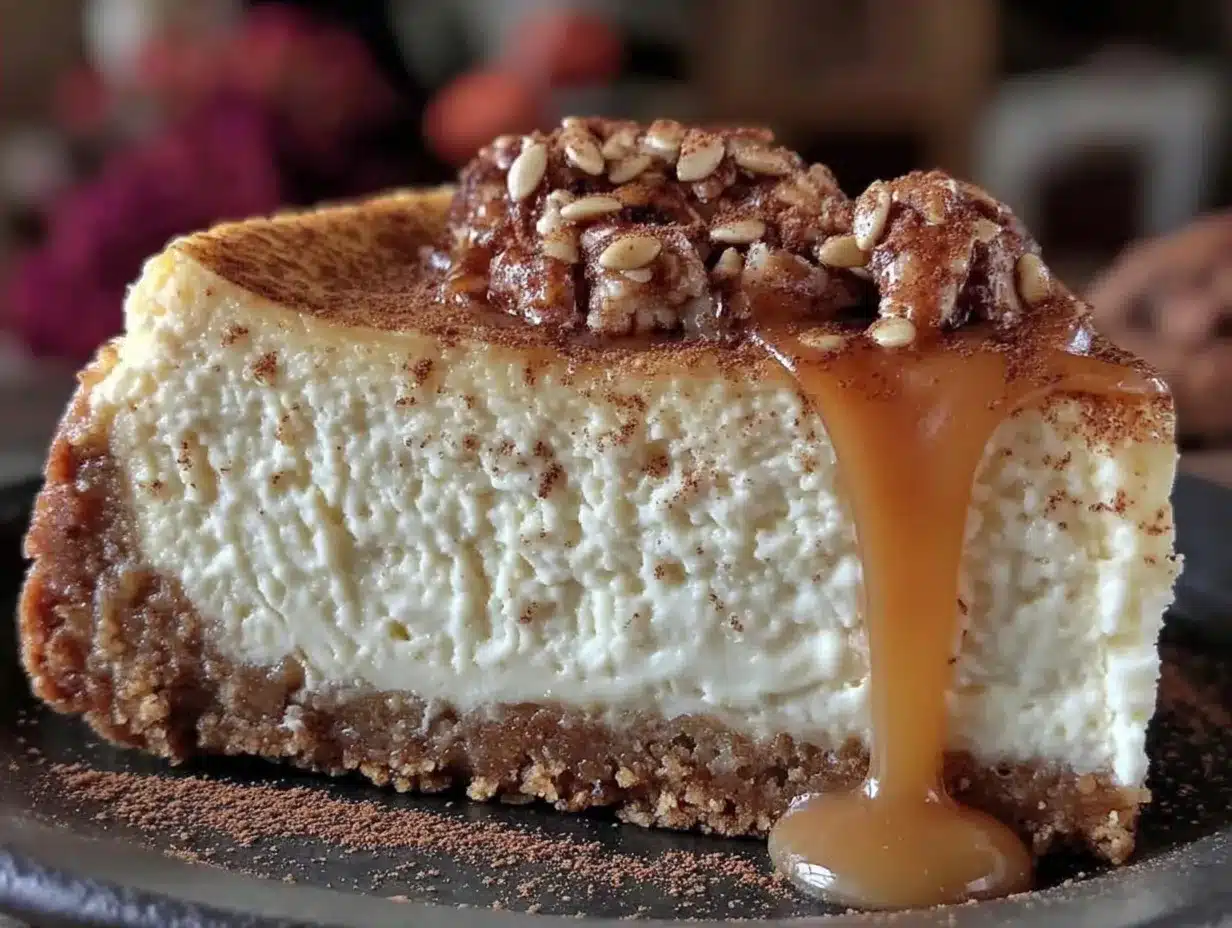
Cream cheese (24 ounces / 680g) — Full-fat, block style. Do not use the tub stuff. It has too much water and air, and your cheesecake will be runny. I buy the big blocks and let them come to room temperature for 30 minutes before mixing. Cold cream cheese is the enemy of smooth cheesecake.
Granulated sugar (1 cup / 200g) — This gives it the right sweetness. Don’t reduce it too much, or the texture will suffer.
Heavy cream (½ cup / 120ml) — Adds richness and helps it set. You can use half-and-half if you’re feeling lazy, but heavy cream is better.
Pumpkin puree (1 ½ cups / 375g) — Not pumpkin pie filling! Pie filling has sugar and spices added. You want 100% pure pumpkin. I use Libby’s or a store brand—it doesn’t matter much, just make sure it’s pure.
Eggs (3 large) — Room temperature. Cold eggs can cause lumps. I take them out of the fridge when I start prepping.
Pumpkin pie spice (2 teaspoons) — This is the magic powder. Cinnamon, ginger, nutmeg, and cloves. If you don’t have it, you can mix your own (1 tsp cinnamon, ½ tsp ginger, ¼ tsp nutmeg, ¼ tsp cloves).
Vanilla extract (1 teaspoon) — Real vanilla, not imitation. It adds depth.
Salt (½ teaspoon) — Crucial. It balances the sweetness. Don’t skip it.
For the Topping (Optional but Recommended)
Whipped cream — Store-bought is fine, but homemade is better. If you want to go all out, try ultra creamy no-churn vanilla bean ice cream as a topping instead. It’s rich and pairs perfectly.
Pumpkin seeds (1 tablespoon) — Toasted. Adds a nice crunch and looks pretty.
Equipment Needed
You don’t need fancy equipment for this. Here’s what I actually use.
9-inch springform pan — This is essential. The sides pop off, making it easy to get the cake out. If you don’t have one, a regular 9-inch pie dish works, but you’ll need to cut slices carefully.
Food processor — For crushing the graham crackers. If you don’t have one, put them in a ziplock bag and smash them with a rolling pin. It’s a workout, but it works.
Mixer — Hand mixer or stand mixer. I use a hand mixer because it’s faster to clean. You need to beat the cream cheese until it’s smooth.
Rubber spatula — For scraping the bowl. Don’t waste any filling!
Measuring cups and spoons — Pretty standard stuff. Dollar store versions work fine.
Aluminum foil — To wrap the bottom of the pan if you’re using a water bath (you’re not, but just in case).
How to Make It: Step-by-Step
Alright, let’s make this! I’m walking you through exactly how I do it, including the little tricks I’ve picked up.
Step 1: Prep Your Crust (5 minutes)
Preheat your oven to 325°F (160°C). In a food processor, pulse the graham crackers until they’re fine crumbs. Add the melted butter, sugar, and cinnamon. Pulse until it looks like wet sand. Press this mixture firmly into the bottom of your springform pan. Use the bottom of a glass to pack it down tight. You want it even and compact. Set aside.
Step 2: Beat the Cream Cheese (3 minutes)
In a large bowl, beat the softened cream cheese on medium-high speed until it’s completely smooth and creamy. This is the most important step. If there are lumps, they’ll stay lumps. Scrape down the sides of the bowl. Add the sugar and beat for another minute until combined.
Step 3: Add the Wet Ingredients (2 minutes)
Add the heavy cream, pumpkin puree, pumpkin pie spice, vanilla, and salt. Mix on low speed until just combined. Don’t overmix, or you’ll incorporate too much air, which can cause cracks. Scrape down the bowl one more time.
Step 4: Add the Eggs (2 minutes)
Add the eggs one at a time, mixing on low speed just until the yellow disappears. Overmixing eggs makes the cheesecake dense and rubbery. Stop as soon as they’re incorporated.
Step 5: Bake (45-50 minutes)
Pour the filling over the crust. Tap the pan on the counter a few times to release any air bubbles. Bake at 325°F for 45-50 minutes. The edges should be set, but the center should still jiggle slightly like Jell-O when you shake the pan. It will firm up as it cools.
Step 6: Cool and Chill (4 hours minimum)
Turn off the oven and crack the door open. Let the cheesecake sit in the oven for 1 hour. This gradual cooling helps prevent cracks. Then, remove it and let it cool completely at room temperature. Finally, refrigerate for at least 4 hours, but overnight is best. This is the hardest part—waiting—but it’s worth it.
Step 7: Serve
Run a knife around the edge to loosen it from the pan. Pop the ring off. Slice with a warm knife for clean cuts. Top with whipped cream and toasted pumpkin seeds if you’re feeling fancy. Or just eat it straight from the container. No judgment here.
Expert Tips & Tricks
Here’s everything I’ve learned from making this dozens of times. These tips will save you from my mistakes.
Room Temperature Ingredients — This is non-negotiable. Cold cream cheese and eggs will create lumps. Take them out of the fridge 30-60 minutes before you start. If you forget, you can microwave the cream cheese in 10-second bursts to soften it.
Don’t Overmix — Once you add the eggs, mix on low speed and stop as soon as they’re incorporated. Overmixing adds air, which leads to cracks. I learned this the hard way with a cheesecake that looked like a spiderweb.
The Jiggle Test — Don’t bake it until it’s completely firm. It should jiggle in the center when you shake the pan. It will set as it cools. If you bake it until it’s firm, it’ll be dry and crumbly.
Gradual Cooling — Leaving it in the turned-off oven with the door cracked prevents cracks from temperature shock. It’s a small step that makes a big difference.
Patience Pays Off — I know you want to eat it now. But if you cut it while it’s warm, it’ll be mushy. Let it chill for at least 4 hours. Overnight is best.
Variations & Substitutions
Once you’ve nailed the basic version, here’s how you can mix it up. I’ve tried all of these.
Gluten-Free — Use gluten-free graham crackers. I’ve used gluten-free lemon poppy seed bundt cake crumbs for a fun twist, but regular GF graham crackers work great.
Dairy-Free — Replace cream cheese with cashew cream (soak cashews, blend with water and lemon juice). Replace butter with coconut oil. Replace heavy cream with full-fat coconut cream. It’s different but still tasty.
Lighter Version — Use Greek yogurt instead of half the cream cheese. It’s tangier and lighter. I make this when I’m trying to be “healthy.”
Chocolate Chip — Stir in ½ cup chocolate chips before baking. My kids love this version.
Caramel Swirl — Drizzle caramel sauce on top after baking. Or swirl it in before baking for a marbled effect.
Serving & Storage
How to Serve: I usually serve this straight from the fridge. It’s firm and creamy. But here are other ways I’ve enjoyed it:
- With a dollop of whipped cream
- With a drizzle of caramel sauce
- With a sprinkle of toasted pecans
- With a side of southern pecan praline bread pudding for a double-dose of sweetness (don’t judge me)
Refrigerator: Store in an airtight container or covered with plastic wrap for up to 5 days. It actually gets better after day 2.
Freezing: Yes, you can freeze it! Wrap the whole cheesecake (or slices) in plastic wrap, then foil. Freeze for up to 2 months. Thaw in the fridge overnight. The texture might be slightly different, but it’s still delicious.
Pro tip: If you’re serving it at a party, take it out of the fridge 30 minutes before serving. It’ll be easier to slice.
Nutrition Information
I’m not a nutritionist, but here’s the breakdown if you’re tracking.
Per Serving (based on 12 servings):
- Calories: 320
- Protein: 6g
- Carbs: 28g
- Fiber: 1g
- Sugar: 22g
- Fat: 22g
- Saturated Fat: 13g
- Cholesterol: 85mg
- Sodium: 220mg
What’s Good: It’s a decent source of calcium from the cheese. Pumpkin adds some vitamin A.
What to Know: It’s higher in calories and sugar because it’s a dessert. But it’s way better than store-bought, and you control the ingredients. When I want to make it lighter, I use the Greek yogurt version and reduce the sugar. But usually? I just eat a reasonable portion and enjoy it.
Final Thoughts
So that’s my pumpkin spice cheesecake! I’ve probably talked your ear off at this point, but when you make a recipe this often, you have a lot to say about it.
This has saved dessert nights more times than I can count. It’s my answer to “what’s for dessert?” when I’m tired, don’t want takeout, and still want something that tastes really good. My kids are happy, my husband’s happy, and I’m happy because I’m not stressed about cooking.
Make it yours! Try different add-ins, swap in your favorite toppings, adjust the spice level. The best recipes are the ones you adapt to your family’s tastes.
If you make this, drop a comment and let me know what you think! I love hearing how recipes turn out in your kitchen. And if something doesn’t work, tell me that too—I’m here to help troubleshoot.
Happy cooking! And I hope your kitchen smells half as good as mine does right now.
Frequently Asked Questions
Can I use pumpkin pie filling instead of pure pumpkin?
No! Pumpkin pie filling has sugar, spices, and thickeners added. If you use it, your cheesecake will be way too sweet and the texture will be wrong. You need 100% pure pumpkin puree. Check the label—it should say “100% pumpkin.”
Why did my cheesecake crack?
Cracks usually happen from overmixing (too much air), overbaking (it’s dry), or temperature shock (cooling too fast). Follow the tips above: room temp ingredients, gentle mixing, and gradual cooling. It happens to the best of us, but it’s mostly cosmetic.
Can I make this ahead for a dinner party?
Absolutely! This is actually better made ahead. Make it 1-2 days before. It needs time to set and for the flavors to meld. Just keep it covered in the fridge.
Can I use a regular pie pan instead of a springform pan?
You can, but it’ll be harder to get it out. Use parchment paper in the bottom and sides of the pie pan. Or, just slice it in the pan and serve slices with a spatula. It’s not pretty, but it works.
How long does it take to cool?
The cooling process is key. 1 hour in the turned-off oven, then 1 hour at room temperature, then at least 4 hours in the fridge. Overnight is best. If you’re in a rush, you can freeze it for 2 hours to speed up the setting, but it won’t be as creamy.
Can I double this recipe?
Yes, but you’ll need a 10-inch springform pan or two 9-inch pans. Increase the baking time by 5-10 minutes. Keep an eye on it.
Pin This Recipe!
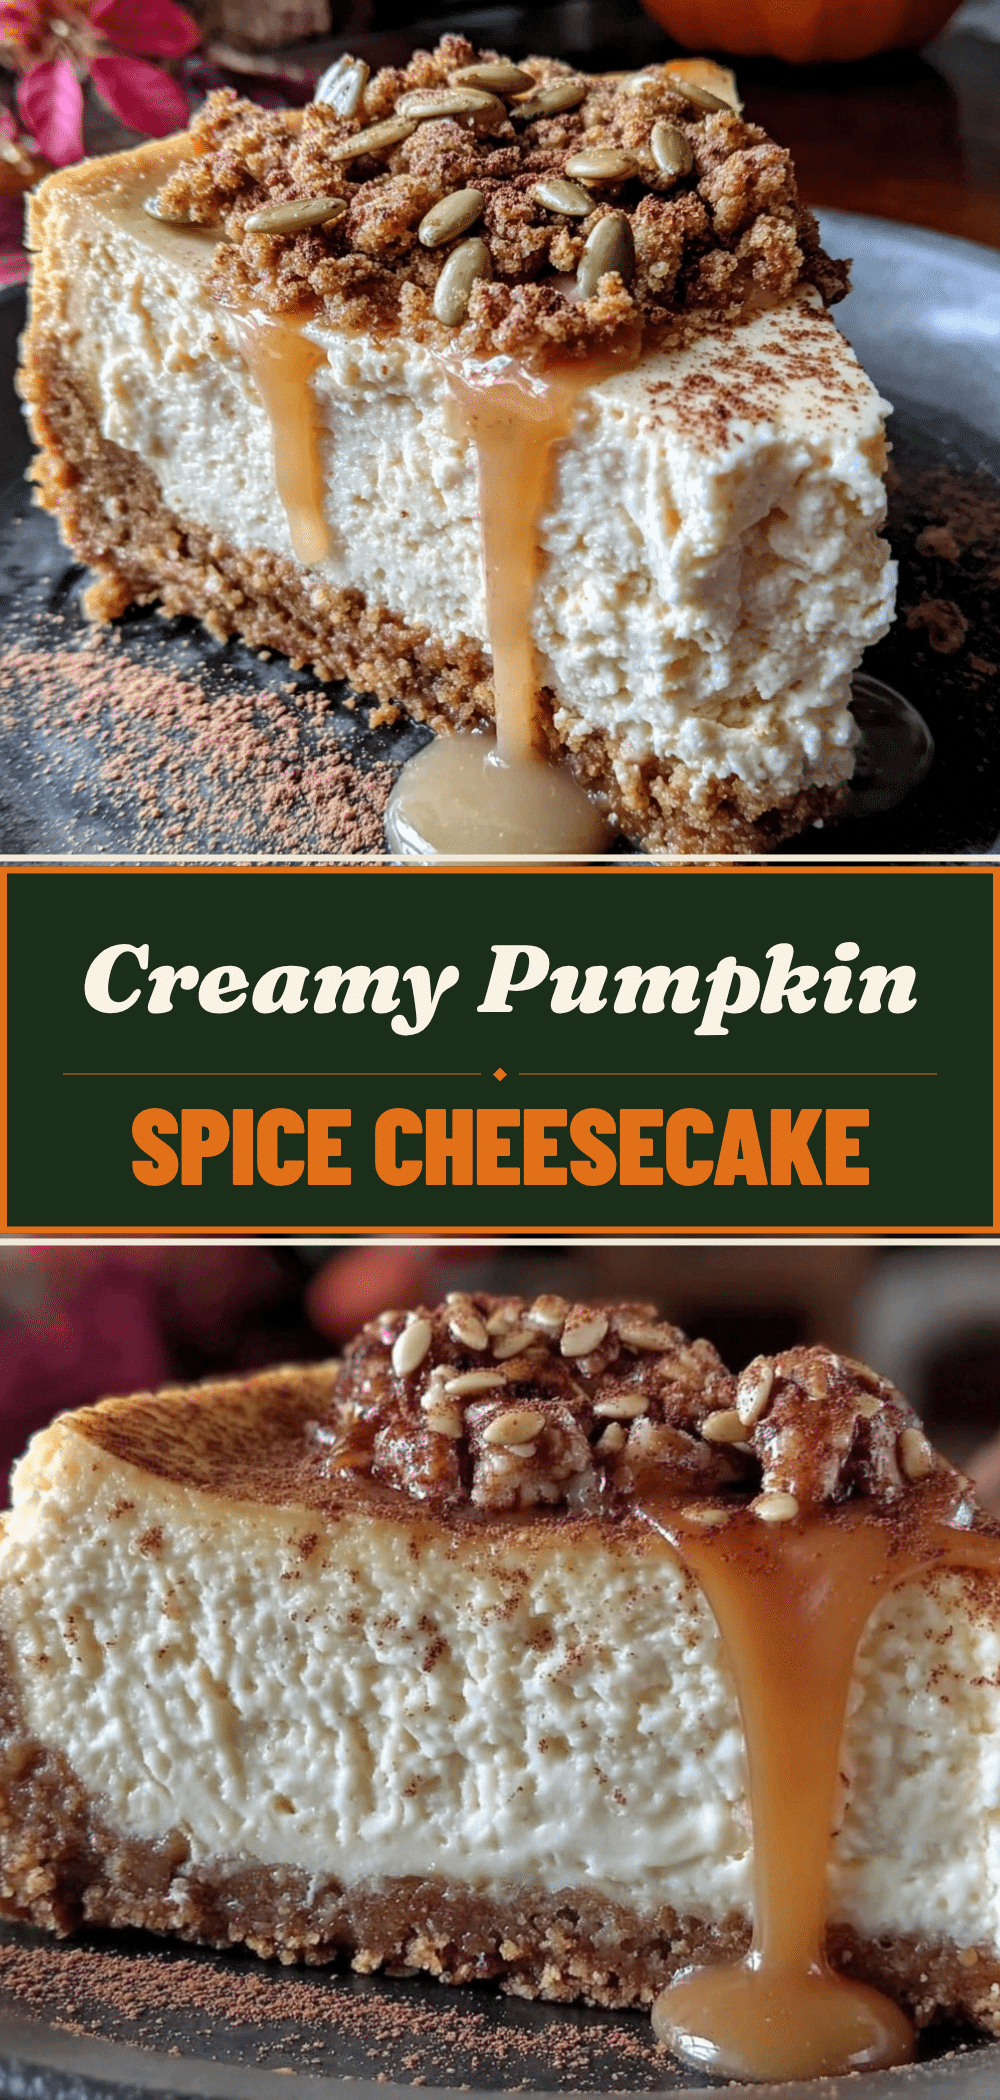
Pumpkin Spice Cheesecake: 5PM Dinner Hack
- Total Time: 5 hours 15 minutes
- Yield: 12 servings 1x
Description
A quick, creamy, and dense pumpkin spice cheesecake that requires no water bath and can be prepped in under 30 minutes. It uses pantry-friendly ingredients like canned pumpkin puree and graham crackers for a crowd-pleasing dessert.
Ingredients
- 1 ½ cups (150g) graham crackers, crushed into fine crumbs
- 6 tablespoons (85g) unsalted butter, melted
- 2 tablespoons (25g) granulated sugar
- ½ teaspoon cinnamon
- 24 ounces (680g) full-fat block cream cheese, room temperature
- 1 cup (200g) granulated sugar
- ½ cup (120ml) heavy cream
- 1 ½ cups (375g) 100% pure pumpkin puree
- 3 large eggs, room temperature
- 2 teaspoons pumpkin pie spice
- 1 teaspoon vanilla extract
- ½ teaspoon salt
- Whipped cream (optional, for topping)
- 1 tablespoon toasted pumpkin seeds (optional, for topping)
Instructions
- Preheat oven to 325°F (160°C).
- In a food processor, pulse graham crackers until fine. Add melted butter, sugar, and cinnamon; pulse until mixture resembles wet sand.
- Press the crust mixture firmly into the bottom of a 9-inch springform pan. Use the bottom of a glass to pack it down tight. Set aside.
- In a large bowl, beat the softened cream cheese on medium-high speed until completely smooth. Scrape down the sides of the bowl.
- Add the sugar and beat for another minute until combined.
- Add heavy cream, pumpkin puree, pumpkin pie spice, vanilla, and salt. Mix on low speed until just combined. Do not overmix.
- Add eggs one at a time, mixing on low speed just until the yellow disappears. Stop mixing as soon as incorporated.
- Pour filling over the crust. Tap the pan on the counter a few times to release air bubbles.
- Bake at 325°F for 45-50 minutes. The edges should be set, but the center should jiggle slightly like Jell-O when shaken.
- Turn off the oven and crack the door open. Let the cheesecake sit in the oven for 1 hour to cool gradually.
- Remove from oven and let cool completely at room temperature.
- Refrigerate for at least 4 hours, preferably overnight, to set.
- Run a knife around the edge to loosen, remove the springform ring, and slice with a warm knife.
- Top with whipped cream and toasted pumpkin seeds if desired.
Notes
Ensure all ingredients, especially cream cheese and eggs, are at room temperature to prevent lumps. Do not use pumpkin pie filling; use 100% pure pumpkin puree. The cheesecake should jiggle slightly in the center when removed from the oven; it will firm up as it cools. For best results, chill overnight. Can be stored in the refrigerator for up to 5 days or frozen for up to 2 months.
- Prep Time: 30 minutes
- Cook Time: 45-50 minutes
- Category: Dessert
- Cuisine: American
Nutrition
- Serving Size: 1 slice
- Calories: 320
- Sugar: 22
- Sodium: 220
- Fat: 22
- Saturated Fat: 13
- Carbohydrates: 28
- Fiber: 1
- Protein: 6
Keywords: pumpkin spice cheesecake, quick dessert, no bake cheesecake alternative, easy pumpkin recipe, weeknight dinner hack, gluten-free option, budget-friendly dessert