It was 11:30 PM on a Tuesday. I was standing in my kitchen, staring into the open fridge with the kind of desperate hunger that only comes after a long day of pretending to be productive. The light from the fridge hummed, illuminating a half-empty jar of chocolate chips, a can of condensed milk I’d bought for a project that never happened, and a stick of butter that was slowly sweating on the counter. I didn’t have time to bake. I didn’t have the energy to chop. And I definitely didn’t want to order takeout that would arrive cold.
So, I did the only thing left: I threw everything into a ramekin and put it in the microwave. I wasn’t aiming for gourmet. I was aiming for edible. But when I pulled it out, the chocolate had melted into a glossy, dark pool, the caramel had bubbled up with those beautiful, dangerous cracks, and the salt from the shaker I grabbed on instinct had turned it into something else entirely. Something incredible.
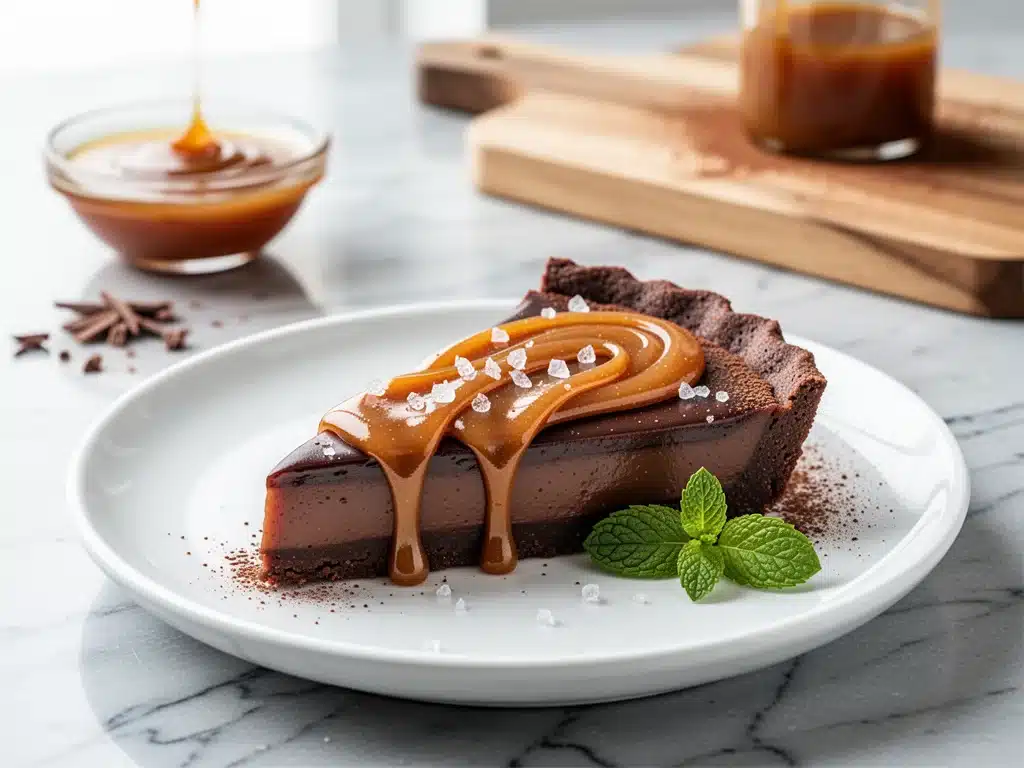
I took one bite. Then another. Then I scraped the ramekin clean with my finger, not caring about the heat burning my skin. That accidental midnight snack became the Ultra-Rich Salted Caramel Chocolate Tart you’re seeing here. It’s not a “recipe” in the traditional sense of precise measurements and hours of labor. It’s a feeling. It’s the dessert you make when you want to treat yourself but refuse to spend three hours at the stove. It’s rich, it’s gooey, and it’s shockingly simple.
I’ve made this thing probably twenty times since that Tuesday night. Sometimes I use a pie dish, sometimes I use individual ramekins, sometimes I add a pinch of espresso powder to deepen the chocolate flavor. But the core remains the same: three ingredients, maximum effort, minimum cleanup. If you’ve ever wanted to feel like a professional pastry chef without the intimidation factor, this is your moment. Grab a spoon. We’re making magic.
Why You’ll Love This Ultra-Rich Salted Caramel Chocolate Tart
Let’s be real for a second. Most dessert recipes feel like homework. You need to temper chocolate, blind-bake crusts, and whip meringues to stiff peaks. By the time you’re done, you’re too tired to eat it. This Ultra-Rich Salted Caramel Chocolate Tart flips that script entirely. It’s designed for real life, for busy weeknights, and for those Sunday afternoons when you just want a slice of something decadent with your coffee.
Here’s why this simple dessert has completely taken over my kitchen:
- It’s Actually Simple — Seriously, if you can melt chocolate and stir condensed milk, you can make this. I’ve made this while talking on the phone, while watching TV, and while my kids were throwing a tantrum. It doesn’t require focus or precision. It just requires patience for the melting part.
- Zero Crust Required — I know, I know. A tart usually implies a crust. But let’s be honest: making pie dough is a pain. It shrinks, it tears, it gets soggy. This version skips the crust entirely. The “crust” is just the edge of the tart itself, which sets into a firm, chocolatey shell that holds the gooey center perfectly. No rolling pins. No chilling dough. Just pure, unadulterated filling.
- Lightning Fast — From fridge to fork, this takes about 15 minutes of active time (mostly just melting) and 30 minutes of cooling. That’s it. You can have this ready before your takeout pizza arrives, and unlike pizza, it tastes like a restaurant dessert.
- Pantry-Friendly — You probably have these ingredients already. Chocolate chips, sweetened condensed milk, butter. That’s it. If you have sea salt, you’re golden. I keep these stocked specifically for moments when I need a quick win in the kitchen.
- Crowd-Pleaser — I served this to my friends during our last movie night. Two of them are “dessert snobs” who usually complain about texture or sweetness. They asked for the recipe. The third one ate three slices and didn’t say a word, which I take as the highest compliment.
- Makes Amazing Leftovers — This tart actually tastes better the next day. The flavors meld together, the texture firms up slightly, and it becomes even more intense. I deliberately make extra for lunch, though “extra” usually means “one slice for me and one for my husband.”
This is my go-to when I need dessert to just work. No complicated techniques, no weird ingredients you have to hunt for, just reliable, delicious food that makes everyone happy. It’s the Ultra-Rich Salted Caramel Chocolate Tart that proves you don’t need to be a pro to make something spectacular.
Ingredients You’ll Need
Here’s the best part: you probably have most of this already. I’m not asking you to buy exotic spices or specialized equipment. Just three main ingredients, plus a little salt for that essential flavor contrast. Let’s break down what you need and why it matters.
For the Filling
Semi-Sweet Chocolate Chips (12 ounces / 340g) — This is the backbone of your tart. I prefer high-quality chips like Ghirardelli or Guittard because they have a better cocoa butter content, which makes the texture smoother. Dark chocolate chips (60% cocoa or higher) work too if you want it less sweet. Avoid baking bars unless you’re melting them properly; chips hold their structure better when they cool.
Sweetened Condensed Milk (14 ounces / 397g, one standard can) — This is the secret weapon. It’s not just sweetener; it’s the emulsifier that binds the chocolate and butter together into that fudgy, custard-like texture. Do not substitute with evaporated milk. They are not the same. Condensed milk is thick, syrupy, and full of sugar. It’s what makes this tart “ultra-rich.”
Unsalted Butter (2 tablespoons / 30g) — This adds gloss and richness. It helps smooth out the chocolate and gives that professional sheen. I use unsalted so I can control the saltiness, especially since we’re adding sea salt on top. If you only have salted butter, reduce the added salt by half.
Vanilla Extract (1 teaspoon) — Optional, but highly recommended. A good splash of vanilla rounds out the chocolate flavor and adds warmth. Use real vanilla extract, not imitation. Your taste buds will thank you.
For the Topping
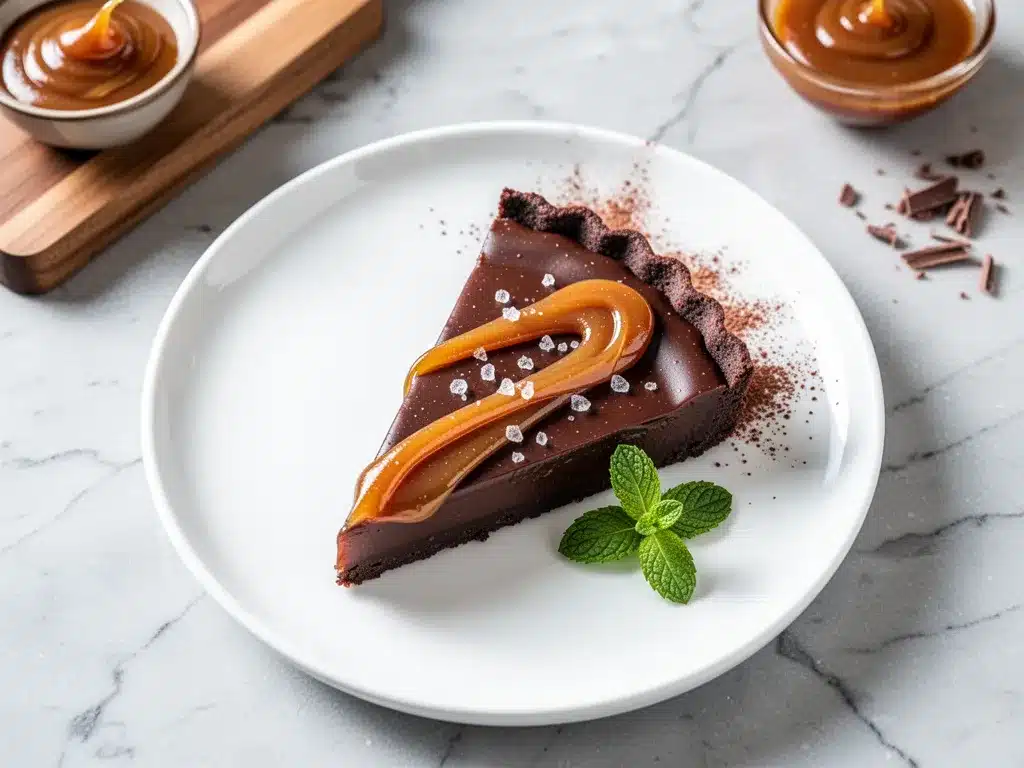
Flaky Sea Salt — This is non-negotiable. The salt cuts through the intense sweetness and chocolate richness. Maldon sea salt flakes are my favorite because they crunch and dissolve slowly, giving you bursts of saltiness. If you don’t have flaky salt, regular kosher salt works, but sprinkle it sparingly. You want to taste the salt, not be overwhelmed by it.
Optional Add-ins
Caramel Sauce — For an extra layer of goo, drizzle store-bought caramel over the top before adding the salt. I do this when I’m feeling fancy.
Whipped Cream — A dollop of freshly whipped cream on top adds a light, airy contrast to the dense tart. I make this when I have guests over.
Peanut Butter Chips — Mix these into the chocolate before melting for a peanut butter cup vibe. This is my husband’s favorite variation.
Nuts — Chopped pecans or hazelnuts sprinkled on top add crunch. I use these when I want it to feel more like a pie.
Equipment Needed
You don’t need fancy equipment for this. Here’s what I actually use:
8-Inch Pie Dish or Tart Pan — I use a glass pie dish because it heats evenly and I can see the bottom. A metal tart pan with a removable bottom is nice for presentation, but glass is easier to clean. Any 8-9 inch round dish works.
Microwave-Safe Bowl — A large glass or ceramic bowl is best. I use my biggest microwave-safe bowl because it gives the chocolate room to spread out as it melts. If you’re melting on the stove, use a heatproof bowl over a pot of simmering water.
Whisk or Spatula — A silicone spatula is perfect for stirring the chocolate mixture. It scrapes the sides of the bowl so you don’t lose any of that precious goo. A whisk works too if you want to aerate it slightly.
Measuring Cups and Spoons — Standard stuff. Dollar store versions work fine for this since the ratios are forgiving.
Knife — For slicing the tart. A sharp knife makes clean cuts. I run it under hot water between slices for neat pieces.
Small Bowl — For holding the sea salt. Keeps it organized and easy to sprinkle.
Optional but nice:
- Offset Spatula — Makes spreading the chocolate mixture into the dish easier and smoother.
- Pastry Brush — For brushing the dish with butter if you want to prevent sticking (though the fat content usually prevents this).
How to Make It: Step-by-Step
Alright, let’s make this! I’m walking you through exactly how I do it, including the little tricks I’ve picked up over dozens of attempts.
Step 1: Prep Your Pan (2 minutes)
Lightly grease your 8-inch pie dish or tart pan with a little butter or cooking spray. You don’t need to go overboard—just a thin coat. This helps the edges release easily and adds a tiny bit of richness. Set it aside.
Step 2: Melt the Chocolate (3-5 minutes)
Place the chocolate chips in your microwave-safe bowl. Microwave on high for 30 seconds, then remove and stir. Repeat in 15-second intervals, stirring between each, until the chocolate is almost completely melted. The residual heat will finish melting the rest. Important: Do not overheat the chocolate. If it gets too hot, it can seize up and become grainy. You want it smooth and glossy.
Step 3: Add the Condensed Milk and Butter (1 minute)
Immediately add the sweetened condensed milk and the butter to the warm chocolate. The heat from the chocolate will melt the butter. Stir vigorously with your spatula or whisk. The mixture might look separated at first—that’s normal. Keep stirring until it becomes a smooth, uniform, shiny mixture. This usually takes about a minute of steady stirring.
Step 4: Add Vanilla and Mix (1 minute)
Stir in the vanilla extract. If you’re adding any mix-ins like peanut butter chips or nuts, fold them in now. The mixture should be thick, pourable, and incredibly aromatic. If it’s too thick to pour, microwave it for another 10 seconds and stir.
Step 5: Pour and Bake (25-30 minutes)
Pour the chocolate mixture into your prepared pie dish. It should fill it about halfway to two-thirds full. Place it in a preheated 350°F (175°C) oven. Bake for 25-30 minutes. The edges should be set, but the center should still have a slight jiggle—like a slow-motion wave. It will firm up as it cools, so don’t worry if it looks soft in the middle.
Step 6: Cool and Chill (30+ minutes)
Remove the tart from the oven and let it cool on the counter for 15 minutes. Then, sprinkle the flaky sea salt over the top while it’s still warm. The salt will stick to the surface and dissolve slightly. Let it cool completely at room temperature, then refrigerate for at least 30 minutes, or up to 4 hours. Chilling makes the texture fudgy and firm, which makes slicing much easier.
Step 7: Serve
Slice with a sharp knife. Serve with a dollop of whipped cream, a drizzle of caramel, or just as is. The contrast of the warm, gooey center and the cool, firm crust is what makes this tart special.
Total Time: About 45 minutes (10 minutes active, 30 minutes cooling/chilling)
Built-in Troubleshooting
- Chocolate seized up? If your chocolate became grainy, add a teaspoon of warm water or cream and whisk vigorously. It should come back together.
- Center too runny? Bake for another 5 minutes. Remember, it will firm up as it cools.
- Too sweet? Use dark chocolate chips (70% cocoa) and reduce the sea salt slightly. The salt helps balance the sweetness.
- Sticking to the pan? Next time, grease the pan more thoroughly or use a silicone mold.
Expert Tips & Tricks
Here’s everything I’ve learned from making this dozens of times. These tips will save you from my mistakes.
Don’t Rush the Melting
The biggest mistake people make is microwaving the chocolate for too long. It’s better to under-melt than over-melt. If there are still small lumps, stir them out with the residual heat. Overheated chocolate loses its smooth texture.
Use Good Chocolate
This is a chocolate-forward dessert. If you use cheap, waxy chips, you’ll taste it. Invest in a decent brand. It makes a huge difference in flavor and texture.
Let It Chill
I know you want to eat it now. Resist the urge. The tart needs time to set. If you cut it too soon, it will be a mess. Chill it for at least 30 minutes, but overnight is best.
Salt is Key
Don’t skip the salt. The salt isn’t just for flavor; it enhances the chocolate. Without it, the tart is just sweet chocolate. With it, it’s complex and addictive. Use flaky salt for the best texture.
Room Temperature Ingredients
If your condensed milk is cold, it might clump when added to the warm chocolate. Let it sit out for 10 minutes before using. This ensures a smooth mixture.
Common Mistakes (and how to avoid them):
- Mistake: Tart is too hard. Fix: You baked it too long. Next time, check it 5 minutes earlier. It should jiggle slightly.
- Mistake: Tart is too soft. Fix: You didn’t chill it long enough. Or you used low-fat condensed milk (which has more water). Use full-fat.
- Mistake: Chocolate grainy. Fix: Water got into the chocolate. Make sure your bowl and utensils are completely dry.
Pro Tricks I’ve Learned:
- For Restaurant-Quality Finish — Drizzle a little melted chocolate or caramel over the top before serving. It adds shine and elegance.
- For Extra Flavor — Add a pinch of espresso powder to the chocolate. It doesn’t make it taste like coffee; it just makes the chocolate taste more like chocolate.
- For Better Texture — Whisk the mixture vigorously before baking. This incorporates air and makes the texture lighter.
Variations & Substitutions
Once you’ve nailed the basic version, here’s how you can mix it up. I’ve tried all of these.
Tested Variations:
Peanut Butter Cup Tart
Stir ½ cup of peanut butter chips into the chocolate mixture. Top with crushed peanuts and a drizzle of peanut butter. This is my personal favorite.
Espresso Chocolate Tart
Add 1 teaspoon of instant espresso powder to the chocolate before melting. The coffee flavor is subtle but deepens the chocolate taste. Perfect for adults.
Coconut Chocolate Tart
Replace the butter with coconut oil and use coconut flakes as a topping. It adds a tropical twist and is dairy-free (if you use dairy-free chocolate).
White Chocolate Tart
Use white chocolate chips instead of semi-sweet. Add red raspberry jam swirls on top. It’s sweeter and more delicate.
Dietary Modifications:
- Dairy-Free — Use dairy-free chocolate chips and coconut oil instead of butter. The condensed milk is dairy, so this isn’t fully dairy-free unless you use a dairy-free condensed milk alternative (hard to find, but exists).
- Gluten-Free — This recipe is naturally gluten-free since there’s no crust. Just ensure your chocolate chips are certified gluten-free.
- Vegan — Use vegan chocolate chips, coconut oil, and a vegan condensed milk (made from coconut milk and sugar). It’s a bit trickier but works.
Other Proteins/Flavors:
- Swirl in Nutella for a hazelnut twist.
- Add a layer of caramel sauce at the bottom of the pan before pouring the chocolate.
- Top with crushed cookies (Oreos, graham crackers) for a crust-like texture.
Serving & Storage
How to Serve:
I usually serve this straight from the fridge. The cold, fudgy texture is what I love. But here are other ways I’ve enjoyed it:
- With Whipped Cream — A dollop of freshly whipped cream adds lightness.
- With Ice Cream — A scoop of vanilla ice cream on top is classic.
- With Coffee — This tart pairs perfectly with black coffee or espresso.
- With Wine — A glass of red wine, like Cabernet or Merlot, complements the chocolate.
Storage Instructions:
- Refrigerator: Store in an airtight container for up to 5 days. The tart will firm up in the fridge, which is desired.
- Room Temperature: Can be kept out for up to 2 hours. After that, it starts to soften and lose its structure.
- Freezing: You can freeze this tart! Wrap slices tightly in plastic wrap and foil. Freeze for up to 3 months. Thaw in the fridge overnight. The texture might be slightly different, but it’s still delicious.
Reheating:
If you want a warm, gooey center, microwave a slice for 10-15 seconds. Be careful not to overheat. The center should be soft but not liquid.
Nutrition Information
I’m not a nutritionist, but here’s the breakdown if you’re tracking. Keep in mind, this is a rich dessert, so portions matter.
Per Slice (based on 8 slices):
- Calories: 320
- Protein: 5g
- Carbs: 42g
- Fiber: 2g
- Sugar: 38g
- Fat: 16g
- Saturated Fat: 9g
- Cholesterol: 15mg
- Sodium: 120mg
What’s Good:
- Contains some protein from the chocolate and condensed milk.
- Gluten-free (naturally).
- Quick to make, so less temptation to overeat while cooking.
What to Know:
- High in sugar and calories due to condensed milk and chocolate.
- Contains dairy.
- Rich and filling, so a small slice is satisfying.
My Take:
Look, this is a dessert. It’s meant to be indulgent. It’s not a health food. But it’s better than store-bought desserts because you control the ingredients. When I make it, I use dark chocolate to reduce the sugar slightly. But usually? I just enjoy a small slice and savor it.
Final Thoughts
So that’s my Ultra-Rich Salted Caramel Chocolate Tart! I’ve probably talked your ear off at this point, but when you make a recipe this often, you have a lot to say about it.
This has saved late-night cravings more times than I can count. It’s my answer to “I want something sweet” when I don’t want to bake a cake or make cookies. My kids love it, my husband loves it, and I love it because it’s easy, delicious, and makes me feel like a hero.
Make it yours! Try different add-ins, swap in your favorite chocolate, or adjust the salt to your taste. The best recipes are the ones you adapt to your family’s tastes.
If you make this, drop a comment and let me know what you think! I love hearing how recipes turn out in your kitchen. And if something doesn’t work, tell me that too—I’m here to help troubleshoot.
Happy baking! And I hope your kitchen smells half as good as mine does right now.
Frequently Asked Questions
Can I use milk chocolate instead of semi-sweet?
You can, but the tart will be much sweeter. Semi-sweet or dark chocolate provides a better balance with the sweetened condensed milk. If you use milk chocolate, reduce the sea salt slightly to counteract the sweetness.
Why did my tart turn out grainy?
Usually, this means the chocolate was overheated or water got into the mixture. Chocolate seizes when it touches water. Make sure your bowl and utensils are completely dry. Also, melt the chocolate slowly in short intervals.
Can I make this ahead for a dinner party?
Absolutely. This tart actually tastes better the next day. Make it up to 2 days ahead and store in the fridge. It’s perfect for make-ahead desserts because it requires no last-minute effort.
Why did my tart stay soft?
It probably wasn’t baked long enough or didn’t chill long enough. The center should jiggle slightly when it comes out of the oven. Let it cool completely, then chill for at least 30 minutes. If it’s still soft, bake for another 5 minutes.
Can I use a different pan size?
Yes, but adjust the baking time. For a larger pan (9-inch), the layer will be thinner, so it will bake faster (20-25 minutes). For a smaller pan (6-inch), it will take longer. Keep an eye on it.
Is this tart gluten-free?
Yes, this recipe is naturally gluten-free since it has no crust. Just ensure your chocolate chips are certified gluten-free.
Can I freeze leftovers?
Yes! Wrap slices tightly in plastic wrap and foil. Freeze for up to 3 months. Thaw in the fridge overnight. The texture might be slightly different, but it’s still delicious.
Pin This Recipe!
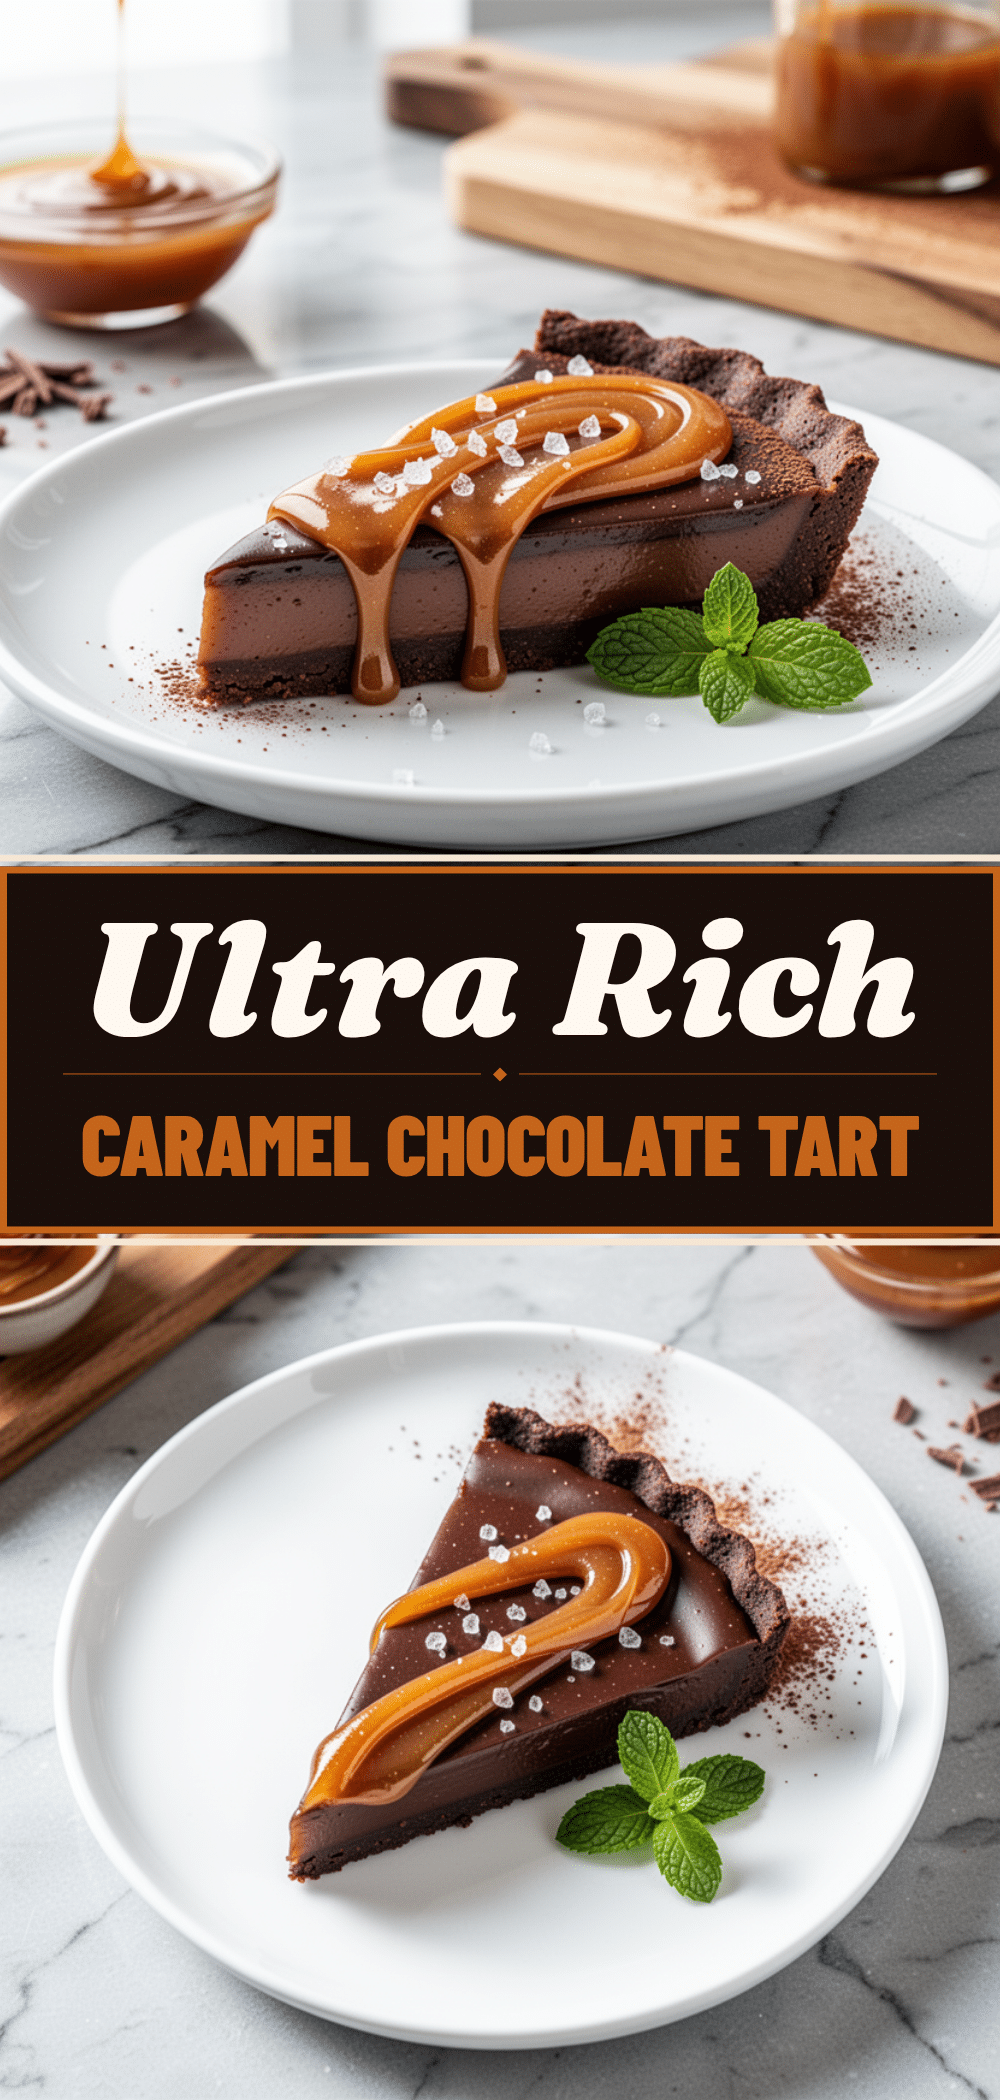
Ultra-Rich Salted Caramel Chocolate Tart: 3-Ingredient Easy Dessert
- Total Time: 45 minutes
- Yield: 8 servings 1x
Description
A simple, rich, and gooey chocolate tart made with just three main ingredients: chocolate chips, sweetened condensed milk, and butter. This no-crust dessert is ready in under an hour and offers a professional-quality taste with minimal effort.
Ingredients
- 12 ounces semi-sweet chocolate chips
- 14 ounces sweetened condensed milk (one standard can)
- 2 tablespoons unsalted butter
- 1 teaspoon vanilla extract
- Flaky sea salt (for topping)
Instructions
- Lightly grease an 8-inch pie dish or tart pan with butter or cooking spray.
- Place chocolate chips in a microwave-safe bowl. Microwave on high for 30 seconds, then stir. Repeat in 15-second intervals, stirring between each, until almost completely melted. Do not overheat.
- Immediately add the sweetened condensed milk and butter to the warm chocolate. Stir vigorously until the mixture is smooth, uniform, and shiny.
- Stir in the vanilla extract. If adding mix-ins like peanut butter chips or nuts, fold them in now.
- Pour the mixture into the prepared pie dish, filling it about halfway to two-thirds full.
- Bake in a preheated 350°F (175°C) oven for 25-30 minutes. The edges should be set, but the center should still have a slight jiggle.
- Remove from oven and let cool on the counter for 15 minutes.
- Sprinkle flaky sea salt over the top while still warm.
- Let cool completely at room temperature, then refrigerate for at least 30 minutes (or up to 4 hours) until firm.
- Slice with a sharp knife and serve chilled.
Notes
Do not rush the melting process; overheated chocolate can seize. Ensure the condensed milk is at room temperature to prevent clumping. The tart tastes better the next day as flavors meld. For a dairy-free version, use dairy-free chocolate chips and coconut oil, though standard condensed milk contains dairy.
- Prep Time: 10 minutes
- Cook Time: 30 minutes
- Category: Dessert
- Cuisine: American
Nutrition
- Serving Size: 1 slice
- Calories: 320
- Sugar: 38
- Sodium: 120
- Fat: 16
- Saturated Fat: 9
- Carbohydrates: 42
- Fiber: 2
- Protein: 5
Keywords: chocolate tart, salted caramel, easy dessert, 3 ingredient recipe, no bake dessert, gluten free dessert, rich chocolate, microwave dessert