
It was 5:30 PM on a Tuesday. You know the time. The sun is still up, but your brain has officially clocked out. My husband was staring into the fridge like it held the secrets to the universe, and I was staring at a sticky counter with zero motivation to cook a full dinner. Then, I saw a bag of lemons in the fruit bowl. They were wrinkled, but they smelled incredible.
I didn’t want to cook. I didn’t want to bake a complicated cake that needed three bowls and an hour of cooling time. I wanted something bright, something that tasted like sunshine, but that I could throw together in one pan while pretending to listen to a podcast. That’s when I made these lemon bars with a buttery shortbread crust.
I’ve made this lemon bars recipe at least a dozen times since that random Tuesday. It’s become my secret weapon for those “I don’t have it in me” evenings. It’s technically a dessert, but let’s be real: when you’re tired, a sweet treat feels like the only thing that matters. And the best part? It’s a one-pan wonder. No separate crust pan, no complicated water baths, just one 9×9 pan and thirty minutes of your life. If you’re looking for a quick win that tastes like a bakery treat, this is it. It’s the perfect partner to a simple weeknight meal, or honestly, just a snack while you’re folding laundry.
Why You’ll Love This Recipe
There are about ten reasons I keep making these lemon bars, but here are the big ones that keep me coming back to this specific lemon bars with buttery shortbread crust version:
- One Pan, Zero Stress — Seriously, you mix the crust, press it in, mix the filling, pour it on, and bake. That’s it. I don’t need a separate springform pan or a water bath (which is a nightmare to clean). It’s the easiest dessert I own, right up there with my high-protein Greek yogurt chocolate chip blondies for sheer simplicity.
- The Crust is the Star — A lot of lemon bar recipes have a crust that’s just… there. This one? It’s a proper shortbread. Buttery, slightly crunchy, and melts in your mouth. It balances the sharp lemon perfectly. It’s like the brown butter snickerdoodle cookies but in bar form.
- Ready in Under 45 Minutes — From start to finish, including baking time, it’s about 40 minutes. The cooling time is the only wait, and you can speed that up in the fridge. Perfect for when guests pop in or you just need a sugar fix before bed.
- Make-Ahead Friendly — These actually taste better the next day. The flavors meld together, and the crust firms up nicely. I make them on Sunday and eat them throughout the week with my morning coffee.
- Budget-Smart — You probably have lemons, butter, sugar, flour, and eggs in your kitchen. It’s cheaper than buying a box of bakery bars and tastes a million times better.
This is my go-to when I need a dessert to just work. No fancy techniques, no weird ingredients, just reliable, zesty, sweet food that makes everyone happy. It’s the antidote to a boring Tuesday night.
Ingredients You’ll Need
Here’s the best part: you probably have most of this already. This isn’t a recipe that requires a trip to the specialty store. It’s pantry staples with a few fresh additions.
For the Buttery Shortbread Crust
Unsalted butter (1/2 cup / 113g, softened) — This needs to be softened but not melted. If you melt it, your crust will be greasy. I take mine out of the fridge about 20 minutes before I start. Real butter only; margarine just doesn’t have the right flavor or texture.
Granulated sugar (1/4 cup / 50g) — Just regular white sugar. It adds a little sweetness to the crust so it’s not too savory.
All-purpose flour (1 cup / 120g) — Standard flour works perfectly. I don’t bother with cake flour here because I want that shortbread crunch.
Salt (1/4 teaspoon) — Essential. It cuts through the butter and makes the lemon flavor pop. Don’t skip it.
For the Zesty Lemon Filling
Granulated sugar (1 cup / 200g) — Yes, a full cup. The lemon is tart, so you need enough sugar to balance it. It’s not a low-sugar recipe, and that’s okay.
Whole eggs (3 large) — Room temperature eggs mix better into the batter. I usually take them out while the crust bakes.
Large egg yolk (1 extra) — This is the secret weapon. The extra yolk makes the filling incredibly rich and creamy, almost like a custard. It prevents the filling from being too rubbery.
Fresh lemon juice (1/2 cup / 120ml) — And I mean fresh. Bottled lemon juice tastes metallic and flat. Squeeze four or five lemons. It’s worth the effort. If you’re short on time, I also love using a creamy lemon garlic orzo with fresh lemon zest for a savory twist, but for dessert, fresh juice is non-negotiable.
Lemon zest (1 tablespoon) — Zest from 1-2 lemons. This is where the intense lemon aroma lives. Use a microplane if you have one; it makes fine, easy-to-mix zest.
All-purpose flour (1/3 cup / 40g) — Just a little bit to thicken the eggs and juice into a bar consistency.
Confectioners’ sugar (powdered sugar) (for dusting) — Optional, but it makes them look fancy. If you’re eating them straight out of the pan with your hands at 10 PM, you can skip it.
Equipment You’ll Need
You don’t need fancy gadgets. Here’s what I actually use:
9×9 inch baking pan — Square is best because it gives you those perfect square bars. A round pan works, but you’ll get weird shapes. Line it with parchment paper for easy removal.
Mixing bowls — Two medium bowls. One for the crust, one for the filling.
Hand mixer or whisk — A hand mixer makes the crust mixing faster, but a sturdy whisk works fine if you’re doing it by hand.
Microplane or zester — For the lemon zest. A regular grater works but leaves bigger shreds.
Knife — A sharp chef’s knife for cutting the bars. Clean cuts are satisfying.
How to Make It: Step-by-Step
Alright, let’s make this! I’m walking you through exactly how I do it, including the little tricks I’ve picked up to ensure your lemon bars with buttery shortbread crust turn out perfect every time.
Step 1: Prep the Pan and Oven (2 minutes)
Preheat your oven to 350°F (175°C). Line your 9×9 inch baking pan with parchment paper, leaving an overhang on the sides. This is crucial. It acts as a sling so you can lift the entire block of bars out later for clean slicing. Grease the parchment lightly with butter or cooking spray.
Step 2: Make the Crust (5 minutes)
In a medium bowl, mix the softened butter and 1/4 cup sugar together. I use a hand mixer on low, or just a fork if I’m feeling lazy. Mix until it looks like wet sand. Add the flour and salt. Mix until it just comes together. It will be crumbly. That’s good.
Press this mixture into the bottom of your prepared pan. Use your fingers or the bottom of a measuring cup to press it down firmly and evenly. You want a flat, compact layer. No gaps, no thick spots.
Step 3: Blind Bake the Crust (15 minutes)
Put the pan in the oven and bake for 15 minutes. You’re looking for a light golden brown color around the edges. It won’t be dark. Remove it from the oven but leave the oven on. You’ll pour the filling right onto this hot crust.
Step 4: Make the Filling (5 minutes)
While the crust bakes, whisk the 1 cup of sugar and the 3 whole eggs (plus the extra yolk) in a bowl. Whisk vigorously for about a minute until the mixture is pale and slightly thickened. This incorporates air and helps the bars set smoothly.
Add the fresh lemon juice and lemon zest. Whisk again. Finally, add the 1/3 cup flour and whisk until just combined. Don’t overmix at this stage; you don’t want to develop gluten and make the bars tough. It should look like a thin, bright yellow batter.
Step 5: Bake the Bars (20-25 minutes)
Pour the lemon filling over the hot crust. It might sizzle a little, which is normal. Smooth the top with a spatula. Put it back in the oven and bake for 20-25 minutes. You’re looking for the edges to be set and puffed, but the center should still have a slight jiggle. It should look like a firm custard, not liquid. If it’s still very wobbly, give it 5 more minutes.
Step 6: Cool Completely (Crucial Step)
This is where most people fail. You cannot cut these hot. They will be a mushy mess. Let the pan sit on a wire rack for 30 minutes. Then, put the whole pan in the fridge for at least 2 hours, preferably overnight. The cold firms up the crust and the filling, making them sliceable. I know it’s hard to wait, but trust me. Patience yields the best lemon bars.
Step 7: Slice and Serve
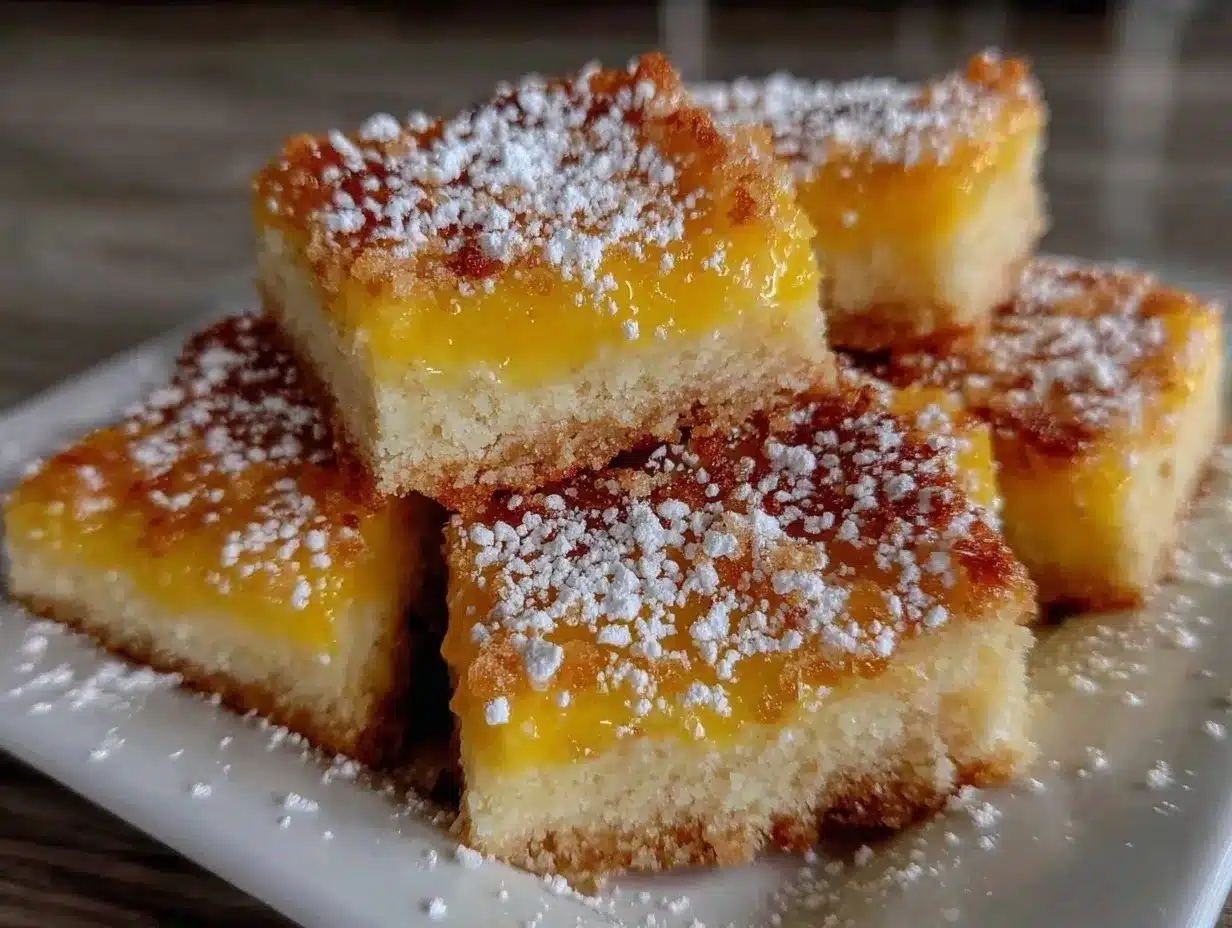
Lift the bars out of the pan using the parchment sling. Place them on a cutting board. Use a sharp knife to cut into squares. Wipe the knife between cuts for clean edges. Dust with powdered sugar if you’re feeling fancy. Serve and enjoy.
Expert Tips & Tricks
Here’s everything I’ve learned from making this dozens of times. These tips will save you from my mistakes.
Don’t Skip the Extra Yolk
I tried making this with just 3 eggs once to save the yolk for something else. The filling was too soft and didn’t set properly. The extra yolk adds fat and protein that creates that dense, fudgy texture. It’s the difference between a lemon curd and a lemon bar.
Room Temperature Eggs Matter
Cold eggs can cause the butter in the filling to seize up slightly if the batter isn’t mixed well. Let your eggs sit out while the crust bakes. It ensures a smooth, lump-free batter.
Zest Before You Juice
Always zest your lemons before you cut them in half to juice them. It’s much easier to hold a whole lemon for zesting. Also, make sure you’re only getting the yellow part. The white pith underneath is bitter and will ruin the flavor.
Chill, Chill, Chill
I cannot stress this enough. If you cut these warm, you’ll be scraping lemon goo off your knife. The cold is what gives them that distinct bar texture. If you’re in a rush, freeze them for 30 minutes, but the fridge is best.
Keep the Oven Door Closed
Like custards and cheesecakes, lemon bars don’t like sudden temperature drops. Don’t peek in the first 15 minutes. Open the door only to check for doneness near the end.
Variations & Substitutions
Once you’ve nailed the basic version, here’s how you can mix it up. I’ve tried all of these.
Berry Swirl
Add a handful of fresh blueberries or raspberries on top of the crust before pouring the lemon filling. The berries burst slightly and create a pretty swirl. It adds a nice tartness that complements the lemon.
Coconut Lemon Bars
Substitute half of the flour in the crust with shredded coconut. It adds a tropical vibe and a nice chew. It pairs beautifully with the citrus.
Gluten-Free Version
Use a 1-to-1 gluten-free flour blend for both the crust and the filling. I’ve used Bob’s Red Mill and King Arthur, and both work great. The texture might be slightly more delicate, but the flavor is the same.
Lemon Lavender
Add 1 teaspoon of dried culinary lavender to the crust mixture. It’s subtle and floral. It makes the bars feel very sophisticated, perfect for a spring gathering. Just make sure it’s food-grade lavender.
Dark Chocolate Drizzle
Melt 1/2 cup of dark chocolate and drizzle it over the cooled bars. The bitterness of the dark chocolate cuts the sweetness of the lemon. It’s a classic combo for a reason.
Serving & Storage
How to Serve:
I usually serve these straight from the fridge. They taste best cold, like a lemon popsicle but richer. I pair them with a cup of hot tea or coffee. The bitterness of the coffee balances the sweet lemon perfectly. If I’m having guests, I put them on a nice platter with a dusting of powdered sugar and maybe some fresh mint leaves for color.
Side Dishes:
These are dessert, so they don’t really have sides. But if you’re having a light lunch, you could serve these with a simple green salad. The acidity of the lemon cuts through the greens nicely. Or, if you’re having a BBQ, these are a great light finish to a heavy meal like my Labor Day BBQ chicken skewers.
Storage Instructions:
Refrigerator: Store in an airtight container for up to 5 days. They last longer than most baked goods because of the acid in the lemon, which acts as a preservative. Just keep them cold.
Freezing: Yes, you can freeze these! Wrap the whole block in plastic wrap, then foil. They’ll keep for up to 3 months. Thaw in the fridge overnight before slicing. They thaw beautifully and don’t get mushy.
Reheating: Do not reheat. Lemon bars are best served cold or at room temperature. Heating them makes the crust soggy and the filling runny.
Nutrition Information
I’m not a nutritionist, but here’s the breakdown if you’re tracking. Keep in mind, these are rich bars, so portion control is key.
Per Serving (based on 16 bars):
- Calories: 180
- Protein: 3g
- Carbs: 26g
- Fiber: 0g
- Sugar: 20g
- Fat: 8g
- Saturated Fat: 5g
- Cholesterol: 55mg
- Sodium: 90mg
What’s Good:
It’s relatively low in protein, but it’s a treat. The lemon juice adds a tiny bit of vitamin C. It’s lighter than a slice of cake or a brownie.
What to Know:
High in sugar and saturated fat from the butter and sugar. It’s a indulgence. If you’re watching your sugar, maybe stick to half a bar or share with a friend. But honestly, one square is usually enough to satisfy the sweet tooth.
Final Thoughts
So that’s my go-to lemon bars with a buttery shortbread crust! I’ve probably talked your ear off at this point, but when you make a recipe this often, you have a lot to say about it.
This has saved my weeknights more times than I can count. It’s my answer to “what’s for dessert” when I’m tired, don’t want takeout, and still want something that tastes really good. My kids are happy, my husband’s happy, and I’m happy because I’m not stressed about cooking.
Make it yours! Try different add-ins, swap in your favorite berries, or adjust the lemon. The best recipes are the ones you adapt to your family’s tastes. If you make this, drop a comment and let me know what you think! I love hearing how recipes turn out in your kitchen. And if something doesn’t work, tell me that too—I’m here to help troubleshoot.
Happy baking! And I hope your kitchen smells half as good as mine does right now.
Frequently Asked Questions
Can I use bottled lemon juice?
You can, but I don’t recommend it. Bottled lemon juice often has preservatives that give it a metallic taste. Fresh lemon juice is bright and vibrant. If you must use bottled, mix it with some fresh zest to boost the flavor, but fresh is always better.
Why did my lemon bars turn out runny?
Usually, this means they weren’t baked long enough. The center should still jiggle slightly, but it shouldn’t be liquid. Also, make sure you’re using the extra egg yolk. It’s essential for the structure. If you underbaked them, they might set more as they cool, but if they’re still runny after chilling, they need more time in the oven next time.
Can I make these in a different pan size?
Yes, but the baking time will change. If you use a larger pan (like 9×13), the bars will be thinner and bake faster (maybe 15-18 minutes). If you use a smaller pan, they’ll be thicker and need more time. Keep an eye on them and test for doneness.
How do I get clean cuts?
Use a sharp knife. Wipe the blade clean between every cut. Dip the knife in hot water and dry it before each cut for super clean edges. And again, make sure the bars are completely cold. Warm bars will squish.
Can I make the crust ahead of time?
You can prepare the crust mixture and press it into the pan, then cover it and refrigerate for up to 24 hours before baking. Just let it come to room temperature before adding the filling, or the filling might not cook evenly.
Are these gluten-free?
The original recipe contains wheat flour. However, you can easily make them gluten-free by using a 1-to-1 gluten-free flour blend. I’ve tested this and it works perfectly.
Can I freeze the unbaked bars?
I don’t recommend freezing the unbaked bars because the eggs in the filling can separate or change texture when thawed. It’s better to bake, cool, and then freeze the finished bars.
Pin This Recipe!


Lemon Bars: Easy 1-pan Dessert for Busy Weeknights
- Total Time: 40 minutes
- Yield: 16 servings 1x
Description
A simple, one-pan lemon bar recipe featuring a buttery shortbread crust and a zesty, creamy filling. Perfect for busy weeknights, this dessert is ready in under 45 minutes and tastes like a bakery treat.
Ingredients
- 1/2 cup (113g) unsalted butter, softened
- 1/4 cup (50g) granulated sugar
- 1 cup (120g) all-purpose flour
- 1/4 teaspoon salt
- 1 cup (200g) granulated sugar
- 3 large whole eggs, room temperature
- 1 large egg yolk
- 1/2 cup (120ml) fresh lemon juice
- 1 tablespoon lemon zest
- 1/3 cup (40g) all-purpose flour
- Confectioners’ sugar (powdered sugar) for dusting
Instructions
- Preheat oven to 350°F (175°C). Line a 9×9 inch baking pan with parchment paper, leaving an overhang on the sides, and grease lightly.
- In a medium bowl, mix softened butter and 1/4 cup sugar until it resembles wet sand. Add flour and salt, mixing until crumbly.
- Press the crust mixture firmly and evenly into the bottom of the prepared pan.
- Blind bake the crust for 15 minutes until lightly golden brown around the edges. Remove from oven but leave the oven on.
- While the crust bakes, whisk 1 cup sugar and eggs (including the extra yolk) vigorously for one minute until pale and thickened.
- Whisk in fresh lemon juice and lemon zest. Add 1/3 cup flour and whisk until just combined.
- Pour the filling over the hot crust. Bake for 20-25 minutes until edges are set and the center has a slight jiggle.
- Cool in the pan on a wire rack for 30 minutes, then refrigerate for at least 2 hours (or overnight) until completely firm.
- Lift bars out using the parchment sling, slice into squares with a sharp knife, and dust with powdered sugar if desired.
Notes
Use fresh lemon juice for the best flavor; bottled juice can taste metallic. The extra egg yolk is crucial for a creamy, custard-like texture. Do not skip the chilling time, as warm bars will be mushy and difficult to cut. For clean cuts, wipe the knife between slices and ensure bars are completely cold.
- Prep Time: 15 minutes
- Cook Time: 35 minutes
- Category: Dessert
- Cuisine: American
Nutrition
- Serving Size: 1 bar
- Calories: 180
- Sugar: 20
- Sodium: 90
- Fat: 8
- Saturated Fat: 5
- Carbohydrates: 26
- Protein: 3
Keywords: lemon bars, shortbread crust, one pan dessert, easy dessert, weeknight baking, citrus dessert, homemade lemon bars


