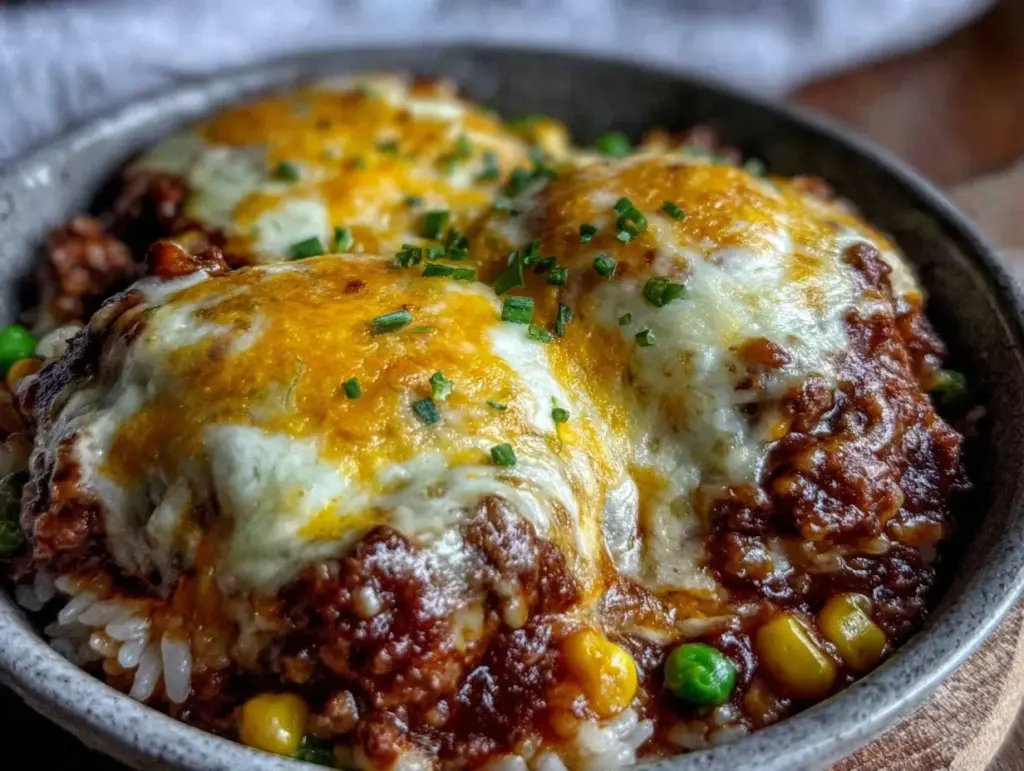
Last Tuesday, I walked into my kitchen at 5:15 PM with two specific problems. One: my kids were already whining about hunger. Two: I had absolutely zero meal prep done. The fridge was sad. The pantry was bare. And the last thing I wanted to do was cook a complicated dinner that required chopping three different vegetables and washing five pans.
I needed a win. I needed dinner on the table in under 30 minutes, and I needed it to taste like I’d actually tried.
So, I looked at the ground beef sitting in the freezer (which I’d defrosted in warm water five minutes earlier), a bag of frozen mixed veggies, and a box of rice. I threw them all on a sheet pan, seasoned the heck out of it, and let the oven do the heavy lifting.
Thirty minutes later, the smell of savory beef and toasted rice filled the house. My kids devoured it. My husband asked for seconds. And I didn’t have to stand over a hot stove stirring anything.
This sheet pan ground beef and rice skillet is my new answer to “5pm and nothing planned.” It’s basically takeout quality but with ingredients I already trust. It’s messy enough to feel indulgent but simple enough to make three times a week. I’ve tested this recipe so many times that I can probably make it blindfolded now.
Why You’ll Love This Recipe
Look, I’m not trying to convince you that this is gourmet cuisine. It’s not. But it is the closest thing to magic when you’re exhausted. Here’s why this sheet pan ground beef and rice has earned a permanent spot in my weekly rotation:
- Zero Active Stirring — Seriously. You mix it once, dump it on the pan, and walk away. No standing over the stove worrying about burning your dinner. The oven handles the cooking while you handle… well, anything else.
- Minimal Cleanup — This is the biggest selling point for me. One baking sheet. One mixing bowl. Maybe a measuring cup. That’s it. If you’re like me and hate doing dishes, this is the holy grail.
- Pantry-Friendly Ingredients — You don’t need specialty stores. Ground beef, rice, frozen veggies, soy sauce, garlic, ginger. You probably have half of this in your house right now. It’s the ultimate “I need to feed my family with what I have” meal.
- Customizable for Picky Eaters — My kids hate peas. So I just pick them out before I serve it. Or I use carrots and corn instead. This recipe bends to your family’s preferences without falling apart. It’s forgiving.
- Ready in 30 Minutes — Not 45. Not an hour. Thirty minutes. From the moment you preheat the oven to the moment you pull it out, it’s fast. Perfect for those chaotic weeknights.
This is my go-to when I’m tired, stressed, or just don’t feel like cooking. It’s reliable, delicious, and it makes everyone happy. No complicated techniques, no weird ingredients, just solid, comforting food that works.
Ingredients You’ll Need
Here’s the best part: you probably have most of this already. I’m not asking you to run to the store for anything obscure. Here’s what you need to make this sheet pan ground beef and rice skillet better than takeout.
For the Base
Ground beef (1 pound / 450g) — I use 80/20 fat ratio. Yes, fat. It keeps the meat juicy. If you use lean beef, it’ll be dry. Don’t skimp. Browned beef is the flavor foundation here.
Uncooked white rice (1 cup / 180g) — I use long-grain white rice like Jasmine or Basmati. It stays fluffy and doesn’t get mushy. Do not use instant rice or brown rice here—they have different cooking times and textures. Stick to white rice for that takeout consistency.
Chicken broth (1 ½ cups / 360ml) — Low-sodium is best so you can control the saltiness. Beef broth works too, but chicken is milder and lets the soy sauce shine. Vegetable broth is fine for a vegetarian version.
Frozen mixed vegetables (2 cups / 200g) — Carrots, peas, corn, green beans. Whatever bag you have. Frozen veggies cook evenly and don’t get soggy like fresh ones might. I love the convenience.
For the Flavor

Soy sauce (3 tablespoons / 45ml) — This is your umami bomb. Use regular soy sauce, not low-sodium, because you need that saltiness to balance the rice. Tamari works for gluten-free.
Garlic (4 cloves, minced / about 2 tablespoons) — Fresh only. No jarred garlic. This recipe relies on fresh garlic for that punch. If you don’t have fresh, use 1 teaspoon of garlic powder, but fresh is better.
Fresh ginger (1 teaspoon, grated / about 5g) — Or ½ teaspoon ground ginger. Fresh ginger adds that bright, zesty note that makes it taste like Chinese takeout. Don’t skip it if you can help it.
Sesame oil (1 teaspoon / 5ml) — Toasted sesame oil. Not the raw kind. Just a little drizzle at the end adds incredible aroma. It’s the secret weapon.
Vegetable oil (1 tablespoon / 15ml) — For tossing the rice and veggies. Helps them crisp up slightly on the pan.
Black pepper (½ teaspoon) — Freshly cracked. Good quality pepper matters.
Optional Add-ins
Green onions (2, sliced) — For garnish. Adds color and a fresh bite.
Sriracha or chili flakes — For heat. If you like it spicy, add this before or after cooking.
Cilantro — Fresh cilantro leaves on top. Some people love it, some hate it. I usually leave it off for the kids but add it for myself.
Personal Tips
– Rice choice matters: I’ve tried brown rice, and it just doesn’t work the same on a sheet pan. It takes too long and gets chewy. Stick to white rice.
– Don’t overcrowd the pan: Use a large rimmed baking sheet. If your beef is piled up too high, it steams instead of browning. Spread it out.
– Prep is fast: Mince the garlic and grate the ginger while the oven preheats. It takes 5 minutes max.
Equipment Needed
You don’t need fancy gadgets for this. Here’s what I actually use.
Large rimmed baking sheet — I use a half-sheet pan (18×13 inches). It needs to be big enough to spread everything out in a single layer. If you use a smaller pan, the rice and beef will steam instead of roast. I’ve made this mistake before—it’s mushy and sad.
Mixing bowl — A medium bowl for tossing the rice, veggies, and seasonings before spreading on the pan. Any bowl works.
Measuring cups and spoons — Standard stuff. Dollar store versions are fine.
Aluminum foil or parchment paper — For lining the pan. I use parchment for easier cleanup, but foil works too. Grease it lightly to prevent sticking.
Wooden spoon or spatula — For mixing the ingredients. Something sturdy.
Knife and cutting board — For chopping green onions if you’re using them.
That’s it. No special tools. Just basic kitchen stuff you already own.
How to Make It: Step-by-Step
Alright, let’s make this! I’m walking you through exactly how I do it, including the little tricks I’ve picked up.
Step 1: Preheat and Prep (5 minutes)
Preheat your oven to 400°F (200°C). Line your large rimmed baking sheet with parchment paper or aluminum foil. Lightly spray with non-stick cooking spray. While the oven heats, mince your garlic and grate your ginger. Chop your green onions if using.
Step 2: Cook the Beef (10 minutes)
Place the ground beef on the baking sheet. Break it up into small crumbles with a fork or spatula. Spread it out in a thin layer. Put the pan in the oven and bake for 10 minutes. This browns the beef without you having to stir it. After 10 minutes, pull the pan out. The beef should be mostly cooked but still a little pink in the center.
Step 3: Mix the Seasonings (5 minutes)
In your mixing bowl, combine the uncooked rice, frozen mixed vegetables, minced garlic, grated ginger, soy sauce, vegetable oil, sesame oil, and black pepper. Toss everything together until the rice and veggies are evenly coated. The rice will absorb some of the sauce.
Step 4: Combine and Bake (15 minutes)
Pour the rice and veggie mixture over the partially cooked beef on the baking sheet. Use your spatula to spread everything out evenly. Try to keep the beef and rice in a single layer. Pour the chicken broth evenly over the entire pan. The liquid should cover the rice but not flood the pan.
Return the pan to the oven and bake for 15-18 minutes. The rice should be tender, the vegetables cooked through, and the liquid absorbed. You’ll know it’s done when you can see a little browning on the edges of the rice and beef.
Step 5: Rest and Serve (5 minutes)
Remove the pan from the oven and let it rest for 5 minutes. This allows the rice to finish absorbing the liquid and firm up. Stir everything together gently to combine the beef and rice. Taste and adjust salt or pepper if needed. Garnish with sliced green onions and serve immediately.
Total Time: About 30-35 minutes (5 minutes prep, 25 minutes cooking)
Built-in Troubleshooting
– Rice is still hard: Your oven might be cooler than it says. Bake for another 5 minutes. Or, add a splash more broth.
– Beef is dry: You might have used lean beef or overcooked it. Next time, use 80/20 fat and pull it out when it’s just barely cooked.
– Veggies are mushy: Frozen veggies release water. Make sure you spread them out so they roast, not steam. If you’re worried, add them in the last 10 minutes of baking.
Expert Tips & Tricks
Here’s everything I’ve learned from making this dozens of times. These tips will save you from my mistakes.
Brown the Beef First
Don’t just dump raw ground beef on top of the rice. It won’t get that savory, caramelized flavor. Baking it first ensures it’s cooked through and tastes good. You can also brown it in a skillet if you prefer, but the sheet pan method is easier.
Don’t Skimp on Salt
Uncooked rice needs salt to flavor it from the inside out. The soy sauce helps, but you still need salt in the broth. Taste your broth before pouring it over the rice—it should taste slightly salty.
Use a Large Pan
This cannot be stressed enough. If you use a small pan, the rice will be crowded and steaming instead of roasting. You want a large surface area. I use a half-sheet pan. If you only have a quarter-sheet pan, cook two batches.
Let It Rest
I know you want to eat it immediately. But letting it rest for 5 minutes makes a huge difference. The rice finishes cooking and absorbs the last bits of liquid. It’s less mushy and more distinct.
Add Protein Variations
I’ve added diced chicken, shrimp, or tofu to this. Chicken works great—just bake it with the beef. Shrimp needs less time, so add it in the last 5 minutes. Tofu is fine too, but it doesn’t brown as well.
Variations & Substitutions
Once you’ve nailed the basic version, here’s how you can mix it up. I’ve tried all of these.
Chicken Version
Swap ground beef for ground chicken or turkey. Same method, same timing. It’s leaner and milder. I like to add extra ginger for this version.
Beef and Broccoli
Replace the mixed veggies with broccoli florets. Toss the broccoli with the rice and beef. Add a little extra soy sauce. It’s basically beef and broccoli takeout in a pan.
Spicy Version
Add 1 tablespoon of sriracha or chili garlic sauce to the rice mixture. Or sprinkle red pepper flakes on top before serving. Great if you like heat.
Vegetarian Version
Skip the beef. Use extra veggies and maybe some chickpeas or edamame. Use vegetable broth instead of chicken broth. Add a little extra soy sauce for umami. It’s surprisingly filling.
Gluten-Free
Use tamari instead of soy sauce. Everything else is naturally gluten-free. Check your rice package to ensure it’s processed in a gluten-free facility.
Instant Rice
I don’t recommend it, but if you must, use instant rice and reduce the cooking time by half. Add it in the last 10 minutes of baking. It won’t have the same texture, but it works.
Serving & Storage
How to Serve:
I usually serve this straight from the pan. It looks rustic and stays warm. But here are other ways I’ve enjoyed it:
Side Dishes:
- Steamed broccoli or green beans
- A simple cucumber salad with vinegar and sesame seeds
- Hot and sour soup (if you want a full takeout meal)
- Simple green salad with sesame dressing
Toppings Bar:
When I have guests, I put out: sliced green onions, chopped cilantro, sriracha, crushed peanuts, and lime wedges. Everyone customizes their bowl.
Storage Instructions:
Refrigerator:
Store in an airtight container for up to 4 days. The rice will firm up in the fridge. This is actually good for meal prep—it’s easy to reheat.
Reheating:
Best method: Add a splash of water or broth to the rice, cover with foil, and bake at 350°F for 10-15 minutes. The moisture brings it back to life.
Microwave method: Heat in 1-minute intervals, stirring between. Add a splash of water if it’s dry.
Freezing:
This doesn’t freeze well. The rice gets mushy when thawed. Make it fresh or store in the fridge for up to 4 days.
Meal Prep:
This is perfect for meal prep. Make it on Sunday, store in containers, and eat all week. It reheats beautifully. I pack it for lunch at work all the time.
Nutrition Information
I’m not a nutritionist, but here’s the breakdown if you’re tracking.
Per Serving (based on 4 servings):
| Nutrient | Amount |
|---|---|
| Calories | 450 |
| Protein | 25g |
| Carbs | 55g |
| Fiber | 3g |
| Sugar | 4g |
| Fat | 12g |
| Sodium | 680mg |
What’s Good:
- Decent protein from the beef
- Rice provides energy
- Vegetables add fiber and vitamins
- More filling than it looks
What to Know:
- Higher in sodium from soy sauce
- Contains gluten (unless using tamari)
- Can be made lighter by using lean beef and less oil
My Take:
Look, this is comfort food. It’s not a diet recipe. But it’s way better than takeout, costs less, and I know exactly what’s in it. When I want to make it lighter, I use lean beef, less soy sauce, and extra veggies. But usually? I just eat a reasonable portion and enjoy it.
Final Thoughts
So that’s my sheet pan ground beef and rice skillet! I’ve probably talked your ear off at this point, but when you make a recipe this often, you have a lot to say about it.
This has saved weeknight dinners more times than I can count. It’s my answer to “what’s for dinner” when I’m tired, don’t want takeout, and still want something that tastes really good. My kids are happy, my husband’s happy, and I’m happy because I’m not stressed about cooking.
Make it yours! Try different add-ins, swap in your favorite vegetables, adjust the spice. The best recipes are the ones you adapt to your family’s tastes. If you’re looking for more easy weeknight wins, check out my crispy panko crusted chicken parmesan or my one-pot creamy lemon garlic orzo with shrimp for more simple, delicious meals.
If you make this, drop a comment and let me know what you think! I love hearing how recipes turn out in your kitchen. And if something doesn’t work, tell me that too—I’m here to help troubleshoot.
Happy cooking! And I hope your kitchen smells half as good as mine does right now.
Frequently Asked Questions
Can I use brown rice instead of white rice?
You can, but it’s not recommended. Brown rice takes longer to cook and has a chewier texture. On a sheet pan, it might not get fully tender. If you must use brown rice, soak it for 30 minutes before cooking and add extra broth. But for that takeout texture, stick to white rice.
Why did my rice turn out mushy?
Usually, this means you used too much liquid or didn’t spread the rice out enough. Make sure you use a large pan and spread everything in a single layer. Also, check your rice package for the correct liquid ratio. If you’re using a different type of rice, the absorption rate might be different.
Can I make this ahead for a dinner party?
Sort of. You can prep the ingredients and mix them, but don’t add the broth until you’re ready to bake. Cook it fresh right before serving. It won’t be quite as good if you reheat it, but it’s close. I usually just make it fresh because it’s so fast.
Can I use ground turkey instead of beef?
Yes! Ground turkey works great. It’s leaner, so you might want to add a little extra oil or broth to keep it moist. I like to add extra ginger and soy sauce for the turkey version. It’s a nice change of pace.
How do I reheat leftovers without it getting dry?
Add a splash of water or broth to the rice, cover with foil, and bake at 350°F for 10-15 minutes. The moisture brings it back to life. Microwave sort of works but tends to dry it out. If you do microwave, definitely add a splash of water first and heat in short bursts, stirring between.
Can I double this recipe?
Absolutely! Double everything and use two baking sheets. The cooking times stay the same. I do this when I’m meal-prepping or feeding a crowd. Just make sure your oven has enough room for two sheets. You might need to rotate them halfway through.
Is this recipe gluten-free?
Not by default, because of the soy sauce. But you can easily make it gluten-free by using tamari instead of soy sauce. Everything else is naturally gluten-free. Just check your rice package to ensure it’s processed in a gluten-free facility.
Pin This Recipe!


Sheet Pan Ground Beef and Rice: Easy 5pm Dinner Win
- Total Time: 30 minutes
- Yield: 4 servings 1x
Description
A quick and easy weeknight dinner featuring ground beef, rice, and frozen vegetables baked on a single sheet pan. It requires minimal cleanup and delivers takeout-quality flavor in under 30 minutes.
Ingredients
- 1 pound ground beef (80/20 fat ratio)
- 1 cup uncooked long-grain white rice (Jasmine or Basmati)
- 1 ½ cups chicken broth (low-sodium)
- 2 cups frozen mixed vegetables (carrots, peas, corn, green beans)
- 3 tablespoons soy sauce
- 4 cloves garlic, minced
- 1 teaspoon fresh ginger, grated
- 1 teaspoon toasted sesame oil
- 1 tablespoon vegetable oil
- ½ teaspoon black pepper
- 2 green onions, sliced (optional, for garnish)
- Sriracha or chili flakes (optional, for heat)
- Fresh cilantro (optional, for garnish)
Instructions
- Preheat oven to 400°F (200°C). Line a large rimmed baking sheet with parchment paper or aluminum foil and lightly spray with non-stick cooking spray.
- Place ground beef on the baking sheet, breaking it into small crumbles and spreading it in a thin layer. Bake for 10 minutes until mostly cooked but still slightly pink.
- In a mixing bowl, combine uncooked rice, frozen mixed vegetables, minced garlic, grated ginger, soy sauce, vegetable oil, sesame oil, and black pepper. Toss until evenly coated.
- Pour the rice and vegetable mixture over the partially cooked beef on the baking sheet. Spread everything out evenly in a single layer.
- Pour chicken broth evenly over the entire pan. The liquid should cover the rice but not flood the pan.
- Return the pan to the oven and bake for 15-18 minutes, or until the rice is tender, vegetables are cooked through, and liquid is absorbed with slight browning on the edges.
- Remove from oven and let rest for 5 minutes to allow rice to firm up.
- Stir gently to combine, taste and adjust seasoning if needed, garnish with green onions, and serve immediately.
Notes
Use a large pan to prevent steaming; ensure ingredients are spread in a single layer. Do not use brown rice or instant rice as they have different cooking times. Let the dish rest for 5 minutes after baking for best texture. For gluten-free, use tamari instead of soy sauce.
- Prep Time: 5 minutes
- Cook Time: 25 minutes
- Category: Main Course
- Cuisine: Asian-American
Nutrition
- Serving Size: 1/4 of the sheet pan
- Calories: 450
- Sugar: 4
- Sodium: 680
- Fat: 12
- Saturated Fat: 4
- Carbohydrates: 55
- Fiber: 3
- Protein: 25
Keywords: sheet pan dinner, ground beef and rice, easy weeknight dinner, 30 minute meals, family friendly, minimal cleanup, takeout alternative


