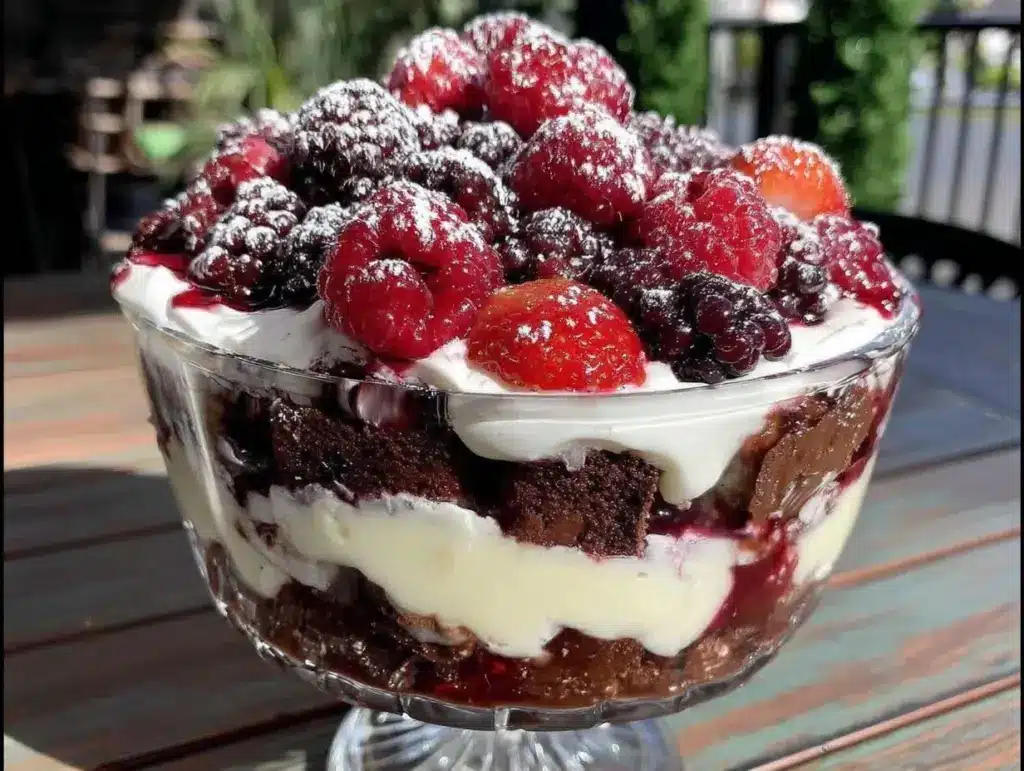
It was 4:45 PM. The sun was still blazing hot, the grill was smoking up the patio, and my husband just announced he’d invited six more people over for dinner. I stared at the empty counter, panic rising in my chest. We had burgers, we had coleslaw, but we absolutely did not have a dessert that would impress a crowd without turning my kitchen into a disaster zone.
I didn’t have time to bake. I didn’t have time to whip cream from scratch. And I certainly didn’t have time to drive to the store.
So I did what I always do when I’m stressed: I raided the pantry and the fridge. I pulled out a bag of frozen mixed berries, a box of pound cake, a tub of vanilla pudding, and a carton of cool whip. I threw them into a giant glass bowl with zero precision and zero planning. Twenty minutes later, I set it on the table. It looked beautiful. It tasted amazing. And honestly? It was the star of the meal.
That accidental berry trifle became my secret weapon for every backyard cookout since. It’s my go-to when the clock is ticking and I need something that looks fancy but takes almost no effort. This 5-ingredient berry trifle is no-bake, it’s incredibly forgiving, and it’s the kind of dessert that disappears before you can even grab a second slice. If you’re looking for a stress-free way to end a summer BBQ, this is it.
Why You’ll Love This Recipe
I’ve made this berry trifle for probably a dozen different gatherings now, from casual Friday night dinners to huge Labor Day parties. Here’s why it keeps coming back to the menu:
Zero Baking Required — Seriously. If you own a refrigerator, you can make this. No oven, no timer, no burnt edges. It’s just assembly. I’ve made this while my kids were running around my ankles, and it turned out fine.
Pantry-Friendly Ingredients — You don’t need exotic fruits or specialty cheeses. Most of this is stuff I already keep on hand. The pound cake is from the bakery section, the pudding is instant, and the berries are often frozen. It’s the ultimate “I forgot to plan dessert” savior.
Feeds a Crowd — One bowl serves 8-10 people easily. That’s less work per person than making individual parfaits. I love that I can assemble it in one big vessel and just set it down. It’s rustic, it’s inviting, and it’s easy to serve.
Make-Ahead Magic — This actually gets better the longer it sits. I usually make it the night before. The cake soaks up the pudding and the berry juices, creating this incredible, moist texture. It’s not soggy; it’s perfect. I can prep it at 8 AM and serve it at 6 PM with zero stress.
Budget-Smart — It costs less than $10 to make this for a crowd. Compared to buying a fancy cake or ordering dessert delivery, this is a steal. Plus, using frozen berries keeps the price down, especially if you’re buying them out of season.
This is my answer to “what’s for dessert?” when I’m tired. No complicated techniques, no weird ingredients, just reliable, delicious food that makes everyone happy. It’s the kind of recipe that lets you actually enjoy your own party instead of hiding in the kitchen.
Ingredients You’ll Need
Here’s the best part: you probably have most of this already. I’m being honest with you—this isn’t a gourmet dessert with hard-to-find items. It’s comfort food in a bowl. I’m particular about one thing: the cake. But everything else? You can swap it out easily.
Pound Cake (1 large loaf / about 600g) — I use a classic vanilla pound cake from the bakery section. It needs to be dense enough to hold up to the moisture but soft enough to soak it up. If you can’t find one, a vanilla sponge cake works too. Avoid anything too airy or dry, or it’ll turn to mush. I usually buy two small loaves or one large one.
Vanilla Instant Pudding (2 boxes / 5.1 oz each) — Get the instant kind. You don’t need to cook it. I use the large boxes. It adds that creamy, sweet base that ties everything together. If you’re feeling fancy, you can use a homemade vanilla custard, but honestly? The instant stuff is consistent and fast.
Milk (4 cups / 960ml) — Whole milk is best for richness. You’ll mix this with the pudding powder. If you’re lactose-free, use almond or oat milk, but the texture will be slightly lighter.
Frozen Mixed Berries (2 bags / 12 oz each) — I use a mix of strawberries, blueberries, and raspberries. Frozen is actually better here because it thaws in the bowl and releases all its juices into the pudding. If you use fresh, you’ll need to macerate them with sugar first, which is extra work. Thawed frozen berries are my hack.
Cool Whip or Whipped Cream (1 tub / 8 oz or 2 cups homemade) — I usually use Cool Whip for the convenience factor. It holds up well in the fridge. If you prefer real whipped cream, whip 2 cups of heavy cream with 2 tablespoons of sugar and 1 teaspoon of vanilla. It’s lighter, but Cool Whip is easier and less messy.
Optional Add-ins:
White Chocolate Chips (½ cup) — I like to sprinkle these in for a little crunch and sweetness. They melt slightly into the layers.
Fresh Mint Leaves — Just for garnish. Makes it look professional.
Graham Cracker Crumbs (½ cup) — I sometimes swap out the pound cake for graham cracker crumbs to make it more like a cheesecake trifle. Both are amazing.
Pro Tip: If you buy the pound cake, ask the baker to slice it for you. It saves time and ensures even slices. If you do it yourself, use a serrated knife and slice it about ½ inch thick.
Equipment Needed
You don’t need fancy equipment for this. Here’s what I actually use:
Large Glass Trifle Bowl or Serving Dish — I use a 3-quart bowl. It needs to be wide so you can see the layers. If you don’t have a trifle bowl, a large glass casserole dish or even a big mixing bowl works fine. I’ve made this in a lasagna pan before (just remove the glass lid for serving), and it looked great.
Knife and Cutting Board — For slicing the pound cake. A serrated knife is best for clean cuts.
Whisk — For mixing the pudding. A simple balloon whisk works perfectly.
Spatula — For spreading the pudding and whipped cream. I like a silicone spatula because it scrapes the bowl clean.
Measuring Cups and Spoons — Standard stuff. Dollar store versions work fine.
Mixing Bowls — One large bowl for the pudding. You might need another for the whipped cream if you’re making it from scratch.
Optional:
Pastry Brush — If you want to soak the cake extra well, a pastry brush helps. But I usually just pour the juice over it.
Serving Spoons — A large serving spoon and a smaller spoon for scooping. Make sure they’re long enough to reach the bottom.
Tool Tip: Don’t have a trifle bowl? Any clear glass dish works. The visual appeal is half the fun, so try to use something transparent. If you’re serving at a picnic, a plastic bowl is fine, but it won’t look as pretty.
How to Make It: Step-by-Step
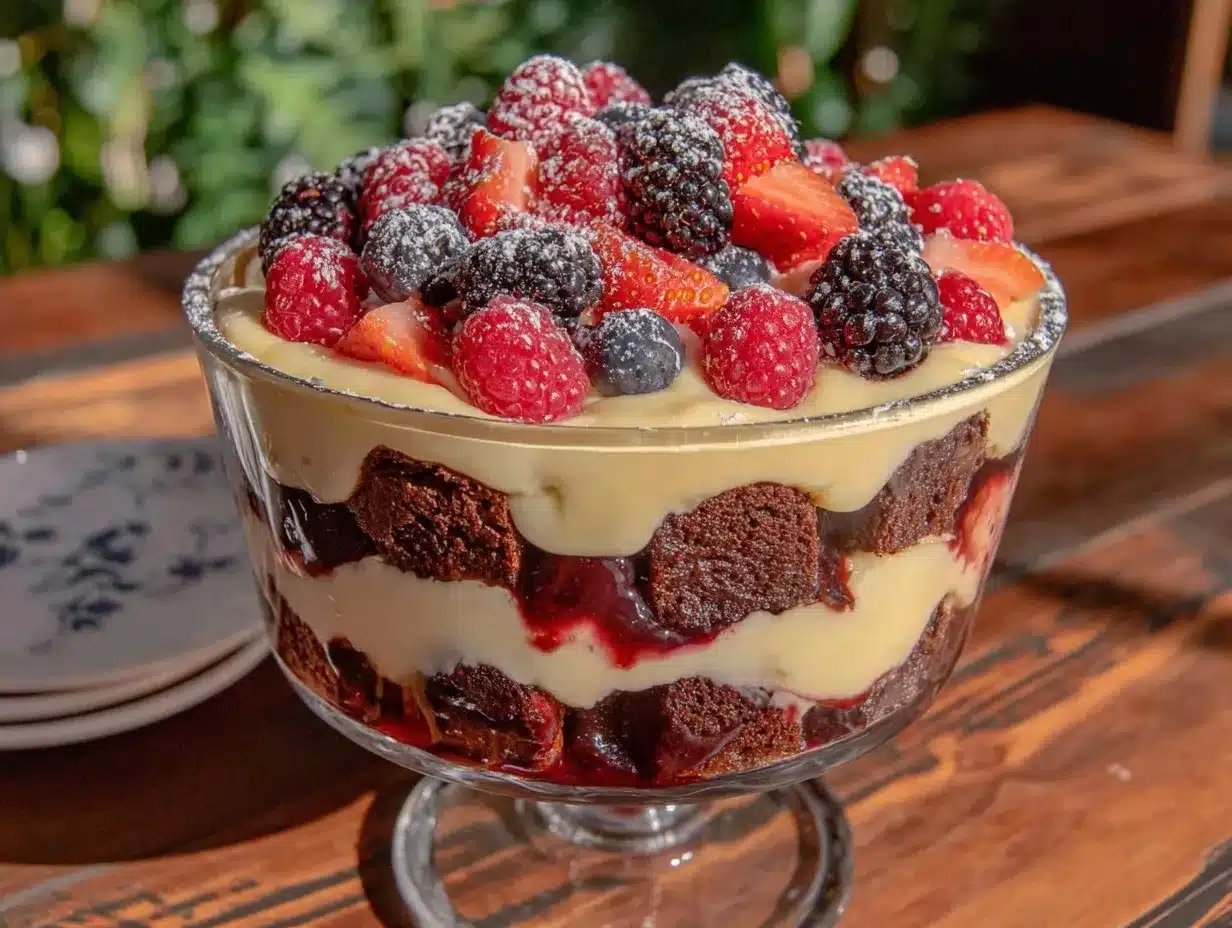
Alright, let’s make this! I’m walking you through exactly how I do it, including the little tricks I’ve picked up over the years.
Step 1: Prep the Pudding (5 minutes)
Start by making the vanilla pudding according to the package directions. Usually, that means whisking the powder with cold milk for about 2 minutes until it thickens. It should be thick enough to hold its shape but still spreadable. If it’s too thick, add a splash more milk. If it’s too thin, let it sit for 5 minutes. Set it aside to cool slightly. I usually put it in the fridge for 10 minutes to chill while I prep the cake.
Step 2: Slice the Cake (5 minutes)
While the pudding chills, slice your pound cake. I cut it into ½-inch cubes. You want them small enough to fit in the bowl but big enough to hold the layers. If the cake is very fresh, it might be soft, so handle it gently. If it’s a day old and firmer, it’s easier to cut. Spread the cubes out on a baking sheet if you have time—it helps them dry out slightly so they don’t get too soggy too fast.
Step 3: Thaw the Berries (10 minutes)
If you’re using frozen berries, throw them in a colander and let them thaw. You don’t need to cook them. Once thawed, drain the excess liquid. Save that juice! It’s pure berry flavor. I usually stir a tablespoon of sugar into the juice if it’s not sweet enough, but the pudding is already sweet, so taste it first.
Step 4: Build the First Layer (5 minutes)
Take your trifle bowl. Start with a layer of pound cake cubes. Don’t press them down too hard; just spread them out evenly. You want about 1/3 of the cake here. If you have extra juice from the berries, drizzle it over the cake. This is where the flavor starts to soak in.
Step 5: Add the Pudding (5 minutes)
Spread half of the vanilla pudding over the cake layer. Use a spatula to get it into the corners. It should cover the cake completely. Don’t worry about making it perfect; rustic is good. The pudding will act as the glue for the next layer.
Step 6: Add the Berries (5 minutes)
Sprinkle half of the thawed berries over the pudding. Distribute them evenly. If you’re using white chocolate chips, sprinkle half of those here too. The contrast of colors is beautiful—red and blue berries against white pudding and yellow cake.
Step 7: Repeat the Layers
Add the remaining cake cubes. Spread the rest of the pudding on top. Then add the remaining berries. You should end with a layer of berries on top. If you have any extra juice, drizzle it over the top. It will make the berries glisten.
Step 8: Top with Whipped Cream (5 minutes)
Spread the Cool Whip or homemade whipped cream over the top. You can do a smooth layer or dollops. I like dollops because it looks more homemade. If you’re using graham cracker crumbs, sprinkle them over the whipped cream now. If you’re using fresh mint, add it here for garnish.
Step 9: Chill and Serve
Cover the bowl with plastic wrap and refrigerate for at least 2 hours, preferably overnight. This is crucial. The cake needs time to soften and absorb the flavors. When you’re ready to serve, take it out 15 minutes before to let it come to room temperature slightly. Serve with a large spoon. Scoop from the center to get all the layers.
Total Time: About 30 minutes active, plus chilling time.
Troubleshooting: If the cake gets too soggy, use a slightly older loaf or don’t add too much juice. If the pudding is too runny, chill it longer before assembling. If the berries are too watery, drain them well. These are small fixes that make a big difference.
Expert Tips & Tricks
Here’s everything I’ve learned from making this dozens of times. These tips will save you from my mistakes.
Use Frozen Berries
This is the #1 tip. Frozen berries break down more and release more juice, which soaks into the cake. Fresh berries stay firm and don’t add much flavor to the layers. I’ve tried both, and frozen is always better for trifle. Thaw them in the colander, not in a bowl, so you can control the drainage.
Don’t Skip the Soak
Drizzle that berry juice over the cake layers. It’s liquid gold. It adds sweetness and moisture. If you drain it all away, you’re wasting flavor. I usually save about ¼ cup of juice to drizzle over the top before adding the whipped cream.
Chill Overnight
I know you want to eat it now, but wait. The cake needs time to soften. If you serve it immediately, the cake will be dry and the layers won’t meld. Overnight is best. I make it the night before dinner parties. It’s stress-free and tastes better.
Layer Heights
Try to keep your layers even. It makes for a more beautiful presentation. If one layer is thicker, it might collapse. I use a ruler in my head (okay, not really, but I eyeball it). Aim for 1-inch layers.
Whipped Cream Stability
If you’re making homemade whipped cream, add a tablespoon of cornstarch to the cream before whipping. It helps it hold its shape in the heat. If you’re using Cool Whip, it’s already stable, so you’re good.
Common Mistakes (and how to avoid them):
Mistake: Cake is too dry
Fix: Use a fresher loaf or add more berry juice. Also, make sure the pudding is spread thickly to seal in moisture.
Mistake: Layers slide apart
Fix: Don’t pack the cake too tightly. Leave some air gaps. Also, chill the bowl before assembling if you’re serving in hot weather. It helps the whipped cream hold.
Pro Tricks I’ve Learned:
For Extra Flavor
Add a splash of Grand Marnier or amaretto to the berry juice. It adds a sophisticated twist. I do this for adult parties. For kids, stick to the juice.
For Better Texture
Toast the graham cracker crumbs in a dry pan for 2 minutes before sprinkling. It adds a nutty crunch that contrasts with the soft cake.
Make-Ahead Strategy
Make the pudding and chop the cake the day before. Store them separately in the fridge. Assemble the trifle the morning of the event. It saves time and ensures freshness.
Variations & Substitutions
Once you’ve nailed the basic version, here’s how you can mix it up. I’ve tried all of these.
Strawberry Shortcake Trifle
Use strawberries instead of mixed berries. Add a layer of sliced fresh strawberries on top. It’s classic and beautiful. I use this version when strawberries are in season.
Chocolate Lovers
Swap the vanilla pudding for chocolate pudding. Use chocolate cake instead of pound cake. Add chocolate chips between the layers. It’s richer and more decadent. My kids prefer this version.
Lighter Version
Use light Cool Whip and skim milk for the pudding. It’s thinner but still good. I make this when I’m trying to be “healthy.” It’s not as rich, but it’s refreshing.
Graham Cracker Crust
Replace the pound cake with graham cracker crumbs. Add a layer of cream cheese mixture (mix 8oz cream cheese with ½ cup sugar and 1 cup whipped cream) between the pudding and berries. It tastes like a cheesecake trifle. This is my favorite variation.
Coconut Twist
Add shredded coconut between the layers. Use coconut milk for the pudding. It’s tropical and refreshing. Great for summer parties.
Dietary Modifications:
Gluten-Free
Use gluten-free pound cake or gluten-free graham crackers. Everything else is naturally gluten-free. I’ve used gluten-free cake, and it works great.
Dairy-Free
Use coconut milk for the pudding (thicken with cornstarch). Use coconut whipped cream. Use dairy-free pudding mix. It’s different but still tasty. My lactose-intolerant friend requests this version.
Lower-Sugar
Use unsweetened berries and sugar-free pudding. It’s not as sweet, but it’s a good option for diabetics. I pair this with my diabetic-friendly sugar-free pumpkin spice cookies for a treat.
Serving & Storage
How to Serve:
I usually serve this straight from the bowl at the dinner table—it looks rustic and stays cool. But here are other ways I’ve enjoyed it:
Side Dishes:
This trifle stands alone as a dessert. But if you’re serving it after a BBQ, it pairs well with grilled meats like Labor Day BBQ Chicken Skewers or Best Labor Day Grilled BBQ Chicken Thighs. The sweetness cuts through the smoky flavor perfectly.
Toppings Bar:
When I have guests, I put out: extra whipped cream, fresh berries, crushed cookies, and chocolate sauce. Everyone customizes their bowl. It’s fun and interactive.
Wine Pairing:
Not a wine expert, but my wine-snob friend says a sweet Riesling or Moscato works great with this. It complements the fruitiness.
Storage Instructions:
Refrigerator:
Store in an airtight container or covered with plastic wrap for up to 3 days. The cake will continue to soften. It’s best eaten within 2 days.
Reheating:
Do not reheat this. It’s a cold dessert. Serve it chilled. If it’s too cold, let it sit at room temperature for 15 minutes.
Freezing:
Honestly, this doesn’t freeze well because of the dairy and cake texture. The cake gets mushy when thawed. Make it fresh or store in the fridge for up to 3 days.
Meal Prep:
Make the pudding and chop the cake the day before. Store them separately. Assemble the trifle the morning of the event. It saves time and ensures freshness.
Pro tip: If the whipped cream starts to weep, add a little more Cool Whip or whipped cream on top before serving. It fixes the look instantly.
Nutrition Information
I’m not a nutritionist, but here’s the breakdown if you’re tracking. This is a rich dessert, so portion control is key.
Per Serving (based on 8 servings):
| Nutrient | Amount |
|---|---|
| Calories | 320 |
| Protein | 4g |
| Carbs | 45g |
| Fiber | 2g |
| Sugar | 28g |
| Fat | 14g |
| Saturated Fat | 6g |
| Cholesterol | 25mg |
| Sodium | 280mg |
| Calcium | 120mg |
What’s Good:
– Calcium from the pudding and cream
– Some vitamins from the berries
– Easy to modify for dietary needs
What to Know:
– Higher in sugar from the pudding and berries
– Contains dairy and gluten
– Moderate calories, but rich
My Take:
Look, this is a dessert. It’s sweet and indulgent. It’s not a health food. But it’s way better than store-bought cake, and it’s fun to make. When I want to make it lighter, I use the lighter versions I mentioned. But usually? I just eat a reasonable portion and enjoy it.
Final Thoughts
So that’s my go-to berry trifle! I’ve probably talked your ear off at this point, but when you make a recipe this often, you have a lot to say about it.
This has saved backyard cookouts more times than I can count. It’s my answer to “what’s for dessert?” when I’m tired, don’t want to bake, and still want something that looks impressive. My kids are happy, my husband’s happy, and I’m happy because I’m not stressed about cooking.
Make it yours! Try different berries, swap in your favorite cake, adjust the sweetness. The best recipes are the ones you adapt to your family’s tastes. And if you’re looking for more no-bake desserts, check out my ultra-creamy no-churn vanilla bean ice cream or my small-batch salted caramel blondies for other easy wins.
If you make this, drop a comment and let me know what you think! I love hearing how recipes turn out in your kitchen. And if something doesn’t work, tell me that too—I’m here to help troubleshoot.
Happy cooking! And I hope your kitchen smells half as good as mine does right now.
Frequently Asked Questions
Can I use fresh berries instead of frozen?
You can, but the texture won’t be as good. Fresh berries don’t break down and release juice, so the cake won’t soak up as much flavor. If you use fresh, macerate them with sugar for 30 minutes first to draw out the juices. But honestly? Frozen is easier and tastes better in this recipe.
Can I make this ahead?
Yes! In fact, it’s better if you make it ahead. Assemble it the night before and refrigerate overnight. The cake will soften and the flavors will meld. It’s the perfect make-ahead dessert for parties.
Why did my trifle turn out soupy?
Usually means you added too much berry juice or the pudding was too thin. Make sure you drain the thawed berries well. Also, let the pudding chill and thicken before assembling. If it’s already soupy, you can add a layer of crushed cookies to absorb the liquid.
Can I use a different type of cake?
Absolutely. Pound cake is classic, but you can use sponge cake, angel food cake, or even graham cracker crumbs. Just make sure the cake is sturdy enough to hold the layers. Avoid very dry cakes, or they’ll be unpleasant.
How long does this last in the fridge?
It lasts up to 3 days in the fridge. After that, the cake gets too soggy. I usually make it for 2 days worth of servings. It’s best eaten fresh.
Can I freeze this?
No. The dairy and cake don’t freeze well. The texture becomes mushy and separated. Make it fresh or store in the fridge for up to 3 days.
What wine goes with this dessert?
A sweet white wine like Riesling, Moscato, or a fruit-forward Chardonnay works great. It complements the berries and balances the sweetness. If you’re serving with BBQ, a light red like Pinot Noir also works.
Can I use homemade whipped cream?
Yes! Whip 2 cups of heavy cream with 2 tablespoons of sugar and 1 teaspoon of vanilla until stiff peaks form. It’s lighter and fresher, but it takes a bit more effort. Cool Whip is easier and holds up better in heat.
Pin This Recipe!
Berry Trifle: 5-Ingredient No-Bake Dessert
- Total Time: 2 hours 30 minutes (including chilling)
- Yield: 8-10 servings 1x
Description
A stress-free, no-bake dessert perfect for summer BBQs and crowds. This berry trifle uses pantry-friendly ingredients like pound cake, instant pudding, and frozen berries to create a delicious, make-ahead treat.
Ingredients
- 1 large loaf (about 600g) vanilla pound cake
- 2 boxes (5.1 oz each) vanilla instant pudding
- 4 cups (960ml) cold milk (whole milk recommended)
- 2 bags (12 oz each) frozen mixed berries (strawberries, blueberries, raspberries)
- 1 tub (8 oz) Cool Whip or 2 cups homemade whipped cream
- Optional: ½ cup white chocolate chips
- Optional: Fresh mint leaves for garnish
- Optional: ½ cup graham cracker crumbs
Instructions
- Prepare the vanilla pudding according to package directions by whisking the powder with cold milk for about 2 minutes until thickened. Set aside to cool slightly, then refrigerate for 10 minutes.
- Slice the pound cake into ½-inch cubes. If the cake is fresh, handle gently; if day-old, it is easier to cut. Spread cubes on a baking sheet to dry slightly if desired.
- Thaw the frozen berries in a colander. Drain excess liquid, saving the juice for drizzling. If the juice is not sweet enough, stir in a tablespoon of sugar.
- In a large glass trifle bowl, create the first layer by spreading 1/3 of the cake cubes evenly. Drizzle some of the reserved berry juice over the cake.
- Spread half of the chilled vanilla pudding over the cake layer, covering it completely.
- Sprinkle half of the thawed berries (and half of the white chocolate chips, if using) over the pudding.
- Repeat the layers with the remaining cake, pudding, and berries. End with a layer of berries on top. Drizzle any remaining berry juice over the top.
- Spread the Cool Whip or homemade whipped cream over the top layer. Add graham cracker crumbs or fresh mint for garnish if desired.
- Cover the bowl with plastic wrap and refrigerate for at least 2 hours, preferably overnight, to allow the cake to soften and flavors to meld.
- Serve chilled with a large spoon, scooping from the center to get all layers.
Notes
For best results, use frozen berries as they break down and release more juice into the cake. Do not freeze this dessert as the texture will become mushy. It can be stored in the refrigerator for up to 3 days. For a lighter version, use skim milk and light Cool Whip. For a gluten-free option, use gluten-free pound cake.
- Prep Time: 30 minutes
- Cook Time: 0 minutes
- Category: Dessert
- Cuisine: American
Nutrition
- Serving Size: 1 bowl
- Calories: 320
- Sugar: 28
- Sodium: 280
- Fat: 14
- Saturated Fat: 6
- Carbohydrates: 45
- Fiber: 2
- Protein: 4
Keywords: berry trifle, no-bake dessert, summer dessert, crowd-pleasing dessert, make-ahead dessert, easy dessert, pound cake trifle, frozen berries dessert


