It was 4:45 PM on a Saturday in late August. The sun was still beating down on the patio, the grill was smoking from the best labor day grilled BBQ chicken thighs, and I was staring into the abyss of my pantry. My husband had just announced that three neighbors were “probably” coming over for drinks and snacks, and my dessert drawer contained nothing but a half-empty bag of pretzels and a single, sad box of crackers.
I panicked. Not the “I’m going to lose my job” kind of panic, but the “I am going to be that person who serves store-bought crackers to guests” kind of panic. I needed something sweet, something that looked like I’d made an effort, but something that didn’t involve turning on the oven (it was 92 degrees outside) or spending two hours babysitting a batter.
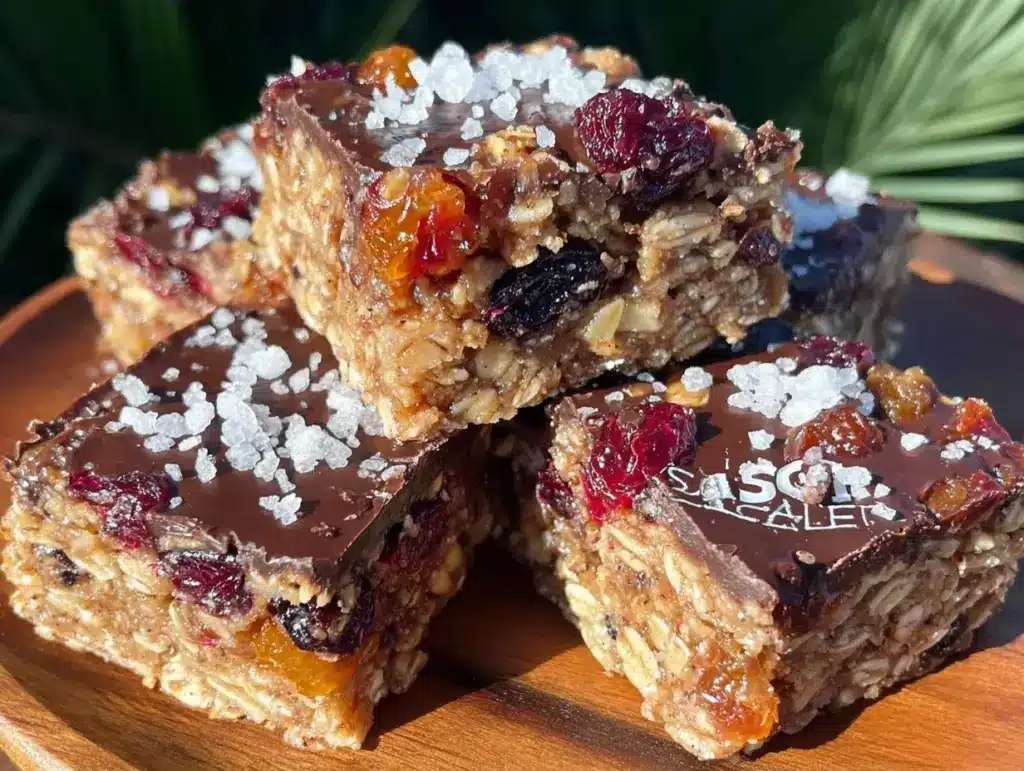
Then I remembered the stash of oats, chocolate chips, and peanut butter in the back of my cupboards. I threw together what I thought would be a mediocre, rushed no-bake cookie batch. Thirty minutes later, those same three neighbors were asking for the recipe. They didn’t know it was made in 15 minutes of active time. They just knew it was sweet, crunchy, and perfectly portable for a backyard hangout.
That’s how I discovered these end of summer no-bake cookie bars for backyard parties. They’ve become my secret weapon for last-minute gatherings. They’re chewy, chocolatey, and require zero oven time. I’ve made them for block parties, post-workout snacks, and even just because I wanted chocolate at 3 PM. If you’re staring at a clock that says 5 PM with nothing planned, this is your answer.
Why You’ll Love This Recipe
I’ve tested this recipe about a dozen times in the last month alone, tweaking the ratios until it was perfect. Here’s why this bar is staying in my regular rotation:
- Zero Oven Required — Seriously, don’t turn on the oven. It’s too hot, and cleaning the inside later is a nightmare. These cook on the stove and set in the fridge. It’s genius.
- 15 Minutes Active Time — I have walked my teenage daughter through making these over the phone. If you can boil water and stir, you can make these. No skills required.
- Perfectly Portable — Unlike a cake that needs a plate and a fork, these bars hold their shape. You can wrap them in foil, toss them in a Tupperware, or serve them on a platter without them falling apart. Ideal for passing around the grill.
- Pantry Staples — You likely have 90% of this already. Oats, chocolate chips, peanut butter, butter, sugar. It’s not a trip to the grocery store; it’s a raid of your cupboards.
- Make-Ahead Friendly — These actually taste better the next day. I make them on Sunday for Monday gatherings, and they hold up perfectly in the fridge for up to a week.
This is my go-to when I need dessert to just work. No complicated techniques, no weird ingredients, just reliable, delicious food that makes everyone happy.
Ingredients You’ll Need
Here’s the best part: you probably have most of this already. I’m particular about two things here—the quality of the peanut butter and the type of oats—but otherwise, it’s pretty flexible.
For the Base
Butter (½ cup / 113g) — Unsalted is best so you can control the saltiness. I use salted if I’m in a rush, but just skip the extra pinch of salt in the recipe. Don’t substitute oil; you need that fat for the texture.
Granulated Sugar (1 cup / 200g) — White sugar gives that classic no-bake cookie crunch. Brown sugar makes it chewier and darker, but I like the balance of both. If you only have white, use it. It works.
Heavy Cream (⅓ cup / 80ml) — This adds richness and helps bind everything. Half-and-half works in a pinch, but it’s a bit thinner. Milk will make it too watery. Stick to heavy cream for that fudgy center.
Peanut Butter (½ cup / 128g) — Use creamy, natural peanut butter. If you use the kind with oil separation, stir it well before measuring. Avoid “whipped” peanut butter; it has air in it and will throw off your ratios. If you have a nut allergy, sunflower seed butter is a great sub.
For the Texture
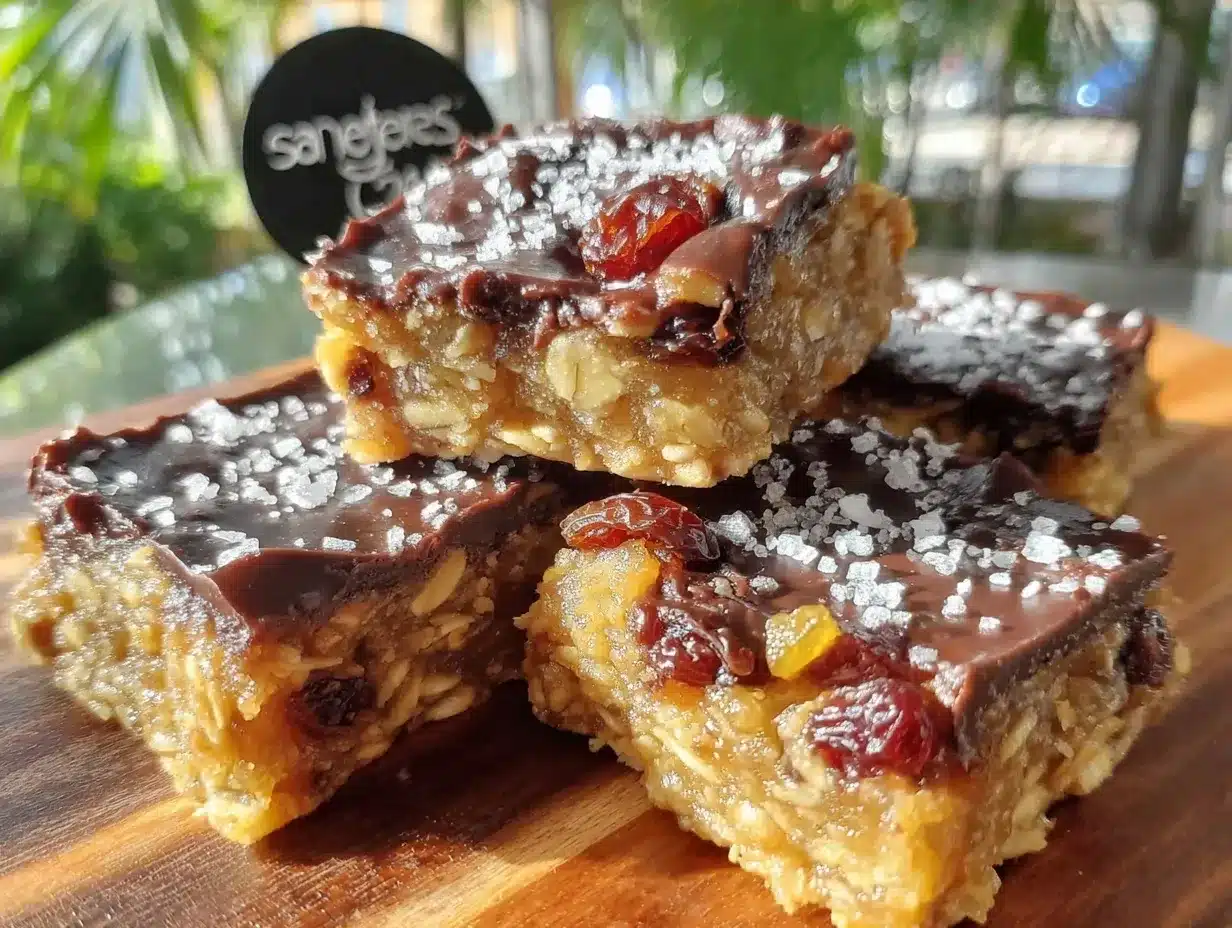
Rolled Oats (2 cups / 160g) — Use old-fashioned rolled oats. Do NOT use quick oats or steel-cut oats. Quick oats get mushy; steel-cut won’t cook right. Rolled oats give that perfect chew.
Vanilla Extract (1 teaspoon) — Pure vanilla. Not the imitation stuff. It adds that warm, bakery-like aroma.
For the Chocolate Layer
Chocolate Chips (1 cup / 170g) — Semi-sweet or milk chocolate both work. I use semi-sweet because it balances the sweetness of the bars. If you want it sweeter, use milk chocolate. Avoid chocolate bars that need chopping; chips melt more evenly.
Extra Chocolate Chips (½ cup / 85g) — For pressing on top before they set. This makes them look fancy, like you spent hours on them.
Salt (¼ teaspoon) — Just a pinch to cut the sweetness. Don’t skip it.
Equipment Needed
You don’t need fancy equipment for this. Here’s what I actually use.
Medium Saucepan — I use a 2-quart saucepan. It needs to be big enough to hold the boiling mixture without bubbling over. My ancient stainless steel pot from college still works fine.
9×9 Inch Baking Pan — Any square pan works. I line it with parchment paper for easy removal. If you don’t have parchment, grease it well with butter or cooking spray.
Wooden Spoon or Heat-Resistant Spatula — For stirring. Silicone works too. Don’t use plastic; it might melt if the mixture is too hot.
Measuring Cups and Spoons — Pretty standard stuff. Dollar store versions work fine.
Microplane or Box Grater — Optional. I like to grate a little extra chocolate on top for a professional look, but it’s not necessary.
How to Make It: Step-by-Step
Alright, let’s make this! I’m walking you through exactly how I do it, including the little tricks I’ve picked up.
Step 1: Prep Your Pan (2 minutes)
Line your 9×9 inch baking pan with parchment paper, leaving an overhang on the sides. This is crucial for lifting the bars out later without making a mess. Grease the parchment lightly with butter or non-stick spray. Set aside.
Step 2: Boil the Wet Ingredients (3-4 minutes)
In your saucepan, combine the butter, sugar, heavy cream, and peanut butter. Heat over medium heat, stirring constantly. You’re looking for a rolling boil. Once it starts bubbling vigorously, set your timer for exactly one minute. Stir often so it doesn’t burn. This step cooks the sugar and creates that fudgy base. If you boil it too long, the bars will be hard. Too short, and they’ll be gooey. One minute is the sweet spot.
Step 3: Remove from Heat and Add Vanilla (1 minute)
Take the pan off the burner immediately after one minute. Stir in the vanilla extract and salt. The mixture will look glossy and smooth. If it looks grainy, keep stirring; it should smooth out as it cools slightly.
Step 4: Fold in the Oats (2 minutes)
Immediately pour the hot mixture over the rolled oats in a large bowl (or pour the oats into the pot if you prefer). Stir vigorously until every oat is coated. The heat from the mixture will soften the oats slightly, which is what you want. If you don’t mix it fast enough, the oats will start to clump.
Step 5: Press into the Pan (2 minutes)
Transfer the oat mixture to your prepared pan. Use a lightly greased spatula or your hands (grease them with butter to prevent sticking) to press the mixture down firmly. You want it even and compact. If it’s too loose, the bars will fall apart. If it’s too tight, they’ll be hard to cut. Aim for firm but not rock-solid.
Step 6: Add the Chocolate Layer (5 minutes)
Scatter the first cup of chocolate chips evenly over the top of the oat bars. Let them sit for 2-3 minutes. The residual heat will melt the chips. Then, use a spatula to spread them into an even layer. If some spots don’t melt, microwave the pan for 10-15 seconds at a time until smooth.
Step 7: Decorate and Chill (30+ minutes)
Press the remaining ½ cup of chocolate chips onto the melted chocolate layer for decoration. Refrigerate for at least 30 minutes, or until the chocolate is set and the bars are firm. You can speed this up by putting them in the freezer for 15 minutes, but watch them closely so they don’t get too hard.
Total Time: About 30-45 minutes (15 minutes active, 30 minutes chilling)
Troubleshooting Tips:
- Mixture too runny? You didn’t boil it long enough. Next time, ensure it’s at a rolling boil for a full minute.
- Bars are crumbly? You pressed them too loosely. Press harder next time, or add a tablespoon more peanut butter.
- Chocolate won’t melt? Your pan wasn’t hot enough. Let the chips sit longer, or use the microwave trick.
Expert Tips & Tricks
Here’s everything I’ve learned from making this dozens of times. These tips will save you from my mistakes.
Don’t Rush the Boil
The one-minute boil is non-negotiable. It’s what dissolves the sugar and cooks the raw taste out of the flour (if you add any) and creates the binding agent. If you take it off too early, your bars will be a mess.
Use Parchment Paper
I can’t stress this enough. If you don’t line your pan, you will be scraping sticky chocolate and oats out of the corners. Parchment makes cleanup a joke and slicing easy.
Room Temperature Peanut Butter
If your peanut butter is cold from the fridge, it can seize up the hot mixture. Take it out 15 minutes before cooking. If you forget, microwave it for 10 seconds.
Chill Before Cutting
I know the temptation to cut them warm. Don’t do it. They will be a sticky, chocolatey disaster. Let them set completely. The texture improves dramatically after an hour in the fridge.
Storage Hack
Store them in an airtight container in the fridge. They last up to a week. If you’re bringing them to a party, keep them in a cooler if it’s hot outside. Chocolate melts fast.
Variations & Substitutions
Once you’ve nailed the basic version, here’s how you can mix it up. I’ve tried all of these.
Chocolate Chip Cookie Dough
Add ½ cup of mini chocolate chips into the oat mixture before pressing. Or, swap half the chocolate chips on top for mini chips.
Butterscotch
Use butterscotch chips instead of chocolate. It tastes like caramel and peanut butter heaven. My kids love this version.
White Chocolate
Use white chocolate chips on top. It’s sweeter and looks beautiful against the dark oats.
Nut-Free
Swap peanut butter for sunflower seed butter or soy nut butter. The texture is slightly different but still delicious.
Gluten-Free
Use certified gluten-free oats. Everything else is naturally gluten-free. I’ve used Bob’s Red Mill GF oats and they work great.
Vegan
Use vegan butter, coconut cream, and vegan chocolate chips. Swap peanut butter for sunflower seed butter if needed. It holds together well.
Serving & Storage
How to Serve:
I usually cut these into 16 squares (4×4 grid). They’re bite-sized enough for grazing but substantial enough to feel like a treat. I serve them on a platter with napkins—because yes, they can be messy.
Side Dishes:
These pair perfectly with cold drinks. I like them with virgin mojitos or lemonade. They also go great with coffee or milk.
Storage Instructions:
Refrigerator: Store in an airtight container for up to 5 days. The chocolate will harden in the fridge, which is good for holding shape.
Freezer: These freeze beautifully. Wrap squares individually in plastic wrap, then put them in a freezer bag. They last up to 3 months. Thaw in the fridge for 30 minutes before eating.
Nutrition Information
I’m not a nutritionist, but here’s the breakdown if you’re tracking. These are indulgent bars, so portion control is key.
Per Serving (1 of 16 bars):
– Calories: 180
– Protein: 4g
– Carbs: 22g
– Fiber: 2g
– Sugar: 14g
– Fat: 10g
– Saturated Fat: 5g
– Cholesterol: 10mg
– Sodium: 90mg
What’s Good:
– Quick energy from oats and sugar
– Some protein from peanut butter
– Portable and satisfying
What to Know:
– High in sugar and saturated fat
– Contains nuts (peanut butter)
– Not suitable for nut allergies
My Take:
Look, these are dessert bars. They’re sweet and rich. I don’t eat them every day, but when I do, I enjoy every bite. They’re way better than store-bought candy bars, and you know exactly what’s in them.
Final Thoughts
So that’s my go-to end of summer no-bake cookie bars for backyard parties! I’ve probably talked your ear off at this point, but when you make a recipe this often, you have a lot to say about it.
This has saved me more times than I can count. It’s my answer to “what’s for dessert” when I’m tired, don’t want to bake, and still want something that tastes homemade. My kids are happy, my neighbors are happy, and I’m happy because I’m not stressed about cooking.
Make it yours! Try different chocolates, add nuts, or swap the peanut butter. The best recipes are the ones you adapt to your family’s tastes.
If you make this, drop a comment and let me know what you think! I love hearing how recipes turn out in your kitchen. And if something doesn’t work, tell me that too—I’m here to help troubleshoot.
Happy cooking! And I hope your kitchen smells half as good as mine does right now.
Frequently Asked Questions
Can I use quick oats instead of rolled oats?
You can, but the texture will be different. Quick oats are thinner and will make the bars softer and more cake-like. Rolled oats give that classic chewy no-bake cookie texture. If you only have quick oats, reduce the boiling time to 30 seconds to prevent mushiness.
Why did my bars fall apart?
Usually, this means the mixture wasn’t sticky enough. This happens if you didn’t boil the sugar mixture long enough, or if you didn’t press the bars down firmly enough. Next time, ensure a full rolling boil for one minute and press down hard with a greased spatula.
Can I make these ahead of time?
Absolutely! These are even better the next day. Make them up to 3 days ahead and store in the fridge. They hold their shape well and are perfect for meal prep or party planning.
How do I store them?
Store in an airtight container in the refrigerator for up to 5 days. They can also be frozen for up to 3 months. If freezing, wrap individual squares in plastic wrap to prevent freezer burn.
Can I use natural peanut butter?
Yes, but make sure it’s well-stirred. Natural peanut butter can be oilier, which might make the bars slightly softer. If it’s very oily, you might need to add a tablespoon more oats to compensate.
What if I don’t have heavy cream?
Half-and-half works, but the bars might be slightly less rich. Milk is not recommended as it’s too thin and won’t bind the mixture properly. If you’re out of dairy cream, coconut cream is a good vegan substitute.
Can I add nuts?
Definitely! Add ½ cup of chopped peanuts or pecans to the oat mixture. It adds a nice crunch and extra flavor. Just toss them in with the oats before pressing.
Pin This Recipe!
End of Summer No-Bake Cookie Bars
- Total Time: 45 minutes
- Yield: 16 servings 1x
Description
A quick, no-bake dessert bar made with pantry staples like oats, peanut butter, and chocolate chips. Perfect for last-minute gatherings, these chewy, chocolatey bars require zero oven time and set in the fridge.
Ingredients
- 1/2 cup (113g) unsalted butter
- 1 cup (200g) granulated sugar
- 1/3 cup (80ml) heavy cream
- 1/2 cup (128g) creamy natural peanut butter
- 2 cups (160g) old-fashioned rolled oats
- 1 teaspoon vanilla extract
- 1 cup (170g) semi-sweet chocolate chips
- 1/2 cup (85g) extra chocolate chips for topping
- 1/4 teaspoon salt
Instructions
- Line a 9×9 inch baking pan with parchment paper, leaving an overhang on the sides, and grease lightly with butter or non-stick spray.
- In a medium saucepan over medium heat, combine butter, sugar, heavy cream, and peanut butter. Stir constantly until the mixture reaches a rolling boil.
- Once boiling vigorously, set a timer for exactly one minute, stirring often to prevent burning. Remove from heat immediately after one minute.
- Stir in vanilla extract and salt until the mixture is glossy and smooth.
- Pour the hot mixture over the rolled oats in a large bowl and stir vigorously until every oat is fully coated.
- Transfer the mixture to the prepared pan. Use a greased spatula or greased hands to press the mixture down firmly and evenly.
- Scatter 1 cup of chocolate chips evenly over the top. Let sit for 2-3 minutes to melt, then spread into an even layer. Microwave for 10-15 seconds if needed to help melting.
- Press the remaining 1/2 cup of chocolate chips onto the melted layer for decoration.
- Refrigerate for at least 30 minutes, or until the chocolate is set and bars are firm. Cut into 16 squares before serving.
Notes
[‘Do not use quick oats or steel-cut oats; old-fashioned rolled oats provide the correct texture.’, ‘Ensure the mixture boils for a full minute to dissolve sugar and bind the bars.’, ‘Use room temperature peanut butter to prevent seizing the hot mixture.’, ‘Bars must be chilled completely before cutting to avoid a sticky mess.’, ‘Store in an airtight container in the refrigerator for up to 5 days, or freeze for up to 3 months.’]
- Prep Time: 15 minutes
- Cook Time: 5 minutes
- Category: Dessert
- Cuisine: American
Nutrition
- Serving Size: 1 bar (1 of 16)
- Calories: 180
- Sugar: 14
- Sodium: 90
- Fat: 10
- Saturated Fat: 5
- Carbohydrates: 22
- Fiber: 2
- Protein: 4
Keywords: no-bake cookies, peanut butter bars, chocolate oat bars, last minute dessert, summer recipes, easy snacks, pantry staples


