It’s 6:45 AM on a Tuesday, and the house is still quiet in that heavy, pre-sunlight way that feels both peaceful and slightly terrifying. I’m standing in the kitchen, rubbing sleep out of my eyes, trying to remember if I actually bought yogurt last week or if I’m going to have to serve dry cereal out of the box again. This is the moment every parent dreads during the school year: the morning rush where “healthy breakfast” usually goes to die in the name of speed.
But here’s the thing about back-to-school mornings—they’re a different beast entirely. You’re running on four hours of sleep, your kid is already asking if you packed their lunch, and the last thing you want to do is stand over a hot stove making pancakes that will get cold in three minutes. That’s why I fell in love with these yogurt parfait cups. Seriously. They’ve become my secret weapon for surviving September without losing my mind.
I first started making these parfaits as a way to use up the random half-jars of yogurt and the sad, bruising berries in my fridge. But somewhere around the fifth morning in a row, I realized I wasn’t just saving time—I was saving my sanity. The kids eat them. They actually eat them, without complaining about the texture or trying to sneak the granola out. And the best part? I can prep five cups on Sunday night, and they’re ready to grab-and-go until Thursday.
This isn’t about fancy plating or Instagram-worthy aesthetics (though they look cute, I won’t lie). This is about practical, protein-packed fuel that tastes like a treat but costs less than a drive-thru coffee run. If you’re drowning in morning chaos, let me show you how to make this 5-minute breakfast work for your family.
Why You’ll Love This Recipe
I know what you’re thinking. “Another yogurt recipe? I have enough yogurt bowls to last a lifetime.” But hear me out. This isn’t just a bowl of yogurt. It’s a structured, grab-and-go solution that actually keeps you full until lunch. Here’s why these parfait cups have taken over our kitchen routine:
- Zero Morning Stress — The magic happens the night before. You build them, stack them in the fridge, and in the morning, you literally just open the fridge and hand it to your kid. No chopping, no cooking, no arguing. I’ve handed these to my teenagers while they’re putting on their shoes, and they’re eating in the car by the time they hit the driveway.
- Protein That Actually Works — Most store-bought breakfast bars are just sugar in disguise. These parfaits use Greek yogurt (or a high-protein alternative) and nuts/seeds, giving you 15-20 grams of protein per cup. That’s the difference between your kid crashing in third period and staying focused until recess.
- Customizable for Picky Eaters — My son hates berries. My daughter hates nuts. With this method, we build individual cups. He gets banana and honey. She gets blueberries and extra granola. No battles. No “I don’t like that” negotiations at the table. Everyone wins.
- Cost-Effective — Buying individual parfait cups at the grocery store is a rip-off. It costs me about $1.50 to make a cup like this at home. That’s less than a single yogurt tube from the gas station, but it’s actually nutritious.
- Meal Prep Friendly — I make a batch of 5-7 cups every Sunday. They last 4-5 days in the fridge if you keep the granola separate until eating (more on that below). It’s one less decision to make when I’m already thinking about what’s for dinner.
- Freezer-Ready Granola — You can make extra granola and freeze it in portions. Then you just grab a handful when you’re running low on store-bought. It’s fresher, less sugary, and tastes incredible.
This is my go-to when I need breakfast to just work. No complicated techniques, no weird ingredients, just reliable, delicious food that makes everyone happy.
Ingredients You’ll Need
Here’s the best part: you probably have most of this already. This isn’t a recipe that requires a special trip to a specialty store. It’s built on pantry staples and fridge basics. I’m particular about three things here—the yogurt, the granola, and the fruit—and I’ll tell you exactly why.
For the Base
Greek Yogurt (1 cup / 245g per serving) — This is non-negotiable. Regular yogurt is too watery and doesn’t have the protein punch you need for a school morning. Look for plain, unsweetened Greek yogurt. Brands like Fage or Chobani work great. If you’re dairy-free, use a coconut-based yogurt that’s high in protein, but be aware the texture will be slightly different. I always buy the big tubs because they’re cheaper per ounce.
Honey or Maple Syrup (1-2 tablespoons) — Even with plain yogurt, a little sweetness helps. I use raw honey because it has a nice floral note that pairs well with berries. Maple syrup works if you’re avoiding honey or making it vegan. Don’t use artificial sweeteners; they leave a weird aftertaste that kids can detect from a mile away.
Vanilla Extract (½ teaspoon) — Just a splash. It makes the yogurt taste like dessert without adding sugar. It’s a flavor enhancer, not a main ingredient, but it makes a huge difference in how the cup tastes.
For the Crunch
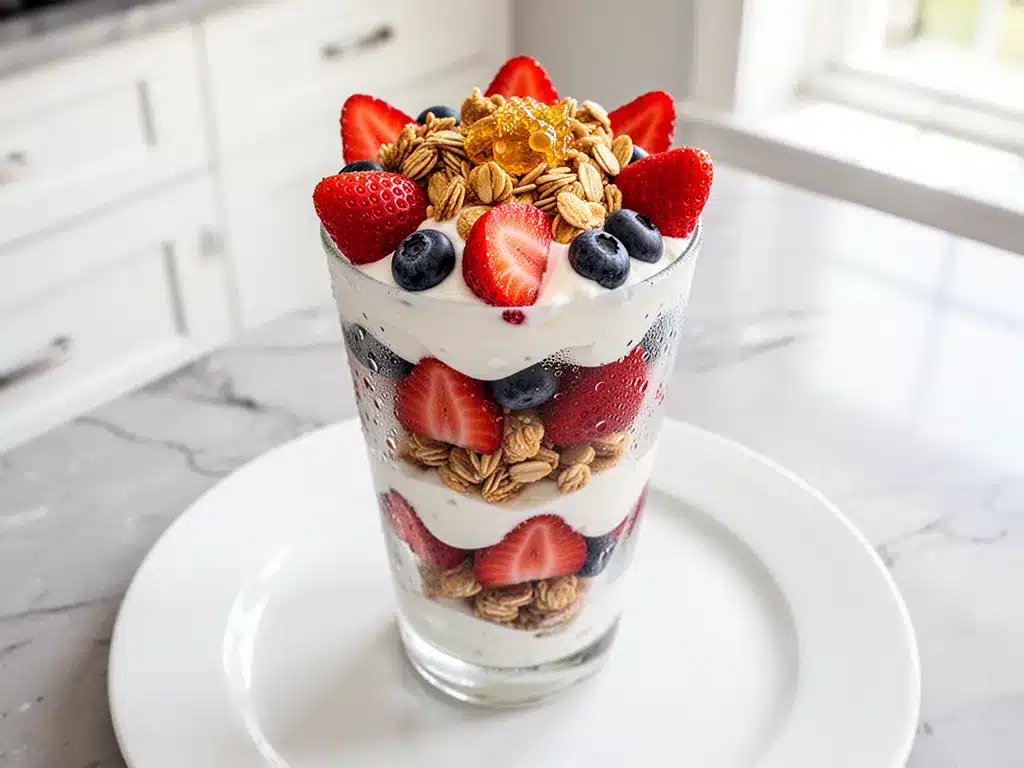
Granola (½ cup / 40g per serving) — This is where you can either buy store-bought or make your own. If you buy it, look for low-sugar options. Many store brands are basically candy bars with oats. I love brands like Kashi or homemade versions. If you’re short on time, you can use crushed nuts or seeds, but granola provides that essential crunch. Pro tip: Keep this separate until serving time to keep it crunchy.
Nuts or Seeds (2 tablespoons) — Walnuts, almonds, chia seeds, or pumpkin seeds. I usually mix chia seeds into the yogurt for extra omega-3s and thickness. If you have nut allergies in the house, sunflower seeds or pumpkin seeds are perfect substitutes. They add texture and healthy fats.
For the Fruit
Berries (½ cup / 75g) — Fresh or frozen. Fresh is nicer if you have them, but frozen works great too. If you use frozen berries, thaw them slightly so they’re not ice-cold, or chop them up. Strawberries, blueberries, raspberries, or a mixed bag all work. I buy frozen mixed berries in the winter because they’re cheaper and just as good.
Banana (1 medium, sliced) — Optional but highly recommended. Bananas add natural sweetness and creaminess. They’re also great for kids who don’t like tart berries. Slice them thinly so they layer nicely.
Other Fruit Options — Apples (diced small), peaches (canned in juice, drained), or mango chunks. Whatever is in season or on sale. I use whatever is about to go bad in the fridge. It’s the perfect way to reduce food waste.
Equipment Needed
You don’t need fancy equipment for this. Here’s what I actually use:
Small Glass Jars or Cups — I use 8-ounce mason jars with lids. They’re cheap, stackable, and look cute. You can also use small plastic containers if you’re packing them for school. Just make sure they have lids so they don’t spill in the backpack. Glass is easier to clean and doesn’t stain from berries.
Measuring Spoons — For the honey and vanilla. I keep these right next to the fridge so I don’t have to dig them out.
Small Whisk or Fork — To mix the yogurt, honey, and vanilla together. A small whisk makes it faster, but a fork works fine.
Spatula — For layering the ingredients neatly. I like to make it look pretty, but it’s not required.
Knife and Cutting Board — For slicing bananas or chopping nuts. If you’re using pre-chopped fruit or whole berries, you can skip this.
Measuring Cups — For the granola and fruit. I use a ½ cup and a ¼ cup for consistency.
Optional: Food Processor — If you’re making homemade granola, a food processor makes it super easy to chop nuts and mix ingredients. But it’s not necessary.
How to Make It: Step-by-Step
Alright, let’s make this! I’m walking you through exactly how I do it, including the little tricks I’ve picked up over two years of morning chaos.
Step 1: Prep Your Yogurt Base (2 minutes)
In a medium bowl, combine your Greek yogurt, honey, and vanilla extract. Whisk it together until smooth. Taste it. It should be sweet enough to eat on its own, but not cloying. If you’re using unsweetened yogurt, you might need a bit more honey. If you’re using sweetened yogurt, skip the honey or use just a teaspoon. This step is crucial because it sets the flavor profile for the whole cup.
Step 2: Prepare Your Fruit and Crunch (3 minutes)
While the yogurt is mixing, prep your fruit. Slice bananas, chop strawberries, or rinse blueberries. If you’re using frozen berries, let them thaw for 10 minutes and pat them dry with a paper towel. Excess moisture makes the yogurt watery, so dry them well. Chop your nuts or seeds if you’re using larger pieces. Set everything aside in separate small bowls or piles.
Step 3: Layer the Parfaits (5 minutes)
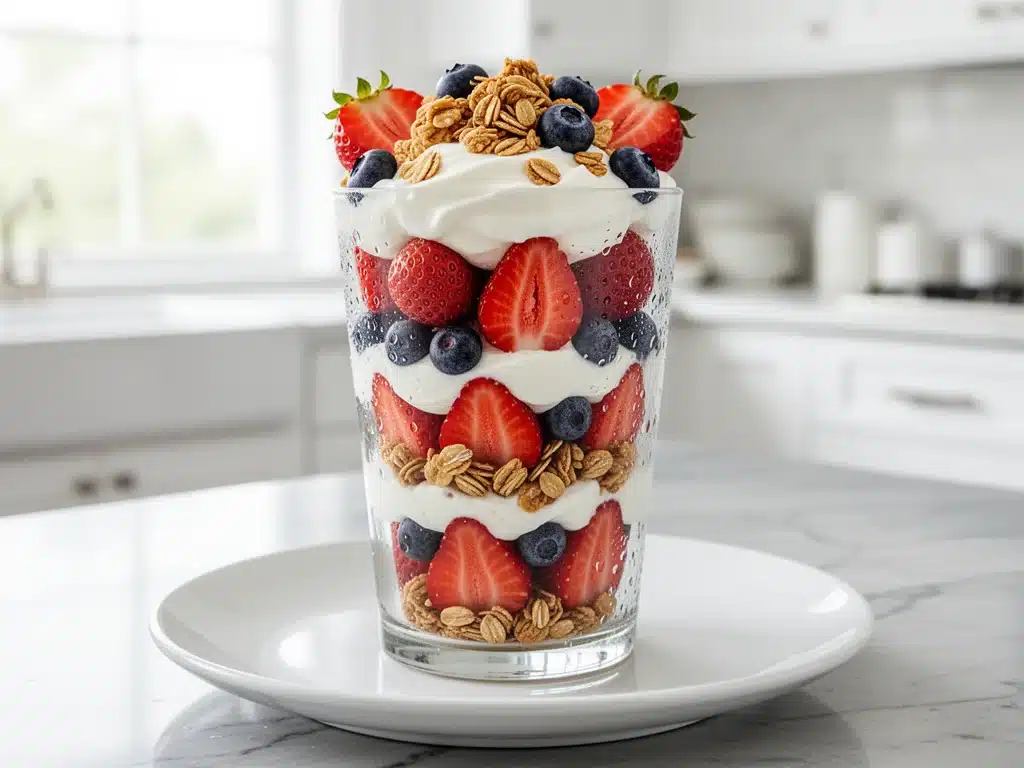
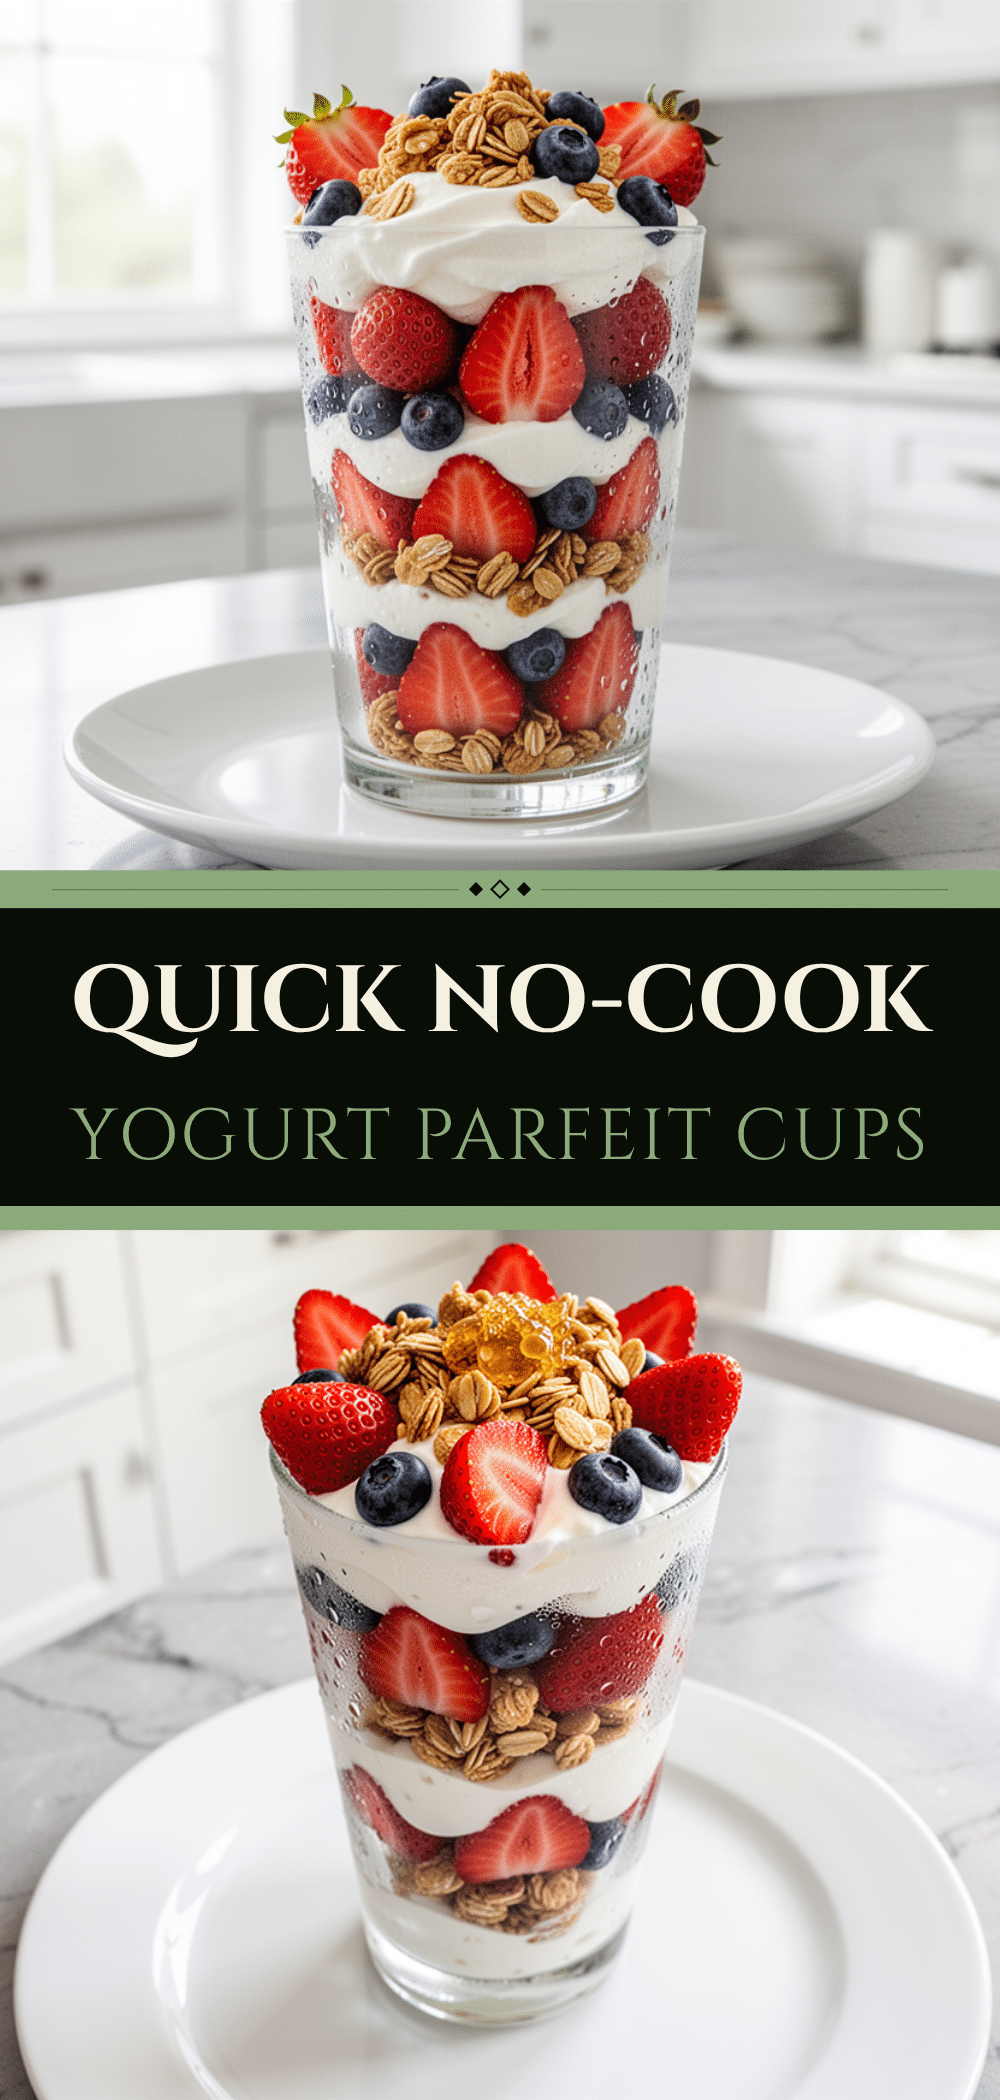
Now for the fun part: layering. Start with a spoonful of yogurt base at the bottom of your jar or cup. This acts as a “glue” for the next layer. Add a layer of fruit on top of the yogurt. Then add a layer of granola. Repeat: yogurt, fruit, granola. You usually get 3-4 layers per cup. The last layer should be yogurt, topped with a sprinkle of granola and a few fresh berries for garnish. This looks pretty and makes it feel special.
Important Note: If you’re packing these for school, keep the granola in a separate small container or baggie and add it in the morning. It will get soggy if you layer it the night before. For home consumption, layering ahead is fine for up to 2 days, but the granola will soften slightly.
Step 4: Seal and Store (1 minute)
Place lids on your jars or cover with plastic wrap. Store them in the fridge. They’ll keep for 4-5 days. If you’re making them for the week, I recommend making 3-4 cups on Sunday and 2-3 cups on Wednesday. This ensures freshness and prevents the fruit from getting too mushy.
Step 5: Serve
Grab a cup, add the granola (if you kept it separate), and eat. No reheating needed. No microwaving. Just open and eat. If you’re eating at home, you can add a drizzle of extra honey or a sprinkle of cinnamon on top. It’s that simple.
Total Time: About 10 minutes for 4-5 cups (mostly hands-off prep).
Expert Tips & Tricks
Here’s everything I’ve learned from making these dozens of times. These tips will save you from my mistakes.
Keep the Granola Separate
This is the #1 tip. Granola absorbs moisture like a sponge. If you layer it the night before, it will be soggy by morning. Soggy granola is sad granola. If you’re eating at home, you can layer it, but I still prefer to keep a small container of granola in the fridge and add it right before eating. It’s worth the extra 10 seconds.
Use Thick Yogurt
Thin yogurt makes a watery parfait. Greek yogurt is thick and creamy, which holds up well in layers. If you use regular yogurt, strain it through a cheesecloth or coffee filter for 30 minutes to remove excess whey. It’s a quick hack that makes a huge difference in texture.
Don’t Skimp on Protein
Protein keeps you full. If you’re using a low-protein yogurt, add a scoop of protein powder to the yogurt base. Mix it well so there are no clumps. Or add a tablespoon of nut butter to the yogurt. It adds creaminess and protein. My husband adds a spoonful of peanut butter to his cup sometimes—it tastes like a Reese’s cup.
Freeze Extra Granola
Make a big batch of granola and freeze it in portions. Then you just grab a handful when you’re running low. It’s fresher, less sugary, and tastes incredible. If you’re a fan of quick breakfasts, you might also enjoy my high-protein peanut butter banana shake—it’s another grab-and-go option for busy mornings.
Customize for Allergies
If you have nut allergies, use seeds instead of nuts. Sunflower seeds, pumpkin seeds, or hemp hearts work great. If you’re dairy-free, use coconut yogurt or soy yogurt. Just check the protein content to make sure it’s high enough. For other dairy-free options, my dairy-free iced matcha coconut latte is a great afternoon pick-me-up that uses similar ingredients.
Variations & Substitutions
Once you’ve nailed the basic version, here’s how you can mix it up. I’ve tried all of these.
Tropical Parfait
Swap berries for mango chunks and pineapple. Use coconut yogurt and top with toasted coconut flakes. It’s like a vacation in a cup. My kids love this one in the summer.
Peanut Butter Banana
Use banana slices and a drizzle of peanut butter. Add a sprinkle of chia seeds. It’s rich, filling, and tastes like a dessert. Great for post-practice snacks.
Apple Cinnamon
Use diced apples and a dash of cinnamon. Top with pecans or walnuts. It tastes like apple pie but healthier. Use cinnamon-spiced granola if you can find it.
Chocolate Indulgence
Add a tablespoon of cocoa powder to the yogurt base. Top with dark chocolate chips or cacao nibs. It’s like a chocolate mousse cup. My daughter’s favorite.
Dietary Modifications:
- Gluten-Free — Use certified gluten-free granola. Most fruits and yogurts are naturally gluten-free.
- Dairy-Free — Use coconut yogurt or soy yogurt. Use maple syrup instead of honey.
- Vegan — Same as dairy-free. Check your granola for honey or dairy additives.
- Low-Sugar — Use unsweetened yogurt, no honey, and low-sugar granola. Add fresh fruit for natural sweetness.
Serving & Storage
How to Serve: I usually serve these straight from the fridge. No reheating needed. They’re refreshing and cool. If you’re eating at home, you can add a sprinkle of cinnamon or a drizzle of honey on top. For school, pack them in a lunchbox with an ice pack to keep them cool.
Side Dishes: These are complete breakfasts on their own. But if you’re hungry, add a piece of fruit or a hard-boiled egg on the side. For dinner, I often pair these with my one-pan honey mustard chicken thighs—it’s a quick, flavorful meal that balances out the light breakfast.
Storage Instructions: Store in the fridge for up to 5 days. Keep the granola separate until eating. If you layer it ahead, the granola will soften. The fruit may release some juice, which is normal. Just stir it in before eating.
Freezing: Do not freeze the parfaits. The yogurt will separate and become grainy. The fruit will get mushy. Make them fresh or store in the fridge.
Meal Prep: Make 5-7 cups on Sunday. They’ll last through the week. If you’re running low, make a small batch on Wednesday. It’s quick and easy.
Nutrition Information
I’m not a nutritionist, but here’s the breakdown if you’re tracking. These are estimates based on standard ingredients.
Per Serving (1 cup, with granola added):
| Calories | 350 |
| Protein | 18g |
| Carbs | 45g |
| Fiber | 5g |
| Sugar | 25g |
| Fat | 12g |
| Saturated Fat | 4g |
| Cholesterol | 10mg |
| Sodium | 80mg |
What’s Good: High in protein, good source of fiber, contains probiotics from yogurt. What to Know: Sugar content varies based on fruit and granola. Use low-sugar granola and unsweetened yogurt to reduce sugar. My Take: This is a balanced breakfast. It’s not a diet food, but it’s nutritious and filling. When I want to make it lighter, I use less granola and more fruit. But usually? I just eat a reasonable portion and enjoy it.
Final Thoughts
So that’s my go-to yogurt parfait cup! I’ve probably talked your ear off at this point, but when you make a recipe this often, you have a lot to say about it. This has saved weeknight mornings more times than I can count. It’s my answer to “what’s for breakfast” when I’m tired, don’t want to cook, and still want something that tastes really good. My kids are happy, my husband’s happy, and I’m happy because I’m not stressed about cooking.
Make it yours! Try different add-ins, swap in your favorite fruits, adjust the sweetness. The best recipes are the ones you adapt to your family’s tastes. If you make this, drop a comment and let me know what you think! I love hearing how recipes turn out in your kitchen. And if something doesn’t work, tell me that too—I’m here to help troubleshoot.
Happy cooking! And I hope your mornings feel half as easy as mine do right now.
Frequently Asked Questions
Q: Can I make these the night before?
A: Yes! This is the best part. You can assemble them the night before and store them in the fridge. Just keep the granola separate if you want it crunchy. If you layer it in, it will soften overnight, which some people prefer. I usually keep it separate for my kids who are picky about texture.
Q: What kind of yogurt is best?
A: Greek yogurt is best because it’s thick and high in protein. Plain, unsweetened is ideal so you can control the sweetness. If you’re dairy-free, use coconut or soy yogurt. Avoid regular yogurt—it’s too watery and makes a mess.
Q: How long do these last in the fridge?
A: Up to 5 days if stored properly. The fruit may get slightly mushy after 3 days, so I recommend making 3-4 cups at a time. If you’re making a big batch, make 5 on Sunday and 2 on Wednesday.
Q: Can I use frozen fruit?
A: Yes, but thaw it first and pat it dry. Frozen fruit releases a lot of water, which can make the yogurt watery. If you use it straight from the freezer, it will also make the yogurt ice-cold, which might not be appealing. Thawing and drying is key.
Q: How do I keep the granola crunchy?
A: Keep it in a separate container and add it right before eating. If you layer it in the night before, it will absorb moisture and get soggy. It’s a small extra step, but it makes a huge difference in the eating experience.
Q: Can I make these for meal prep?
A: Absolutely. Make 5-7 cups on Sunday. Store them in the fridge with lids on. They’re ready to grab and go all week. I pack them for my kids’ lunches, and they love having something homemade instead of store-bought bars.
Q: What if I don’t have granola?
A: You can use crushed nuts, seeds, or even cereal. Chex mix, granola clusters, or even crushed graham crackers work. The goal is crunch, so whatever you have on hand that provides texture is fine. For a warm breakfast option, my slow cooker chicken and wild rice soup is great for cold mornings, but these parfaits are faster.
Pin This Recipe!
Yogurt Parfait Cups: Easy 5-Min Breakfast
- Total Time: 10 minutes
- Yield: 4-5 servings 1x
Description
A quick, grab-and-go breakfast solution perfect for busy school mornings. These protein-packed yogurt parfaits are customizable, cost-effective, and can be prepped ahead for the entire week.
Ingredients
- 1 cup (245g) plain, unsweetened Greek yogurt
- 1–2 tablespoons honey or maple syrup
- 1/2 teaspoon vanilla extract
- 1/2 cup (40g) granola (low-sugar or homemade)
- 2 tablespoons nuts or seeds (walnuts, almonds, chia seeds, or pumpkin seeds)
- 1/2 cup (75g) berries (fresh or frozen, thawed and dried)
- 1 medium banana, sliced (optional)
- Other fruit options: diced apples, canned peaches, or mango chunks
Instructions
- In a medium bowl, combine Greek yogurt, honey, and vanilla extract. Whisk until smooth and taste to adjust sweetness.
- Prepare the fruit by slicing bananas, chopping strawberries, or rinsing blueberries. If using frozen berries, thaw and pat dry to remove excess moisture.
- Chop nuts or seeds if using larger pieces. Set fruit and crunch ingredients aside in separate bowls.
- Layer the parfait in jars or cups: start with a spoonful of yogurt base, add a layer of fruit, then a layer of granola. Repeat for 3-4 layers.
- Finish with a yogurt layer topped with a sprinkle of granola and fresh berries for garnish.
- If packing for school, keep granola separate in a small container and add in the morning to maintain crunch. For home consumption, layering ahead is fine for up to 2 days.
- Seal jars with lids or plastic wrap and store in the refrigerator for up to 5 days.
- Serve cold directly from the fridge. Add extra honey or cinnamon if desired.
Notes
[‘Keep granola separate until serving time to prevent sogginess.’, ‘Use thick Greek yogurt for better texture; strain regular yogurt if necessary.’, ‘Frozen berries must be thawed and patted dry to avoid watery yogurt.’, ‘Do not freeze the assembled parfaits as yogurt will separate and fruit will become mushy.’, ‘Customize for allergies: use seeds instead of nuts, and coconut/soy yogurt for dairy-free/vegan versions.’]
- Prep Time: 10 minutes
- Cook Time: 0 minutes
- Category: Breakfast
- Cuisine: American
Nutrition
- Serving Size: 1 cup (with granola
- Calories: 350
- Sugar: 25
- Sodium: 80
- Fat: 12
- Saturated Fat: 4
- Carbohydrates: 45
- Fiber: 5
- Protein: 18
Keywords: yogurt parfait, healthy breakfast, meal prep, grab and go, high protein breakfast, quick breakfast, school lunch, Greek yogurt recipe