Last Tuesday, I came home from work exhausted, my brain completely fried by back-to-back Zoom calls. I opened the fridge, staring at a half-chicken breast, a bag of frozen corn, and a block of cream cheese that had been hiding in the back since my last cooking attempt. I didn’t want to cook. I really didn’t. I was mentally already ordering takeout from that Thai place down the street.
But then I remembered I had some cotija cheese and chili powder. Something clicked. I threw everything into a skillet, added some shredded chicken, and let it bubble away while I finally sat down. Twenty minutes later, I had a dish that smelled like a summer night at a street fair—smoky, creamy, tangy, and incredibly comforting. My kids didn’t just eat it; they cleaned their plates. Then they asked if we could have “street corn chicken” for dinner again the next day.
That was the birth of my Street Corn Chicken Casserole. It wasn’t planned. It was born out of fatigue and a pantry that needed clearing. But it turned out to be the perfect solution for those nights when you need dinner to just work. It’s essentially all the flavors of Mexican street corn (elote) baked into a cozy, cheesy casserole with tender chicken.
I’ve made this recipe at least fifteen times since that Tuesday. I’ve tweaked the spice levels, tested different cheeses, and figured out the perfect ratio of creamy to crispy. It’s become a staple in our house, right up there with our usual weeknight rotations. If you’re tired of the same old chicken and rice or pasta dishes, this is the game-changer you need. It’s flavorful, it’s easy, and it tastes like you spent hours in the kitchen (even though you won’t).
Why You’ll Love This Recipe
There are about a dozen reasons I keep making this Street Corn Chicken Casserole, but here are the big ones that have convinced my family to request it regularly.
- It’s a Flavor Bomb — Seriously, the combination of smoky chili powder, tangy lime, and creamy cheese is unbeatable. It hits every taste bud. I’ve served this to my neighbor who claims she “doesn’t like Mexican food,” and she asked for the recipe within ten minutes. It’s not spicy-hot; it’s savory-smoky with a kick.
- One-Dish Wonder — I love a casserole because cleanup is minimal. You mix everything in one big dish (or skillet, depending on your preference) and bake. No chopping a dozen vegetables, no managing three different pots. Just mix, bake, eat. It’s the holy grail of weeknight efficiency.
- Uses Up Leftovers — Got leftover rotisserie chicken? This recipe is its best friend. I make this specifically on Sundays when I have leftover chicken from the weekend. It transforms plain pulled chicken into something exciting. If you don’t have leftovers, poaching chicken breasts takes only 15 minutes.
- Kid-Approved Comfort — Cheese and corn are two things most kids love. By baking it, the corn gets slightly sweet and tender, and the cheese melts into a gooey blanket. My picky eater, who usually picks out the green peppers, eats this without complaint. That’s a win in my book.
- Customizable Heat — You control the spice. Want it mild? Skip the jalapeño and use less chili powder. Want it fiery? Add some diced jalapeños and a dash of hot sauce. I keep the chili powder mild for my kids but add a pinch of cayenne for myself.
- Budget-Friendly — Chicken, corn, cream cheese, and a few spices. This feeds a family of four for under $15. It’s significantly cheaper than ordering from a restaurant, and you know exactly what’s going into it.
This is my go-to when I need dinner to be delicious without being complicated. It feels special, like a treat, but it’s simple enough for a random Wednesday night.
Ingredients You’ll Need
Here’s the best part: you probably have most of this already in your pantry or freezer. This recipe relies on simple, accessible ingredients that come together to create something complex-tasting.
For the Base:
Chicken breast or thighs (3 cups, cooked and shredded / about 680g) — I prefer boneless, skinless chicken breasts for a leaner option, but thighs are juicier and more flavorful. If using thighs, remove the skin before shredding. You can use rotisserie chicken to save time—just shred about 3 cups.
Frozen corn (2 cups / 300g) — I use frozen because it’s convenient and just as sweet as fresh. Thaw it slightly before adding. If you have fresh corn off the cob, you can use 2 cups of kernels, but frozen works perfectly fine and saves the chore of cutting kernels off the cob.
Cream cheese (8 oz / 225g) — Softened to room temperature. This is the key to the creamy texture. Don’t skip this or try to substitute with low-fat versions; the fat content is what makes it rich. Soften it by leaving it out for 30 minutes or microwaving in 10-second bursts.
Black beans (1 can, 15 oz / 425g) — Drained and rinsed. These add protein and a nice texture. If you’re not a fan of beans, you can swap them for diced bell peppers, but the beans do add a nice earthiness.
Chicken broth (½ cup / 120ml) — Low-sodium is best so you can control the salt. This adds moisture and helps bind the ingredients.
For the Flavor:

Chili powder (1 tablespoon) — This is your main spice. Use a good quality blend like McCormick or a homemade mix. It provides smokiness, not just heat. If you only have cumin, you can use 2 teaspoons, but chili powder is better for that authentic street corn flavor.
Cumin (1 teaspoon) — Adds warmth and depth. It’s subtle but necessary for that Mexican-inspired profile.
Garlic (3 cloves, minced / about 1 tablespoon) — Fresh garlic is non-negotiable here. It adds a pungent aroma that ties everything together. No jarred garlic for this one; it tastes too metallic.
Lime juice (2 tablespoons / juice of 1 lime) — Freshly squeezed. This cuts through the richness of the cream cheese and cheese. Bottled lime juice just doesn’t have the same bright, fresh punch.
Green onions (4 stalks, sliced / about ½ cup) — For a bit of oniony bite and color. You can use white onion if you prefer, but green onions are milder and look nice.
For the Topping:
Shredded Mexican blend cheese (2 cups / 225g) — Or a mix of cheddar and Monterey Jack. Mexican blend usually includes queso quesadilla and asadero, which melt beautifully. If you can’t find it, cheddar and mozzarella work, too.
Cotija cheese (½ cup, crumbled / 60g) — This is the traditional topping for elote. It’s a dry, salty, crumbly cheese. If you can’t find it, feta is the closest substitute. It adds that salty tang that balances the creaminess.
Fresh cilantro (¼ cup, chopped) — For garnish. It adds freshness and color. If your kids hate cilantro, you can skip it or use parsley, though it won’t be authentic.
Jalapeño (1, optional, diced) — For heat. Remove seeds for less spice. I usually leave some seeds in for my husband but take them out for the kids.
Optional Add-ins:
Diced bell peppers (1 cup) — Red or green peppers add sweetness and crunch. I throw them in sometimes for extra veggies.
Black olives (½ cup, sliced) — Adds a briny note. Not traditional, but I like it.
Equipment Needed
You don’t need fancy equipment for this. Here’s what I actually use.
9×13 inch baking dish — A standard casserole dish works perfectly. I use a ceramic one that goes from oven to table. Glass works too, but ceramic retains heat better.
Large mixing bowl — For combining the chicken, corn, beans, and cream cheese mixture. Anything big enough to fit 3 cups of chicken and the other ingredients.
Wooden spoon or spatula — For stirring. You need something sturdy enough to break up the cream cheese.
Small saucepan or microwave-safe bowl — To soften the cream cheese. I usually microwave it, but you can soften it in the bowl with hot water.
Measuring cups and spoons — Standard stuff. Dollar store versions work fine.
Sharp knife and cutting board — For chopping green onions, jalapeño, and garlic.
Colander — For rinsing the black beans.
Optional but nice:
Handheld mixer — If you’re lazy like me, use this to blend the cream cheese and broth until smooth. It saves arm fatigue.
Aluminum foil — To cover the casserole if you want to steam it first, though I usually skip this for a crispy top.
How to Make It: Step-by-Step
Alright, let’s make this! I’m walking you through exactly how I do it, including the little tricks I’ve picked up.
Step 1: Prep Your Chicken (5 minutes)
If you’re using raw chicken, season it with salt and pepper and cook it in a skillet or boil it until done (about 6-7 minutes per side for breasts). Let it rest for 5 minutes, then shred it with two forks. You should have about 3 cups. If using rotisserie chicken, just shred it. Set aside.
Step 2: Soften the Cream Cheese (2 minutes)
While the chicken cooks, place the softened cream cheese in a large mixing bowl. If it’s still cold, microwave it for 15-20 seconds until it’s pliable. Add the chicken broth, chili powder, cumin, minced garlic, and lime juice. Mix vigorously with a wooden spoon or spatula until smooth and creamy. There should be no lumps of cream cheese left.
Step 3: Combine the Base (3 minutes)
Add the shredded chicken, thawed frozen corn, and drained black beans to the cream cheese mixture. Stir until everything is evenly coated. The mixture will be thick and creamy. Taste it now—if you want more spice, add a pinch of cayenne. If you want more tang, add a squeeze of lime.
Step 4: Transfer to Baking Dish (1 minute)
Grease your 9×13 baking dish with cooking spray or a little butter. Pour the mixture into the dish and spread it out evenly with a spatula. You want a flat, even layer so it bakes uniformly.
Step 5: Add the Toppings (2 minutes)
Sprinkle the shredded Mexican blend cheese evenly over the top. Then, crumble the cotija cheese (or feta) over the cheese layer. If you’re using jalapeños, scatter them on top. The cheese should cover the entire surface.
Step 6: Bake (20 minutes)
Preheat your oven to 375°F (190°C). Place the casserole in the oven and bake for 20 minutes. You’ll know it’s done when the cheese is bubbly and starting to brown in spots, and the edges are hot. If you want a crispier top, broil for the last 2-3 minutes, but watch it closely so it doesn’t burn.
Step 7: Rest and Serve (5 minutes)
Remove from the oven and let it rest for 5 minutes. This helps the casserole set slightly so it’s easier to scoop. Garnish with sliced green onions and fresh cilantro. Serve warm with tortilla chips, rice, or a simple salad.
Total Time: About 30 minutes (10 minutes prep, 20 minutes baking)
Troubleshooting:
Casserole too dry? Add an extra ¼ cup of broth or a splash of milk.
Cheese not melting? Make sure your oven is fully preheated. If the top browns too fast, cover loosely with foil.
Too spicy? Next time, reduce the chili powder or remove jalapeño seeds.
Expert Tips & Tricks
Here’s everything I’ve learned from making this dozens of times. These tips will save you from my mistakes.
Softening Cream Cheese is Key
Cold cream cheese won’t mix smoothly. It will create lumpy pockets in your casserole. Soften it beforehand. I usually take it out of the fridge 30 minutes before I start cooking. If I forget, I microwave it in 10-second bursts.
Don’t Skip the Lime
The lime juice is what makes this taste like street corn, not just cheesy chicken. It cuts the fat and adds brightness. Use fresh lime juice—bottled tastes flat and artificial.
Use High-Quality Chili Powder
Not all chili powders are created equal. Some are just red dye and salt. Look for a blend that includes cumin, garlic, and oregano. McCormick is a reliable brand, or make your own with smoked paprika, cumin, garlic powder, and oregano.
Rest Before Serving
I know it’s hard to wait, but letting it rest for 5 minutes after baking helps the sauce thicken slightly. If you scoop it immediately, it might be a bit loose. Resting makes it easier to serve and enhances the flavors.
Customize the Cheese
While Mexican blend is traditional, you can use whatever cheese you like. Pepper jack adds heat. Gouda adds smokiness. Cheddar is classic. Just make sure it melts well.
Make-Ahead Strategy
You can assemble this casserole up to 24 hours ahead. Cover it tightly and refrigerate. When ready to bake, add 5-10 minutes to the baking time since it’s starting cold. This is perfect for meal prep or dinner parties.
Variations & Substitutions
Once you’ve nailed the basic version, here’s how you can mix it up. I’ve tried all of these.
Veggie-Loaded
Add 1 cup of diced bell peppers or zucchini to the base. It adds volume and nutrition without changing the flavor much. I do this when I want to sneak in more veggies for my kids.
Spicy Version
Add 1 diced jalapeño to the base, use pepper jack cheese, and add a dash of hot sauce to the cream cheese mixture. For extra heat, sprinkle crushed red pepper flakes on top before baking.
Smoky Version
Add 1 teaspoon of smoked paprika to the spices. It enhances the smoky flavor of the chili powder. This is my favorite variation for a deeper taste.
Gluten-Free
This recipe is naturally gluten-free! Just make sure your chili powder and cheese don’t have added gluten (rare, but check labels). Serve with gluten-free tortilla chips or rice.
Dairy-Free
Use dairy-free cream cheese (like Kite Hill or Miyoko’s) and dairy-free shredded cheese. The texture might be slightly different, but it still works. For the cotija, use a crumbled tofu seasoned with nutritional yeast and lime.
Protein Swap
Instead of chicken, use shredded pork or turkey. It works just as well. For a vegetarian version, replace chicken with extra beans or lentils.
Serving & Storage
How to Serve
I usually serve this straight from the baking dish at the dinner table—it looks rustic and stays warm. Here are some side dishes I love with it:
- Warm tortillas — For making tacos with the casserole filling.
- Fluffy rice — Cilantro-lime rice is perfect for soaking up the sauce.
- Simple green salad — A light salad with avocado and vinaigrette balances the richness.
- Tortilla chips — For dipping. Obviously.
Storage Instructions
Refrigerator: Store leftovers in an airtight container for up to 4 days. The flavors actually get better after a day or two as they meld together.
Reheating:
Oven: Reheat in a 350°F oven for 15-20 minutes, covered with foil, until warm. This keeps it moist.
Microwave: Heat in 1-minute intervals, stirring in between. Add a splash of water or broth if it looks dry.
Freezing:
You can freeze this casserole, but the texture of the cream cheese might change slightly upon thawing. It’s still delicious, just a bit grainier. Freeze in individual portions for easy lunches. Thaw in the fridge overnight before reheating.
Nutrition Information
I’m not a nutritionist, but here’s the breakdown if you’re tracking. Note that this is an estimate based on standard ingredients.
Per Serving (based on 6 servings):
- Calories: 380
- Protein: 28g
- Carbs: 18g
- Fiber: 3g
- Sugar: 4g
- Fat: 22g
- Sodium: 580mg
What’s Good:
High in protein from the chicken and cheese. Good source of calcium. The corn and beans add fiber and vitamins.
What to Know:
Higher in calories due to the cream cheese and cheese. Sodium can be high if you use canned beans and broth—use low-sodium versions to reduce. Contains dairy and gluten (if using non-GF spices).
My Take:
This is comfort food. It’s rich and satisfying. I don’t view it as a diet meal, but it’s balanced enough for a regular weeknight dinner. When I want to make it lighter, I reduce the cheese by half and add extra veggies. But usually? I just enjoy a reasonable portion and love it.
Final Thoughts
So that’s my Street Corn Chicken Casserole! I’ve probably talked your ear off at this point, but when you make a recipe this often, you have a lot to say about it. It has saved weeknight dinners more times than I can count. It’s my answer to “what’s for dinner” when I’m tired, don’t want takeout, and still want something that tastes really good.
My kids are happy, my husband’s happy, and I’m happy because I’m not stressed about cooking. It’s flavorful, easy, and uses simple ingredients. Make it yours! Try different add-ins, swap in your favorite vegetables, adjust the spice level. The best recipes are the ones you adapt to your family’s tastes.
If you make this, drop a comment and let me know what you think! I love hearing how recipes turn out in your kitchen. And if something doesn’t work, tell me that too—I’m here to help troubleshoot. Happy cooking! And I hope your kitchen smells half as good as mine does right now.
Frequently Asked Questions
Can I use fresh corn instead of frozen?
Yes! You can use about 3-4 ears of fresh corn, cut off the cob. Fresh corn is sweeter, so you might not need to add extra sugar if the recipe called for it (though this one doesn’t). Just make sure the kernels are thawed if you’ve chilled them, or add them directly if they’re fresh. Frozen corn is just more convenient and just as good.
Why did my casserole turn out watery?
This usually happens if you didn’t drain the black beans and corn thoroughly, or if you added too much broth. Make sure to rinse and drain the beans well. Also, frozen corn releases water as it thaws—pat it dry with a paper towel before adding. If your casserole is still watery after baking, let it rest for 10 minutes before serving; it will thicken up.
Can I make this ahead for a dinner party?
Absolutely. Assemble the casserole up to 24 hours in advance. Cover it tightly and refrigerate. When you’re ready to serve, take it out of the fridge and let it sit for 20 minutes while the oven preheats. Bake as directed, adding 5-10 minutes to the cooking time since it’s starting cold. This is a great way to reduce stress during a party.
What can I serve with this casserole?
I love serving it with warm flour tortillas to make tacos, or with cilantro-lime rice. A simple green salad with avocado and a light vinaigrette cuts through the richness. Tortilla chips are a must for dipping. It also goes well with roasted vegetables like asparagus or broccoli.
Is this recipe spicy?
It’s mildly spicy. The chili powder adds a smoky flavor with a little heat, but it’s not overwhelming. If you want it milder, use half the chili powder and skip the jalapeño. If you want it spicier, add diced jalapeños and use pepper jack cheese. You have full control over the heat level.
Can I freeze this casserole?
Yes, you can freeze it. Let it cool completely, then cover tightly with plastic wrap and foil. Freeze for up to 3 months. Thaw in the fridge overnight before reheating. The texture might be slightly different due to the cream cheese, but it’s still delicious. I usually freeze individual portions for easy lunches.
Can I use rotisserie chicken?
Yes! This is actually my preferred method. Shred about 3 cups of rotisserie chicken and add it to the mixture. It saves time and adds great flavor. Just make sure to remove any skin and bones before shredding.
Pin This Recipe!
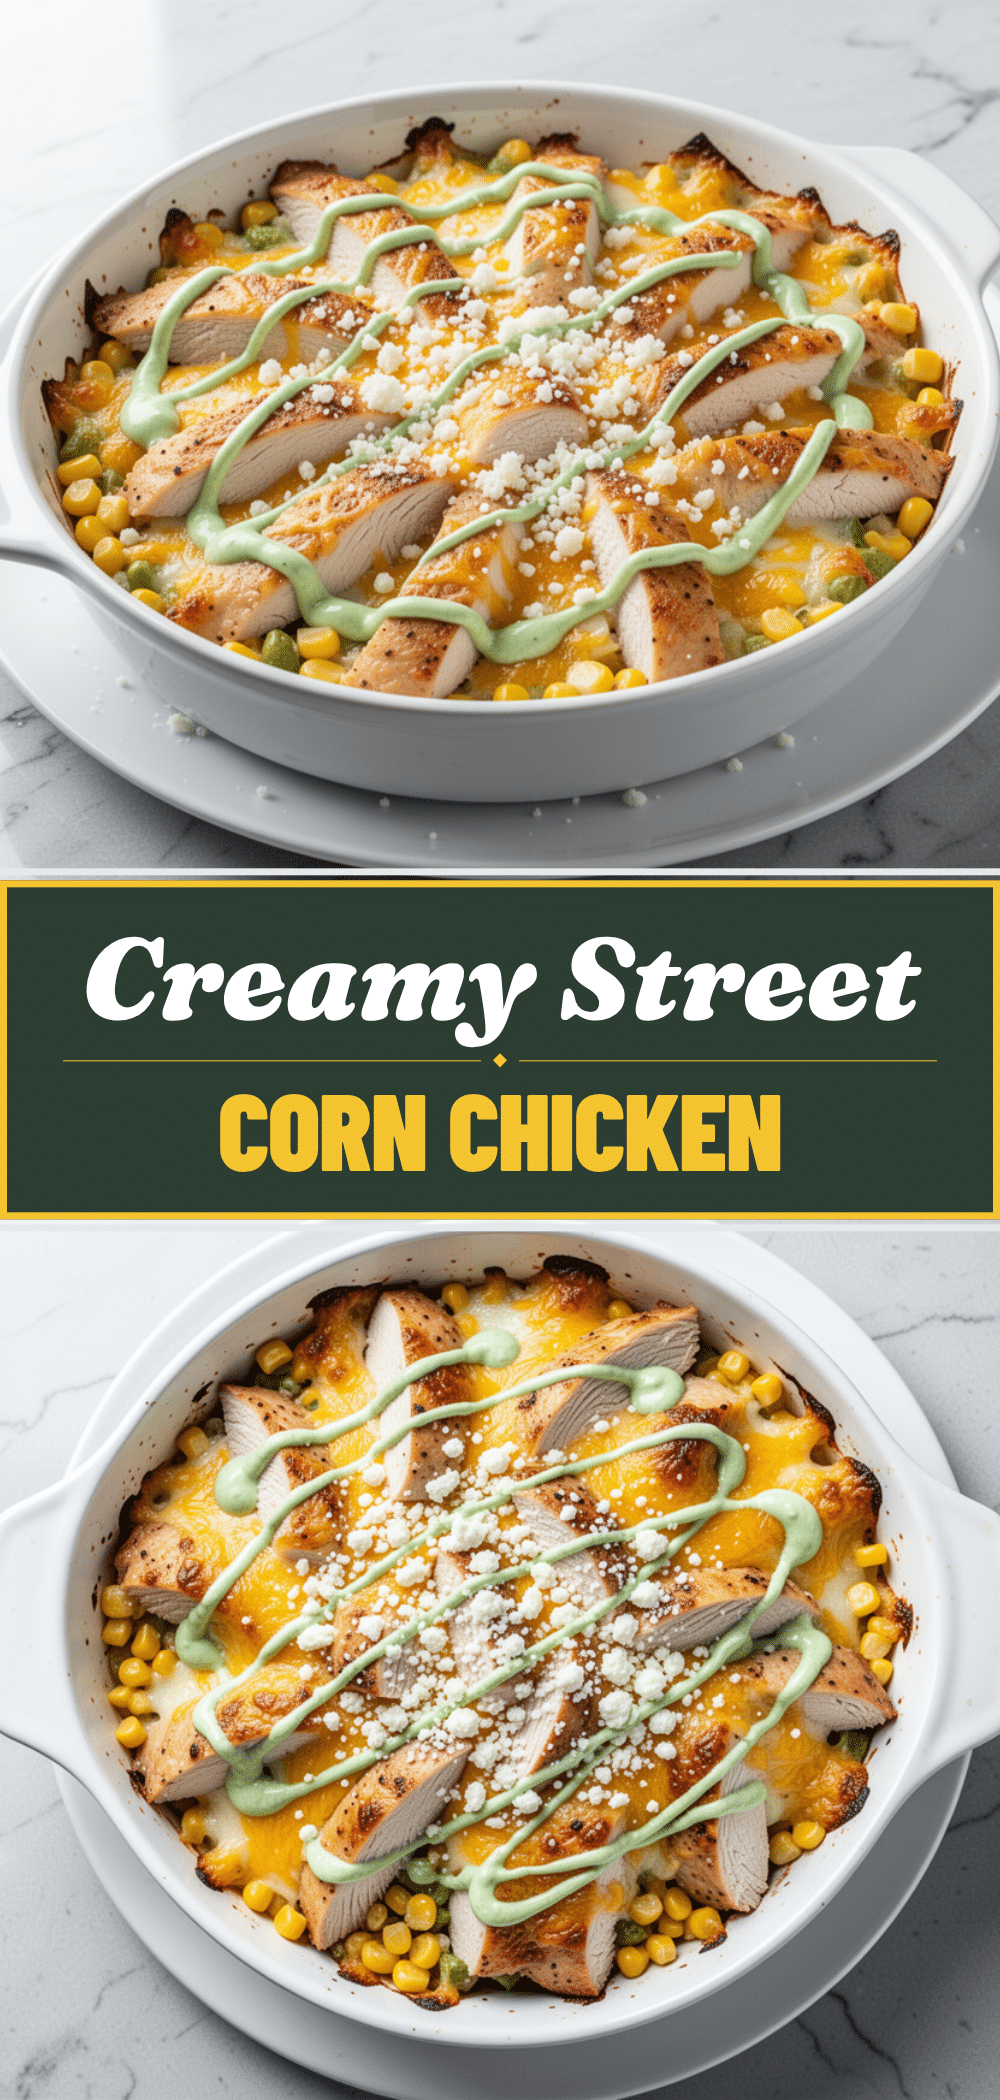

Street Corn Chicken Casserole
- Total Time: 30 minutes
- Yield: 6 servings 1x
Description
A creamy, smoky, and tangy weeknight dinner that combines the flavors of Mexican street corn with tender shredded chicken and melted cheese in a cozy casserole.
Ingredients
- 3 cups cooked and shredded chicken breast or thighs
- 2 cups frozen corn (thawed)
- 8 oz cream cheese (softened)
- 1 can (15 oz) black beans (drained and rinsed)
- 1/2 cup chicken broth (low-sodium)
- 1 tablespoon chili powder
- 1 teaspoon cumin
- 3 cloves garlic (minced)
- 2 tablespoons lime juice (freshly squeezed)
- 4 stalks green onions (sliced)
- 2 cups shredded Mexican blend cheese
- 1/2 cup cotija cheese (crumbled)
- 1/4 cup fresh cilantro (chopped)
- 1 jalapeño (diced, optional)
Instructions
- Preheat oven to 375°F (190°C).
- If using raw chicken, season with salt and pepper and cook until done, then shred. If using rotisserie chicken, shred it. Set aside.
- In a large mixing bowl, combine softened cream cheese, chicken broth, chili powder, cumin, minced garlic, and lime juice. Mix vigorously until smooth.
- Add the shredded chicken, thawed corn, and drained black beans to the cream cheese mixture. Stir until evenly coated.
- Grease a 9×13 inch baking dish. Pour the mixture into the dish and spread evenly.
- Sprinkle shredded Mexican blend cheese and crumbled cotija cheese over the top. Add diced jalapeño if using.
- Bake for 20 minutes, or until cheese is bubbly and starting to brown.
- Optional: Broil for 2-3 minutes for a crispier top, watching closely to prevent burning.
- Remove from oven and let rest for 5 minutes before serving.
- Garnish with green onions and fresh cilantro. Serve warm.
Notes
Softening the cream cheese is key to avoiding lumps. Use fresh lime juice for the best flavor. This recipe is naturally gluten-free if you check your spice labels. It can be assembled up to 24 hours ahead and refrigerated before baking.
- Prep Time: 10 minutes
- Cook Time: 20 minutes
- Category: Main Course
- Cuisine: Mexican
Nutrition
- Serving Size: 1 serving
- Calories: 380
- Sugar: 4
- Sodium: 580
- Fat: 22
- Saturated Fat: 12
- Carbohydrates: 18
- Fiber: 3
- Protein: 28
Keywords: street corn chicken, casserole, weeknight dinner, Mexican food, chicken recipe, easy dinner, family friendly