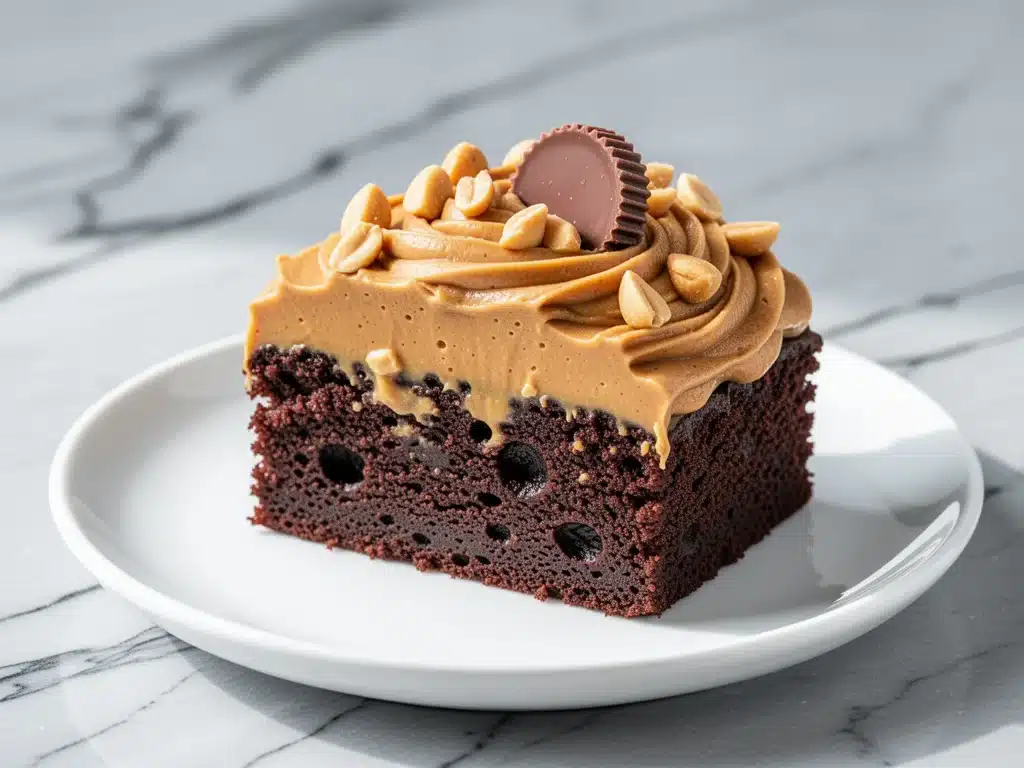
I have a confession to make. I used to think that combining chocolate and peanut butter in a single cake was asking too much of my tastebuds. I figured it would be a flavor clash, a sugary mess where the two personalities fought for dominance. Then I made this Reese’s Peanut Butter Chocolate Cake for my nephew’s birthday, and suddenly, everything I thought I knew about dessert was wrong.
The first bite was silence. Not awkward silence, but the kind of silence that happens when your brain is too busy processing flavor to form words. The chocolate cake was impossibly moist, rich without being heavy, and the peanut butter frosting was salty, sweet, and creamy in all the right ways. It tasted exactly like my favorite candy bar, but elevated—like someone took the magic of a peanut butter cup and baked it into something substantial and celebratory.
Since that day, this Reese’s Peanut Butter Chocolate Cake has become my go-to for any occasion that demands a little extra drama. Whether it’s a last-minute dinner party where I need to impress, a birthday, or just a Tuesday when I need to treat myself, this cake shows up. It’s not complicated. You don’t need to be a pastry chef. But the result? It looks and tastes like you spent hours in a professional kitchen.
I’ve tested this recipe at least ten times over the last year. I’ve tweaked the flour ratios, adjusted the sugar levels, and even experimented with different types of peanut butter to find the perfect balance. What I’ve landed on is a recipe that is foolproof, deeply flavorful, and honestly, a little bit addictive. If you’re a fan of rich chocolate desserts or creamy peanut butter treats, you’re going to want to pin this one.
Why You’ll Love This Reese’s Peanut Butter Chocolate Cake
There are plenty of chocolate cakes out there. And there are plenty of peanut butter desserts. But this Reese’s Peanut Butter Chocolate Cake sits in that sweet spot where comfort meets indulgence. Here’s why it keeps me coming back to the kitchen:
It Tastes Like a Candy Bar, But Better
Let’s be honest—we all love a Reese’s Peanut Butter Cup. But eating one is a snack. Eating a slice of this cake is an experience. The flavors are amplified. The chocolate is deeper, and the peanut butter is more nuanced because it’s baked into the frosting and layered throughout the cake. It’s like the candy bar had a gourmet makeover.
It’s Surprisingly Easy
I know what you’re thinking: “Cake sounds like a lot of work.” But this recipe is designed for real life. You don’t need to whip egg whites to stiff peaks or temper chocolate. It’s a one-bowl cake method for the batter, and the frosting comes together in the same bowl. If you can mix batter and spread frosting, you can make this. I’ve made it after long days at work when I had zero energy but zero desire for takeout. It takes about 45 minutes from start to finish, including cooling time.
It’s Moist Without Being Heavy
One of the biggest complaints I hear about homemade chocolate cakes is that they can be dry or dense. This one is neither. The combination of buttermilk, oil, and hot coffee (yes, coffee!) creates a cake that is tender, moist, and incredibly soft. It doesn’t crumble everywhere. It holds its shape beautifully for slicing, yet melts in your mouth.
It’s a Crowd-Pleaser
I’ve served this to picky eaters, chocolate purists, and peanut butter addicts. Everyone loves it. Even people who say they “don’t really like peanut butter” usually change their minds after one bite of this frosting. It’s salty, sweet, and creamy in a way that feels familiar and comforting.
Makes Amazing Leftovers
Let’s be real—it rarely lasts more than two days. But if it does, the leftovers are actually better the next day. The flavors meld together overnight, and the cake becomes even more moist. I deliberately make this on Sunday so I have cake for Monday morning coffee. It’s become a ritual.
Ingredients You’ll Need for the Ultimate Chocolate Peanut Butter Cake
Here’s the best part: you probably have most of these ingredients already. This isn’t a recipe that requires a trip to three different specialty stores. It uses pantry staples and a few key items that make all the difference.
For the Chocolate Cake:
All-purpose flour (2 cups / 250g) — The base of the cake. Don’t try to substitute with whole wheat unless you want a denser, nuttier texture. For this recipe, we want that classic, tender crumb. Sift it if it’s lumpy.
Cocoa powder (3/4 cup / 75g) — This is where the chocolate flavor lives. Use unsweetened cocoa powder, not drinking chocolate mix. I prefer Dutch-processed cocoa powder because it’s darker and has a richer, less acidic flavor. It gives the cake that deep, almost black color.
Baking soda (1 1/2 teaspoons) — And baking powder (1/2 teaspoon). The baking soda reacts with the acidic ingredients (buttermilk and coffee) to create lift. Don’t skip these, or your cake won’t rise properly.
Salt (1 teaspoon) — Essential for balancing the sweetness. It makes the chocolate taste more like chocolate.
Granulated sugar (1 3/4 cups / 350g) — Yes, it’s sweet. But the salt and coffee cut through it. Don’t reduce the sugar unless you want a dry cake; sugar adds moisture.
Buttermilk (1 cup / 240ml) — This is the secret weapon. Buttermilk tenderizes the gluten in the flour, keeping the cake soft. If you don’t have buttermilk, make your own by adding 1 tablespoon of lemon juice or white vinegar to 1 cup of milk and letting it sit for 5 minutes.
Vegetable oil (1/2 cup / 120ml) — Oil keeps cakes moister than butter. Butter adds flavor, but oil adds texture. This cake is meant to be moist, so stick with oil.
Large eggs (2) — Room temperature eggs emulsify better into the batter. Cold eggs can cause the batter to break, leading to a dense cake.
Vanilla extract (2 teaspoons) — Pure vanilla, not imitation. It rounds out the chocolate and peanut butter flavors.
Hot brewed coffee (1 cup / 240ml) — This sounds weird, but trust me. Coffee doesn’t make the cake taste like coffee. It intensifies the chocolate flavor. If you’re avoiding caffeine, use hot water, but the coffee is better.
For the Peanut Butter Frosting:
Salted butter (1 cup / 226g) — Softened to room temperature. This is crucial. If the butter is too cold, you’ll get lumps. If it’s melted, the frosting will be runny.
Peanut butter (1 cup / 250g) — Use creamy, natural peanut butter if possible. I love Jif or Skippy for consistency, but if you use natural peanut butter, make sure it’s well-stirred and not too oily. Avoid “no-stir” varieties with hydrogenated oils if you can help it; they can make the frosting grainy.
Confectioners’ sugar (4 cups / 480g) — Also known as powdered sugar. Sift it if it’s clumpy. This gives the frosting its smooth, fluffy texture.
Heavy cream (2-3 tablespoons) — Just enough to loosen the frosting to a spreadable consistency. Add it one tablespoon at a time.
Vanilla extract (1 teaspoon) — To tie the flavors together.
Chocolate chips (1/2 cup / 80g) — Mini chocolate chips are perfect for sprinkling on top. They mimic the candy bar chunks.
Equipment You’ll Need
You don’t need fancy gadgets for this. Here’s what I actually use:
Two 9-inch round cake pans — Grease them well and line the bottoms with parchment paper. This is non-negotiable if you want the cake to come out cleanly. I use Baker’s Joy or just butter and flour.
Large mixing bowl — A 5-quart bowl is ideal. You’ll be dumping a lot of ingredients in here.
Electric mixer — A hand mixer or stand mixer with a paddle attachment makes life easier. You can do it by hand, but your arms will thank you if you use a machine.
Whisk — For mixing the dry ingredients.
Wire cooling rack — Let the cakes cool completely before frosting. Warm cake = melted frosting = disaster.
Spatula — A rubber spatula is great for scraping down the sides of the bowl and spreading the frosting.
Cake turntable (optional) — If you want your cake to look professional, a turntable helps. But a lazy susan or just a plate works fine too.
How to Make It: Step-by-Step
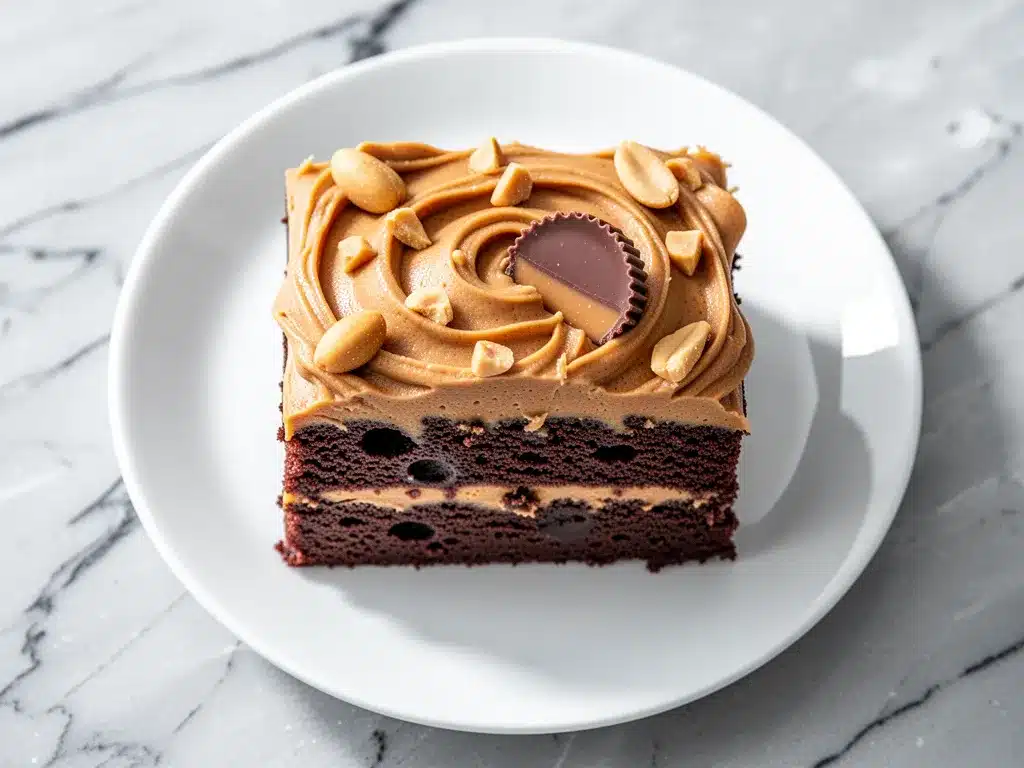
Alright, let’s make this! I’m walking you through exactly how I do it, including the little tricks I’ve picked up.
Step 1: Prep Your Pans and Oven
Preheat your oven to 350°F (175°C). Grease your two 9-inch round cake pans with butter or non-stick spray. Line the bottoms with parchment paper circles. This ensures the cakes don’t stick and can be removed easily. Dust the pans lightly with flour or cocoa powder, tapping out the excess.
Step 2: Mix the Dry Ingredients
In your large mixing bowl, whisk together the flour, cocoa powder, baking soda, baking powder, salt, and sugar. Make sure there are no lumps of cocoa powder. Sift it if you have to. This step is important for even distribution of leavening agents.
Step 3: Add the Wet Ingredients
Add the buttermilk, vegetable oil, eggs, and vanilla extract to the dry ingredients. Beat on medium speed with your electric mixer for about 2 minutes. The batter will be thick. Scrape down the sides of the bowl with a spatula to make sure everything is incorporated.
Step 4: Add the Hot Coffee
Slowly pour in the hot brewed coffee while mixing on low speed. Be careful—it will splatter a little. Once added, increase the mixer speed to medium and beat for another 2 minutes. The batter will become thin and liquidy. This is normal! The coffee hydrates the cocoa powder and creates a smooth, pourable batter. Don’t worry about the thinness; it’s what makes the cake moist.
Step 5: Bake the Cakes
Divide the batter evenly between the two prepared pans. Bake for 30-35 minutes. You’ll know they’re done when a toothpick inserted into the center comes out clean or with just a few moist crumbs. Do not overbake, or the cake will be dry. Let the cakes cool in the pans for 10 minutes, then remove them from the pans and let them cool completely on a wire rack. This is crucial—warm cake will melt the frosting.
Step 6: Make the Peanut Butter Frosting
While the cakes cool, make the frosting. In a large bowl, beat the softened butter and peanut butter together until smooth and creamy. Add the vanilla extract. Gradually add the confectioners’ sugar, one cup at a time, mixing on low speed to avoid a sugar cloud. Once all the sugar is added, beat on high speed for 2-3 minutes until the frosting is light and fluffy. Add heavy cream, one tablespoon at a time, until you reach your desired consistency. It should be thick enough to hold peaks but soft enough to spread easily.
Step 7: Assemble the Cake
Place one cake layer on your serving plate or turntable. Spread a generous layer of peanut butter frosting over the top. Place the second cake layer on top. Frost the top and sides of the cake with the remaining frosting. Use a spatula to create swirls or a smooth finish—whatever looks good to you.
Step 8: Garnish and Chill
Sprinkle mini chocolate chips over the top for that classic Reese’s look. Chill the cake in the refrigerator for at least 30 minutes before slicing. This sets the frosting and makes slicing cleaner.
Expert Tips & Tricks
Here’s everything I’ve learned from making this dozens of times. These tips will save you from my mistakes.
Don’t Skip the Coffee
I know it sounds odd, but the coffee is essential. It doesn’t make the cake taste like coffee; it makes the chocolate taste more like chocolate. It’s a flavor enhancer, like salt. If you’re sensitive to caffeine, use hot water, but the coffee is better.
Room Temperature Ingredients Matter
Make sure your eggs and butter are at room temperature. Cold ingredients don’t emulsify well, which can lead to a dense cake or lumpy frosting. If you forgot to take them out, warm the eggs in a bowl of warm water for 5 minutes, or microwave the butter in short bursts until soft.
Don’t Overmix the Batter
Once you add the flour, mix just until combined. Overmixing develops gluten, which makes the cake tough. For this recipe, since we’re using oil and buttermilk, it’s a bit more forgiving, but still, don’t go overboard.
Frosting Consistency
If your frosting is too stiff, add more cream. If it’s too runny, add more powdered sugar. The climate in your kitchen can affect this—humidity makes sugar absorb moisture. Adjust as needed.
Chill Before Slicing
This is the biggest mistake people make. They cut into the cake immediately after frosting, and it’s a mess. Chill it for at least 30 minutes. The frosting sets, and the cake firms up, making for clean, beautiful slices.
Variations & Substitutions
Once you’ve nailed the basic version, here’s how you can mix it up. I’ve tried all of these.
Gluten-Free Version
Use a 1:1 gluten-free flour blend. The texture might be slightly denser, but it still works. Make sure your baking powder and cocoa powder are certified gluten-free.
Dairy-Free Version
Use dairy-free butter and almond milk (or oat milk) mixed with lemon juice for the buttermilk substitute. Use dairy-free chocolate chips. The frosting will be slightly different in texture but still delicious.
Mini Cupcakes
This batter makes about 24 cupcakes. Bake at 350°F for 18-20 minutes. Fill cupcake liners 2/3 full. Frost with a piping bag for a fancy look.
Extra Chocolate
Add 1/2 cup of mini chocolate chips to the batter for extra gooeyness. Or drizzle melted chocolate over the top before chilling.
Salted Caramel
Drizzle salted caramel sauce over the layers before frosting. This adds a gooey, sweet-salty element that complements the peanut butter perfectly.
Serving & Storage
How to serve this beast:
How to Serve:
I usually serve this straight from the fridge, sliced into generous wedges. It’s rich, so you don’t need a huge piece. Pair it with a cup of hot coffee or tea to cut through the sweetness. It’s also great with a glass of cold milk or a scoop of vanilla ice cream if you want to go all out.
Side Dishes:
This is a dessert, so it doesn’t really have side dishes. But if you’re having a dessert party, serve it with fresh berries (strawberries or raspberries) to add a tart contrast to the sweet cake.
Storage Instructions:
Refrigerator:
Store covered in the refrigerator for up to 5 days. The frosting will harden in the fridge, so let it sit at room temperature for 15-20 minutes before serving to soften it up.
Freezing:
This cake freezes well! Wrap the unfrosted cake layers tightly in plastic wrap and then aluminum foil. Freeze for up to 3 months. Thaw overnight in the fridge before frosting. You can also freeze the frosted cake, but it’s trickier. Wrap tightly and thaw in the fridge.
Pro Tip:
If you’re making this ahead, bake the cakes a day ahead, wrap them tightly, and store at room temperature. Frost them the day you serve. This is the best way to ensure freshness.
Nutrition Information
I’m not a nutritionist, but here’s the breakdown if you’re tracking. Keep in mind that this is a rich, indulgent dessert, so portion control is key.
Per Serving (based on 12 slices):
Calories: 480
Protein: 6g
Carbs: 52g
Fiber: 2g
Sugar: 40g
Fat: 28g
Saturated Fat: 12g
Cholesterol: 50mg
Sodium: 280mg
Calcium: 80mg
What’s Good: It provides some protein from the peanut butter and eggs. The cocoa powder has antioxidants.
What to Know: It’s high in sugar and saturated fat. This is a treat, not a health food. Enjoy it mindfully.
Final Thoughts
So that’s my Reese’s Peanut Butter Chocolate Cake! I’ve probably talked your ear off at this point, but when you make a recipe this often, you have a lot to say about it. This cake has saved me more times than I can count. It’s my answer to “what’s for dessert” when I want something that feels special but doesn’t require a degree in baking.
My kids are happy, my husband’s happy, and I’m happy because I’m not stressed about cooking. It’s reliable, delicious, and always a crowd-pleaser. Make it yours! Try different add-ins, swap in your favorite chocolate chips, or adjust the peanut butter to your taste. The best recipes are the ones you adapt to your family’s tastes.
If you make this, drop a comment and let me know what you think! I love hearing how recipes turn out in your kitchen. And if something doesn’t work, tell me that too—I’m here to help troubleshoot.
Happy baking! And I hope your kitchen smells half as good as mine does right now.
Frequently Asked Questions
Q: Can I use a box mix for the cake?
You can! If you’re in a rush, use a chocolate cake mix. Add an extra egg and use the buttermilk substitution I mentioned. It won’t be quite as rich, but it’s a great shortcut. Just don’t tell anyone.
Q: Why did my cake sink in the middle?
This usually happens if the oven temperature is too high or if you opened the oven door too early. Also, underbaking can cause sinking. Make sure your toothpick comes out clean before removing it from the oven.
Q: Can I make this a day ahead?
Absolutely. Bake the cakes, let them cool, wrap them tightly, and store at room temperature. Frost them the day you serve. This is actually better because the cake has time to settle.
Q: Why is my frosting too runny?
Probably because your butter was too warm or you added too much cream. Add more powdered sugar, a little at a time, and chill the frosting in the fridge for 15 minutes before using.
Q: Can I use crunchy peanut butter?
Yes, but it will change the texture of the frosting. It will be less smooth. I recommend creamy peanut butter for a classic Reese’s look, but crunchy adds a nice crunch if you like it.
Q: How do I store leftovers?
Keep it covered in the refrigerator for up to 5 days. Let it come to room temperature before serving for the best texture and flavor.
Q: Can I freeze this cake?
Yes, freeze the unfrosted layers for up to 3 months. Thaw overnight in the fridge before frosting. The frosted cake can also be frozen, but it’s harder to transport without damage.
Pin This Recipe!
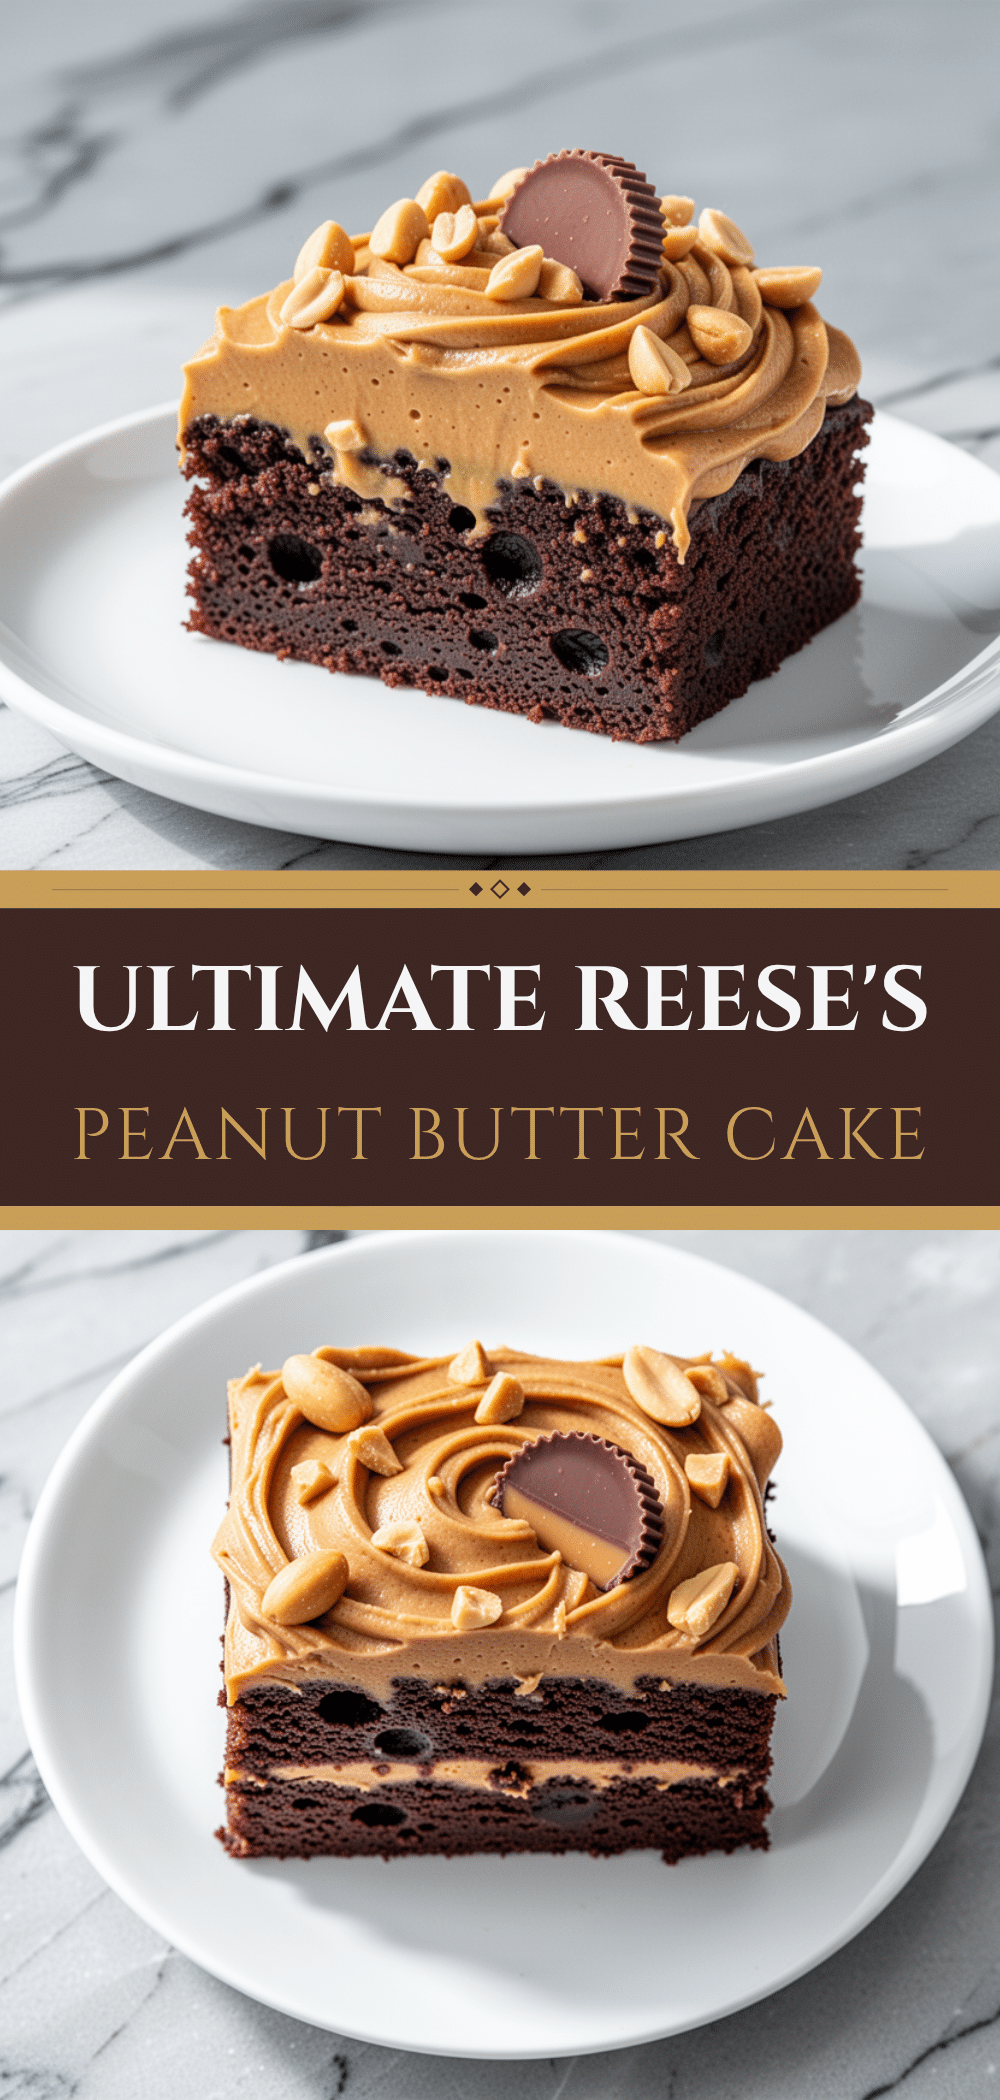
Reeses Peanut Butter Chocolate Cake: Best Easy Recipe
- Total Time: 45 minutes
- Yield: 12 servings 1x
Description
A moist, rich chocolate cake with creamy peanut butter frosting that tastes like an elevated Reese’s Peanut Butter Cup. This foolproof, one-bowl recipe is perfect for birthdays or any occasion.
Ingredients
- 2 cups (250g) all-purpose flour
- 3/4 cup (75g) unsweetened cocoa powder (preferably Dutch-processed)
- 1 1/2 teaspoons baking soda
- 1/2 teaspoon baking powder
- 1 teaspoon salt
- 1 3/4 cups (350g) granulated sugar
- 1 cup (240ml) buttermilk
- 1/2 cup (120ml) vegetable oil
- 2 large eggs, room temperature
- 2 teaspoons vanilla extract
- 1 cup (240ml) hot brewed coffee
- 1 cup (226g) salted butter, softened
- 1 cup (250g) creamy peanut butter
- 4 cups (480g) confectioners’ sugar
- 2–3 tablespoons heavy cream
- 1 teaspoon vanilla extract
- 1/2 cup (80g) mini chocolate chips
Instructions
- Preheat oven to 350°F (175°C). Grease two 9-inch round cake pans and line bottoms with parchment paper. Dust with flour or cocoa powder.
- In a large mixing bowl, whisk together flour, cocoa powder, baking soda, baking powder, salt, and sugar until no lumps remain.
- Add buttermilk, vegetable oil, eggs, and vanilla extract to the dry ingredients. Beat on medium speed for 2 minutes until combined. Scrape down sides of the bowl.
- Slowly pour in hot brewed coffee while mixing on low speed. Increase speed to medium and beat for another 2 minutes until batter is thin and smooth.
- Divide batter evenly between prepared pans. Bake for 30-35 minutes or until a toothpick inserted in the center comes out clean.
- Cool cakes in pans for 10 minutes, then remove to a wire rack to cool completely.
- While cakes cool, beat softened butter and peanut butter together until smooth. Add 1 teaspoon vanilla extract.
- Gradually add confectioners’ sugar, one cup at a time, mixing on low speed. Beat on high speed for 2-3 minutes until light and fluffy.
- Add heavy cream, one tablespoon at a time, until frosting reaches a spreadable consistency.
- Place one cake layer on a serving plate. Spread a generous layer of frosting on top. Add second layer.
- Frost top and sides of the cake with remaining frosting. Sprinkle mini chocolate chips over the top.
- Chill in refrigerator for at least 30 minutes before slicing to set the frosting.
Notes
Coffee intensifies the chocolate flavor without making the cake taste like coffee. Ensure eggs and butter are at room temperature for best emulsification. Do not overmix the batter. Chill the cake before slicing for clean cuts. Leftovers keep well in the fridge for up to 5 days.
- Prep Time: 15 minutes
- Cook Time: 30 minutes
- Category: Dessert
- Cuisine: American
Nutrition
- Serving Size: 1 slice
- Calories: 480
- Sugar: 40
- Sodium: 280
- Fat: 28
- Saturated Fat: 12
- Carbohydrates: 52
- Fiber: 2
- Protein: 6
Keywords: Reese's cake, peanut butter chocolate cake, easy cake recipe, moist chocolate cake, peanut butter frosting, birthday cake, dessert recipe