My kitchen used to smell like burnt coffee and desperation every weekday morning. You know the vibe: it’s 6:45 AM, the alarm is blaring, I’m running around looking for my keys, and breakfast is an afterthought—usually a stale granola bar or, worse, nothing at all. I was running on fumes, relying on caffeine to keep my eyes open until lunch, and my energy was crashing by 10 AM. It wasn’t sustainable. I wasn’t happy. And my husband definitely wasn’t happy.
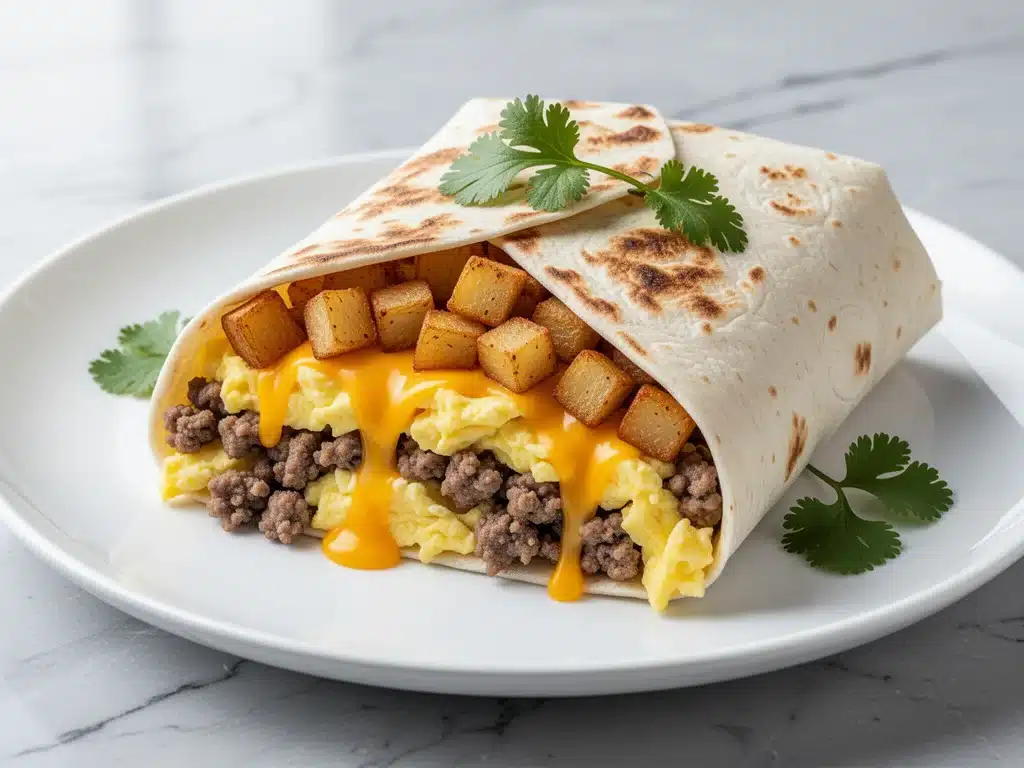
Then, last autumn, I had a revelation. I realized I was trying to cook breakfast *every single morning*. Who has time for that? The answer, of course, is nobody. So, I decided to tackle the biggest meal of the day on a Sunday afternoon. I made a massive batch of these loaded breakfast burritos with crispy potatoes. I wrapped them in foil, froze them, and for the first time in years, I woke up without panic. I just pulled one out, microwaved it, and ate it while getting the kids ready for school. It felt like cheating. It felt like magic. It felt like freedom.
That single Sunday afternoon changed everything. Now, I make these breakfast burritos every other Sunday. They are the backbone of our weekday mornings. The secret isn’t just the food—it’s the crispy potatoes inside. Most breakfast burritos use mushy, soggy hash browns. But if you take the time to actually roast diced potatoes until they’re golden and crisp, the texture changes completely. It turns a simple breakfast into something that feels indulgent, like you’re eating at a diner, but it’s actually healthy, filling, and ready in seconds.
I’ve tested this batch-cooking method at least twenty times. I’ve tried different cheeses, different meats, and different potato cuts. This version? This is the one that sticks. It’s sturdy enough to hold up in the freezer but tender enough to enjoy fresh. If you’re tired of the same old high protein peanut butter banana shake or plain oatmeal, this is the upgrade you’ve been waiting for. Let’s talk about why this recipe is about to become your new best friend.
Why You’ll Love This Batch-Cooked Breakfast Strategy
There are a dozen reasons I keep coming back to these loaded breakfast burritos, but let’s be real: it’s mostly because they save my sanity. Here’s the breakdown of why this recipe deserves a permanent spot in your freezer.
Stupid Simple Prep — Seriously, if you can dice a potato and scramble eggs, you can master this. I’ve walked my teenage daughter through the whole process over FaceTime while she was at college. She made a batch for her dorm fridge, and her roommates were jealous. It’s that easy.
Lightning Fast Mornings — On weekday mornings, this takes exactly three minutes. You pull the foil-wrapped burrito out of the freezer, wrap it in a damp paper towel, and zap it. Three minutes. That’s it. No chopping, no heating pans, no cleanup. I make this on mornings when I’m running late for work meetings or when I just need five more minutes of sleep.
Freezer-Friendly Forever — These burritos don’t just survive the freezer; they thrive in it. I’ve made them three weeks ago, and they taste just as good as when I made them on day one. I usually make two dozen at a time, so I have a whole month’s worth of breakfasts prepped. This is my answer to “what’s for breakfast?” when I’m tired, don’t want takeout, and still want something that tastes really good.
Customizable for Everyone — I’ve served these to my keto-loving brother, my vegetarian sister, and my husband who is obsessed with bacon. Everyone wins. You can swap the meat, change the cheese, or add extra veggies. It’s a blank canvas for your family’s tastes. I deliberately make extra for lunch throughout the week because they actually taste better reheated the next day.
Budget-Smart — Potatoes are cheap. Eggs are cheap. When you buy in bulk and cook at home, this costs pennies per burrito compared to buying them at the drive-thru. Feeds 4-6 people for under $15. That’s less than one meal at a fast-food place, and it’s way healthier.
This is my go-to when I need dinner to just work. No complicated techniques, no weird ingredients, just reliable, delicious food that makes everyone happy.
Ingredients You’ll Need for the Perfect Burrito
Here’s the best part: you probably have most of this already. I’m particular about a few things, and I’ll tell you exactly why. This looks like a long list, but most of it is pantry basics or easy fridge finds.
For the Crispy Potato Base
Yukon Gold potatoes (3 large, about 1.5 lbs / 680g) — I use Yukon Golds because they’re waxy enough to hold their shape but creamy inside. Russets fall apart too much. Dice them into half-inch cubes. Don’t skip the dicing—uniform size means even cooking.
Vegetable oil or avocado oil (3 tablespoons) — You need a high smoke point oil for roasting. Olive oil can burn at high temps. I keep a bottle of avocado oil specifically for this. It gives a neutral, clean flavor.
Smoked paprika (1 teaspoon) — This is the secret weapon. It adds a smoky depth that makes the potatoes taste like they were cooked on a grill. Regular paprika works, but smoked is better. I buy mine in bulk.
Garlic powder (1 teaspoon) — Fresh garlic burns too fast here. Powder gives even flavor. Use the real stuff, not the cheap shaker.
Salt and black pepper — Generous amounts. The potatoes need seasoning before they hit the oven.
For the Filling
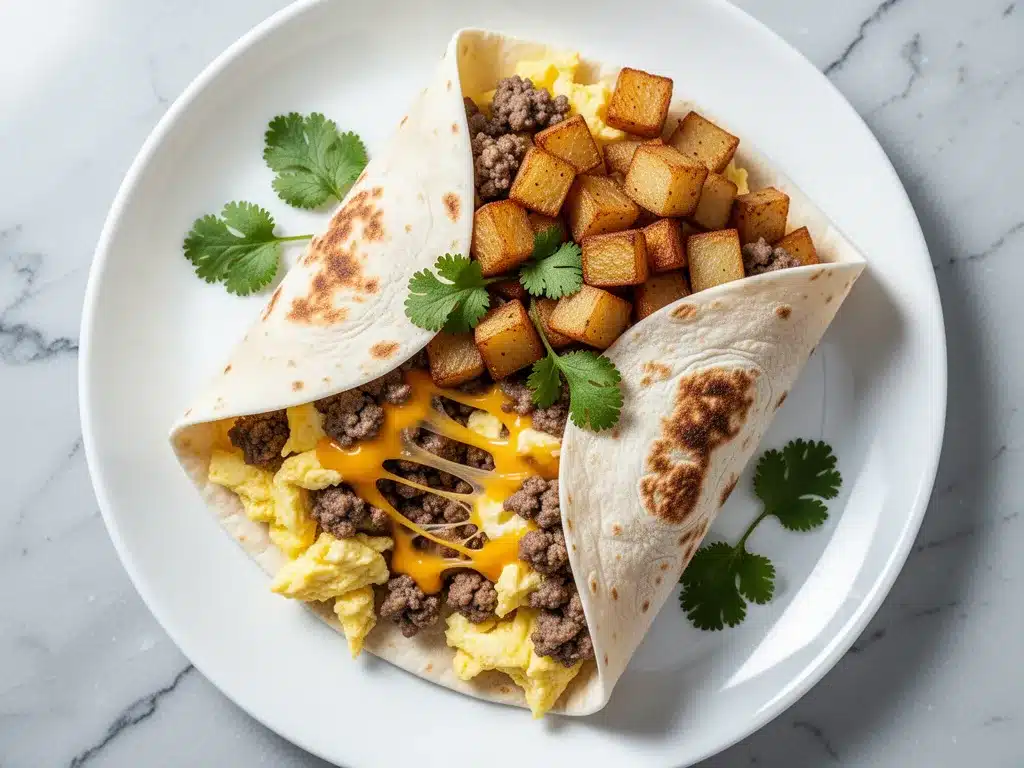
Eggs (8 large) — I use large eggs. If you’re making a huge batch, buy a dozen and freeze extras. Farm-fresh eggs have better color, but any large eggs work.
Milk (¼ cup / 60ml) — Just a splash to make the eggs fluffy. Whole milk is best, but 2% works fine. Don’t skip this; it changes the texture.
Cheddar cheese (1.5 cups / 170g, shredded) — Sharp cheddar has more flavor. Mild cheddar is too bland. Shred your own block—pre-shredded has anti-caking agents that stop it from melting smoothly. Trust me on this.
Bacon or sausage (1 pound / 450g) — I use thick-cut bacon because it stays crispier after freezing. If you prefer sausage, use breakfast links or bulk pork sausage. Cook it fully before adding it to the mix.
Onion (1 medium, diced) — Yellow onion is standard. White onion is sharper. I use yellow for sweetness. Dice it small so it cooks evenly with the eggs.
Salsa (½ cup / 120g) — I use a mild chunky salsa. It adds moisture and tang. If you like heat, use a medium or hot salsa. Just don’t use too much, or the burrito gets soggy.
Large flour tortillas (8-10, 10-inch) — You need big tortillas. The 8-inch ones are too small for this filling. I buy the “burrito size” or “large” flour tortillas. They’re pliable and don’t tear easily when rolled.
Optional Add-ins
Black beans (1 can, drained) — Adds fiber and makes it more filling. I add these for my vegetarian days.
Avocado (2 ripe, diced) — Add fresh avocado right before eating, or freeze it with a squeeze of lime to prevent browning. I usually save fresh avocado for when I’m eating it warm.
Fresh cilantro (¼ cup, chopped) — Adds brightness. I sprinkle it on after reheating.
Equipment Needed
You don’t need fancy equipment for this. Here’s what I actually use.
Two large sheet pans — I use half-sheet pans (18×13 inches). You need two so you can roast the potatoes in a single layer. Crowding them makes them steam instead of crisp. My old pans from Target work fine.
Large skillet — 12-inch cast iron or stainless steel. I prefer cast iron for even heating. You’ll use this to scramble the eggs and cook the meat.
Sharp knife and cutting board — For dicing potatoes and onions. A dull knife makes you cry more—learned this the hard way.
Whisk — For beating the eggs. Fork works too, but whisk is faster.
Spatula — Silicone or wooden. For stirring eggs and flipping tortillas.
Aluminum foil — Lots of it. You’ll wrap each burrito tightly. I buy the heavy-duty kind because it doesn’t tear as easily.
Freezer bags or container — Large zip-top bags work best for space. Or use airtight containers if you prefer.
Optional but nice:
– Pastry brush — For brushing oil on potatoes.
– Parchment paper — Lines the sheet pans for easy cleanup. I don’t always use it, but it saves scrubbing.
How to Make It: Step-by-Step
Alright, let’s make this! I’m walking you through exactly how I do it, including the little tricks I’ve picked up. This takes about 1 hour total, but most of it is hands-off roasting.
Step 1: Prep and Roast the Potatoes (25 minutes)
Preheat your oven to 425°F (220°C). Line two large sheet pans with parchment paper (optional but helpful). Dice the potatoes into half-inch cubes. Toss them in a large bowl with oil, smoked paprika, garlic powder, salt, and pepper. Spread them out in a single layer on the sheet pans. Don’t crowd them! If they touch, they’ll steam. Roast for 20-25 minutes, flipping halfway through, until golden and crispy on the edges. This is the most important step. Crispy potatoes make the difference.
Step 2: Cook the Meat and Onions (10 minutes)
While potatoes roast, heat your large skillet over medium heat. Add the bacon or sausage. Cook until crispy and browned. If using sausage, break it into small crumbles. Remove the meat from the pan and set aside on a plate, leaving the fat in the pan. Add the diced onion to the pan. Sauté for 3-4 minutes until soft and translucent. If you’re using bacon, you can skip the onion in the fat and use a little oil. Combine the cooked meat and onions in a bowl.
Step 3: Scramble the Eggs (5 minutes)
In a medium bowl, whisk the eggs with milk, salt, and pepper. Heat a clean skillet over medium-low heat with a little oil or butter. Pour in the eggs. Let them sit for 10 seconds, then gently push them from the edges toward the center. Cook until they’re just barely set but still soft and creamy. They will continue cooking later, so undercook them slightly. Remove from heat and spread onto a plate to cool slightly.
Step 4: Assemble the Burritos (10 minutes)
Warm the tortillas. This is crucial. Cold tortillas crack when you roll them. You can microwave them for 15 seconds each, or warm them in a dry skillet for 30 seconds per side. Place a warm tortilla on a flat surface. Add a scoop of roasted potatoes, a handful of cheese, a portion of the egg mixture, and some of the meat/onion mix. Top with salsa. Don’t overfill! Leave a 2-inch border on all sides.
Step 5: Roll and Wrap (5 minutes)
Fold the bottom of the tortilla up over the filling. Fold in the left and right sides. Roll tightly from the bottom up. The key is to roll it snugly so it doesn’t unravel. Once rolled, wrap it tightly in aluminum foil. I wrap it twice to ensure no steam escapes. Place the wrapped burrito on a baking sheet.
Step 6: Freeze or Eat
If eating immediately, skip to Step 7. If freezing, place the wrapped burritos in a single layer in the freezer for 1 hour to flash-freeze. This prevents them from sticking together. Then, transfer them to a large freezer bag or container. They’ll keep for up to 3 months.
Step 7: Reheat
To eat, unwrap the foil. Wrap the burrito in a damp paper towel. Microwave on high for 2-3 minutes, flipping halfway through. Let it sit for 1 minute before eating—the inside will be extremely hot.
Total Time: About 1 hour (30 minutes active, 30 minutes mostly hands-off)
Expert Tips & Tricks
Here’s everything I’ve learned from making this dozens of times. These tips will save you from my mistakes.
Don’t Skip the Parchment
I know it’s extra work, but lining your sheet pans with parchment paper saves you from scrubbing baked-on cheese and potato bits. It’s worth the 10 seconds to peel it off.
Undercook the Eggs
This is the #1 mistake. People cook eggs until they’re dry. But since you’re freezing and reheating them, they’ll cook further. Soft, creamy eggs stay moist. Dry eggs turn into rubber after freezing.
Warm the Tortillas
Cold tortillas are the enemy. They crack and tear. Always warm them before rolling. If you forget, microwave them for 10 seconds. It’s a game-changer.
Wrap Tightly
If your burritos unravel in the freezer, you didn’t wrap them tight enough. Roll them snugly, then wrap the foil tightly around the seam. I usually do a “burrito wrap” technique: fold the sides in, then roll up like a sleeping bag.
Cool Before Freezing
Don’t put hot burritos in the freezer. It raises the freezer temp and can ice-crystallize other foods. Let them cool to room temperature first, then freeze.
Common Mistakes (and how to avoid them):
Mistake: Soggy burritos — Fix: Don’t add too much salsa. Salsa is watery. Use a thick, chunky salsa, and drain it slightly before adding. Also, ensure potatoes are crispy, not steamed.
Mistake: Tortillas cracking — Fix: Warm them. Always warm them. And don’t overfill.
Mistake: Freezer burn — Fix: Wrap tightly in foil, then put in a freezer bag. Squeeze out all air.
Variations & Substitutions
Once you’ve nailed the basic version, here’s how you can mix it up. I’ve tried all of these.
Veggie-Loaded
Add 1 cup of sautéed bell peppers and spinach with the onions. This is how I get my kids to eat vegetables. It adds color and nutrients without changing the flavor much.
Turkey Sausage Version
Swap bacon for turkey sausage. Lower fat, same flavor. I use this when I’m trying to be “healthy.” It’s still delicious.
Green Chile and Pork
Swap bacon for diced ham or pork. Add diced green chiles to the eggs. Southwestern vibe. Great with corn tortillas if you want gluten-free.
Breakfast Potato Hash
Add diced zucchini or mushrooms to the potatoes. Cook them with the potatoes for extra texture. I love the earthiness of mushrooms.
Dietary Modifications:
Gluten-Free — Use corn tortillas or gluten-free flour tortillas. Everything else is naturally gluten-free. I’ve used Mission gluten-free tortillas and they work great.
Dairy-Free — Replace cheddar with dairy-free cheese shreds (like Violife or Daiya). Use olive oil instead of butter. It’s different but still tasty. My lactose-intolerant friend requests this version.
Lower-Carb — Use lettuce wraps instead of tortillas. Or use low-carb tortillas. I won’t lie—it’s not the same, but it works if you’re watching carbs.
Vegan — Use tofu scramble instead of eggs. Use vegan cheese. Use tempeh bacon or smoked tofu. Add extra veggies. It’s surprisingly good.
Serving & Storage
How to Serve:
I usually serve these straight from the microwave at the dinner table. But here are other ways I’ve enjoyed them:
Side Dishes:
– Fresh fruit salad
– Greek yogurt with honey
– A simple green salad with vinaigrette
– Garlic butter roasted asparagus (if you’re feeling fancy on the weekend)
Toppings Bar:
When I have guests, I put out: extra salsa, hot sauce, fresh cilantro, diced avocado, sour cream. Everyone customizes their bowl.
Wine Pairing:
Not a wine expert, but my wine-snob friend says a light Pinot Grigio or a sparkling rosé works great with this. It’s light enough for breakfast.
Storage Instructions:
Refrigerator:
Store in an airtight container for up to 3 days. The tortilla might get softer, but it’s still good.
Freezer:
Store wrapped in foil in a freezer bag for up to 3 months. Label with the date so you don’t forget. I usually eat them within 6 weeks for best texture.
Reheating:
Best method: Microwave with a damp paper towel. 2-3 minutes.
Oven method: Unwrap foil, place on baking sheet, bake at 350°F for 15-20 minutes. This makes the tortilla crispier. I prefer this for weekend brunches.
Never works: Trying to reheat in the microwave without a paper towel. It dries out the tortilla. Ask me how I know.
Pro tip: If leftovers are drying out, add a splash of water to the paper towel when reheating. Brings back that soft texture.
Nutrition Information
I’m not a nutritionist, but here’s the breakdown if you’re tracking.
Per Serving (1 burrito, based on 8 servings):
- Calories: 420
- Protein: 22g
- Carbs: 35g
- Fiber: 3g
- Sugar: 2g
- Fat: 22g
- Saturated Fat: 8g
- Cholesterol: 180mg
- Sodium: 650mg
What’s Good:
– High protein from eggs and meat
– Satisfying fiber from potatoes
– Can add veggies to boost nutrition
– More filling than it looks
What to Know:
– Higher in calories from cheese and meat
– Contains dairy and gluten
– Moderate sodium (use low-sodium bacon to reduce)
My Take:
Look, this is comfort food with cheese and meat. It’s not a diet recipe. But it’s way better than takeout, costs less, and I know exactly what’s in it. When I want to make it lighter, I use turkey sausage and less cheese. But usually? I just eat a reasonable portion and enjoy it.
Final Thoughts
So that’s my go-to loaded breakfast burritos with crispy potatoes! I’ve probably talked your ear off at this point, but when you make a recipe this often, you have a lot to say about it.
This has saved weeknight mornings more times than I can count. It’s my answer to “what’s for breakfast?” when I’m tired, don’t want takeout, and still want something that tastes really good. My kids are happy, my husband’s happy, and I’m happy because I’m not stressed about cooking.
Make it yours! Try different add-ins, swap in your favorite vegetables, adjust the spice level. The best recipes are the ones you adapt to your family’s tastes. If you want to mix up your lunch, check out my one pan honey mustard chicken thighs for a quick savory option later in the day.
If you make this, drop a comment and let me know what you think! I love hearing how recipes turn out in your kitchen. And if something doesn’t work, tell me that too—I’m here to help troubleshoot. Happy cooking! And I hope your kitchen smells half as good as mine does right now.
Frequently Asked Questions
Can I use sweet potatoes instead of regular potatoes?
You can, but sweet potatoes take longer to cook and might not get as crispy. If you use them, dice them smaller and roast for 30-35 minutes. They’ll be softer inside, which is fine, but the texture is different. I prefer Yukon Golds for that classic breakfast feel.
Why did my burrito fall apart when I rolled it?
Two reasons: either the tortilla was too cold, or you overfilled it. Always warm the tortilla. And don’t add more than ½ cup of filling per tortilla. Less is more. If it’s still tricky, try folding the sides in tightly before rolling.
Can I make these ahead for a dinner party?
Absolutely! Assemble them, wrap in foil, and freeze. Then, when guests arrive, just microwave them. They’re perfect for brunch. I make these for holiday mornings all the time. Just make sure you have enough microwave space!
Why did my potatoes turn out soggy?
Usually means you crowded the pan. Potatoes need space to crisp up. If they’re touching, they steam. Use two sheet pans, and don’t be afraid to spread them out. Also, make sure the oven is fully preheated to 425°F.
Can I use corn tortillas?
You can, but they’re smaller and more fragile. You’ll need to use two corn tortillas per burrito, or use larger “burrito size” corn tortillas. They’re more gluten-free friendly, but the texture is different. Flour tortillas are more pliable and easier to roll.
How do I reheat leftovers without them getting dry?
Add a splash of water to the paper towel when microwaving. The steam keeps the tortilla soft. If you’re using the oven method, cover the burrito with foil while heating to retain moisture. Uncover for the last 5 minutes to crisp the outside.
Can I double this recipe?
Yes! Double everything and use your biggest pots and pans. The cooking times stay the same. I do this when I’m meal-prepping for a big family. Just make sure your sheet pans aren’t overcrowded. You might need to roast the potatoes in two batches.
Pin This Recipe!
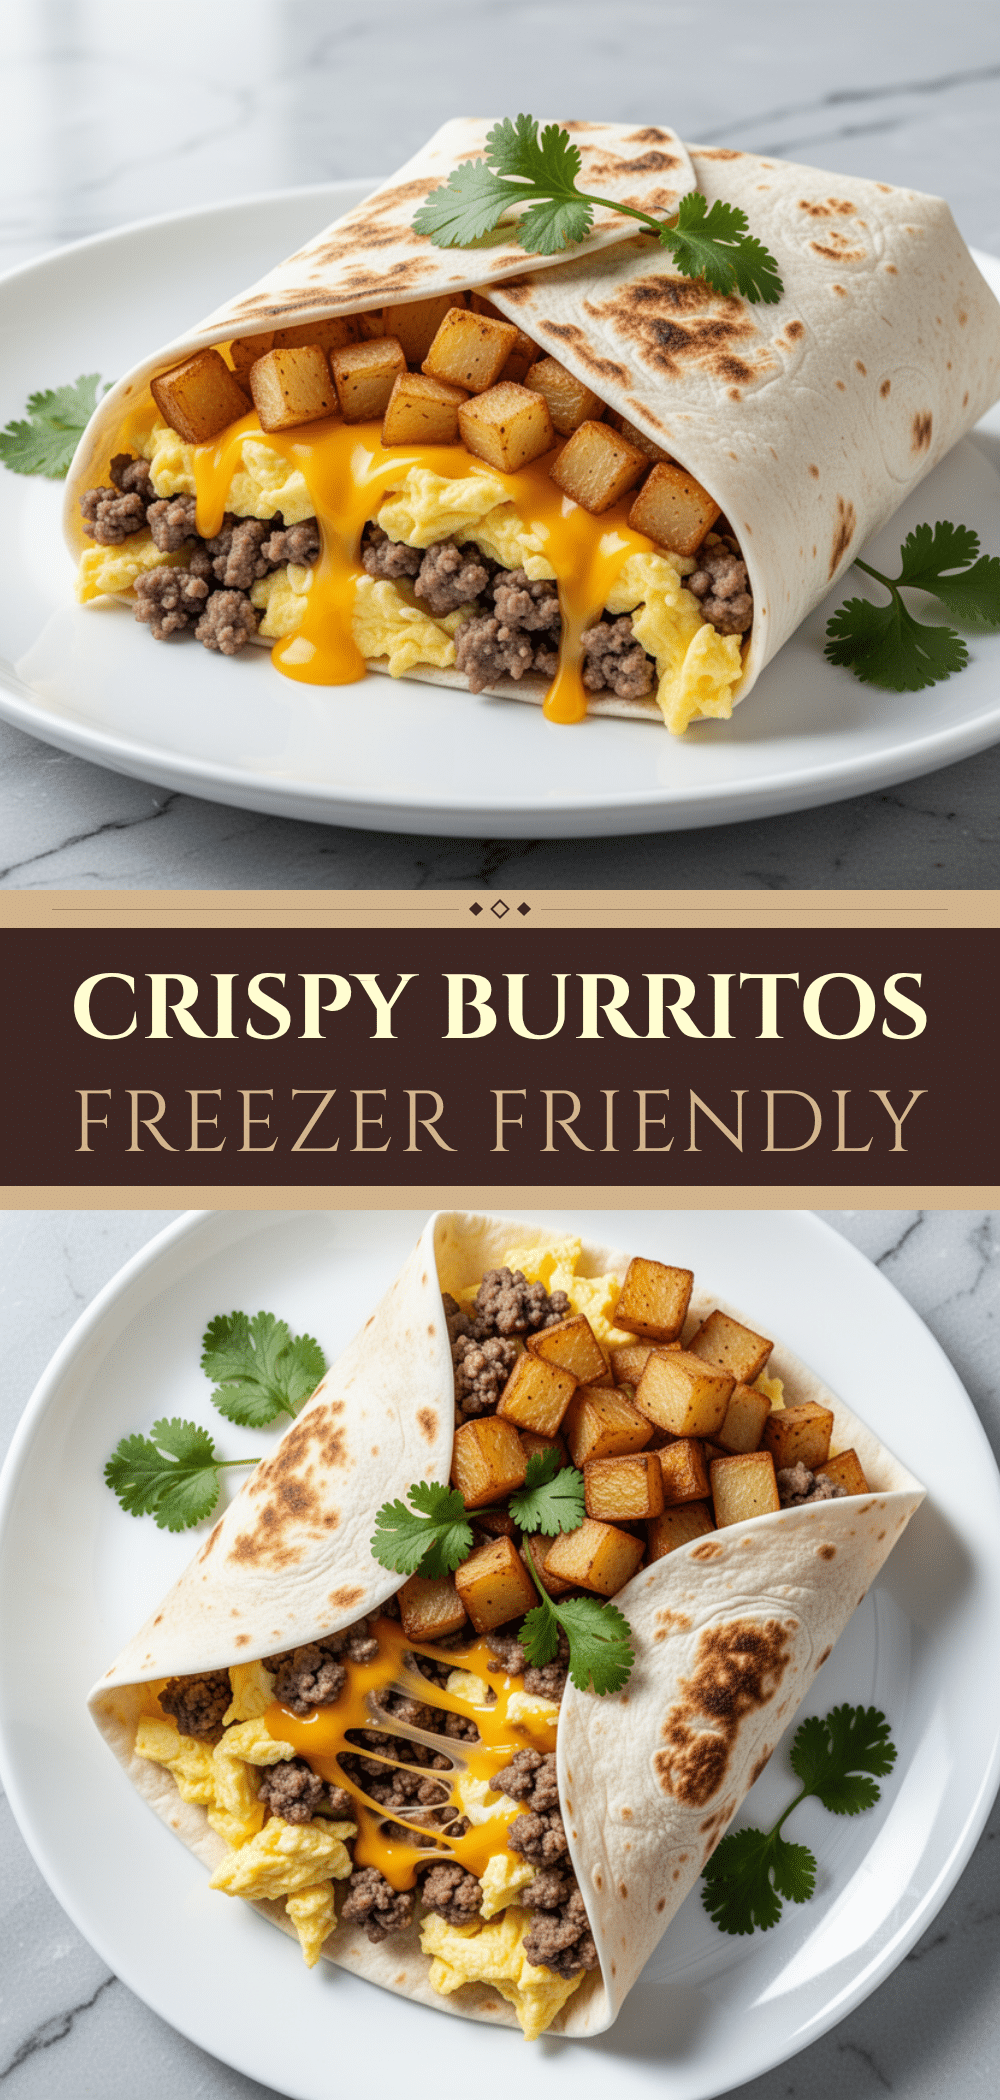
Loaded Breakfast Burritos with Crispy Potatoes: Easy Batch Meal
- Total Time: 1 hour
- Yield: 8 servings 1x
Description
A freezer-friendly breakfast burrito recipe featuring crispy roasted Yukon Gold potatoes, scrambled eggs, bacon or sausage, and cheese. Perfect for batch cooking and quick weekday mornings.
Ingredients
- 3 large Yukon Gold potatoes (about 1.5 lbs / 680g), diced into half-inch cubes
- 3 tablespoons vegetable oil or avocado oil
- 1 teaspoon smoked paprika
- 1 teaspoon garlic powder
- Salt and black pepper, to taste
- 8 large eggs
- ¼ cup (60ml) milk
- 1.5 cups (170g) shredded sharp cheddar cheese
- 1 pound (450g) thick-cut bacon or breakfast sausage
- 1 medium yellow onion, diced
- ½ cup (120g) mild chunky salsa
- 8–10 large flour tortillas (10-inch)
- Optional: 1 can black beans (drained), 2 ripe avocados (diced), ¼ cup fresh cilantro (chopped)
Instructions
- Preheat oven to 425°F (220°C). Line two large sheet pans with parchment paper.
- Toss diced potatoes with oil, smoked paprika, garlic powder, salt, and pepper. Spread in a single layer on sheet pans.
- Roast potatoes for 20-25 minutes, flipping halfway, until golden and crispy.
- While potatoes roast, cook bacon or sausage in a large skillet over medium heat until crispy. Remove meat, leaving fat in pan.
- Sauté diced onion in the pan fat for 3-4 minutes until soft. Combine with cooked meat.
- Whisk eggs with milk, salt, and pepper. Scramble in a clean skillet over medium-low heat until just barely set. Remove from heat.
- Warm tortillas in microwave or dry skillet.
- Assemble burritos: Place filling (potatoes, cheese, eggs, meat/onion mix, salsa) on tortilla, leaving a 2-inch border.
- Fold bottom up, fold in sides, and roll tightly. Wrap securely in aluminum foil.
- For freezing: Flash-freeze wrapped burritos for 1 hour, then store in freezer bags for up to 3 months.
- To reheat: Unwrap foil, wrap in damp paper towel, and microwave on high for 2-3 minutes, flipping halfway.
Notes
Do not crowd the potatoes on the sheet pans to ensure they crisp up instead of steaming. Undercook the eggs slightly as they will continue to cook during reheating. Always warm tortillas before rolling to prevent cracking. Wrap burritos tightly to prevent freezer burn.
- Prep Time: 30 minutes
- Cook Time: 30 minutes
- Category: Breakfast
- Cuisine: American
Nutrition
- Serving Size: 1 burrito
- Calories: 420
- Sugar: 2
- Sodium: 650
- Fat: 22
- Saturated Fat: 8
- Carbohydrates: 35
- Fiber: 3
- Protein: 22
Keywords: breakfast burritos, batch cooking, freezer meals, crispy potatoes, meal prep, easy breakfast, high protein breakfast