Last Tuesday, I was standing in my kitchen at 6:45 PM, staring into the open fridge like it held the secrets to the universe. It didn’t. It had half a lemon, some wilting spinach, and a tiny tub of fresh raspberries that were starting to look a little sad. I was exhausted. I had zero energy for baking, zero time for complicated techniques, and definitely zero desire to order takeout. But I wanted something sweet. Something that felt like a treat but didn’t involve washing a mountain of dishes or waiting two hours for dough to chill.
So, I did what any desperate home cook does: I improvised. I grabbed a handful of almonds from the pantry, grabbed some butter, flour, and sugar, and threw them into a bowl. I didn’t have a recipe in mind. I just wanted a quick crumble. I pressed it into a small loaf pan, scattered the raspberries on top, and threw the rest of the almond mixture over it. I popped it in the oven while I tried to get dinner started.
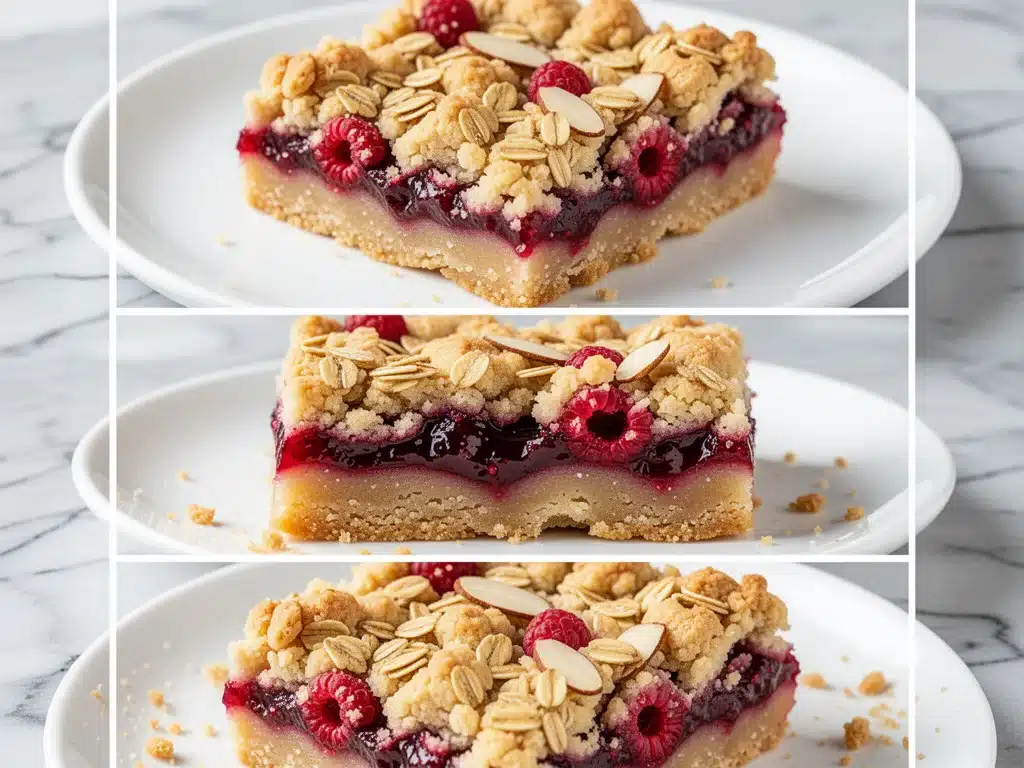
Twenty minutes later, my kitchen smelled like a high-end French bakery. When I pulled it out, the edges were golden, the raspberries were bubbling up through the crumb topping like little red jewels, and the smell of toasted almonds was driving my kids crazy. I cut a warm square, sat on the counter, and took a bite. It was tart, sweet, buttery, and crunchy all at once. It was perfect.
That accidental dessert turned into a ritual. I’ve made these small-batch raspberry almond crumb bars at least a dozen times since that night. They’re my go-to when I need to satisfy a sweet tooth without the stress. They’re fast, they’re forgiving, and they taste like you spent hours in the kitchen (even though you didn’t). If you’re looking for a quick dessert that feels fancy but is actually super simple, this is it. Trust me, once you try these, you’ll never go back to store-bought cookies again.
Why You’ll Love These Small-Batch Raspberry Almond Crumb Bars
There are about ten reasons I keep coming back to this recipe, but let’s be real—you probably just need to know why it fits your life right now. Here’s the deal:
- Stupid Simple — Seriously, if you can dump ingredients into a bowl, you can make these. No electric mixer needed. No rolling pins. Just a fork and a bowl. I’ve made this while holding a baby. It works.
- Lightning Fast — From start to finish, these take about 45 minutes, but only 15 of those are active work. That’s it. I make these on weeknights when I get home late and still want something homemade for dessert.
- Small-Batch Magic — Most crumb bar recipes make a huge 9×13 pan that lasts forever (and then gets stale). This recipe makes one 8×8 pan. Perfect for a family of four, or just for me and my husband to share over two days. No waste.
- Pantry-Friendly — You probably have most of this already. Flour, sugar, butter, almonds, raspberries. If you don’t have fresh raspberries, frozen works just as well (more on that later).
- Makes Amazing Leftovers — These actually taste better the next day. The flavors meld together, and the crumb topping gets even crunchier. I deliberately make extra for breakfast with a cup of coffee.
- Budget-Smart — Feeds 4-6 people for under $8. That’s less than a single slice of cake at a coffee shop, and it’s made in your own kitchen.
This is my go-to when I need dessert to just work. No complicated techniques, no weird ingredients, just reliable, delicious food that makes everyone happy. Plus, the smell alone will have your house smelling like heaven.
Ingredients You’ll Need
Here’s the best part: you probably have most of this already. I’m particular about three ingredients here, and I’ll tell you exactly why. This looks like a short list, but every ingredient plays a specific role in the texture and flavor.
For the Crumb Topping & Base
All-purpose flour (1 ½ cups / 190g) — The backbone of the crumb. Don’t use self-rising flour; it’ll mess up the texture. I always use Gold Medal because it’s consistent, but any brand works.
Unsalted butter (½ cup / 115g, cold and cubed) — This is crucial. Cold butter creates those flaky, sandy crumbs. If your butter is warm, it’ll melt into the flour and you’ll get a dough instead of crumbs. I keep my butter in the fridge until the last second.
Granulated sugar (⅓ cup / 65g) — Just enough sweetness to balance the tart raspberries. Don’t skip it, but don’t add more or it’ll be cloying.
Ground almonds (½ cup / 50g) — This is the secret weapon. It adds that nutty, rich flavor and helps the crumbs hold together slightly better. You can buy pre-ground almond flour, or just pulse whole almonds in a blender until fine.
Almond extract (½ teaspoon) — This amplifies the almond flavor without making it taste like soap. A little goes a long way. If you don’t have it, skip it, but I recommend getting it. It’s cheap and lasts forever.
For the Filling
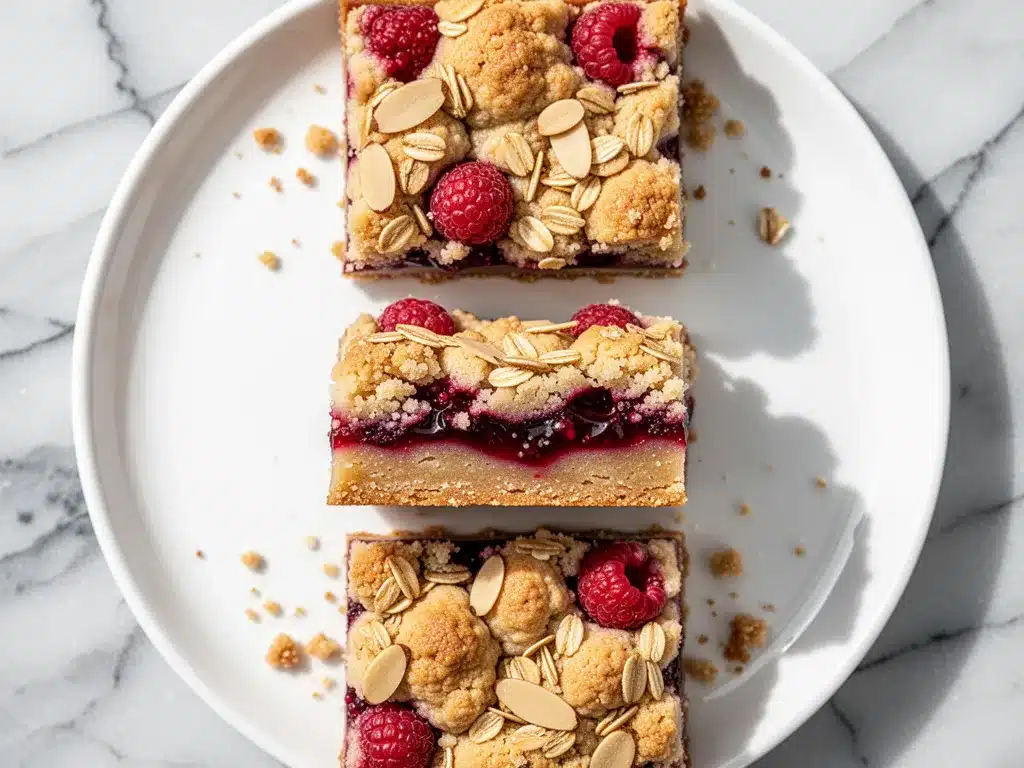
Fresh or frozen raspberries (1 ½ cups / 200g) — Fresh is best for texture, but frozen works perfectly fine. If using frozen, do not thaw them first. Toss them in a little flour to prevent bleeding. I use frozen in winter and fresh in summer.
Granulated sugar (1 tablespoon / 15g) — Just a touch to sweeten the berries slightly.
Cornstarch (1 teaspoon) — This thickens the juices that the raspberries release. Without it, your bars will be a soupy mess. Don’t skip this step.
For the Finish
Flaky sea salt (a pinch) — Sprinkle this on top before baking. It contrasts with the sweetness and makes the almond flavor pop. I love Maldon salt for this.
Powdered sugar (for dusting, optional) — Makes them look fancy when you serve them. I usually skip this for weeknight casual eating, but add it if you’re bringing them to a party.
Equipment Needed
You don’t need fancy equipment for this. Here’s what I actually use:
8×8 inch baking pan — This is key for the small-batch size. A 9×13 will make them too thin and they’ll burn. If you only have a 9×9 square pan, that works too, but adjust baking time slightly.
Medium mixing bowl — For combining the crumb mixture.
Fork or pastry cutter — To cut the butter into the flour. I use a fork because it’s faster and easier to clean. A pastry cutter works if you have one, but it’s not necessary.
Small bowl — For tossing the raspberries with sugar and cornstarch.
Offset spatula — For spreading the berries and smoothing the topping. A regular spoon works fine too.
Cooling rack — To cool the bars before cutting. This prevents them from falling apart.
Chef’s knife — For slicing. A sharp knife makes clean cuts.
How to Make It: Step-by-Step
Alright, let’s make this! I’m walking you through exactly how I do it, including the little tricks I’ve picked up to ensure perfect results every time.
Step 1: Prep Your Pan and Oven (2 minutes)
Preheat your oven to 350°F (175°C). Line your 8×8 inch baking pan with parchment paper, leaving an overhang on the sides. This is non-negotiable. It makes lifting the bars out of the pan so much easier and keeps cleanup to a minimum. I spray the parchment with cooking spray just to be safe.
Step 2: Make the Crumb Mixture (5 minutes)
In your medium bowl, whisk together the flour, ⅓ cup granulated sugar, ground almonds, and almond extract. Add the cold, cubed butter. Use a fork to cut the butter into the flour mixture. You’re looking for a coarse, sandy texture with some pea-sized clumps. Don’t overmix! If it looks like wet sand, you’re good. If it looks like dough, you’ve worked it too much. Set aside about half of this mixture for the topping.
Step 3: Press the Base (2 minutes)
Take the reserved half of the crumb mixture and press it firmly into the bottom of your prepared pan. Use the bottom of a measuring cup or your fingers to create an even layer. This is your crust. It needs to be tight so it doesn’t crumble when you cut the bars.
Step 4: Prepare the Raspberry Filling (2 minutes)
In a small bowl, toss the raspberries with the 1 tablespoon of sugar and the cornstarch. Make sure they’re evenly coated. This prevents the berries from sticking together and ensures the sauce thickens properly as they bake.
Step 5: Assemble the Bars (3 minutes)
Spread the raspberry mixture evenly over the pressed base layer. Then, take the remaining crumb mixture and sprinkle it generously over the top. You don’t need to press it down; just scatter it evenly. The goal is a thick, crunchy topping that covers the berries.
Step 6: Bake (25-30 minutes)
Place the pan in the preheated oven. Bake for 25-30 minutes. You’ll know they’re done when the topping is golden brown and the raspberries are bubbling up through the crumbs. The edges should be firm to the touch. If the top is browning too fast, you can loosely tent it with foil after 20 minutes.
Step 7: Cool and Cut (30 minutes)
This is the hardest part: waiting. Let the bars cool in the pan on a wire rack for at least 30 minutes. If you cut them while they’re hot, they’ll fall apart and be messy. Once cooled, use the parchment overhang to lift them out, then slice into squares. I usually get 9-12 bars depending on how hungry everyone is.
Expert Tips & Tricks
Here’s everything I’ve learned from making these dozens of times. These tips will save you from my mistakes.
Keep That Butter Cold
I can’t stress this enough. If your butter is warm, you’ll lose the crumb texture. It’ll just be a cake. I even chill my bowl for 10 minutes before mixing if it’s a hot day. It makes a huge difference.
Frozen Berries Are Fine
Don’t stress about fresh berries. Frozen raspberries work beautifully. Just don’t thaw them. If you thaw them, they turn to mush and release too much water. Toss them straight from the freezer into the sugar/cornstarch mix.
Don’t Skip the Cornstarch
Raspberries are juicy. Without cornstarch, your bars will be soggy in the middle. The cornstarch absorbs the excess liquid and creates a lovely jam-like consistency. It’s a small ingredient with a big impact.
Cool Completely for Clean Cuts
I know it’s tempting to dig in, but patience pays off. Warm bars are fragile. Let them cool until they’re just barely warm to the touch. Then, use a sharp knife and wipe it clean between cuts for perfect squares.
Storage is Simple
Store these in an airtight container at room temperature for up to 3 days. They actually get better on day two as the flavors meld. If you need to keep them longer, freeze them for up to 2 months.
Variations & Substitutions
Once you’ve nailed the basic version, here’s how you can mix it up. I’ve tried all of these, and they’re all winners.
Blueberry Lemon Variation
Swap raspberries for blueberries and add the zest of one lemon to the crumb mixture. The lemon and blueberry combo is classic and bright. Add 1 tablespoon of lemon juice to the berries for extra zing.
Strawberry Basil
Use fresh strawberries, sliced thin, and add a few chopped fresh basil leaves to the crumb mixture. It sounds weird, but it’s amazing. The basil adds a peppery note that cuts the sweetness.
Gluten-Free Option
Use a 1:1 gluten-free flour blend instead of all-purpose flour. Make sure it contains xanthan gum, or add ½ teaspoon if it doesn’t. The texture is almost identical.
Nut-Free Version
Skip the ground almonds and almond extract. Use ½ cup of additional flour and a teaspoon of vanilla extract instead. It’s still delicious, just less nutty.
Dark Chocolate Drizzle
After the bars cool, melt ¼ cup of dark chocolate chips with a teaspoon of coconut oil and drizzle it over the top. Let it set for 15 minutes. Now you’re fancy.
Serving & Storage
How to Serve
I usually serve these warm, right out of the oven, with a dollop of whipped cream or a scoop of vanilla ice cream. But they’re also great at room temperature with a cup of coffee or tea. The crumb topping stays crunchy for days if stored properly.
Side Dishes
These are a dessert, so keep sides simple. A light green salad after a heavy dinner works well. Or just enjoy them as is. They’re rich enough on their own.
Storage Instructions
Refrigerator: Store in an airtight container for up to 4 days. The crumbs might soften slightly in the fridge, but they’ll be fine.
Freezer: These freeze beautifully. Wrap individual bars in plastic wrap, then place them in a freezer bag. They’ll last up to 2 months. Thaw at room temperature for 30 minutes before eating.
Reheating: If you want them warm, microwave a bar for 15-20 seconds. It softens the crumb slightly and warms the berries. Don’t overheat or they’ll get mushy.
Nutrition Information
I’m not a nutritionist, but here’s the breakdown if you’re tracking. This is per bar (based on 9 bars).
| Nutrient | Amount |
|---|---|
| Calories | 210 |
| Protein | 3g |
| Carbs | 28g |
| Fiber | 2g |
| Sugar | 14g |
| Fat | 10g |
| Saturated Fat | 6g |
| Cholesterol | 25mg |
| Sodium | 120mg |
Look, this is a dessert with butter and sugar. It’s not a health food. But it’s way better than store-bought pastries, and you control the ingredients. When I want to make it lighter, I reduce the sugar in the crumb to ¼ cup. It’s still sweet enough. But usually? I just enjoy a square and move on with my day.
Final Thoughts
So that’s my go-to small-batch raspberry almond crumb bars! I’ve probably talked your ear off at this point, but when you make a recipe this often, you have a lot to say about it. These bars have saved weeknight desserts more times than I can count. They’re my answer to “what’s for dessert?” when I’m tired, don’t want takeout, and still want something that tastes really good. My kids are happy, my husband’s happy, and I’m happy because I’m not stressed about cooking.
Make it yours! Try different berries, swap the nuts, add chocolate. The best recipes are the ones you adapt to your family’s tastes. If you make this, drop a comment and let me know what you think! I love hearing how recipes turn out in your kitchen. And if something doesn’t work, tell me that too—I’m here to help troubleshoot.
Happy baking! And I hope your kitchen smells half as good as mine does right now.
Frequently Asked Questions
Can I use frozen raspberries?
Absolutely. In fact, I prefer them in winter. Just don’t thaw them before using. Toss them frozen with the sugar and cornstarch. They’ll release more water, but the cornstarch handles it. If you thaw them first, they turn to mush and your bars will be soggy.
Why did my crumb topping turn into a dough?
Your butter was probably too warm, or you overmixed it. The goal is sandy, clumpy crumbs, not a cohesive dough. Use cold butter, cut it in quickly, and stop mixing as soon as it looks like coarse sand. If it’s already doughy, you can still bake it, but the texture will be more cake-like than crumbly.
Can I make this in a 9×13 pan?
You can, but the bars will be very thin and might bake too fast. If you do, reduce the baking time to 15-20 minutes and watch them closely. I recommend sticking to the 8×8 pan for the best texture and ease of cutting.
How do I store leftover bars?
Store them in an airtight container at room temperature for up to 3 days. If your kitchen is hot or humid, store them in the fridge. They’ll last up to 4 days refrigerated. For longer storage, freeze them for up to 2 months.
Can I substitute the almond extract?
Yes, use vanilla extract instead. It’s still delicious, just less nutty. If you don’t have almond extract, the flavor will be more like a standard crumb bar, which is still great.
Why are my bars soggy?
This usually happens if you skip the cornstarch or use thawed berries. The cornstarch is essential for thickening the berry juices. Also, make sure you cool the bars completely before cutting. Cutting them warm releases steam and makes them gummy.
Can I double this recipe?
Yes, but use a 9×13 pan. Increase baking time to 30-35 minutes. The cooking dynamics change slightly in a larger pan, so keep an eye on the edges to prevent burning.
Pin This Recipe!
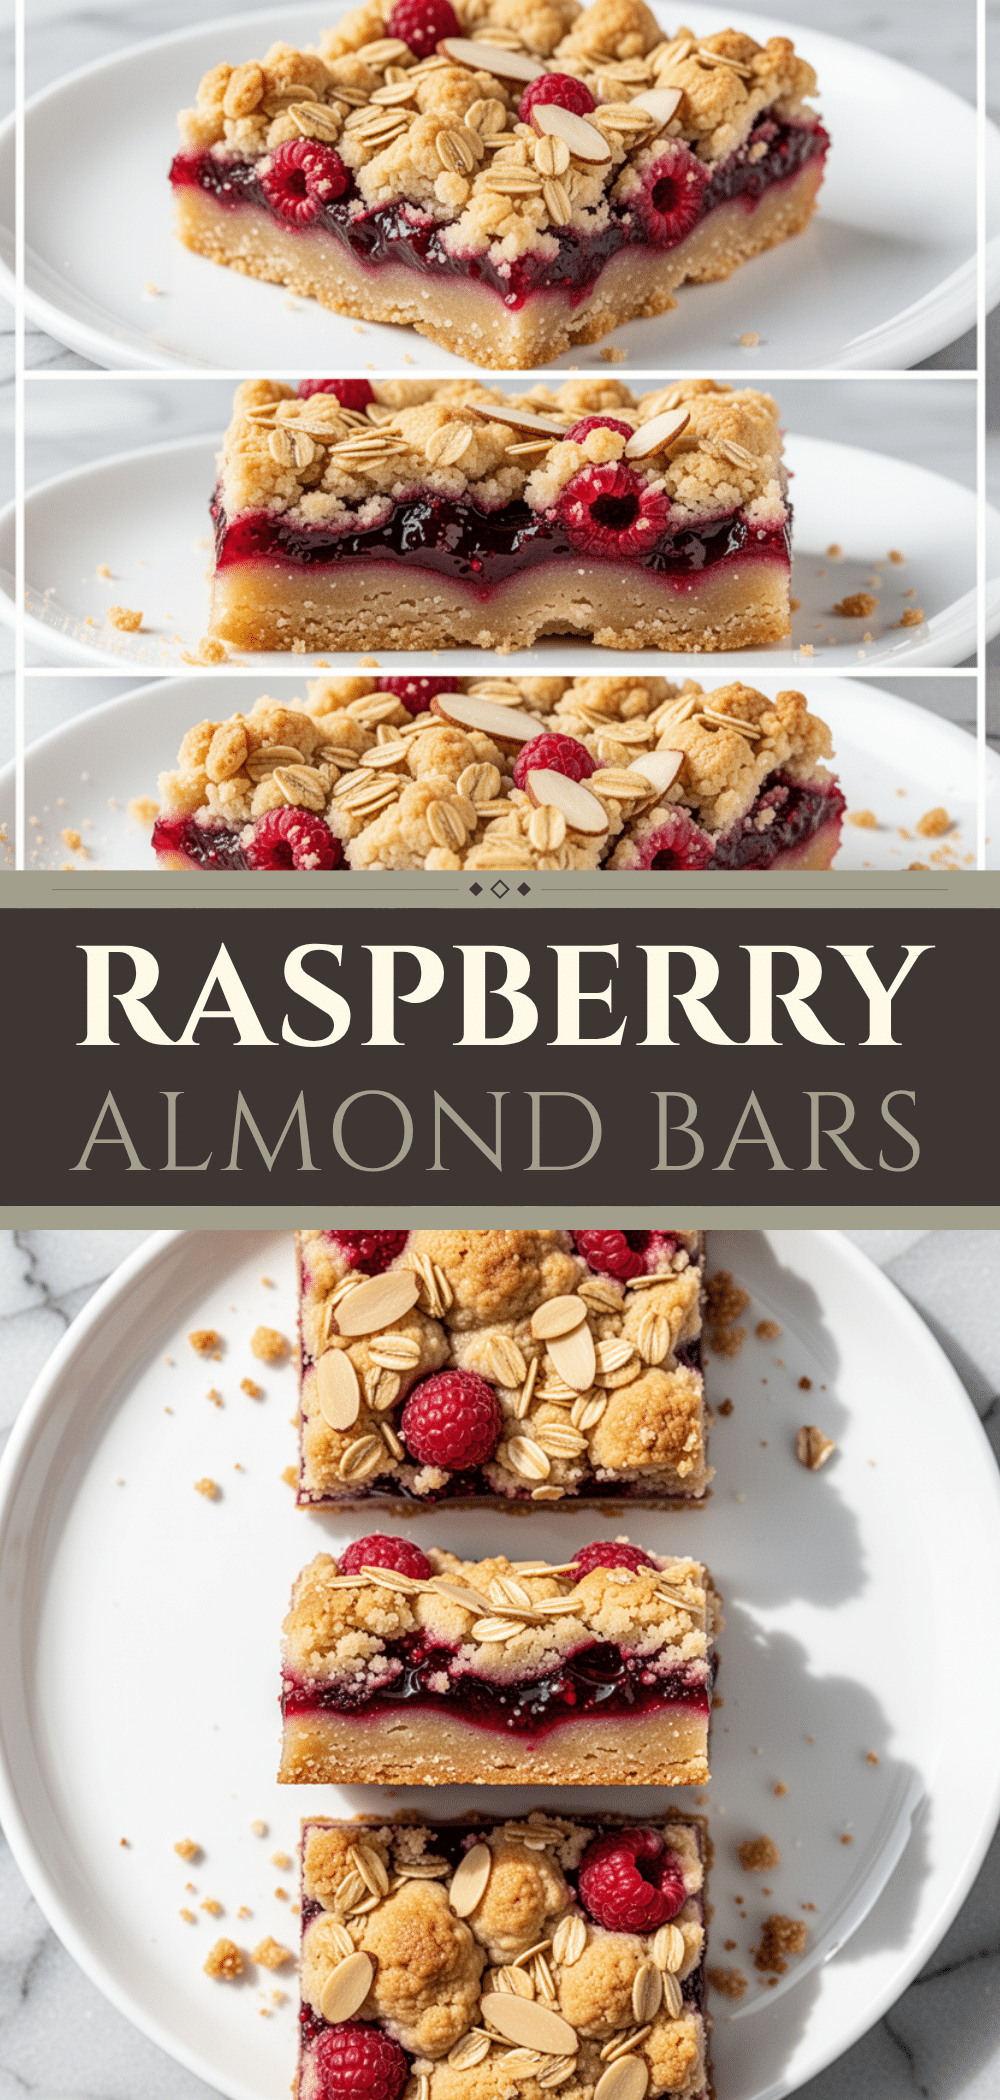
Small-Batch Raspberry Almond Crumb Bars
- Total Time: 45 minutes
- Yield: 9-12 servings 1x
Description
A quick, easy, and forgiving dessert featuring a buttery almond crumb base and topping with tart fresh or frozen raspberries. Perfect for weeknights, this small-batch recipe yields a single 8×8 pan of delicious bars.
Ingredients
- 1 ½ cups all-purpose flour
- ½ cup unsalted butter, cold and cubed
- ⅓ cup granulated sugar (for crumb mixture)
- ½ cup ground almonds
- ½ teaspoon almond extract
- 1 ½ cups fresh or frozen raspberries
- 1 tablespoon granulated sugar (for filling)
- 1 teaspoon cornstarch
- Pinch of flaky sea salt
- Powdered sugar, for dusting (optional)
Instructions
- Preheat oven to 350°F (175°C). Line an 8×8 inch baking pan with parchment paper, leaving an overhang on the sides, and spray with cooking spray.
- In a medium mixing bowl, whisk together the flour, ⅓ cup granulated sugar, ground almonds, and almond extract.
- Add the cold, cubed butter to the flour mixture. Use a fork to cut the butter into the flour until the texture resembles coarse, wet sand with some pea-sized clumps.
- Remove about half of the crumb mixture and set it aside for the topping.
- Press the remaining half of the crumb mixture firmly into the bottom of the prepared pan to form an even base layer.
- In a small bowl, toss the raspberries with the 1 tablespoon of sugar and cornstarch until evenly coated.
- Spread the raspberry mixture evenly over the pressed base layer.
- Sprinkle the reserved crumb mixture generously over the top of the raspberries.
- Bake for 25-30 minutes, or until the topping is golden brown and the raspberries are bubbling. Tent with foil if the top browns too quickly.
- Let the bars cool in the pan on a wire rack for at least 30 minutes before slicing into squares.
Notes
Keep butter cold to ensure a crumbly texture rather than a doughy one. If using frozen raspberries, do not thaw them first; toss them directly with the sugar and cornstarch. Cornstarch is essential to thicken the berry juices and prevent sogginess. Bars taste better the next day as flavors meld. Store in an airtight container at room temperature for up to 3 days, or freeze for up to 2 months.
- Prep Time: 15 minutes
- Cook Time: 30 minutes
- Category: Dessert
- Cuisine: American
Nutrition
- Serving Size: 1 bar
- Calories: 210
- Sugar: 14
- Sodium: 120
- Fat: 10
- Saturated Fat: 6
- Carbohydrates: 28
- Fiber: 2
- Protein: 3
Keywords: raspberry bars, almond crumb bars, small batch dessert, easy baking, weeknight dessert, gluten-free option, frozen berry dessert


