I still remember the specific shade of red. It wasn’t the electric, neon pink you see in those box mixes from the 90s. It was a deep, rich crimson, the color of a fine wine or a ripe beet, stained onto my grandmother’s white apron and her chipped Formica counter. That was the red velvet cake. And if you know anything about Southern baking, you know that a recipe like that isn’t just food—it’s heritage. It’s the thing you bring to a funeral, a birthday, a baptism, or just because you’re missing someone.
For years, I tried to recreate it. I bought the fancy tubs of cream cheese frosting from the bakery (they were good, but they lacked soul). I tried the box mixes with the “food coloring” packets that always made the cake taste slightly metallic. Nothing hit the spot. The texture was too dense, the flavor too sweet, and the red? Well, it was just wrong.
Then, two years ago, I was tasked with making dessert for my uncle’s 80th birthday. He’s the family patriarch, the man who still believes ketchup belongs on everything, but who will give you his last cigarette if you ask nicely. He asked for “red velvet.” I panicked. I pulled out my grandmother’s old index card, the one stained with butter and coffee, and started cooking. I followed her notes, but I also used my own instincts. I added a splash of buttermilk for tang. I toasted the cocoa powder. I made sure the frosting was thick enough to stand up on its own.
When I cut that first slice, the room went quiet. My uncle took a bite, chewed slowly, and said, “Mama would be proud.” That’s high praise. Since then, this classic Southern red velvet sheet cake has become my go-to for every celebration. It’s moist, it’s tangy, it’s gorgeous, and it’s forgiving enough for a beginner but impressive enough for a food snob. I’ve tested this recipe at least a dozen times, tweaking the frosting consistency and the baking time, until I landed on this perfect version. It’s the best red velvet cake I’ve ever had, and I’m sharing it with you so you can be the hero of your next gathering.
Why You’ll Love This Southern Red Velvet Sheet Cake
There are a hundred cake recipes out there, but this one sticks. It’s not just because it looks pretty (though that deep red is impossible to ignore). It’s because it hits all the right notes for a Southern celebration. Here’s why this red velvet sheet cake has earned a permanent spot in my rotation:
- It’s Actually Moist — A lot of red velvet cakes dry out by the second day. This one? It stays tender for days. The buttermilk and oil (yes, oil, not just butter) keep it soft. I’ve kept leftovers in the fridge for four days, and they were still delicious on day five. That’s rare for a cake this rich.
- The Tangy Frosting Balance — Sweetness can get cloying fast. The key here is the cream cheese frosting. It’s tangy, slightly salty, and perfectly balanced against the sweet cake. It cuts through the richness so you can eat three slices without feeling guilty. Or, well, less guilty.
- Sheet Cake Magic — Let’s be honest: layer cakes are stressful. Getting the layers even? Stacking them without them sliding? Stressful. A sheet cake is a dream. You bake it in one pan, frost it flat, and serve it with a knife. It’s rustic, it’s easy, and it serves a crowd without requiring architectural skills.
- It’s a Crowd-Pleaser — I’ve served this to my vegan sister (with a swap), my gluten-free friend (with a blend), and my kids who usually hate “fancy” cakes. Everyone loves it. The cocoa flavor is subtle, not chocolate-dominant, which makes it approachable for people who think they don’t like chocolate.
- Make-Ahead Friendly — This is the ultimate party cake. You can bake it two days ahead, frost it the night before, and just bring it to the party. It actually tastes better after the flavors have had time to meld overnight. I love that I can focus on my guests instead of being stuck in the kitchen.
This is my answer to “what should I bring?” when I’m invited somewhere. It’s reliable, it’s delicious, and it makes people smile. If you’ve ever struggled with dry cakes or complicated frosting techniques, this one will change your life.
Ingredients You’ll Need
Here’s the thing about red velvet: the ingredients seem simple, but the quality matters. You don’t need fancy gadgets, but you do need good basics. I’m particular about three things here: the cocoa, the buttermilk, and the cream cheese. Here’s what you need to make this classic Southern red velvet sheet cake.
For the Cake
All-purpose flour (3 cups / 375g) — The foundation. Don’t use self-rising flour unless you adjust the leavening. I always sift mine to avoid lumps, which ensures a tender crumb.
Baking soda (1 teaspoon) — Essential for that classic red velvet rise and for reacting with the buttermilk. Make sure it’s fresh; old baking soda makes flat cakes.
Salt (1 teaspoon) — Not optional. Salt brings out the chocolate flavor. Use kosher salt.
Unsweetened cocoa powder (2 tablespoons) — Use natural cocoa, not Dutch-processed. Natural cocoa is more acidic, which reacts with the buttermilk and baking soda. This is what gives red velvet its distinct flavor profile.
Butter (1 cup / 2 sticks / 226g, softened) — I use unsalted butter so I can control the salt. Room temperature is crucial for creaming it properly with the sugar.
Granulated sugar (1 ½ cups / 300g) — The standard sweetener. Don’t reduce this too much, or the cake will be dense.
Vegetable oil (½ cup / 120ml) — This is the secret weapon. Oil keeps the cake moist longer than butter alone. I use a neutral oil like canola or vegetable. Olive oil will taste too strong.
Eggs (4 large) — Room temperature eggs incorporate better into the batter. If you forget, just put them in a bowl of warm water for 5 minutes.
Vanilla extract (2 teaspoons) — Pure vanilla, please. The imitation stuff makes the cake taste chemical.
Buttermilk (1 ½ cups / 360ml) — The tangy star. If you don’t have buttermilk, make your own: add 1 tablespoon of white vinegar or lemon juice to a measuring cup, then fill with milk to the 1 ½ cup line. Let it sit for 5 minutes until it curdles.
Red food coloring (2 tablespoons) — Liquid gel works best. I use a concentrated red gel for that deep, vibrant color. If you use liquid food coloring, you might need more, but it can thin out the batter.
For the Cream Cheese Frosting

Cream cheese (16 oz / 450g, full-fat) — Do not use the tubs of “cream cheese spread.” You need the block kind. It’s denser and has less water, which means your frosting won’t be runny. Soften it completely.
Butter (½ cup / 1 stick / 113g, softened) — Again, unsalted, room temperature.
Confectioners’ sugar (4 cups / 480g) — Sift this! Lumpy sugar is the enemy of smooth frosting. I sift mine twice.
Vanilla extract (1 teaspoon) — For flavor.
Salt (¼ teaspoon) — To balance the sweetness.
Optional: White chocolate chips (½ cup) — Some people like to fold these into the frosting for extra sweetness. I skip them, but it’s your cake.
Equipment Needed
You don’t need a fancy kitchen for this. Here’s what I actually use when I’m making this red velvet sheet cake.
9×13 inch baking pan — The standard sheet cake size. I use a glass pan because it bakes evenly, but metal works too. Grease it well with butter and flour, or use baking spray with flour.
Stand mixer or hand mixer — Creaming the butter and sugar by hand is a workout. I use my stand mixer on medium speed. It takes about 3 minutes and gives a light, fluffy texture that’s hard to replicate by hand.
Mixing bowls — One large bowl for the wet ingredients, one medium for the dry. I like having separate bowls so I don’t overmix.
Spatula — A rubber spatula is great for scraping the bowl. You want to get every bit of batter.
Whisk — For mixing the dry ingredients. Makes sure the baking soda and salt are evenly distributed.
Offset spatula — For spreading the frosting. It makes a smooth, even layer much easier than a regular spatula.
How to Make It: Step-by-Step
Alright, let’s make this! I’m walking you through exactly how I do it, including the little tricks I’ve picked up over the years.
Step 1: Prep Your Pan and Oven
Preheat your oven to 350°F (175°C). Grease and flour your 9×13 inch pan. I like to line the bottom with parchment paper too, just in case. It makes cleanup easier and ensures the cake doesn’t stick.
Step 2: Mix the Dry Ingredients
In a medium bowl, whisk together the flour, baking soda, salt, and cocoa powder. Sifting is optional but recommended if your flour is lumpy. Set this aside.
Step 3: Cream the Butter and Sugar
In a large bowl, beat the softened butter and granulated sugar together on medium-high speed for about 3-4 minutes. You want it to look pale and fluffy. This step is crucial for the cake’s texture. Don’t rush it.
Step 4: Add Eggs and Oil
Beat in the eggs one at a time, mixing well after each addition. Then, add the vegetable oil and vanilla extract. Mix until combined. The mixture might look a little curdled at this point—that’s okay.
Step 5: Combine Wet and Dry
Reduce the mixer speed to low. Add the dry ingredients in three parts, alternating with the buttermilk in three parts. Start and end with the dry ingredients. Mix just until the flour disappears. Overmixing makes the cake tough. I stop mixing as soon as I see no more white streaks.
Step 6: Add the Red Color
Add the red food coloring. Mix on low until the color is even. The batter should be a vibrant, deep red. Pour it into your prepared pan and smooth the top with a spatula.
Step 7: Bake
Bake for 25-30 minutes. Test for doneness by inserting a toothpick into the center. It should come out clean or with just a few moist crumbs. Do not overbake, or the cake will be dry. The edges should just start to pull away from the pan.
Step 8: Cool Completely
Let the cake cool in the pan for 10 minutes, then turn it out onto a wire rack to cool completely. This is important. If you frost a warm cake, the frosting will melt and slide off. I usually bake the cake in the morning and frost it in the evening.
Step 9: Make the Frosting
While the cake cools, beat the softened cream cheese and butter together until smooth. Add the sifted confectioners’ sugar, vanilla, and salt. Beat on low until incorporated, then increase speed to high and beat for 2-3 minutes until fluffy. If it’s too stiff, add a teaspoon of milk. If it’s too runny, add more sugar.
Step 10: Frost and Serve
Spread the frosting over the cooled cake. Use an offset spatula for a smooth finish. You can leave it plain or add some white chocolate shavings on top. Slice with a sharp knife for clean cuts.
Expert Tips & Tricks
Here’s everything I’ve learned from making this dozens of times. These tips will save you from my mistakes.
Room Temperature Ingredients — I can’t stress this enough. Cold butter, cold eggs, cold cream cheese—they don’t blend well. It leads to lumpy batter and grainy frosting. Take everything out of the fridge an hour before you start.
Don’t Skip the Buttermilk — Buttermilk tenderizes the gluten and adds that signature tang. If you substitute with regular milk, the cake will be flatter and less flavorful. Make your own buttermilk if you have to.
Sift Your Sugar — Confectioners’ sugar has cornstarch in it, which can clump. Sifting ensures a silky smooth frosting. I’ve made the mistake of skipping this, and the result was lumpy. Don’t do that.
Use Gel Food Coloring — Liquid food coloring is mostly water. If you add enough to get a deep red, you’ll thin out the batter. Gel coloring is concentrated, so you get vibrant color without affecting the texture.
Refrigerate Before Serving — Cream cheese frosting needs to set. After frosting, put the cake in the fridge for at least 30 minutes before cutting. It makes the slices cleaner and the frosting firmer.
Common Mistakes:
- Cake is dry: You overbaked it. Check it at 25 minutes. The toothpick test is key.
- Frosting is runny: The cream cheese wasn’t cold enough, or you added too much milk. Chill the frosting in the fridge for 15 minutes before using.
- Frosting is too sweet: Add a pinch more salt or a splash of lemon juice to balance it.
Variations & Substitutions
Once you’ve nailed the basic version, here’s how you can mix it up. I’ve tried all of these.
White Chocolate Red Velvet — Fold ½ cup of white chocolate chips into the frosting. It adds a nice crunch and extra sweetness.
Strawberry Red Velvet — Add ¼ cup of freeze-dried strawberry powder to the dry ingredients. It enhances the red color naturally and adds a berry flavor.
Gluten-Free — Use a 1:1 gluten-free flour blend. The texture might be slightly denser, but it still tastes great. I use King Arthur’s blend.
Dairy-Free — Use vegan butter and dairy-free cream cheese. Use almond milk with vinegar for buttermilk. The flavor is slightly different, but it works.
Mini Cupcakes — Divide the batter into a muffin tin and bake for 18-20 minutes. Perfect for parties.
Chocolate Frosting — Swap the cream cheese frosting for a simple chocolate ganache. It’s a different vibe, but still delicious.
Serving & Storage
I usually serve this straight from the fridge, sliced into squares. It looks rustic and stays warm if you leave it out for a bit. Here are other ways I’ve enjoyed it:
Side Dishes: It’s a dessert, so it stands alone. But it pairs well with black coffee or sweet tea.
Toppings: White chocolate shavings, red sprinkles, or a dusting of powdered sugar. Keep it simple.
Storage:
- Refrigerator: Store in an airtight container for up to 5 days. The frosting will firm up in the fridge.
- Freezing: You can freeze the unfrosted cake for up to 3 months. Wrap it tightly in plastic and foil. Thaw in the fridge overnight. The frosted cake doesn’t freeze as well because the texture of the cream cheese changes.
Reheating: You don’t need to reheat this cake. Serve it at room temperature or slightly chilled. If it’s too cold from the fridge, let it sit out for 20 minutes before serving.
Nutrition Information
I’m not a nutritionist, but here’s the breakdown if you’re tracking. This is a rich dessert, so portion control is key.
Per serving (based on 12 slices):
- Calories: 450
- Protein: 5g
- Carbs: 60g
- Fiber: 1g
- Sugar: 45g
- Fat: 22g
- Saturated Fat: 13g
- Cholesterol: 65mg
- Sodium: 350mg
Look, this is a celebration cake. It’s not a health food. But it’s better than store-bought, and you know exactly what’s in it. When I want to make it lighter, I reduce the sugar in the frosting by ¼ cup, but I don’t recommend it too much—it’s meant to be sweet.
Final Thoughts
So that’s my classic Southern red velvet sheet cake! I’ve probably talked your ear off at this point, but when you make a recipe this often, you have a lot to say about it. This has saved me on more holidays than I can count. It’s my answer to “what should I bring?” when I’m tired, don’t want takeout, and still want something that tastes really good. My family is happy, my guests are happy, and I’m happy because I’m not stressed about cooking.
Make it yours! Try different add-ins, swap in your favorite sprinkles, adjust the sweetness. The best recipes are the ones you adapt to your family’s tastes. If you make this, drop a comment and let me know what you think! I love hearing how recipes turn out in your kitchen. And if something doesn’t work, tell me that too—I’m here to help troubleshoot.
Happy baking! And I hope your kitchen smells half as good as mine does right now.
Frequently Asked Questions
Can I use Dutch-processed cocoa?
You can, but the color might be darker and the flavor less tangy. Dutch-processed cocoa is neutralized, so it won’t react with the baking soda as much. If you use it, add ½ teaspoon of baking powder to help with the rise. Natural cocoa is traditional for red velvet.
Why did my cake turn out dense?
This usually happens if you overmix the batter after adding the flour. Once you add the dry ingredients, mix just until combined. Also, make sure your baking soda is fresh. Old baking soda won’t create the lift you need.
Can I make this ahead of time?
Yes! This is actually better made ahead. Bake the cake a day ahead, let it cool, wrap it in plastic, and refrigerate. Make the frosting the day of, or the night before. Frost the cake 30 minutes before serving. It holds up beautifully.
Why is my frosting runny?
The cream cheese was probably too warm, or you added too much milk. Cream cheese frosting is sensitive to heat. Make sure your cream cheese and butter are cool when you start. If it’s too runny, chill it in the fridge for 15 minutes, then beat it again.
Can I use liquid food coloring?
You can, but you’ll need a lot more to get a deep red, which can thin out the batter. Gel food coloring is concentrated and doesn’t add water. I highly recommend gel for the best color and texture.
How do I store leftovers?
Store in an airtight container in the fridge for up to 5 days. The frosting will firm up in the fridge. Let it sit at room temperature for 20 minutes before serving for the best texture.
Can I freeze the frosted cake?
It’s not recommended. The cream cheese frosting can separate and become grainy when thawed. Freeze the unfrosted cake instead, then frost it after thawing.
Pin This Recipe!


Classic Southern Red Velvet Sheet Cake
- Total Time: 1 hour
- Yield: 12 servings 1x
Description
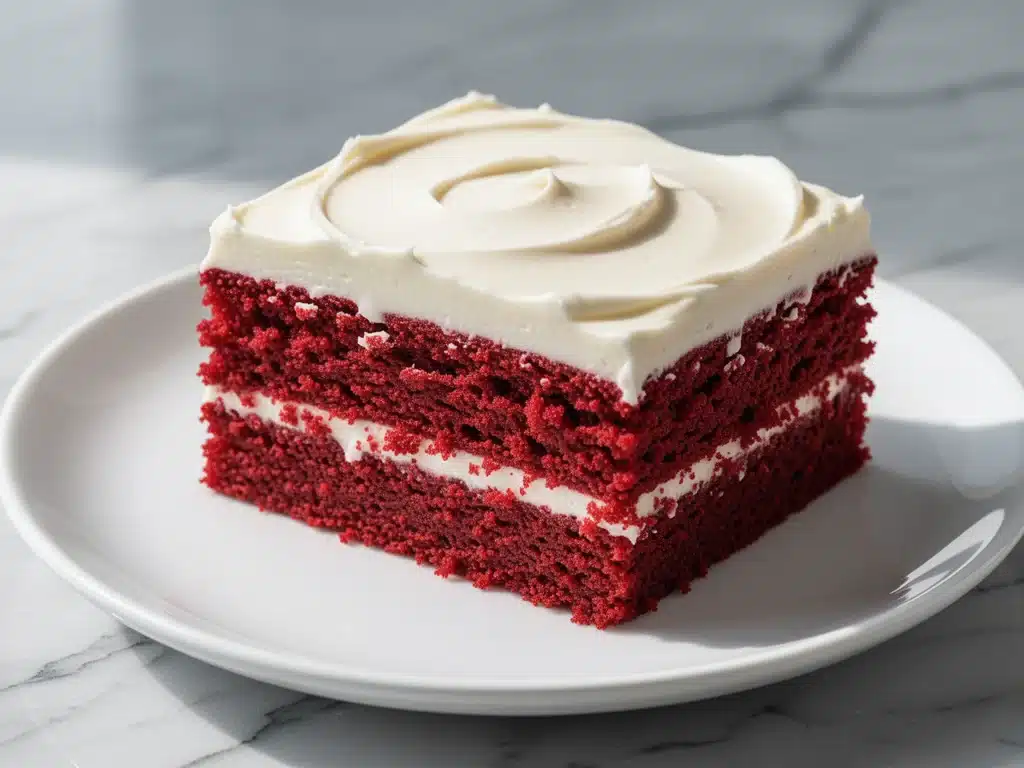
A moist, tangy, and vibrant red velvet sheet cake with cream cheese frosting, designed for easy celebration baking and crowd-pleasing results.
Ingredients
- 3 cups (375g) all-purpose flour
- 1 teaspoon baking soda
- 1 teaspoon kosher salt
- 2 tablespoons natural unsweetened cocoa powder
- 1 cup (2 sticks / 226g) unsalted butter, softened
- 1 ½ cups (300g) granulated sugar
- ½ cup (120ml) vegetable oil
- 4 large eggs, room temperature
- 2 teaspoons pure vanilla extract
- 1 ½ cups (360ml) buttermilk
- 2 tablespoons red gel food coloring
- 16 oz (450g) full-fat block cream cheese, softened
- ½ cup (1 stick / 113g) unsalted butter, softened
- 4 cups (480g) confectioners’ sugar, sifted
- 1 teaspoon vanilla extract
- ¼ teaspoon salt
Instructions
- Preheat oven to 350°F (175°C). Grease and flour a 9×13 inch baking pan, optionally lining the bottom with parchment paper.
- In a medium bowl, whisk together the flour, baking soda, salt, and cocoa powder. Set aside.
- In a large bowl, beat the softened butter and granulated sugar on medium-high speed for 3-4 minutes until pale and fluffy.
- Beat in the eggs one at a time, then add the vegetable oil and vanilla extract. Mix until combined.
- Reduce mixer speed to low. Add the dry ingredients in three parts, alternating with the buttermilk in three parts, starting and ending with dry ingredients. Mix just until flour disappears.
- Add the red food coloring and mix on low until the batter is evenly colored.
- Pour batter into the prepared pan and smooth the top.
- Bake for 25-30 minutes, or until a toothpick inserted in the center comes out clean. Do not overbake.
- Let the cake cool in the pan for 10 minutes, then turn out onto a wire rack to cool completely.
- While the cake cools, beat the cream cheese and softened butter together until smooth.
- Add the sifted confectioners’ sugar, vanilla, and salt. Beat on low until incorporated, then increase speed to high and beat for 2-3 minutes until fluffy.
- Spread the frosting over the completely cooled cake using an offset spatula.
- Refrigerate for at least 30 minutes before slicing to allow the frosting to set.
Notes
Ensure all ingredients are at room temperature for best results. Use natural cocoa powder, not Dutch-processed, for the traditional tang and color reaction. Gel food coloring is recommended over liquid to prevent thinning the batter. The cake stays moist for up to 5 days when stored in the refrigerator.
- Prep Time: 30 minutes
- Cook Time: 30 minutes
- Category: Dessert
- Cuisine: Southern
Nutrition
- Serving Size: 1 slice
- Calories: 450
- Sugar: 45
- Sodium: 350
- Fat: 22
- Saturated Fat: 13
- Carbohydrates: 60
- Fiber: 1
- Protein: 5
Keywords: red velvet cake, sheet cake, southern baking, cream cheese frosting, celebration cake, moist cake, easy dessert


