I still remember the summer my ice cream maker broke. It was July, the kind of humid, sticky heat that makes you crave something cold and sweet within five minutes of waking up. I was standing in my kitchen, staring at a bowl of what could only be described as “frozen dairy sludge,” feeling like a failure. I had followed the recipe exactly. I had chanted the manufacturer’s instructions like a prayer. But instead of creamy, dreamy vanilla clouds, I had gritty, icy shards that tasted like regret.
I was ready to give up. I was ready to accept that homemade ice cream was a luxury for people with expensive machines and infinite patience. Then, my friend Sarah came over, saw my sad bowl, and laughed. She didn’t offer sympathy. She handed me a whisk, a can of condensed milk, and a jar of vanilla beans. “You don’t need a machine,” she said. “You need heavy cream and a freezer.”
That was three years ago. Since then, I’ve made this ultra-creamy no-churn vanilla bean ice cream at least fifty times. I’ve made it for birthdays, for random Tuesday cravings, for when I needed to comfort a friend, and for when I just wanted to feel like a kid again. And let me tell you—it’s not just good. It’s better than the stuff from the fancy ice cream shop down the street. It’s richer, it’s smoother, and it tastes like actual vanilla, not that artificial chemical burn you get from the store-bought tubs.
The secret isn’t magic. It’s physics. Well, cooking physics. By whipping heavy cream into stiff peaks and folding in sweetened condensed milk, you’re trapping air into the fat structure of the cream. That air is what prevents ice crystals from forming. It’s the same principle as making mousse or whipped cream, but applied to a frozen dessert. The result? A texture so silky it melts on your tongue before you even realize you’ve taken a bite.
I’ve tweaked this recipe over and over. I’ve tried using vanilla extract (it’s fine, but not great). I’ve tried adding egg yolks (too much work, and it changes the texture). I’ve tried different sugars (granulated sugar gets grainy). But this specific combination—high-fat cream, sweetened condensed milk, and real vanilla beans—is the holy grail. It’s stable, it’s simple, and it’s absolutely addictive. If you’ve ever been intimidated by ice cream making, this is your invitation. You don’t need a machine. You just need a few ingredients and about fifteen minutes of active time.
Why You’ll Love This No-Churn Vanilla Bean Ice Cream
There are a dozen reasons I keep coming back to this recipe, but let’s be honest: it’s the convenience and the texture that keep me hooked. Here’s why this no-churn vanilla bean ice cream has earned a permanent spot in my freezer and my rotation:
- Zero Equipment Needed — Seriously. If you have a hand mixer or a stand mixer, you’re good to go. No ice cream maker? No problem. No churning, no freezing cans, no waiting for parts to thaw. Just mix, pour, and freeze. I’ve made this with nothing but a whisk and a bowl of courage, though a mixer helps.
- Texture That Rivals Premium Brands — I’m not exaggerating when I say this is ultra-creamy. The whipped cream base creates a light, airy structure that prevents that icy, crunchy texture you get from traditional churned ice cream if it’s not done perfectly. It’s smooth, dense, and velvety.
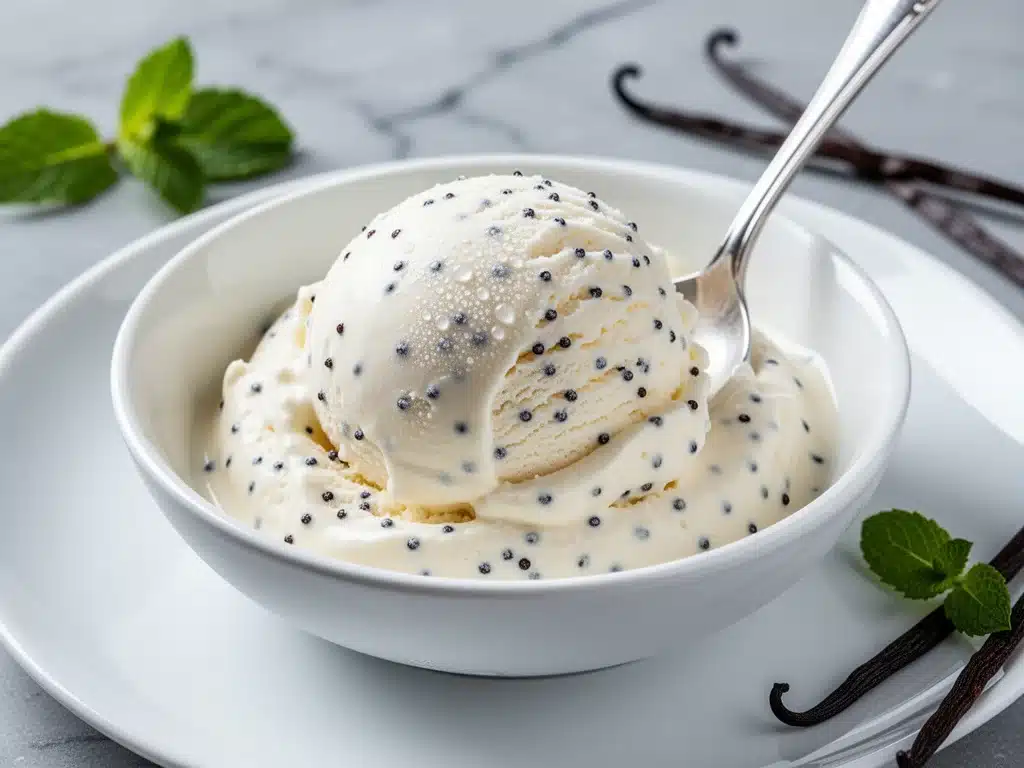
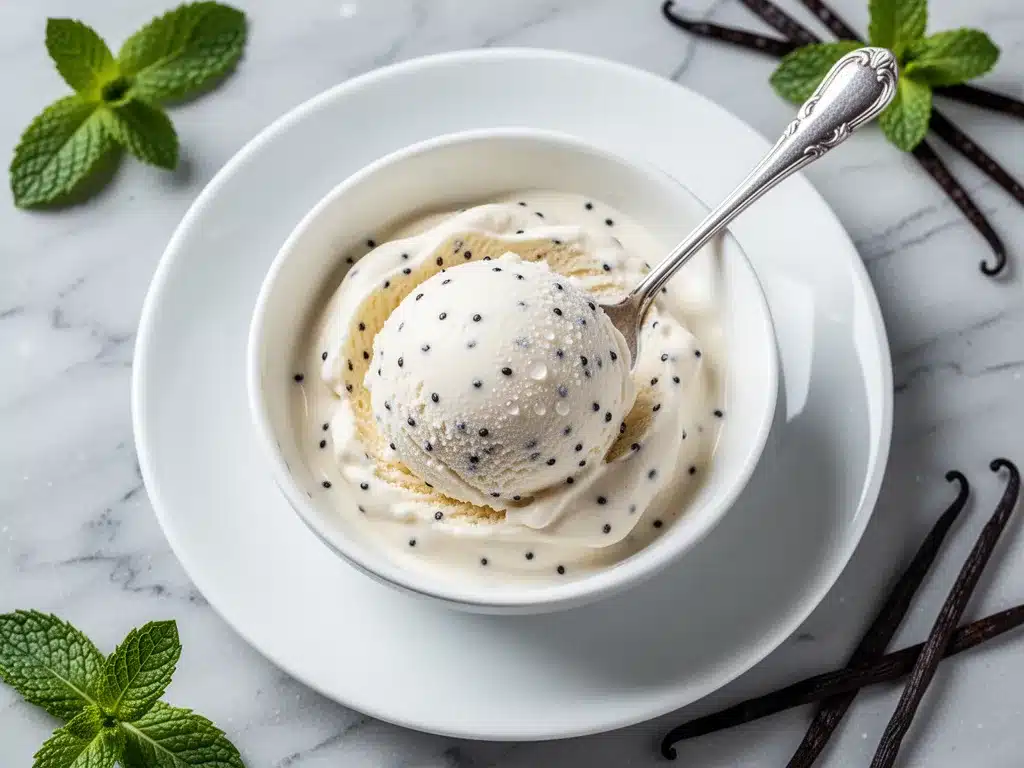
- Real Vanilla Flavor — Most store-bought vanilla ice creams taste like sugar and vanilla extract. This recipe uses actual vanilla beans. You’ll see those tiny black specks throughout, and the flavor is floral, complex, and deeply aromatic. It tastes like you spent hours steeping cream, but you didn’t.
- Ready in 6 Hours, Not Days — You can have ice cream in your freezer in less time than it takes to order delivery, wait for the driver, and find a bowl. It needs about 6 hours to set, but you can eat it sooner if you’re patient (and brave enough to deal with softer ice cream).
- Endlessly Customizable — While this vanilla bean base is perfect on its own, it’s also the ultimate canvas. Want chocolate? Fold in cocoa. Want strawberry? Puree fresh berries. Want bourbon? Add a splash. But honestly? The plain vanilla is so good, I often stick to the classic.
- Cost-Effective Luxury — Making this at home costs a fraction of buying premium pints. A quart of homemade ice cream is cheaper than two small tubs from the grocery store, and the quality difference is night and day.
This recipe has saved me on more hot days than I can count. It’s my go-to when I want something special but don’t want to deal with the hassle. It’s reliable, it’s delicious, and it makes everyone happy. Even the pickiest eaters in my life (hi, my teenage son) ask for seconds.
Ingredients You’ll Need
Here’s the best part: you probably have most of these ingredients already. This no-churn vanilla bean ice cream relies on pantry staples and a few key dairy products. The simplicity is what makes it so approachable, but the quality of ingredients matters more than you’d think.
The Base
Heavy Cream (2 cups / 480ml) — This is non-negotiable. You need heavy cream with at least 36% fat content. Light cream or half-and-half won’t whip up stiff peaks, and without those peaks, you’ll end up with icy ice cream. I use organic heavy cream when I can find it, but any good brand works. Make sure it’s cold—straight from the fridge.
Sweetened Condensed Milk (14 oz / 397g can) — This is the sweetener and the stabilizer. It adds sugar for sweetness, but more importantly, the milk solids in condensed milk prevent ice crystals from forming. Do not use evaporated milk. They are not the same. Evaporated milk is unsweetened and thin; condensed milk is thick and syrupy. You need the thick stuff.
Vanilla Beans (2 whole pods) — This is where the magic happens. Real vanilla beans give you that speckled look and the complex flavor. If you can’t find fresh beans, you can use 2 tablespoons of high-quality vanilla extract, but the flavor won’t be as deep. Look for Madagascar or Tahitian vanilla beans for the best aroma.
Salt (¼ teaspoon) — A pinch of salt enhances the vanilla flavor and balances the sweetness. Don’t skip it. It’s the secret ingredient that makes the ice cream taste “finished.”
Optional Add-Ins
Chocolate Chips (½ cup) — For a funfetti-style twist, fold in semi-sweet chocolate chips. They add crunch and contrast to the smooth cream.
Fresh Berries (1 cup) — If you want a fruit twist, fold in fresh strawberries or raspberries. Just make sure they’re chopped small so they distribute evenly.
Liquor (1-2 tablespoons) — Bourbon, rum, or vanilla vodka can add a grown-up twist. The alcohol prevents the ice cream from freezing too hard, making it scoopable even after a few days.
Personal Tips:
- Brand Recommendations: I always use La Lechera for condensed milk because it’s consistent. For vanilla beans, I buy from local spice shops or online retailers that specialize in vanilla. Avoid the tiny packets in the baking aisle; they’re often dried out and flavorless.
- Shopping Shortcuts: If you’re in a pinch, you can use vanilla extract, but I recommend buying a few extra vanilla beans and scraping them into a jar of sugar to make vanilla sugar for future use.
- Substitutions: No heavy cream? You can use coconut cream (the thick part from a can of full-fat coconut milk), but the flavor will be coconutty, not vanilla. For a dairy-free version, use coconut cream and maple syrup instead of condensed milk.
Equipment Needed
You don’t need fancy equipment for this. Here’s what I actually use:
Large Mixing Bowl — I use a stainless steel bowl because it stays cold. Glass works too. Avoid plastic if you can, as it doesn’t retain cold as well.
Electric Hand Mixer or Stand Mixer — A hand mixer is perfect for this. I’ve used my KitchenAid stand mixer with the whisk attachment, but a hand mixer is easier to clean and just as effective. If you don’t have an electric mixer, you can use a whisk, but it will take about 10-15 minutes of arm workout.
Rubber Spatula — Essential for folding the mixture gently without deflating the air you’ve whipped into the cream. I use a flexible silicone spatula because it gets every bit of mixture out of the bowl.
9×5 Inch Loaf Pan or Similar Container — Any freezer-safe container works. I use a metal loaf pan because it conducts cold well and helps the ice cream freeze evenly. You can also use a plastic container with a lid.
Plastic Wrap — To cover the pan and prevent freezer burn. I press the plastic wrap directly onto the surface of the ice cream to minimize air exposure.
Small Knife — For splitting the vanilla bean and scraping out the seeds.
Optional but Nice:
- Microplane Zester — If you want to add orange zest or lemon zest for a citrus twist.
- Offset Spatula — For smoothing the top of the ice cream before freezing.
How to Make It: Step-by-Step
Alright, let’s make this! I’m walking you through exactly how I do it, including the little tricks I’ve picked up over the years. This process is simple, but technique matters.
Step 1: Prep Your Vanilla Beans (5 minutes)
Take your vanilla beans and split them lengthwise with a small knife. You’ll see the tiny black seeds inside. Use the back of the knife to scrape out those seeds. This is where all the flavor is. Add both the seeds and the pods to a small bowl. The pods can be saved and dried for later use in sugar or cream.
Step 2: Whip the Heavy Cream (5-7 minutes)
Pour the cold heavy cream into your large mixing bowl. Start whipping with your electric mixer on medium speed. Gradually increase to high speed. Watch closely. You’re looking for stiff peaks. This means when you lift the beaters, the cream stands up in sharp points and doesn’t droop. This usually takes 3-5 minutes. Do not over-whip, or the cream will start to separate into butter. Stop as soon as you see stiff peaks.
Step 3: Fold in the Condensed Milk (2 minutes)
Pour the sweetened condensed milk over the whipped cream. Add the scraped vanilla seeds and the vanilla pod. Gently fold the mixture together using your rubber spatula. Use a cutting motion, lifting from the bottom and folding over the top. Do this gently to keep the air in the cream. You’re just combining the ingredients, not mixing them vigorously. Once the vanilla seeds are distributed and the mixture looks uniform, stop.
Step 4: Transfer and Smooth (2 minutes)
Pour the mixture into your prepared loaf pan. Use the spatula to smooth the top. Make sure there are no air pockets. If you’re adding chocolate chips or fruit, fold them in now, gently mixing until just combined.
Step 5: Freeze (6+ hours)
Cover the pan with plastic wrap, pressing it directly onto the surface of the ice cream to prevent ice crystals. Place the pan in the freezer. Let it freeze for at least 6 hours, or overnight for best results. The longer it freezes, the firmer it will be.
Step 6: Serve
When you’re ready to serve, let the ice cream sit at room temperature for 5-10 minutes to soften slightly. This makes scooping much easier. Enjoy straight from the pan or in cones!
Expert Tips & Tricks
Here’s everything I’ve learned from making this dozens of times. These tips will save you from my mistakes.
The #1 Rule: Keep Everything Cold
Your heavy cream must be ice cold. If your bowl or beaters are warm, the cream won’t whip properly. I sometimes put my bowl in the fridge for 15 minutes before starting. This small step makes a huge difference in the final texture.
Don’t Over-Mix
When folding in the condensed milk, be gentle. If you mix too vigorously, you’ll deflate the air bubbles you worked so hard to create. The ice cream will be dense and icy instead of light and creamy. Think of it like making a soufflé—treat it with care.
Use Real Vanilla Beans
I can’t stress this enough. Vanilla extract is fine, but it lacks the complexity of real beans. The seeds add visual appeal and a deeper flavor. If you’re worried about the cost, buy a few beans and use them for multiple batches. You can also dry the pods and use them to make vanilla sugar.
Prevent Freezer Burn
Plastic wrap is your best friend. Press it directly onto the surface of the ice cream. This prevents air from reaching the surface, which causes freezer burn and ice crystals. If you don’t have plastic wrap, you can use a layer of parchment paper, but plastic wrap works best.
Common Mistakes (and how to avoid them)
- Mistake: Ice Cream is too hard. Fix: It needs more time to soften before scooping. Let it sit out for 10-15 minutes. If it’s still too hard, you may have used too much condensed milk or frozen it for too long.
- Mistake: Ice Cream is too soft. Fix: It needs more freezing time. Also, check that your freezer is at 0°F (-18°C). If your freezer is too cold, the ice cream will freeze too hard. If it’s too warm, it won’t set.
- Mistake: Grainy texture. Fix: This usually happens if the condensed milk wasn’t fully incorporated or if sugar crystals formed. Make sure to fold gently but thoroughly. Also, ensure your cream wasn’t over-whipped.
Variations & Substitutions
Once you’ve nailed the basic version, here’s how you can mix it up. I’ve tried all of these.
Chocolate No-Churn Ice Cream
Replace ½ cup of the heavy cream with ½ cup of heavy cream + ¼ cup cocoa powder. Sift the cocoa powder into the cream before whipping. This creates a rich, dark chocolate ice cream.
Bourbon Vanilla
Add 2 tablespoons of bourbon to the condensed milk before folding. The alcohol keeps the ice cream softer and adds a warm, spicy flavor that pairs beautifully with vanilla.
Strawberry Swirl
Puree 1 cup of fresh strawberries with 1 tablespoon of sugar. Let it cool completely, then swirl it into the vanilla mixture before freezing. Don’t mix it all in; just create ribbons of strawberry.
Mint Chocolate Chip
Add 1 teaspoon of peppermint extract to the condensed milk. Fold in ½ cup of mini chocolate chips. This is a classic combination that never fails.
Dairy-Free Version
Use full-fat coconut cream instead of heavy cream, and maple syrup instead of condensed milk. The texture will be different but still creamy and delicious. Add a pinch of salt to balance the sweetness.
Gluten-Free
This recipe is naturally gluten-free. Just ensure your vanilla beans and condensed milk are certified gluten-free if you have severe allergies.
Serving & Storage
How to Serve: I usually serve this straight from the loaf pan at the dinner table—it looks rustic and stays warm. But here are other ways I’ve enjoyed it:
- With Fresh Fruit — Berries, peaches, or figs add a nice contrast to the rich cream.
- On Waffles or Pancakes — A scoop of vanilla ice cream on warm waffles is a dream.
- With Pie — Classic slice of apple pie with a scoop of this ice cream is heaven.
Storage Instructions:
Refrigerator: Not applicable. This is frozen dessert.
Freezer: Store in an airtight container for up to 2 weeks. The plastic wrap pressed against the surface is crucial for maintaining quality. After 2 weeks, it may start to develop freezer burn.
Reheating: Not applicable. Just let it soften at room temperature for 5-10 minutes before scooping.
Pro Tip:
If you’re making this for a party, make it a day ahead. It needs time to set fully, and making it ahead ensures it’s ready to serve without last-minute stress.
Nutrition Information
I’m not a nutritionist, but here’s the breakdown if you’re tracking.
Per Serving (based on 8 servings):
| Nutrient | Amount |
|---|---|
| Calories | 280 |
| Protein | 3g |
| Carbs | 32g |
| Fiber | 0g |
| Sugar | 30g |
| Fat | 16g |
| Saturated Fat | 10g |
| Cholesterol | 50mg |
| Sodium | 45mg |
| Calcium | 120mg |
What’s Good:
- High in calcium from the dairy.
- Relatively low in protein, but that’s expected for ice cream.
- No artificial preservatives or additives.
What to Know:
- High in sugar and saturated fat. Enjoy in moderation.
- Contains dairy. Not suitable for lactose-intolerant individuals without modifications.
- Calories can vary based on the brand of condensed milk and cream used.
My Take: Look, this is ice cream. It’s not a health food. It’s a treat. But it’s a high-quality treat made with simple ingredients. When I make this, I know exactly what’s in it. No gums, no stabilizers, no weird chemicals. Just cream, sugar, and vanilla. That’s worth it.
Final Thoughts
So that’s my go-to ultra-creamy no-churn vanilla bean ice cream! I’ve probably talked your ear off at this point, but when you make a recipe this often, you have a lot to say about it.
This has saved summer evenings more times than I can count. It’s my answer to “what’s for dessert” when I want something special but don’t want to spend hours in the kitchen. My kids are happy, my husband’s happy, and I’m happy because I’m not stressed about cooking.
Make it yours! Try different add-ins, swap in your favorite fruits, adjust the vanilla. The best recipes are the ones you adapt to your family’s tastes. If you make this, drop a comment and let me know what you think! I love hearing how recipes turn out in your kitchen. And if something doesn’t work, tell me that too—I’m here to help troubleshoot.
Happy scooping! And I hope your freezer smells half as good as mine does right now.
Frequently Asked Questions
Q: Can I use vanilla extract instead of vanilla beans?
A: Yes, you can. Use 2 tablespoons of high-quality vanilla extract. However, the flavor won’t be as complex, and you won’t get the pretty black specks. If you use extract, add it to the condensed milk before folding. I recommend saving the vanilla beans for future batches—they’re worth the effort.
Q: Why is my ice cream icy?
A: This usually happens if the cream wasn’t whipped to stiff peaks, or if the mixture wasn’t folded gently enough. Air is what prevents ice crystals. Also, make sure your cream was cold when you started. If your freezer isn’t cold enough, that can also cause iciness. Check your freezer temperature—it should be 0°F (-18°C).
Q: Can I make this ahead for a party?
A: Absolutely. This ice cream actually improves with time. Make it 2-3 days ahead, and let it sit in the freezer until you’re ready to serve. Just remember to let it soften at room temperature for 10 minutes before scooping.
Q: How long does this ice cream last in the freezer?
A: It lasts up to 2 weeks in an airtight container. After that, it may start to develop freezer burn or lose its creamy texture. The plastic wrap pressed against the surface is crucial for maintaining quality.
Q: Can I use coconut cream instead of heavy cream?
A: Yes, for a dairy-free version. Use the thick part from a can of full-fat coconut milk. Chill the can overnight, then scoop out the solid cream. Whip it like heavy cream. You’ll need to use maple syrup or agave instead of condensed milk, as condensed milk contains dairy. The flavor will be coconutty, but still creamy and delicious.
Q: Why did my ice cream turn out too hard to scoop?
A: It likely needs more time to soften at room temperature. Try letting it sit out for 15-20 minutes before scooping. If it’s still too hard, you may have used too much condensed milk, which acts as a hardener. Next time, reduce the condensed milk slightly or add a splash of alcohol (like bourbon) to keep it softer.
Q: Can I double this recipe?
A: Yes, you can double everything. Just use a larger mixing bowl and a larger container for freezing. The process is the same, but you may need to whip the cream in batches if your mixer isn’t large enough.
Pin This Recipe!
Ultra-Creamy No-Churn Vanilla Bean Ice Cream
- Total Time: 6 hours 15 minutes
- Yield: 8 servings 1x
Description
A rich, silky, and ultra-creamy homemade ice cream that requires no ice cream machine. By whipping heavy cream and folding in sweetened condensed milk with real vanilla beans, you achieve a texture that rivals premium brands in just 15 minutes of active time.
Ingredients
- 2 cups (480ml) heavy cream, cold
- 1 can (14 oz / 397g) sweetened condensed milk
- 2 whole vanilla beans
- 1/4 teaspoon salt
- Optional: 1/2 cup semi-sweet chocolate chips
- Optional: 1 cup fresh berries, chopped
- Optional: 1-2 tablespoons bourbon, rum, or vanilla vodka
Instructions
- Split the vanilla beans lengthwise with a small knife and scrape out the seeds. Add both the seeds and the pods to a small bowl.
- Pour the cold heavy cream into a large mixing bowl. Whip with an electric mixer on medium speed, gradually increasing to high speed, until stiff peaks form (about 3-5 minutes). Do not over-whip.
- Pour the sweetened condensed milk over the whipped cream. Add the scraped vanilla seeds and pods.
- Gently fold the mixture together using a rubber spatula until uniform, being careful not to deflate the air in the cream.
- Pour the mixture into a 9×5 inch loaf pan or similar freezer-safe container. Smooth the top with a spatula.
- If using add-ins like chocolate chips or fruit, fold them in gently now.
- Cover the pan with plastic wrap, pressing it directly onto the surface of the ice cream to prevent freezer burn.
- Freeze for at least 6 hours or overnight until firm.
- Before serving, let the ice cream sit at room temperature for 5-10 minutes to soften slightly for easier scooping.
Notes
Ensure the heavy cream is ice cold for best whipping results. If you cannot find vanilla beans, substitute with 2 tablespoons of high-quality vanilla extract. For a dairy-free version, use coconut cream and maple syrup instead of heavy cream and condensed milk. Press plastic wrap directly onto the surface to prevent ice crystals.
- Prep Time: 15 minutes
- Cook Time: 0 minutes
- Category: Dessert
- Cuisine: American
Nutrition
- Serving Size: 1/8 of the loaf pan
- Calories: 280
- Sugar: 30
- Sodium: 45
- Fat: 16
- Saturated Fat: 10
- Carbohydrates: 32
- Protein: 3
Keywords: no-churn ice cream, vanilla bean ice cream, homemade ice cream, easy dessert, summer treats, dairy dessert, frozen dessert


