I have a confession to make. For years, I convinced myself that I needed a wok, a deep fryer, and the steady hands of a Chinese takeout chef to make good sesame chicken. So, I just ordered it. Every time. It was easier. It was consistent. It was… okay.
But here’s the thing about takeout chicken. It’s usually breading, not chicken. And the sauce? It’s sweet, yes, but it’s also thin and salty in a weird, preservative way. I wanted the sticky, glossy, finger-licking good version, but I wanted it to taste like actual food. Real chicken. Real sauce.
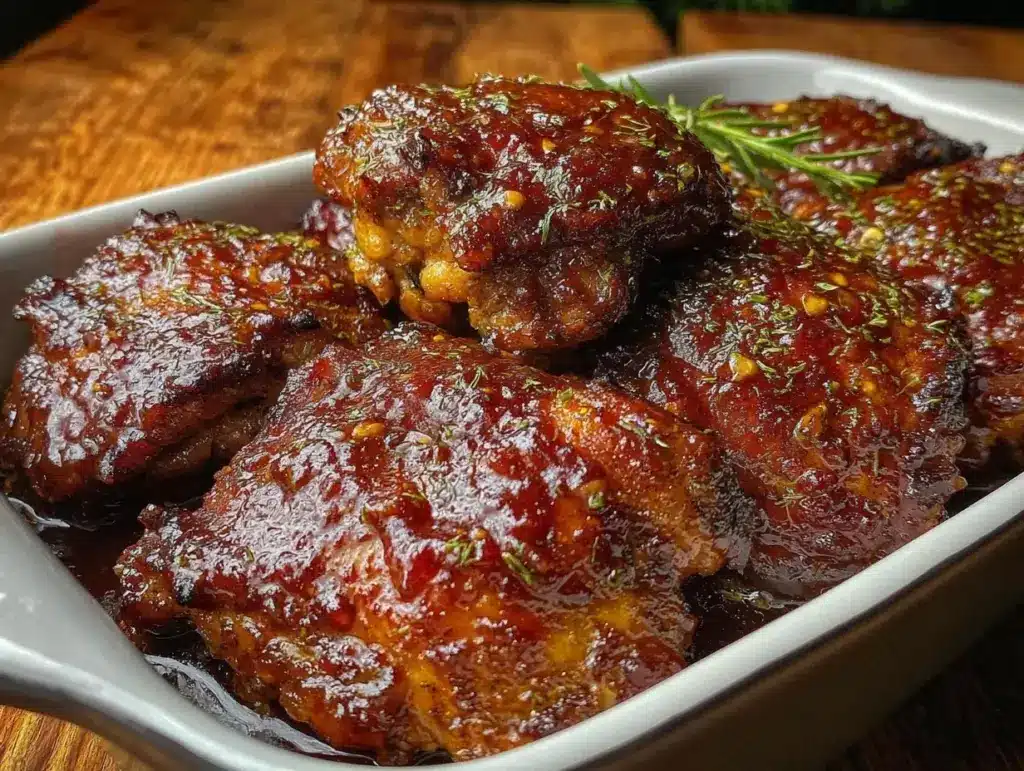
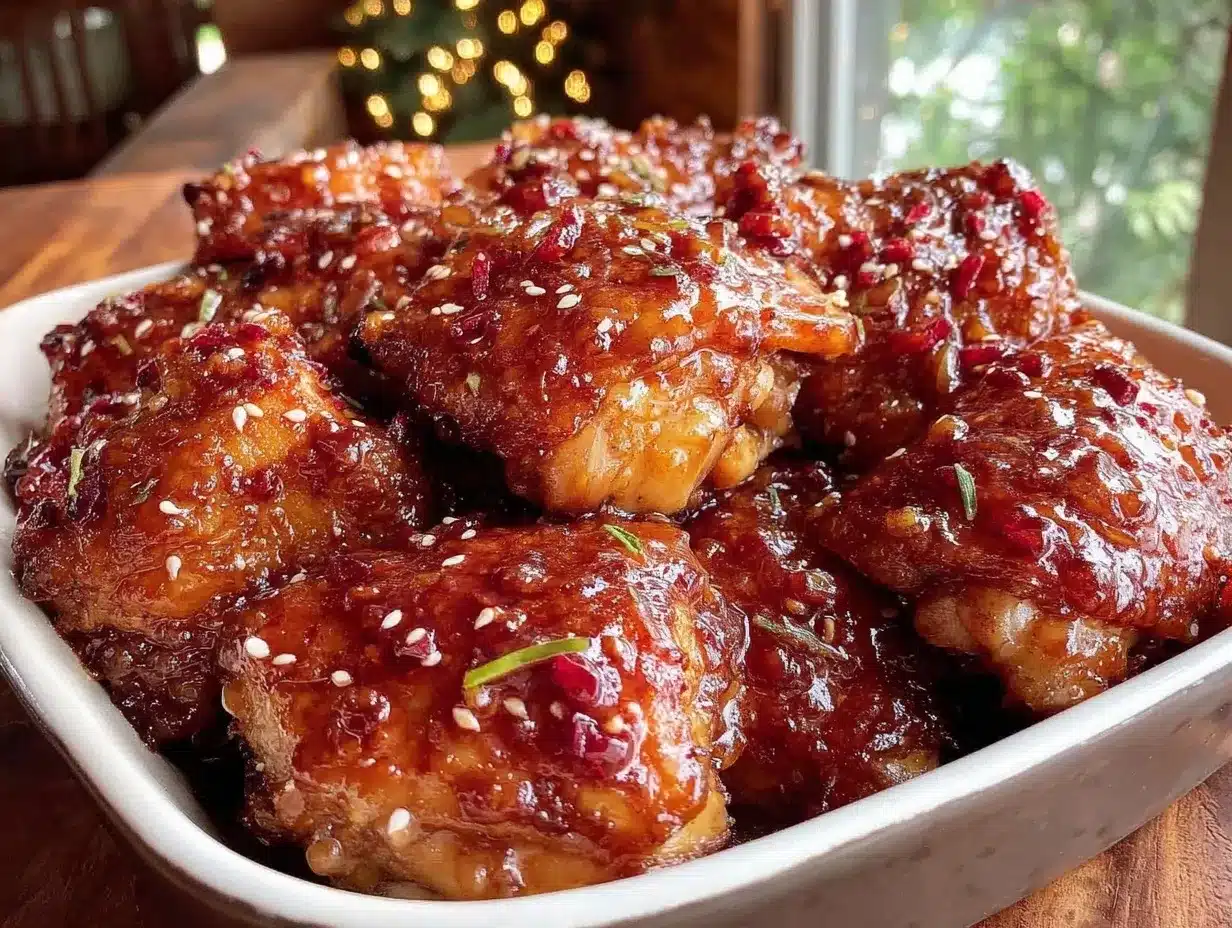
So, I stopped overthinking it. I bought some chicken thighs (boneless, skinless, because I’m not trying to debone anything on a Tuesday) and a handful of pantry staples. I threw them in the oven. I didn’t fry a single thing. I didn’t need a wok. And when I took that tray out of the oven, golden brown and dripping with that thick, amber-colored glaze, I realized I’d been doing it wrong my whole life.
These Sticky Baked Sesame Chicken Thighs are better than takeout. Not just “good for homemade” better. Actually better. The meat stays juicy because thighs don’t dry out like breasts. The coating gets crispy without deep frying. And the sauce? It’s thick enough to coat the back of a spoon and cling to every bite. I’ve made this recipe so many times that it’s now the default answer when someone asks what I’m making for dinner. If you’re looking for a weeknight dinner that feels fancy but takes zero effort, this is the one. Trust me. You really can’t mess this up.
Why You’ll Love This Recipe
There are a lot of chicken recipes out there. But this one? It’s special. It’s the kind of recipe that makes your house smell amazing and your guests ask for the secret ingredient (it’s just soy sauce and sesame oil, by the way).
Here’s why this baked sesame chicken has taken over my kitchen:
It’s Foolproof for Beginners — Seriously. If you can mix a bowl of sauce and toss chicken in cornstarch, you can make this. I’ve walked my teenager through it. No complex techniques. No timing nightmares. You just bake it. That’s it.
Thighs Stay Juicy — Chicken breasts are tricky. They dry out in two seconds if you look at them wrong. Thighs? They’re forgiving. They stay moist even if you bake them a minute too long. Plus, they have more flavor. I’ll never go back to breasts for this recipe.
Zero Deep Frying — I hate cleaning grease splatter. I hate the smell of fried oil lingering in my curtains for days. Baking gives you that crispy, fried texture without the mess or the health guilt. It’s a win-win.
Sauce That Actually Sticks — Have you ever ordered takeout and watched the sauce slide off the chicken into the box? Not here. This sauce is thickened with a little cornstarch slurry, so it clings to the chicken like glue. Every bite is covered.
Pantry-Friendly — You probably have 90% of this already. Soy sauce, sesame oil, honey, garlic, ginger, cornstarch. These aren’t obscure ingredients. They’re staples. This is the perfect recipe for when you’re tired and don’t want to go to the store.
This is my go-to when I want dinner to feel like a treat but don’t want to stress about it. It’s reliable. It’s delicious. And it’s going to change your mind about homemade Chinese food.
Ingredients You’ll Need
Here’s the best part: this recipe is minimalist. You don’t need a weird spice blend or five different types of vinegar. Just good, simple ingredients that do exactly what they’re supposed to.
For the Chicken:
Chicken Thighs (2 pounds / 900g) — Boneless and skinless. Cut into bite-sized pieces, about 1-inch chunks. I buy them in a bulk bag and freeze half for later. Thighs are key here—breasts get tough, thighs get tender.
Cornstarch (½ cup / 60g) — This is the secret weapon. It creates that crispy, fried-like coating when baked. Don’t use flour. Don’t use breadcrumbs. Cornstarch is the only way to get that specific texture. It’s cheap and easy to find.
Egg White (1 large) — Just the white. It acts as a binder so the cornstarch sticks to the chicken. If you’re worried about waste, scramble the yolk into your sauce or make an omelet with it. Don’t let it go to waste.
Salt and Black Pepper (to taste) — Basic seasoning. Don’t skip it. It seasons the chicken itself, not just the sauce.
Sesame Oil (1 teaspoon) — Just a little bit tossed with the chicken. It adds that nutty aroma right from the start. Toasted sesame oil is strong, so don’t overdo it.
For the Sticky Sauce:
Soy Sauce (½ cup / 120ml) — I use regular soy sauce, not low-sodium, because I want that salty umami punch. If you’re watching sodium, use low-sodium and add a pinch more salt later. Kikkoman is my go-to brand.
Honey (⅓ cup / 80g) — Or corn syrup. Honey gives it a floral sweetness. Corn syrup makes it glossier. I like honey, but both work. Don’t use maple syrup; it has a flavor that clashes with the sesame.
Rice Vinegar (2 tablespoons / 30ml) — This cuts the sweetness. It’s essential. If you don’t have rice vinegar, apple cider vinegar works in a pinch, but rice is more authentic and milder.
Garlic (4 cloves, minced) — Fresh garlic. Only. Jarred garlic tastes metallic in this sauce. Minced is fine, or grate it if you hate chunks. Four cloves is a lot, but it balances the sweet sauce.
Fresh Ginger (1 tablespoon, grated) — Or 1 teaspoon ground ginger. Fresh is better, but ground works if you’re in a rush. Ginger adds that spicy warmth that makes it taste like takeout.
Water (¼ cup / 60ml) — To thin the sauce so it coats evenly.
For the Finish:
Sesame Seeds (2 tablespoons) — Toasted sesame seeds. You can buy them pre-toasted, or toast them in a dry pan for 2 minutes. They add crunch and look beautiful. Don’t skip the garnish; it makes it look professional.
Green Onions (2 stalks, sliced) — For color. It makes the dish pop. I usually have green onions in the fridge from another recipe. If you don’t, chopped cilantro works too, but green onions are traditional.
Equipment Needed
You don’t need fancy gear for this. Here’s what I actually use:
Rimmed Baking Sheet — A standard half-sheet pan. Line it with parchment paper or aluminum foil. This is non-negotiable for easy cleanup. If you don’t line it, you’ll be scraping burnt sugar off your pan for 20 minutes.
Large Mixing Bowls — You’ll need two. One for the chicken, one for the sauce. I use two medium bowls.
Whisk — For the sauce. A small whisk is fine.
Tongs — For tossing the chicken in cornstarch and flipping it on the baking sheet. Forks work too, but tongs are faster.
Small Saucepan — Or just a microwave-safe bowl. You’ll heat the sauce briefly to dissolve the cornstarch. I use a small saucepan on the stove, but if you’re lazy, microwave works fine.
Parchment Paper — Seriously, buy a roll. This recipe gets sticky. So sticky. Parchment paper saves your sanity.
How to Make It: Step-by-Step
Alright, let’s make this! I’m walking you through exactly how I do it. It’s simple, but there are a few tricks to get that perfect sticky coating.
Step 1: Prep the Chicken (5 minutes)
Cut your chicken thighs into 1-inch cubes. Pat them dry with paper towels. This is important—dry chicken helps the cornstarch stick. If they’re wet, they’ll get soggy. Place the chicken in a large bowl.
Step 2: Coat the Chicken (5 minutes)
Add the egg white, salt, pepper, and sesame oil to the chicken. Toss until everything is coated. Now, add the cornstarch. Toss again until every piece is lightly dusted. It should look like it’s wearing a thin, white powder coat. Don’t panic if it looks dry; that’s what we want. Set aside.
Step 3: Bake the Chicken (20 minutes)
Preheat your oven to 400°F (200°C). Line a baking sheet with parchment paper. Spread the chicken in a single layer. Don’t crowd them! If they touch, they steam instead of bake. Give them space. Bake for 20 minutes. Flip them halfway through (at 10 minutes) to ensure even browning. They should be golden and slightly crispy.
Step 4: Make the Sauce (5 minutes)
While the chicken bakes, make the sauce. In a small saucepan, combine soy sauce, honey, rice vinegar, water, minced garlic, and grated ginger. Whisk it together. Place it over medium heat and bring to a simmer. Once it’s hot, mix 1 tablespoon of cornstarch with 1 tablespoon of cold water to make a slurry. Whisk the slurry into the sauce. Let it bubble for 1-2 minutes until it thickens. It should coat the back of a spoon. Remove from heat.
Step 5: Combine and Glaze (5 minutes)
Take the chicken out of the oven. Pour the hot sauce over the chicken. Toss gently to coat every piece. Return the baking sheet to the oven for 5 more minutes. The sauce will bubble and thicken further, clinging to the chicken. Watch it closely—it can burn if you leave it too long.
Step 6: Garnish and Serve
Take it out. Sprinkle with toasted sesame seeds and sliced green onions. Serve immediately over steamed rice. The rice is crucial for soaking up that extra sauce.
Expert Tips & Tricks
Here’s everything I’ve learned from making this dozens of times. These tips will save you from my mistakes.
Don’t Skip the Parchment Paper
I know, it’s extra trash. But when this recipe is done, your pan will look like a caramel factory exploded. Parchment paper means you peel it off and throw it away. Zero scrubbing. Worth it.
Pat the Chicken Dry
Wet chicken = soggy coating. I’ve made this mistake twice. The cornstarch slides right off if the chicken is wet. Always pat it dry with paper towels first.
Don’t Crowd the Pan
If the chicken pieces are touching, they won’t get crispy. They’ll steam in their own juices. Use two baking sheets if you have to. Give them space.
Toast Your Sesame Seeds
Raw sesame seeds are bland. Toast them in a dry pan for 2-3 minutes until they smell nutty and turn light brown. It takes 2 minutes and adds so much flavor.
Make the Sauce Thick
The sauce needs to be thick enough to cling. If it’s too thin, it’ll run off. If it’s too thick, it’ll clump. Aim for a consistency like warm maple syrup. The slurry is key here.
Flip the Chicken
Halfway through baking, flip the pieces. This ensures even browning on all sides. It takes 30 seconds and makes a big difference.
Variations & Substitutions
Once you’ve nailed the basic version, here’s how you can mix it up. I’ve tried all of these.
Spicy Version
Add 1-2 teaspoons of sriracha or chili garlic sauce to the sauce. If you like heat, this is the way to go. My nephew loves it this way.
Vegetarian Version
Use firm tofu or seitan instead of chicken. Press the tofu well, then follow the same steps. It works surprisingly well.
Gluten-Free
Use tamari instead of soy sauce. Everything else is naturally gluten-free. Check your cornstarch (most is GF, but some brands process wheat). I use Bob’s Red Mill.
Dairy-Free
This recipe is already dairy-free! Just make sure your honey is vegan if you’re strict (some vegans avoid honey). Otherwise, you’re good.
Slow Cooker Version
I haven’t tested this in a slow cooker for the crispy texture, but you can bake the chicken first, then toss in the slow cooker with the sauce on low for 30 minutes. It won’t be as crispy, but it’s easier for meal prep.
Serving & Storage
How to Serve:
I serve this over jasmine rice. The fluffy rice soaks up the sticky sauce perfectly. You can also serve it with broccoli or stir-fried veggies. A simple side salad works too if you want something light.
Storage:
Store leftovers in an airtight container in the fridge for up to 4 days. The chicken will get softer as it sits, but the flavor stays good.
Reheating:
Reheat in the oven at 350°F for 10 minutes to crisp it up again. The microwave will make it soggy. If you must use the microwave, do it in 30-second intervals and let it sit for a minute after.
Freezing:
You can freeze the baked chicken (without sauce) for up to 3 months. Thaw and reheat, then make fresh sauce. The sauce doesn’t freeze well because the cornstarch breaks down.
Nutrition Information
I’m not a nutritionist, but here’s the breakdown if you’re tracking. Per serving (based on 4 servings):
- Calories: 450
- Protein: 35g
- Carbs: 40g
- Fiber: 1g
- Sugar: 25g
- Fat: 15g
Look, this is comfort food. It has sugar and sodium. But it’s also high in protein and uses real chicken. It’s better than takeout because you control the ingredients. When I want to make it lighter, I double the veggies and use less honey. But usually? I just enjoy it.
Final Thoughts
So that’s my go-to sticky baked sesame chicken! I’ve probably talked your ear off at this point, but when you make a recipe this often, you have a lot to say about it.
This has saved weeknight dinners more times than I can count. It’s my answer to “what’s for dinner” when I’m tired, don’t want takeout, and still want something that tastes really good. My kids are happy, my husband’s happy, and I’m happy because I’m not stressed about cooking.
Make it yours! Try different add-ins, swap in your favorite vegetables, adjust the garlic (though more is always better in my opinion). The best recipes are the ones you adapt to your family’s tastes.
If you make this, drop a comment and let me know what you think! I love hearing how recipes turn out in your kitchen. And if something doesn’t work, tell me that too—I’m here to help troubleshoot.
Happy cooking! And I hope your kitchen smells half as good as mine does right now.
Frequently Asked Questions
Can I use chicken breasts instead of thighs?
You can, but they will be drier. Thighs are juicier and more forgiving. If you must use breasts, cut them into smaller pieces and don’t overbake them. Check them at 15 minutes.
Why is my sauce too thin?
You probably didn’t let it simmer long enough after adding the cornstarch slurry. Let it bubble for another 2-3 minutes. It will thicken as it cools too.
Can I make this ahead for a dinner party?
Sort of. Bake the chicken ahead and store it. Make the sauce fresh right before serving. Reheat the chicken, toss with the hot sauce, and serve. It won’t be quite as crispy, but it’s close and saves you stress.
Can I use low-sodium soy sauce?
Yes, but you may need to add a pinch of salt to the chicken or sauce to make up for the lost flavor. Low-sodium soy sauce is milder, so taste as you go.
What’s the best rice to serve with this?
Jasmine rice is traditional. It’s fragrant and slightly sticky, which helps it hold the sauce. Basmati is too dry. Short-grain rice is good too, but jasmine is the classic choice.
Can I freeze this?
Freeze the chicken without sauce. The sauce doesn’t freeze well because the cornstarch separates. Thaw the chicken, reheat, and make fresh sauce.
Is this recipe spicy?
No, it’s sweet and savory. If you want heat, add sriracha or red pepper flakes to the sauce. It’s mild as written.
Pin This Recipe!
Sticky Baked Sesame Chicken Thighs
- Total Time: 35 minutes
- Yield: 4 servings 1x
Description
Better than takeout, these sticky baked sesame chicken thighs are juicy, crispy, and coated in a thick, glossy homemade sauce. A foolproof weeknight dinner that requires zero deep frying.
Ingredients
- 2 pounds boneless, skinless chicken thighs, cut into 1-inch chunks
- 1/2 cup cornstarch
- 1 large egg white
- Salt and black pepper to taste
- 1 teaspoon toasted sesame oil
- 1/2 cup soy sauce
- 1/3 cup honey
- 2 tablespoons rice vinegar
- 4 cloves garlic, minced
- 1 tablespoon fresh ginger, grated
- 1/4 cup water
- 1 tablespoon cornstarch (for sauce slurry)
- 1 tablespoon cold water (for sauce slurry)
- 2 tablespoons toasted sesame seeds
- 2 stalks green onions, sliced
Instructions
- Preheat oven to 400°F (200°C). Line a rimmed baking sheet with parchment paper.
- Pat chicken thighs dry with paper towels and place in a large bowl.
- Add egg white, salt, pepper, and sesame oil to the chicken. Toss to coat.
- Add 1/2 cup cornstarch to the chicken and toss until every piece is lightly dusted. Set aside.
- Spread chicken in a single layer on the prepared baking sheet, ensuring pieces do not touch.
- Bake for 20 minutes, flipping the chicken halfway through (at 10 minutes) to ensure even browning.
- While chicken bakes, combine soy sauce, honey, rice vinegar, 1/4 cup water, garlic, and ginger in a small saucepan over medium heat.
- Bring sauce to a simmer. Mix 1 tablespoon cornstarch with 1 tablespoon cold water to create a slurry.
- Whisk the slurry into the simmering sauce and cook for 1-2 minutes until thickened. Remove from heat.
- Remove chicken from oven. Pour hot sauce over chicken and toss gently to coat.
- Return baking sheet to oven for 5 more minutes until sauce bubbles and clings to chicken.
- Remove from oven, sprinkle with toasted sesame seeds and sliced green onions, and serve immediately over steamed rice.
Notes
Pat chicken dry before coating to ensure cornstarch sticks. Do not crowd the pan to allow for crispy texture. Toast sesame seeds in a dry pan for 2-3 minutes for best flavor. Sauce can be made ahead, but cornstarch-thickened sauces do not freeze well. Reheat leftovers in the oven at 350°F to maintain crispiness.
- Prep Time: 10 minutes
- Cook Time: 25 minutes
- Category: Main Course
- Cuisine: Chinese
Nutrition
- Serving Size: Approximately 1/4 of
- Calories: 450
- Sugar: 25
- Fat: 15
- Saturated Fat: 3
- Carbohydrates: 40
- Fiber: 1
- Protein: 35
Keywords: sesame chicken, baked chicken, sticky chicken, easy dinner, weeknight meals, chinese food, chicken thighs, gluten-free option


