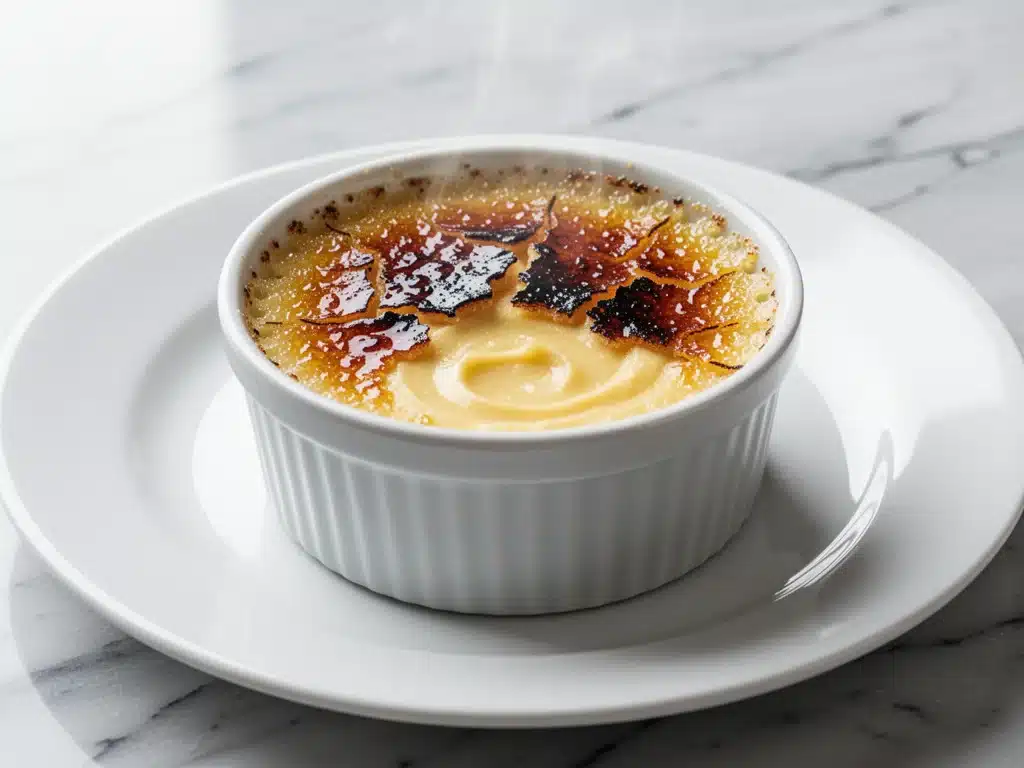
It was 2014, and I was twenty-six years old, standing in my ex-boyfriend’s kitchen, trying to impress him with something that felt “fancy” enough for our three-month anniversary. I had decided on crème brûlée. Because nothing says “I want you to stay” like custard that requires a kitchen torch and a good twenty minutes of waiting.
I had never made custard before. I had no idea that the difference between “silky dream” and “scrambled egg soup” was literally one degree of temperature. I watched the mixture curdle in the ramekins while I was distracted by a glass of wine (which, fair). The result? A lumpy, watery disaster that tasted like regret and vanilla extract. He politely finished his bowl, but I could see the confusion in his eyes. I was devastated.
Fast forward to last weekend. I was hosting my in-laws for Sunday dinner. You know the vibe—polite conversation, slightly tense atmosphere, everyone trying to be on their best behavior. I decided to serve the classic crème brûlée I’ve perfected over the last decade. When I walked into the dining room with the ramekins, the sound of the spoon cracking that caramelized sugar top was audible. My mother-in-law actually stopped mid-sentence. My father-in-law closed his eyes just to listen to it again. That sound—that sharp, satisfying crack—is the best part of the evening.
This isn’t just a dessert. It’s a confidence booster. It’s the dish that makes you look like a pastry chef, even if you’re just a home cook who burned their first attempt years ago. Today, I’m sharing the exact method that guarantees that restaurant-quality crackly sugar top and a custard so smooth it melts on your tongue. It’s easier than you think, and it’s going to save your next dinner party.
Why You’ll Love This Classic Crème Brûlée Recipe
There are about a million dessert recipes out there. Why make this one? Because this classic crème brûlée hits a sweet spot that few other dishes do. It’s elegant but approachable, impressive but actually manageable.
It Looks Impossible, But It’s Not — Seriously. Most people think you need a professional kitchen to make custard. You don’t. You just need patience and a water bath. I’ve made this in my cramped apartment kitchen while listening to a podcast. If I can do it, you can definitely do it.
Make-Ahead Magic — This is the ultimate stress-buster for hosts. You can make the custards up to 48 hours in advance. In fact, they taste better after sitting in the fridge for a day because the flavors meld. The only thing you do right before serving is torch the sugar. That means you can enjoy your dinner party instead of standing in the kitchen sweating over a stove.
The Texture Contrast — There is nothing like the contrast between the hard, glass-like caramelized sugar and the cool, creamy vanilla custard underneath. It’s a sensory experience. It’s why people take photos of it. It’s why they ask for the recipe immediately after finishing.
Minimal Ingredients, Maximum Impact — You only need four main ingredients: cream, egg yolks, sugar, and vanilla. No weird stabilizers, no gelatin, no food coloring. Just high-quality pantry staples. It’s pure, simple comfort food that feels luxurious.
This is my go-to when I need to impress without stressing. It’s reliable, it’s delicious, and that crackly top? It’s addictive.
Ingredients You’ll Need for the Perfect Custard
Here’s the thing about crème brûlée: the quality of your ingredients matters. You can’t hide bad butter in a cake, but in custard, every single ingredient is front and center. That’s why I’m particular about what I buy.
Heavy Whipping Cream (2 cups / 480ml) — This is the base. Do not substitute with half-and-half or milk unless you want a very thin, weak custard. You need the fat content (at least 36%) to get that rich, silky texture. I buy the carton, not the small cans. It’s cheaper and fresher.
Egg Yolks (5 large / about 90g) — We’re using only yolks for a reason. Whites make the custard rubbery and jiggly. Yolks make it tender and rich. If you’re worried about the whites, freeze them! I use them later for gluten-free flourless chocolate torte or macarons, so nothing goes to waste.
Granulated White Sugar (½ cup / 100g for custard + ¼ cup per ramekin for topping) — Use standard white sugar for the custard. It dissolves easily. For the topping, you need fine granulated sugar. Do not use brown sugar, coconut sugar, or powdered sugar. Powdered sugar has cornstarch, which ruins the crack. Granulated sugar caramelizes into that hard glass shell.
Vanilla Bean or Pure Vanilla Extract — This is non-negotiable. I prefer a real vanilla bean because you get those tiny black specks, which look beautiful and taste incredible. Split a bean lengthwise and scrape the seeds into the cream. If you’re using extract, use pure vanilla, not imitation. I use about 1 tablespoon of extract if I’m not using a bean. It’s worth the extra dollar.
A Pinch of Salt (¼ teaspoon) — I know it sounds weird in a sweet dessert, but salt enhances the vanilla flavor and balances the sweetness. Don’t skip it.
Optional: Lemon Zest — If you want a brighter flavor, add the zest of half a lemon. It cuts through the richness slightly. I like this version when I serve it after a heavy meal.
Equipment Needed
You don’t need a lot of fancy gadgets, but you do need specific tools to get that perfect texture.
Ramekins (6-8 oz capacity) — You need heat-proof ceramic ramekins. I use 6-ounce ramekins. They’re the perfect size for a single serving. Make sure they have straight sides, not curved ones, so the custard cooks evenly. You can find these at any kitchen store or even thrift shops.
Deep Roasting Pan or Casserole Dish — This is for the water bath (bain-marie). It needs to be deep enough to hold the ramekins and have hot water poured around them without overflowing. My old cast-iron roaster works perfectly.
Whisk — A simple balloon whisk is best for combining the eggs and cream without incorporating too much air. Too much air leads to bubbles in the custard.
Strainer or Sieve — This is the secret weapon. Straining the custard mixture removes any bits of cooked egg white or undissolved sugar. It guarantees a silky-smooth texture. I don’t skip this step. Ever.
Kitchen Torch — For the sugar topping. I use a butane torch from the hardware store. It’s cheap, easy to use, and gives you the most control. You can use an oven broiler as a backup, but it’s harder to get an even crack without overcooking the custard underneath.
Saucepan — For heating the cream. Medium saucepan works best.
How to Make It: Step-by-Step
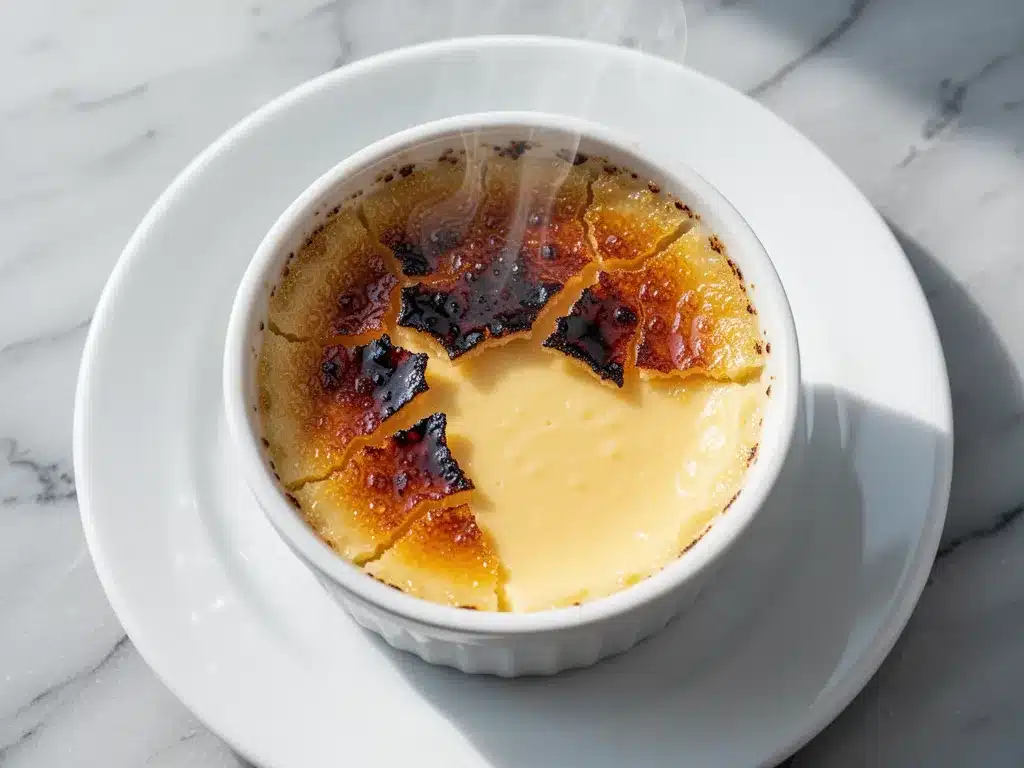
Alright, let’s make this! I’m walking you through exactly how I do it, including the little tricks I’ve picked up over the years. This classic crème brûlée recipe is all about technique, but it’s not complicated.
Step 1: Heat the Cream (10 minutes)
Preheat your oven to 325°F (160°C). In a medium saucepan, combine the heavy cream and your vanilla (seeds and pod, or extract). Heat over medium-low heat until it just starts to simmer. You’ll see small bubbles around the edges. Do not let it boil vigorously, or you’ll scorch the cream. Remove from heat and let it steep for 15 minutes. This infuses the vanilla flavor deeply. If using a bean, remove the pod now. If using extract, stir it in now.
Step 2: Whisk the Yolks and Sugar (2 minutes)
In a large bowl, whisk the egg yolks and ½ cup of sugar together until the mixture is pale yellow and slightly thickened. This takes about 2-3 minutes of whisking. You’re not adding air, just combining them until the sugar starts to dissolve. Whisk in the pinch of salt.
Step 3: Temper the Eggs (3 minutes)
This is the most critical step. You need to slowly raise the temperature of the eggs so they don’t scramble. While whisking the egg mixture constantly, slowly pour in about ½ cup of the hot cream. Keep whisking. Then pour that egg-cream mixture back into the saucepan with the rest of the hot cream, whisking the whole time. This ensures everything is evenly distributed and warm.
Step 4: Strain the Custard (2 minutes)
Place a fine-mesh strainer over a large measuring cup or bowl. Pour the custard mixture through the strainer. This catches any tiny bits of cooked egg or vanilla pod fragments. You want this liquid to be perfectly smooth. If you see bubbles on top, skim them off with a spoon.
Step 5: Fill the Ramekins
Divide the custard evenly among your ramekins. I use a ladle for this. Fill them about ¾ full. You don’t want to fill them to the brim because the sugar topping will be added later, and you don’t want it to spill over during baking.
Step 6: The Water Bath (Bain-Marie)
Place the ramekins in your deep roasting pan. Pour hot tap water into the pan until it comes about halfway up the sides of the ramekins. The water should be hot but not boiling. This gentle heat cooks the custard slowly and evenly, preventing curdling.
Step 7: Bake (35-45 minutes)
Transfer the pan to the oven. Bake for 35-45 minutes. The custards are done when the edges are set but the centers still jiggle slightly like Jell-O when you shake the pan. They will firm up as they cool. Do not overbake, or you’ll get a rubbery texture.
Step 8: Chill (At least 4 hours)
Remove the ramekins from the water bath and let them cool to room temperature on a wire rack. Then, cover them tightly with plastic wrap and refrigerate for at least 4 hours, preferably overnight. This is when the custard sets completely and the flavors develop.
Step 9: The Sugar Top (5 minutes)
Right before serving, remove the ramekins from the fridge. Pat the tops dry with a paper towel if there’s any condensation. Sprinkle a thin, even layer of granulated sugar over each custard. I use about 1-2 tablespoons per ramekin. Use a torch to melt and caramelize the sugar. Hold the flame 2-3 inches away and move it in a circular motion until the sugar bubbles and turns golden brown. Let it sit for 1 minute to harden into that glass-like shell.
Expert Tips & Tricks for the Perfect Crack
Here’s everything I’ve learned from making this dozens of times. These tips will save you from my early mistakes.
Strain, Strain, Strain
I cannot stress this enough. Straining the custard is what makes it restaurant-quality. If you skip this, you risk tiny lumps that ruin the smooth texture. It takes two minutes. Do it.
The Water Bath is Key
Don’t be scared of the water bath. It’s what keeps the custard tender. If you bake the ramekins directly on the oven rack, the bottom will cook too fast and you’ll get a rubbery layer at the bottom. The water bath ensures gentle, even cooking.
Don’t Overmix
When whisking the yolks and sugar, don’t whip it into a froth. You want to combine them, not aerate them. Too much air creates bubbles that rise to the top and create holes in the custard.
The Sugar Layer Must Be Even
When adding the topping sugar, make sure it’s a thin, even layer. If you pile it up in one spot, that spot will burn while the rest stays raw. A light dusting is all you need.
Torch Away from Yourself
Obviously, be careful with the flame. But also, angle the torch so the flame hits the sugar, not the ceramic. You’re melting the sugar, not heating the bowl. If the bowl gets too hot, the custard underneath will start to cook again, which you don’t want.
Common Mistake: Soft Crack
If your sugar top doesn’t crack hard, you didn’t caramelize it enough. Keep torching until it’s deeply golden and bubbly. It should harden within a minute or two. If it’s still chewy, it needs more heat.
Variations & Substitutions
Once you’ve nailed the basic classic crème brûlée, here’s how you can mix it up. I’ve tried all of these, and they’re all winners.
Lavender Crème Brûlée
Add 1 tablespoon of culinary-grade dried lavender to the cream while heating. Strain it out before combining with the eggs. It adds a beautiful floral note that pairs well with berries.
Coffee Crème Brûlée
Stir 2 tablespoons of instant espresso powder into the hot cream. This gives a rich coffee flavor that’s perfect for adults. It’s like a liquid tiramisu in a ramekin.
Chai Spiced
Add a cinnamon stick, two cardamom pods, and a star anise to the cream while heating. Remove the spices before straining. It’s warm and aromatic, perfect for fall.
Chocolate Drizzle
After torching the sugar, drizzle a little melted dark chocolate over the top. It’s a bit messy, but it’s delicious.
Dietary Modifications
Gluten-Free — This recipe is naturally gluten-free. Just make sure your vanilla extract and sugar are certified gluten-free if you have celiac disease.
Lactose-Free — You can use coconut cream instead of heavy cream, but the texture will be slightly different and less rich. It still tastes good, but it’s not the same.
Serving & Storage
How to Serve:
I serve this straight from the fridge, with the sugar top just torched. It looks beautiful on a simple white plate. I often garnish with a fresh raspberry or a mint leaf for a pop of color. It pairs wonderfully with a cup of coffee or a glass of dessert wine.
Side Dishes:
Since this is rich and heavy, I like to serve it with something light. A simple mixed green salad with a lemon vinaigrette cuts through the richness perfectly. Fresh berries are also a great accompaniment.
Storage Instructions:
Refrigerator: The custards (without the sugar top) can be stored in the fridge for up to 3 days. Cover tightly with plastic wrap. The sugar top should only be added right before serving, as it will dissolve if it sits too long.
Freezing: I do not recommend freezing crème brûlée. The custard texture changes when thawed, and it becomes watery. It’s best made fresh.
Make-Ahead Strategy: Make the custards 2-3 days in advance. Store them in the fridge. When you’re ready to serve, take them out, let them sit for 10 minutes to take the chill off, then torch the sugar. This is the best way to manage your time for a dinner party.
Nutrition Information
I’m not a nutritionist, but here’s the breakdown if you’re tracking. This is a rich dessert, so portion control is key.
Per Serving (based on 6 servings):
- Calories: 380
- Protein: 6g
- Carbs: 28g
- Fiber: 0g
- Sugar: 26g
- Fat: 28g
- Saturated Fat: 17g
- Cholesterol: 210mg
- Sodium: 45mg
What’s Good:
- High in calcium from the dairy
- Gluten-free by nature
- Simple ingredients
What to Know:
- High in saturated fat and sugar
- Not suitable for low-carb or keto diets
- Dense and filling, so one serving is usually enough
My Take:
Look, this is crème brûlée. It’s cream, sugar, and eggs. It’s not a health food. It’s a treat. Enjoy it in moderation, and pair it with something light like fruit or tea. It’s worth every calorie for the experience.
Final Thoughts
So that’s my classic crème brûlée! I’ve probably talked your ear off at this point, but when you make a recipe this often, you have a lot to say about it. This dessert has saved my social life more times than I can count. It’s my answer to “I need to impress people but I’m tired” when I want something that tastes really good and looks stunning.
My friends are happy, my family is happy, and I’m happy because I’m not stressed about cooking. The make-ahead nature of this recipe is a game-changer. You can spend your evening chatting with your guests while the custards chill in the fridge, then just torch the tops right before dinner. It’s elegant, it’s easy, and it’s delicious.
Make it yours! Try different vanilla beans, add a hint of lavender, or serve it with fresh berries. The best recipes are the ones you adapt to your tastes. The classic crème brûlée is a blank canvas for your creativity.
If you make this, drop a comment and let me know what you think! I love hearing how recipes turn out in your kitchen. And if something doesn’t work, tell me that too—I’m here to help troubleshoot. Happy cooking! And I hope your kitchen smells half as good as mine does right now.
Frequently Asked Questions
Can I use a broiler instead of a torch?
You can, but it’s trickier. Place the ramekins on a baking sheet and put them under the broiler for 1-2 minutes. Watch them closely! The sugar can go from golden to burnt in seconds. Also, the broiler heats the whole ramekin, so the custard underneath might warm up, which you don’t want. A torch gives you more control over just the sugar layer.
Why did my custard curdle?
Usually, this means the heat was too high. Either you boiled the cream too vigorously, or you added the hot cream to the eggs too fast without tempering them properly. Always temper slowly, and keep the oven temperature moderate (325°F). If it curdles slightly, it’s still edible, but the texture won’t be as smooth.
Can I make this in a muffin tin?
Yes! Use a muffin tin as your water bath container. Just make sure the muffin cups are deep enough to hold the custard. The baking time will be shorter, about 20-25 minutes. Check them earlier than you would with ramekins.
How far in advance can I make the custard?
You can make the custard up to 3 days in advance. Store it covered in the fridge. The flavors actually improve after a day. Just remember to add the sugar topping right before serving.
What kind of sugar should I use for the topping?
Use fine granulated white sugar. Superfine sugar works even better because it melts more evenly. Do not use coarse sugars like turbinado or demerara; they don’t melt as smoothly and can leave crunchy bits instead of a glass-like shell. Powdered sugar won’t work because of the cornstarch.
Can I use egg whites?
No. Egg whites will make the custard rubbery and firm. You need the fat and emulsifiers in the yolks to create that tender, silky texture. If you’re worried about waste, save the whites for a chocolate crinkle cookies recipe or meringues!
Why is my sugar top soft instead of hard?
This usually happens if you didn’t caramelize the sugar enough, or if the humidity is very high. Make sure you torch until it’s deeply golden and bubbly. Let it sit for a minute to cool and harden. If it’s still soft, torch it again briefly.
Pin This Recipe!

Classic Creme Brulee: Best Easy Dessert for Special Occasions
- Total Time: 4 hours 65 minutes
- Yield: 6 servings 1x
Description
A perfected, restaurant-quality classic crème brûlée recipe featuring a silky vanilla custard and a crackly caramelized sugar top. This make-ahead dessert is elegant, approachable, and guaranteed to impress.
Ingredients
- 2 cups (480ml) heavy whipping cream (at least 36% fat)
- 5 large egg yolks (about 90g)
- 1/2 cup (100g) granulated white sugar (for custard)
- 1/4 cup granulated white sugar per ramekin (for topping)
- 1 vanilla bean (split and scraped) OR 1 tablespoon pure vanilla extract
- 1/4 teaspoon salt
- Optional: Zest of half a lemon
Instructions
- Preheat oven to 325°F (160°C).
- In a medium saucepan, combine heavy cream and vanilla (seeds/pod or extract). Heat over medium-low until it just starts to simmer (small bubbles around edges). Do not boil.
- Remove from heat and let steep for 15 minutes to infuse flavor. Remove vanilla pod if used.
- In a large bowl, whisk egg yolks and 1/2 cup sugar until pale yellow and slightly thickened (2-3 minutes). Whisk in salt.
- Temper the eggs: Slowly pour about 1/2 cup of the hot cream into the egg mixture while whisking constantly. Then pour the egg-cream mixture back into the saucepan with the rest of the hot cream, whisking continuously.
- Strain the custard mixture through a fine-mesh sieve into a large measuring cup to remove any lumps or vanilla fragments. Skim off any bubbles.
- Divide the custard evenly among 6-8 oz heat-proof ramekins, filling them about 3/4 full.
- Place ramekins in a deep roasting pan. Pour hot tap water into the pan until it comes halfway up the sides of the ramekins (water bath).
- Bake for 35-45 minutes. The custards are done when edges are set but centers still jiggle slightly like Jell-O.
- Remove ramekins from the water bath and let cool to room temperature on a wire rack.
- Cover tightly with plastic wrap and refrigerate for at least 4 hours, preferably overnight.
- Right before serving, pat tops dry if condensation is present. Sprinkle a thin, even layer of granulated sugar over each custard.
- Use a kitchen torch to caramelize the sugar, holding the flame 2-3 inches away and moving in a circular motion until golden brown and bubbly. Let sit for 1 minute to harden.
Notes
The quality of ingredients matters significantly for custard. Use heavy whipping cream, not half-and-half. Straining the custard is crucial for a smooth texture. The water bath ensures gentle, even cooking. Do not overbake or the custard will become rubbery. The sugar topping must be added right before serving to maintain the crack. This recipe is naturally gluten-free.
- Prep Time: 20 minutes
- Cook Time: 45 minutes
- Category: Dessert
- Cuisine: French
Nutrition
- Serving Size: 1 ramekin
- Calories: 380
- Sugar: 26
- Sodium: 45
- Fat: 28
- Saturated Fat: 17
- Carbohydrates: 28
- Protein: 6
Keywords: crème brûlée, custard, dessert, vanilla, caramelized sugar, make-ahead dessert, elegant dessert, gluten-free dessert


